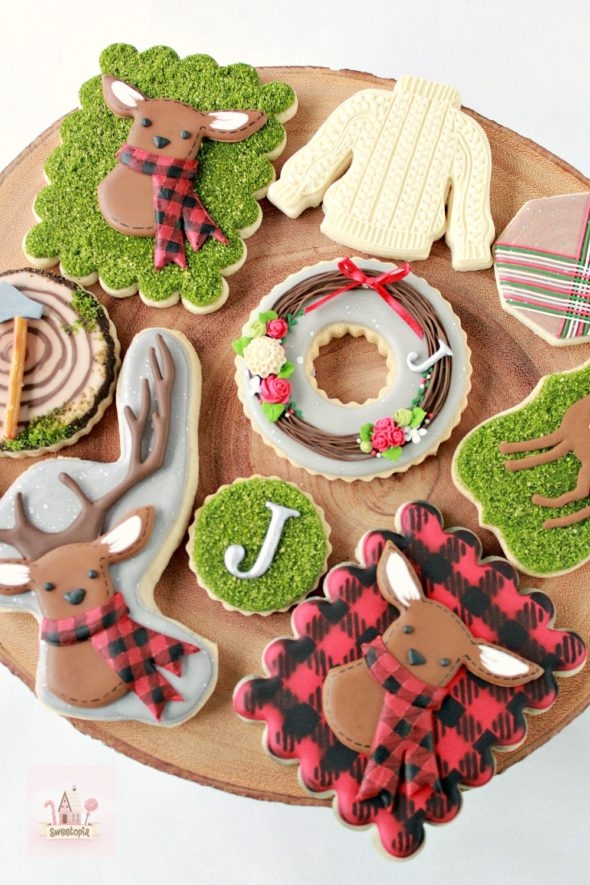
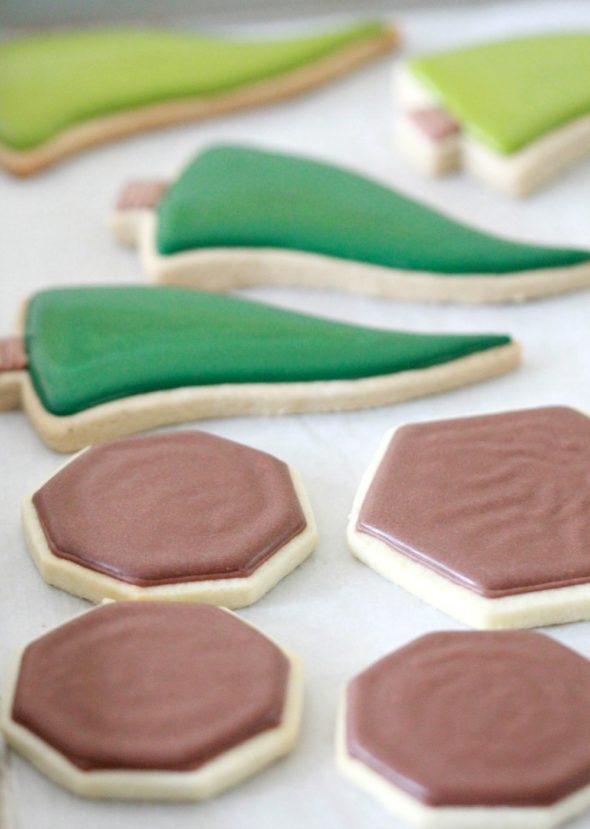
Hello, hello! Happy November! Already into the swing of holiday baking, I’ve been in the mood to experiment with recipes. I love using different extracts to change the flavor of my royal icing, but I’ve always wanted to have a chocolate royal icing made using cocoa powder, especially to pair with these peanut butter cut-out cookies. So finally, after batches of experimentation, I’m ready to share this chocolaty royal icing recipe.
I’ll be sharing how to make the cookies pictured here after the recipe as well. Please feel free to leave me a comment below if you have any questions.
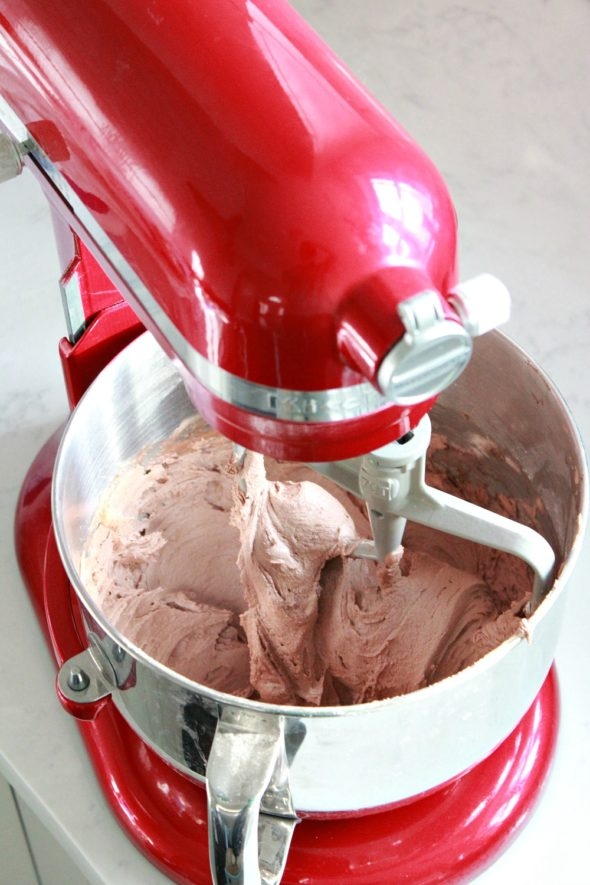
A few notes to share with you about the icing. It’s quite thick once mixed for 10 minutes, but can be thinned out the same way you’d thin out regular royal icing. Here is a video on icing consistency if you like.
The quality of cocoa powder makes a difference with the flavor. Use your favorite brand but rest assured it still tastes nice with the cheapest cocoa powder I could find.
After the icing has been mixed, the shade of brown is quite light, so add brown food coloring to darken it or change the shade if you like.
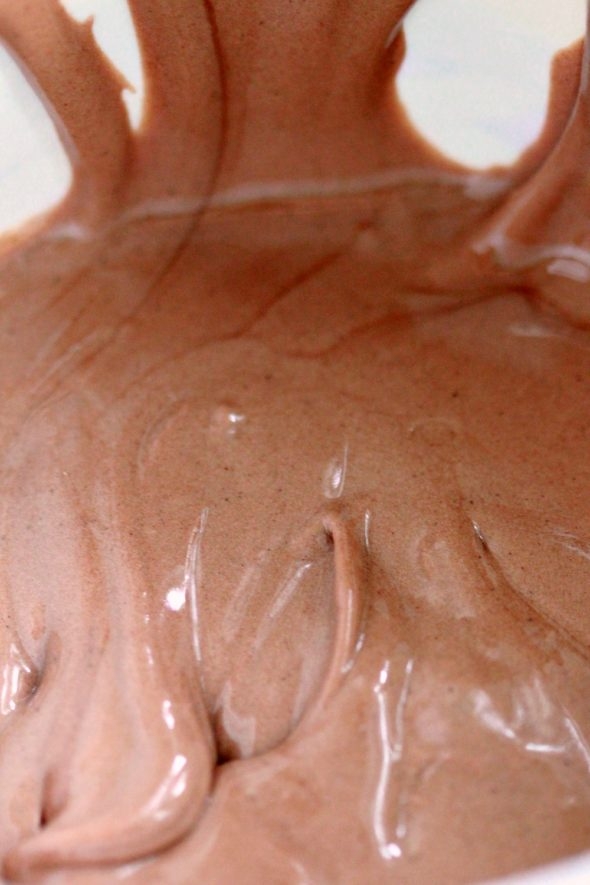
You can still end up seeing some of the cocoa powder granules…
…but it’s barely noticeable once the icing dries.
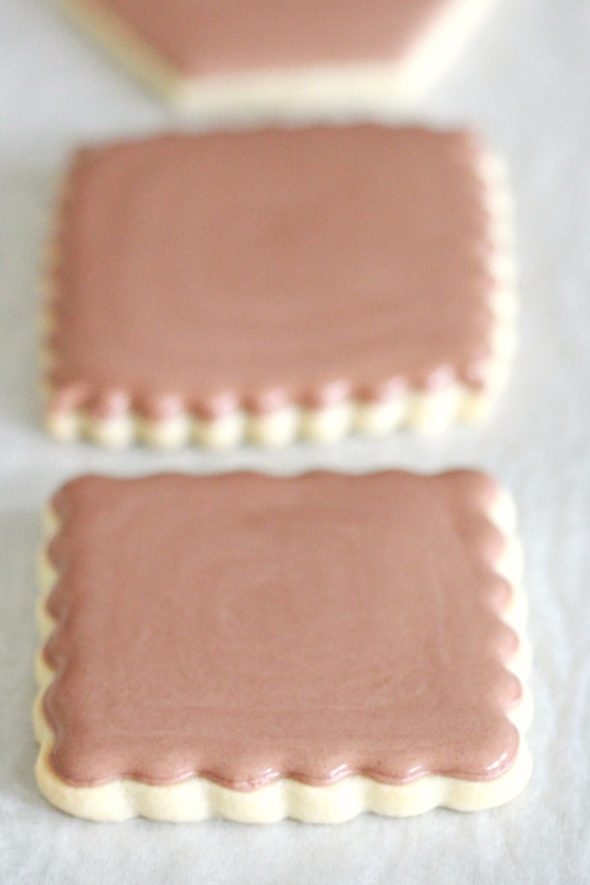
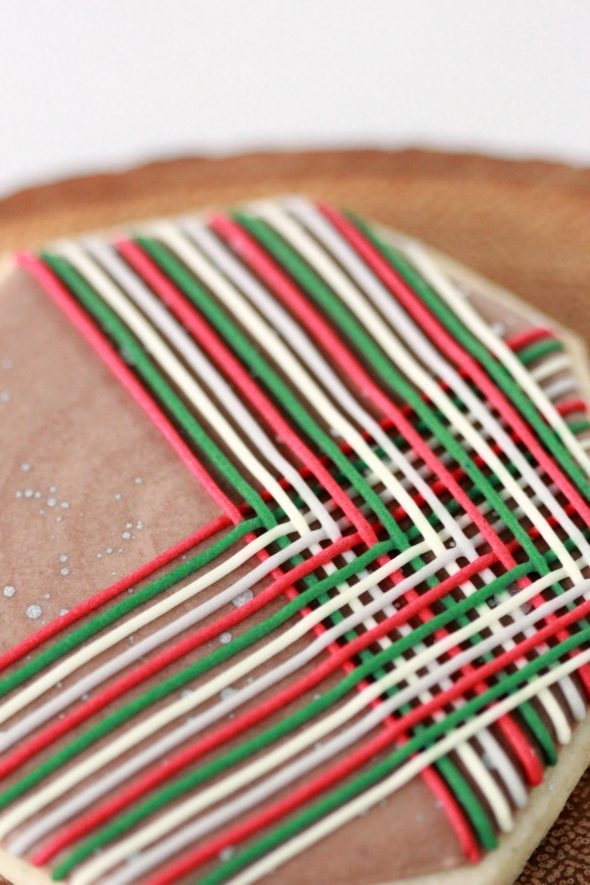
I also tried using more cocoa powder than 1/3 of a cup but I found the larger amount of cocoa affected how the icing dried. It looked like this:
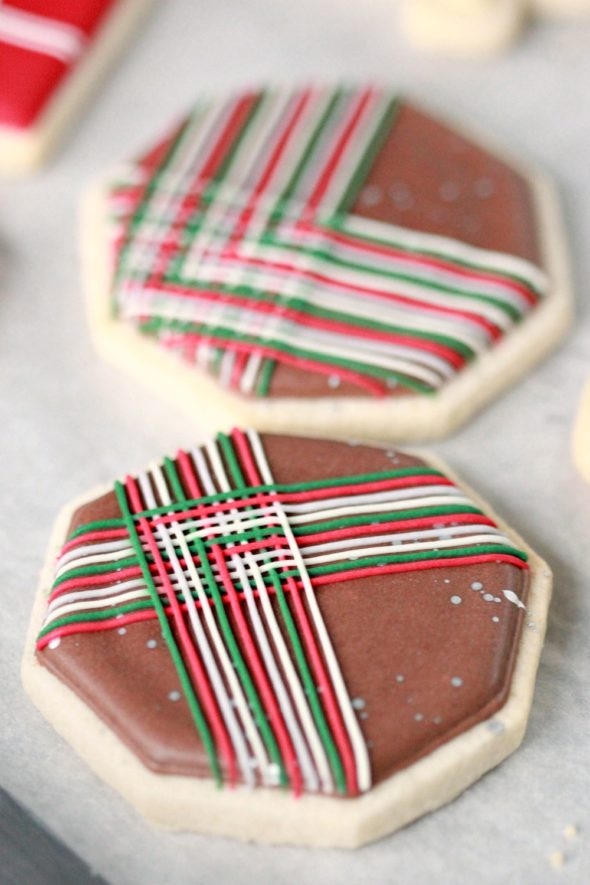
I still ended up using the cookies by covering them with lines.
Now onto the recipe!
Chocolate Royal Icing Recipe
Chocolate Royal Icing Recipe
Ingredients
- 177 mL (6 oz, 3/4 cup) of warm water
- 38 g (1.3 oz or 5 Tablespoons) Meringue Powder
- 30 g (1.1 oz, 1/3 cup) cocoa powder* *Note: Use the best quality (your favorite) cocoa powder for best flavor.
- 1 kg (2 lbs, 8 cups) powdered icing sugar *also known as confectioner's sugar
Instructions
- In mixer bowl, pour in the warm water and the meringue powder. Mix it with a whisk by hand until it is frothy and thickened…about 30 seconds.
- Sift the icing sugar and cocoa powder together. Give it a whisk to make sure the cocoa powder is incorporated fairly evenly.
- Pour in all the icing sugar and cocoa powder at once and place the bowl on the mixer.
- Using the paddle attachment on the LOWEST speed, mix slowly for a full 10 minutes. Icing will get thick and creamy.
- Cover the bowl with a dampened tea-towel to prevent crusting and drying.
- Tint with food colorings and/or thin the icing with small amounts of warm water to reach the desired consistency.
How to Decorate These Cookies
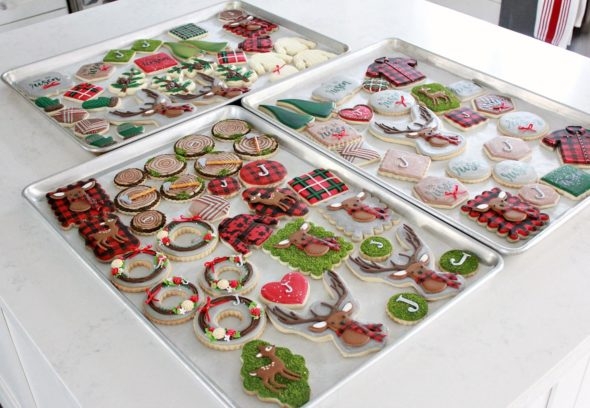
I’ll be sharing the cookie cutters, tools, and basic decorating tips first, and then will explain how I made the individual designs below.
Cookie Cutters
Find the cookie cutters by clicking on each individual cutter below (Any links to Amazon in this post are affiliate links):
Wreath Cookies (Scalloped Circle Cutters)
Hexagons (I have Oggibox cutters)
Leaf (with evergreen design)
Buck Cutter – From How Sweet is That’s shop
Royal Icing Consistency
The consistency of icing is key for easy decorating. Click here to see a YouTube video on finding the right icing thickness for basic flooding and decorating. I used different consistencies for some of the details of the cookies, and will explain according to each cookie below.
Cookie Decorating Basics
This video on outlining and flooding is a good place to start if you’re new to decorating cookies with royal icing. These cookie decorating basics YouTube videos may also be helpful to get you started.
Decorating Items
What you’ll need (these are affiliate links):
- Piping Tips – PME #1.5, PME #2 and PME #3 (I used a few more tips and will explain in individual cookie descriptions. Please leave me a comment below if you have questions)
- Piping Bags
- Couplers
- Gel paste colors
- Scribe Tool or Toothpicks
- I’ll be sharing more tools needed to make some of these cookies, in the corresponding cookie how-to descriptions below.
Before I get down to sharing the details on each cookie, let me mention that it may seem strange to be sharing holiday cookies this early, but the beautiful thing about cookies, is that they freeze really well. If you’d like to start baking and decorating early, click on the links to find posts on freezing cookies, thawing cookies and the shelf life of cookies.
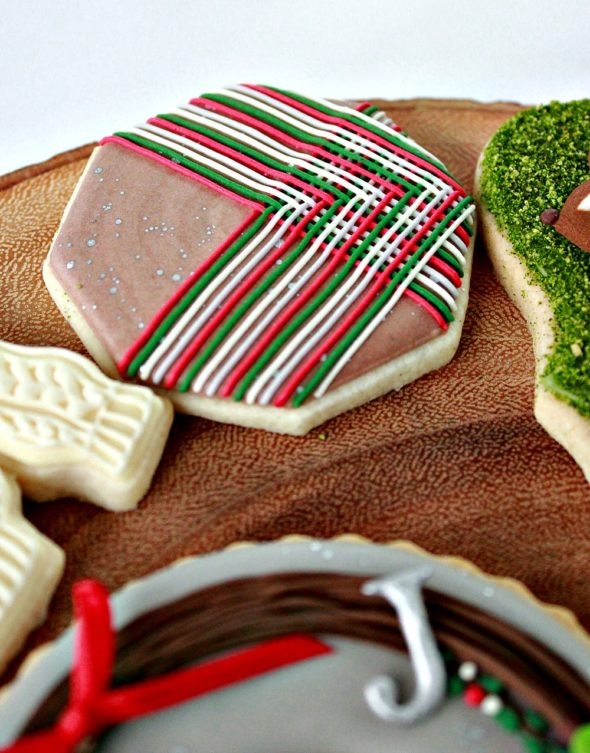
Cookies Decorated with Lines
Outline and flood your cookie base and let dry for at least an hour. The consistency of the icing for piping lines should be like toothpaste. Somewhat thick so the line holds its shape, but not too thick so that the icing becomes brittle and breaks easily.
If you dip a spoon into the icing there should be a peak… The tip of it will flop over, but it’ll be a fairly thick icing.
If I had to choose I would err on the side of making the icing thicker.
Here is a video for you on how to pipe icing lines if you like.
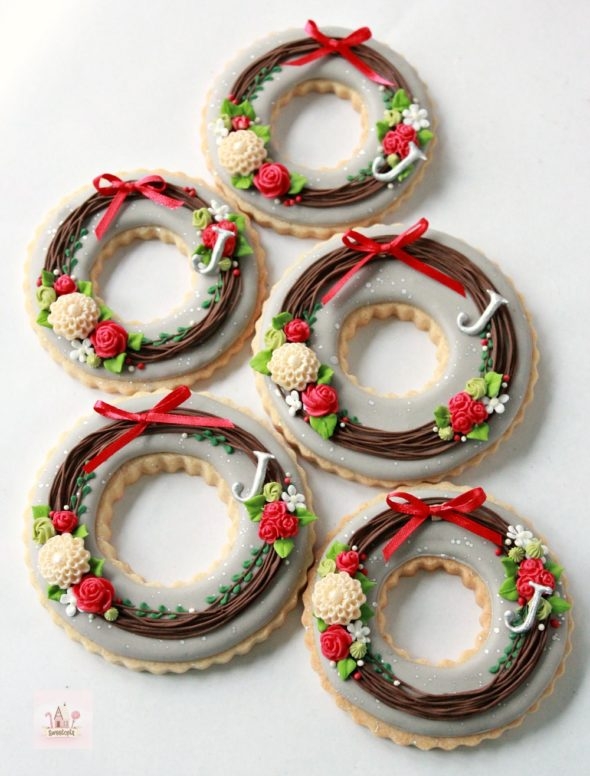
Mongram Cookies
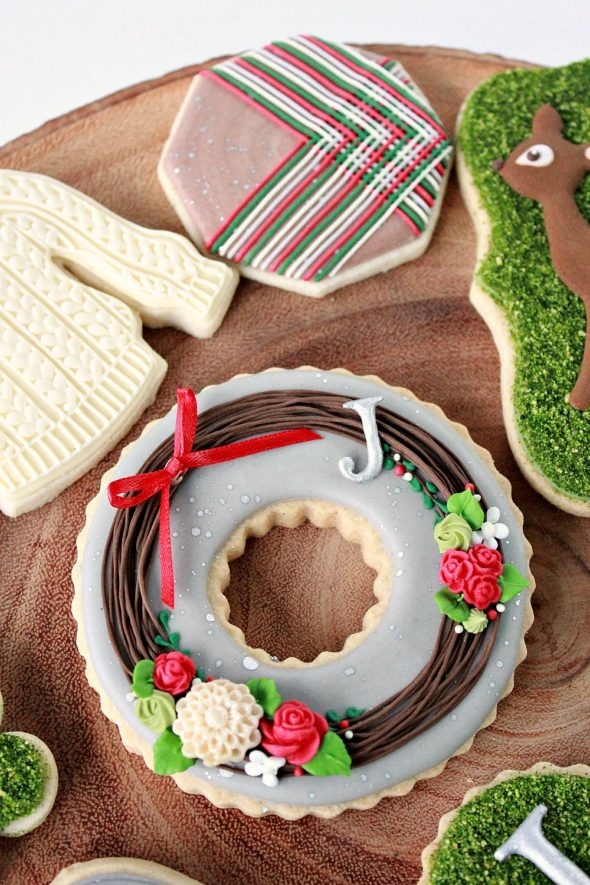
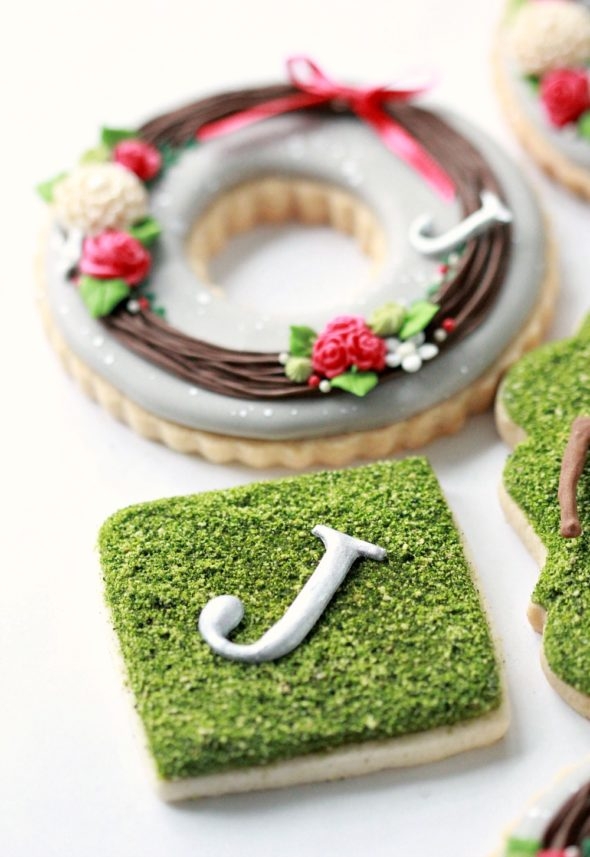
The J is a royal icing transfer. Also known as run outs, flood work, Color Flow (by Wilton), or run sugar, is basically the piping of a runny royal icing onto parchment paper or acetate paper into an outlined shape.
When the shape dries, you have an icing design which you can use for a multitude of decorating purposes; on cakes, cookies, gingerbread houses, cupcakes etc. You can also pipe onto wires, toothpicks, skewers etc. so that your design can be ‘free-standing’. Click here to see a tutorial on royal icing transfers. I used this J as my template and dusted the dry J with silver shimmer dust.
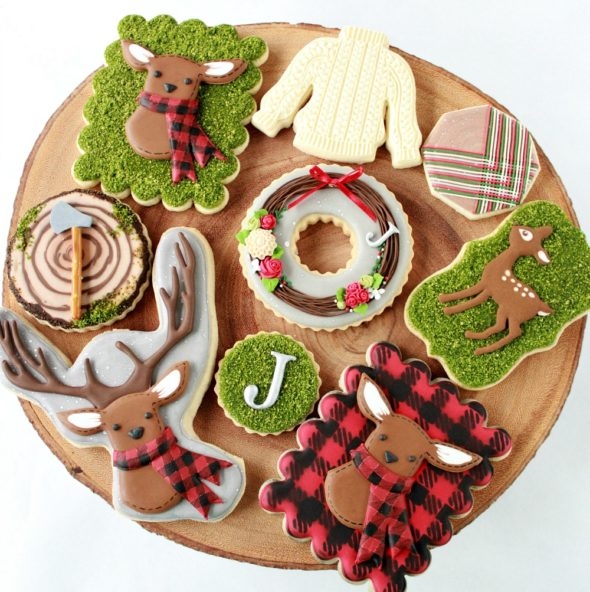
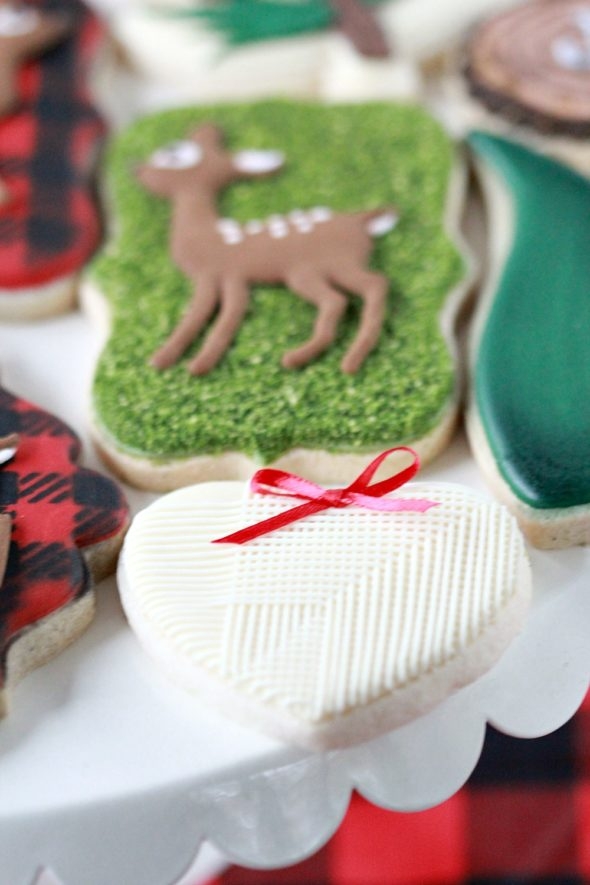
Large Deer Cookies
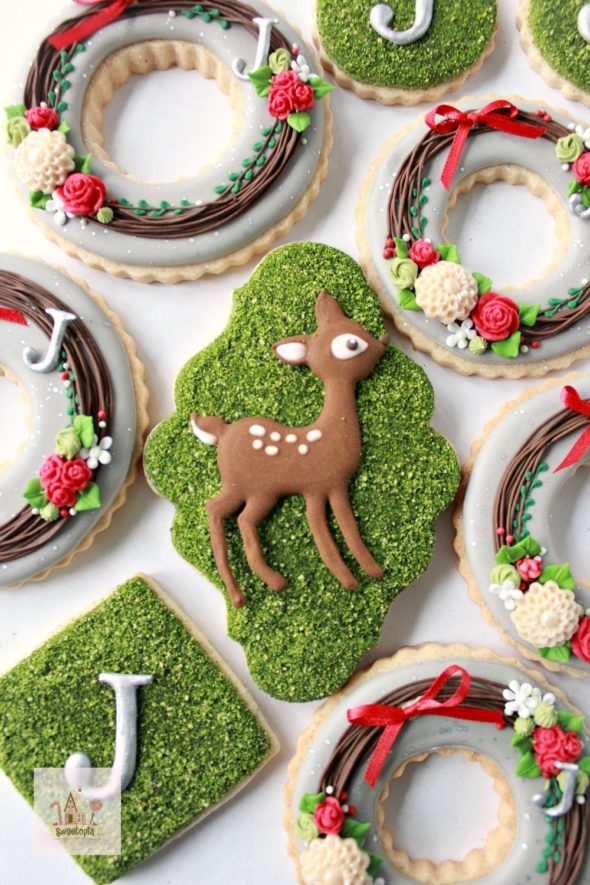
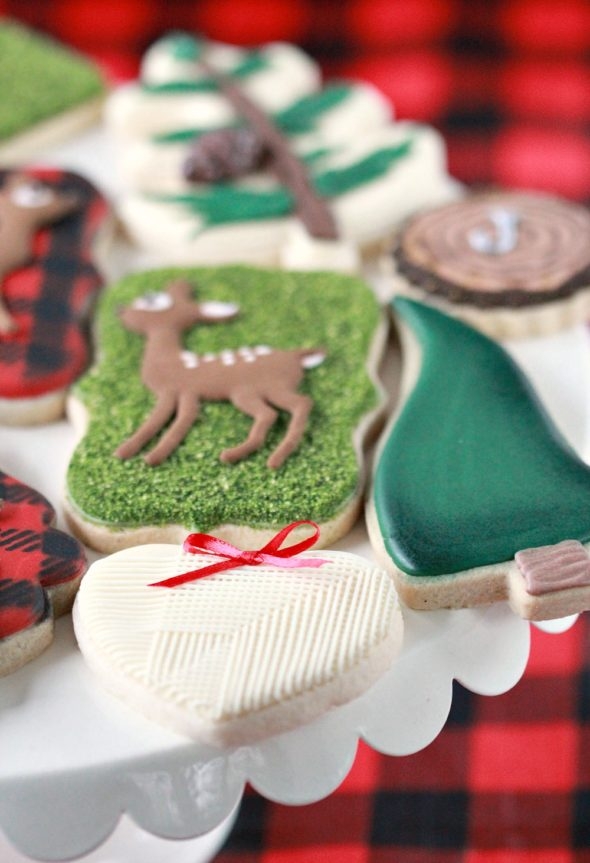
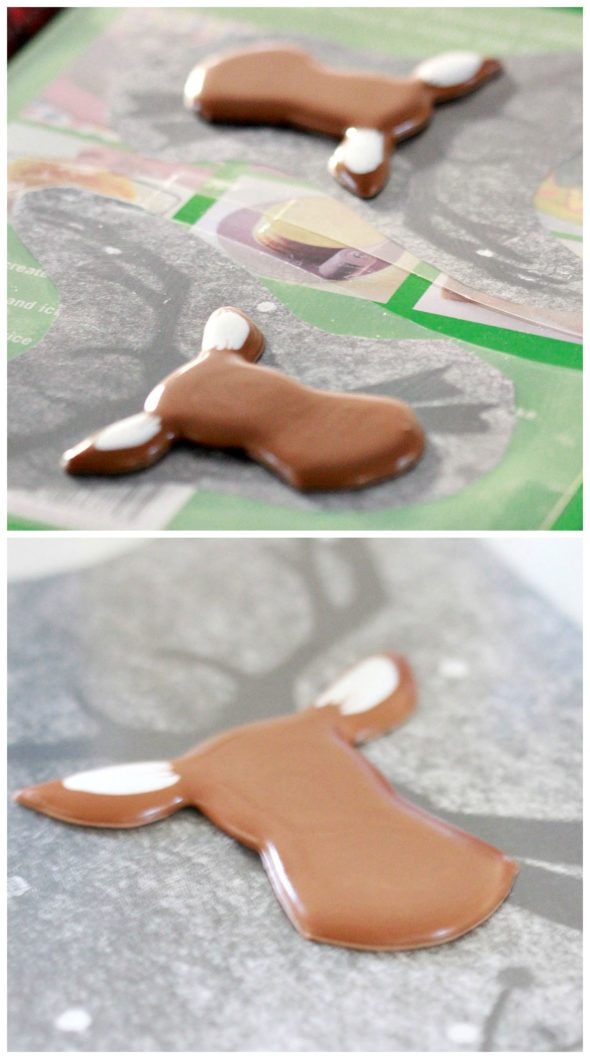
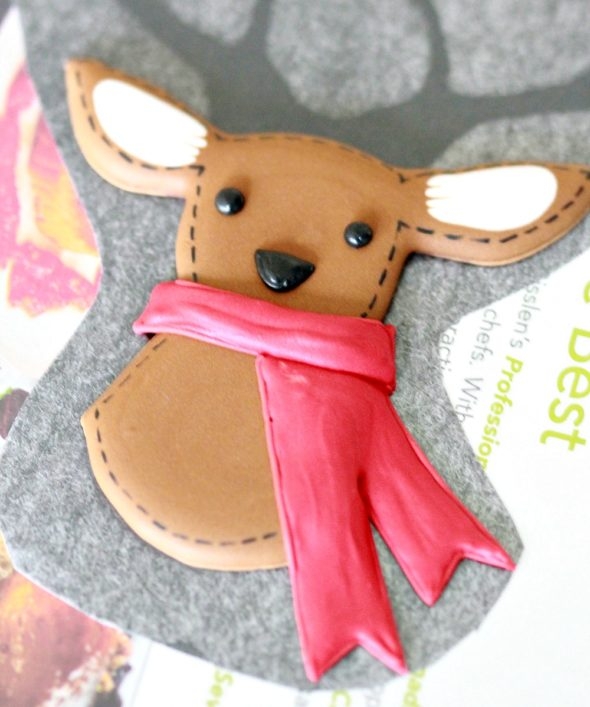
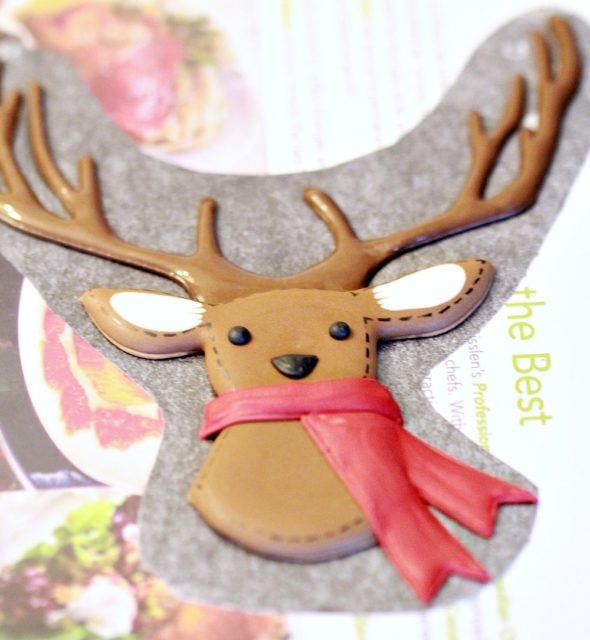
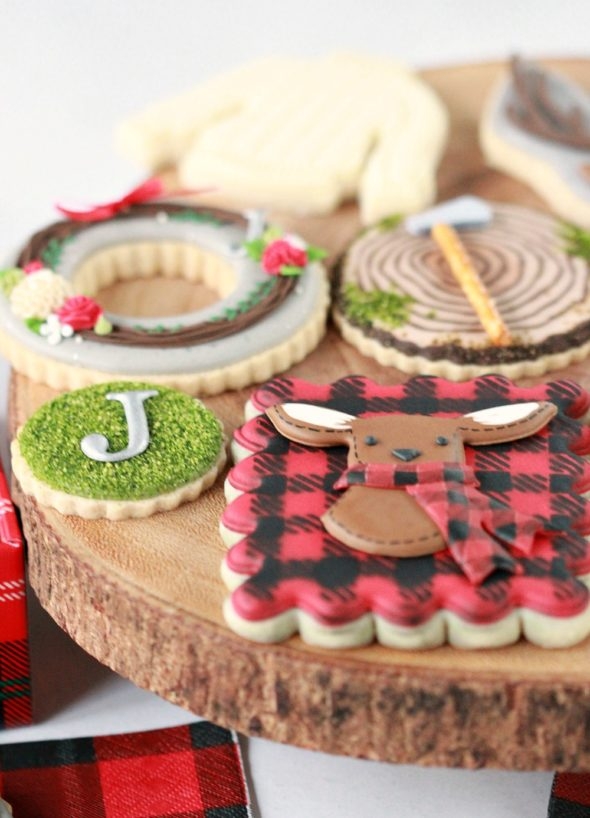
The deer are also royal icing transfers (See description under Monogram Cookies and click here for a tutorial on how to make royal icing transfers).
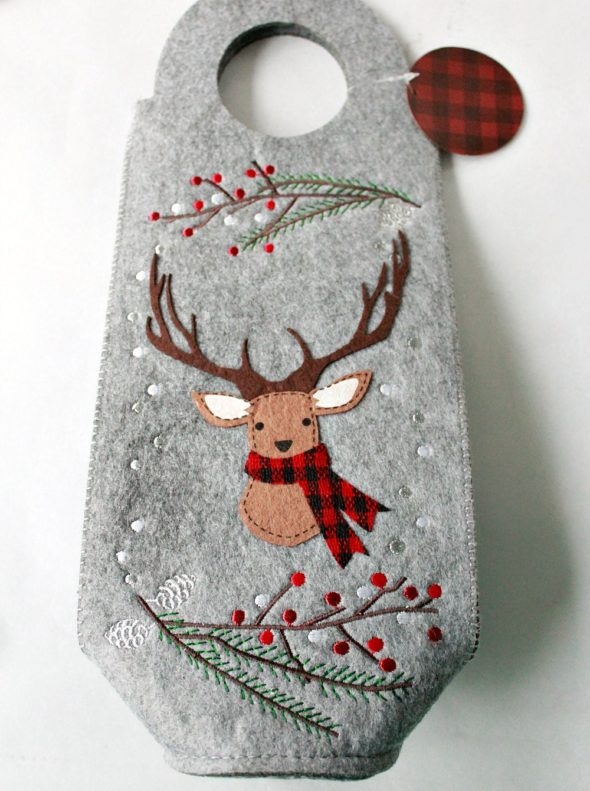
The design came from a gift bag I bought a few years ago at Chapters Indigo.
Note that the icing transfers are fragile and can break easily, to I make sure I let mine dry for a few days at least and always make extra shapes than I need.
Besides the basic royal icing transfer tutorial here, these are the steps I took to make these deer:
Pipe the outline of the head and flood with 10 second icing. Pipe the white inside of the ear immediately on top of the brown icing and drag a toothpick or scribe tool from the brown to the white to create the furry look.
Once the deer head has set (at least one hour), pipe the red scarf. Pipe the eyes and nose using 10 second icing and a tip #1.5 or #2. Draw the lines around the perimeter of the deer head using an edible ink black pen.
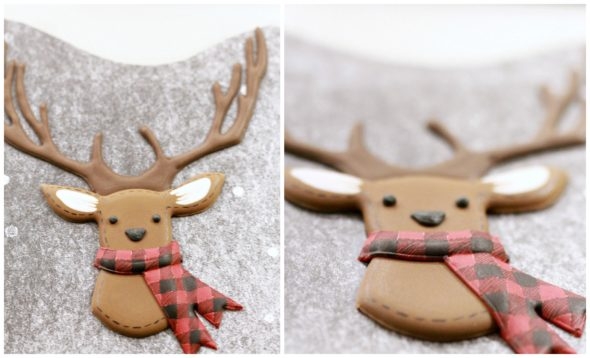
You could draw the buffalo plaid print on at this stage, but I ended up drawing them on at the end.
Pipe the antlers and let them dry at least one day before you remove the icing transfer. I left some deer without antlers for variety and because I knew the antlers would be quite breakable.
Using a scribe tool draw the grid pattern on the scarf and then color the buffalo pattern in with an edible ink marker.
When removing the icing transfer from the acetate paper or transparency peel the paper away from icing, rather than trying to pull the icing away from the paper. Adhere to your cookie with dabs of royal icing.
Edible Moss Cookies
Thank you to Lisa of The Bear Foot Baker and Mike of Semi Sweet Designs for their tutorials on how to make edible moss. I thought coconut might work but wasn’t sure so did a google search and found their tutorials – both excellent! I ended up pulsing graham cracker crumbs in a food processor and adding food coloring to the mix without diluting it, and then baked the green crumbs in oven at 200 degrees Fahrenheit for 10 minutes to dry them out a bit. Just a note that the moss food coloring I tried at first ended up making the crumbs too dark, so went with Wilton’s leaf green, which is what you see pictured here. I just added food coloring until I was happy with the shade. Sorry the information is not precise, it was the first time I’d tried it so just experimented a bit. I’ve linked to the other tutorials above if you’d like to check them out.
Another note, I really enjoyed decorating with this “edible moss”… Satisfying to see it come together. The extra “moss” is ready to go in a ziplock bag for the next time. It’s easy to apply by the way – Just ice your cookie, sprinkle the moss onto the icing and let it dry. I placed my cookie on a coffee filter to catch the excess crumbs and pour back into the ziplock bag for the next cookie.
Sweater Decorated Cookie
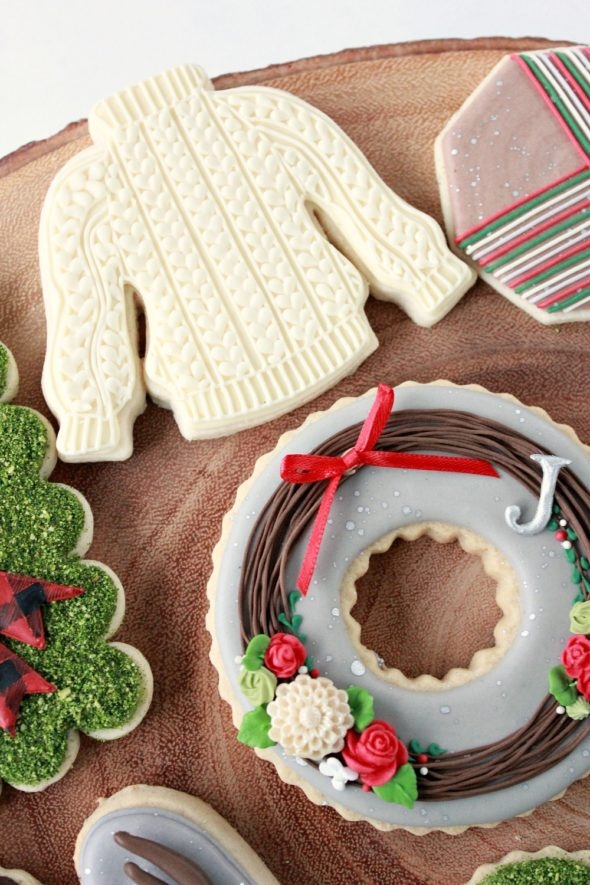
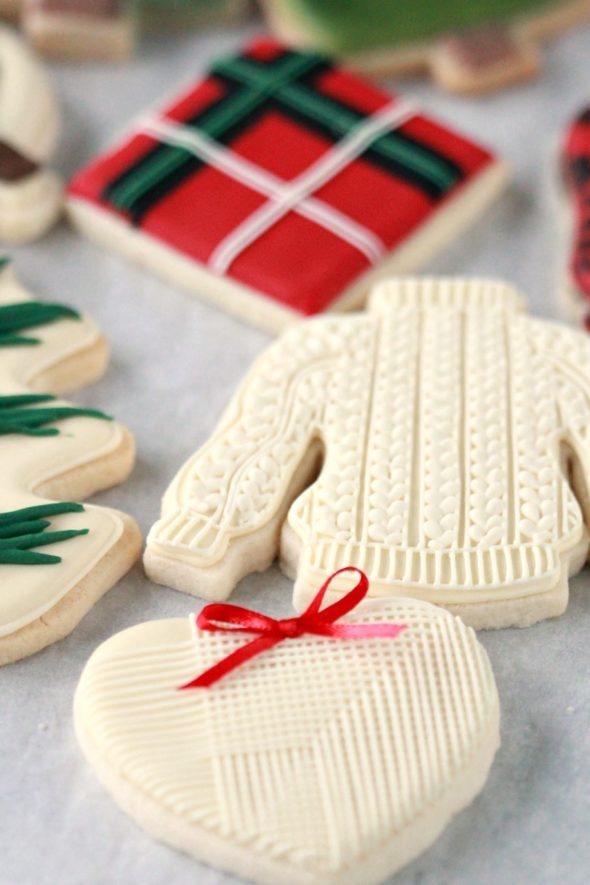
For the sweater cookie, outline and flood the base of the cookie with 10 second, slightly ivory, royal icing. To pipe the sweater pattern, use tip #1.5 to outline the neck, cuffs and around the perimeter of the cookie and pipe the “knit” using tip #2. I have a similar video here if you’d like to check it out.
Buffalo Plaid Cookies
To make your buffalo plaid cookie, ice your cookie with red royal icing (10 second consistency). Once the icing has dried (I waited until the next day), use an airbrush to stencil the pattern on. I definitely don’t feel qualified to share a how-to on airbrushing as I’m so new to it, but I can share a few things I learned. First, here’s what I used:
Buffalo Plaid Stencil (Sold out at How Sweet is That? but Amazon has stencils here).
Dinkydoodle Airbrush
Stencil Genie (Helped hold the stencil in place, loved this tool).
A few things I learned:
Definitely place your cookie inside a cardboard box (I cut one side open to make it easier to spray) to catch the tiny food coloring spray particles. Even so, I still found some escaped onto the surfaces I was near, so next time I’ll be doing it in the garage or outside, weather permitting.
Wear a mask! Now I know why people who airbrush do! Let’s just say I found food coloring in interesting places. Sorry.
The details seemed to be more precise the closer I went to the stencil, but again, I don’t think I should be sharing airbrushing information as I’m a beginner. Maybe more some day.
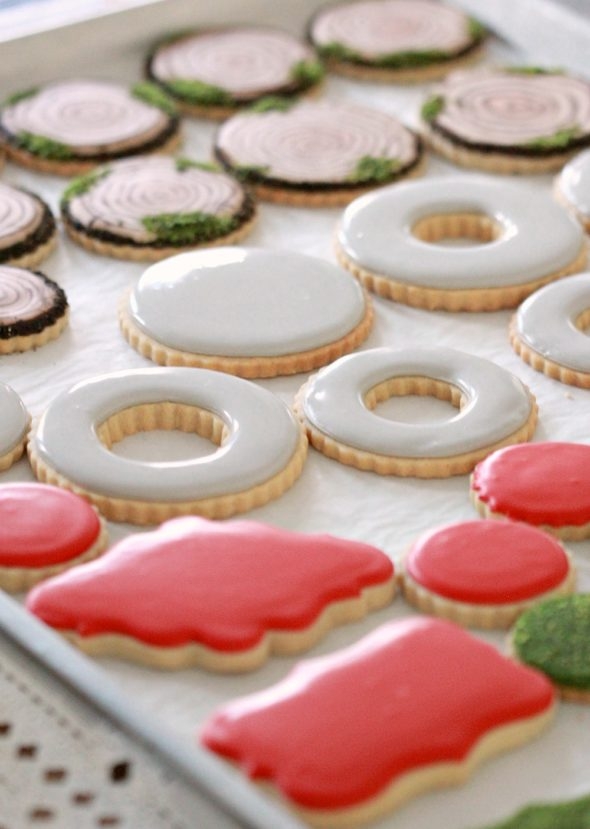
Cross Section of Stump Cookies
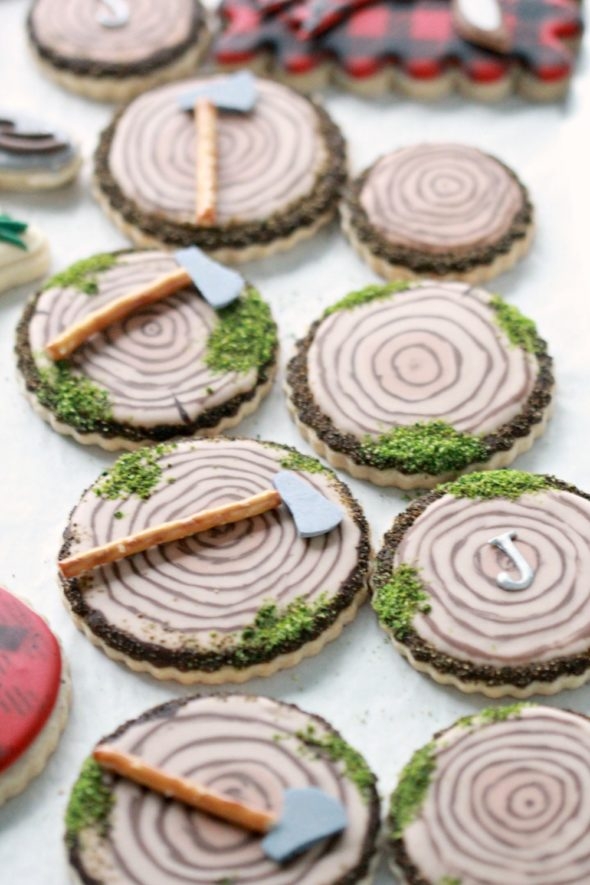
To make the cross section of a stump cookies, outline your circle with brown icing and a #3 tip. While the icing is wet sprinkle brown graham cracker crumbs or brown sanding sugar on the edges. (To make the brown graham cracker crumbs, pulse graham cracker crumbs or crackers in a food processor and add brown food paste coloring and mix. Place on a baking sheet and bake at 200 degrees Fahrenheit for 10 minutes to dry crumbs out).
Once the outline has set flood the cookie with light brown icing and a slightly darker brown near the center and immediately pipe brown circles on top. Run a toothpick or scribe tool through the circles to make them a little uneven. Sprinkle some edible moss (see explanation above, under Edible Moss Cookies) on the edges. Once the base icing has dried adhere a pretzel stick for an ax handle and broken, grey, Necco Wafer for the ax head.
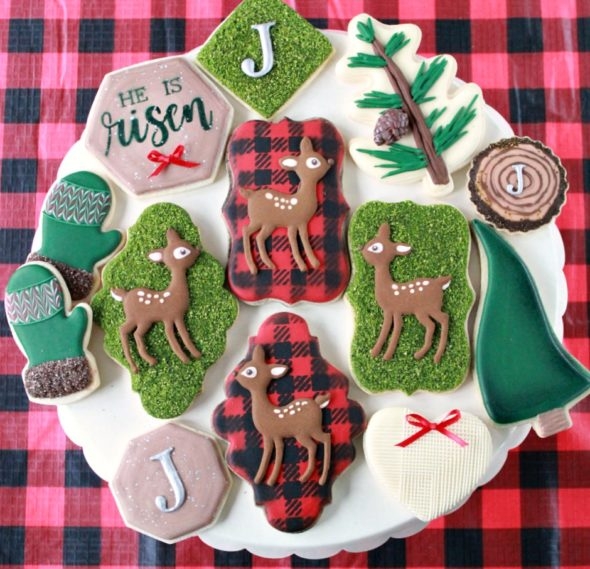
He is Risen Cookies
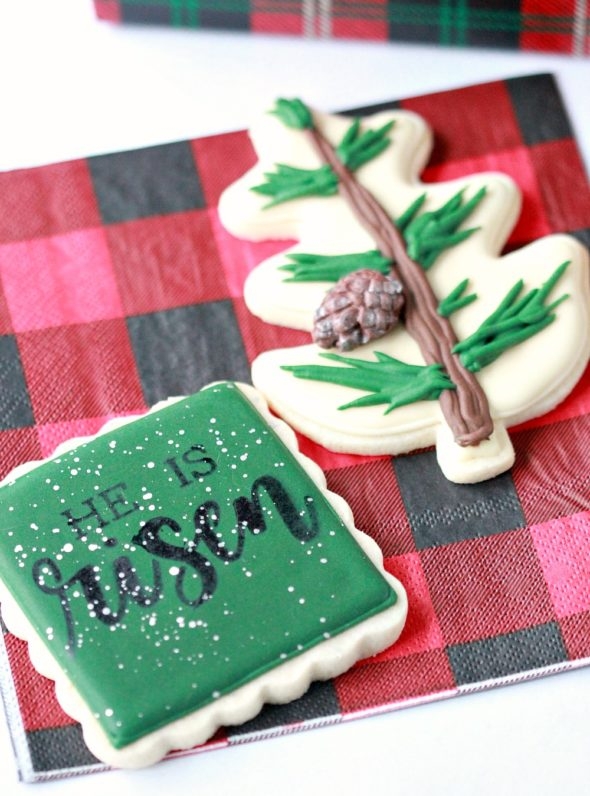
Usually, “He is Risen” is shared around Easter time, referring to Jesus’ resurrection, and Christmas time is a celebration of His birth, but because I made these for a church event last week, and the He is Risen stencil is the only one I had relating to Jesus, I used it. It’s a good reminder any time, I thought. For these cookies, flood your base with 10 second royal icing and once the icing has dried, sprinkle silver shimmer dust mixed with vodka (I used raspberry vodka, but you can also use any clear extract) onto the cookies with a paintbrush only used for this purpose. I kind of flick the paint brush over the cookies to get that splatter look. Once that has set, airbrush your cookies using the following tools:
He is Risen Stencil (Sold out at How Sweet is That? but a similar one can be found on Amazon here).
Dinkydoodle Airbrush
Dark Green Airbrush Food Coloring
Evergreen Cookies
Thanks to Lorena of Lorena’s Sweets for the idea for the evergreens on a leaf cookie cutter. I piped ivory 10 second royal icing as a base and once that was dry piped the brown stem with a #3 tip and added forest green needles with a #3 tip as well. The pine cone was made using fondant colored brown and pressed into this mold. I placed the mold in the freezer for 5 minutes and then the fondant popped out easily. Each pine cone was dusted with a little bit of silver shimmer dust and adhered to the cookie with a little royal icing.
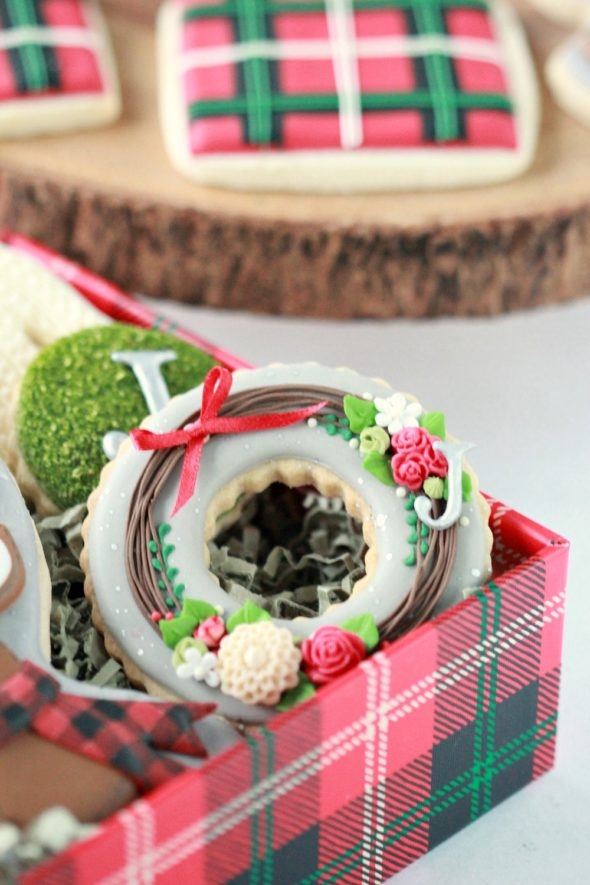
Wreath Decorated Cookies
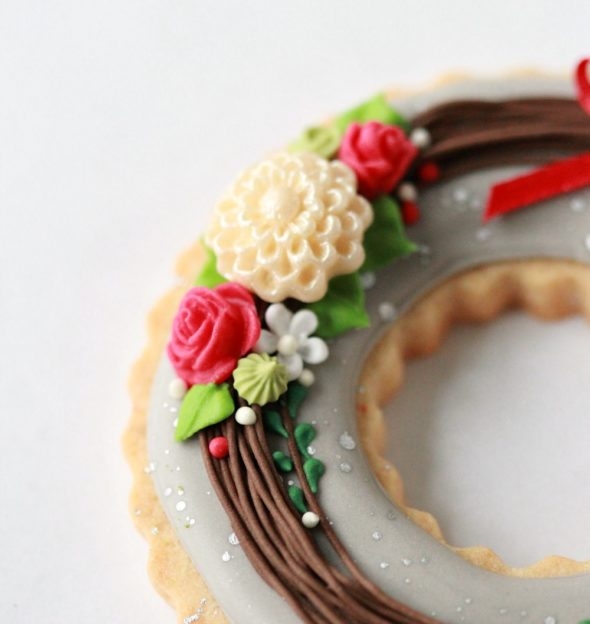
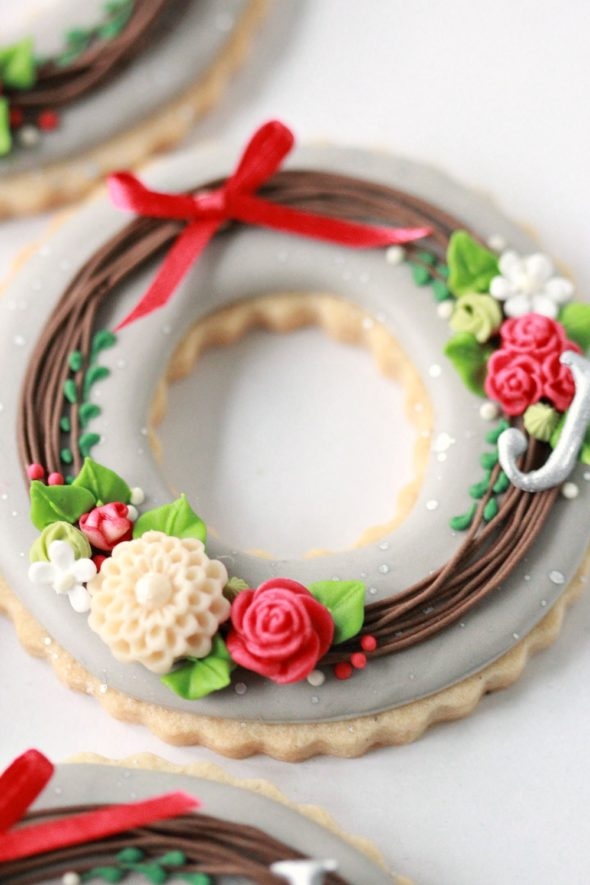
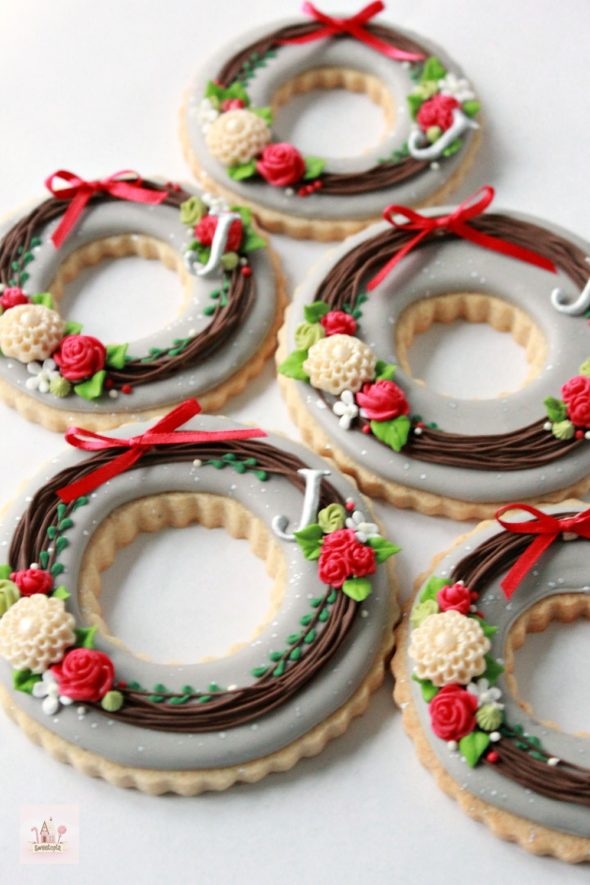
For the wreath cookies, flood your base with 10 second royal icing and once the icing has dried, sprinkle silver shimmer dust mixed with vodka (I used raspberry vodka, but you can also use any clear extract) onto the cookies with a paintbrush only used for this purpose. I kind of flick the paint brush over the cookies to get that splatter look. Once that has set, pipe thick icing in layered and overlapping circles, using tip #1.5.
To make the flowers, I used:
For the roses, I colored fondant red with paste food coloring and pressed it into the molds, let them set in the freezer for 5 minutes, popped them out and adhered them to the wreath with small dabs of royal icing.
For the dahlia, I followed the same process except I didn’t color the fondant red, dusted it with pale shimmer dust and adhered to the cookie with icing.
The leaves were piped with leaf tip 65S, using Wilton leaf green food paste coloring, and the tiny star tip #362 and small rosettes star tip #14 were made using Americolor Avocado and Lime Green. The daisies I piped on parchment using a #2 tip for the petals and centers.
I’m sure I’ve missed some details, there was so much to share in this post, so please feel free to ask any questions below and thanks for visiting me here!
Happy decorating!
xo,
Marian
















HiMarian,
What an amazing post! So much info! So much to learn from you! Beautiful artwork,lots of time and patience involved! I admire your art talents. Every post you do, is very creative and knowledgeable! This one is very special! I’m glad you are back into it again!
ML
Thank you so much Maria! xo
Hi Marian! I love all your posts and videos on decorating! Your recipes and hints are awesome as well.
Does this chocolate royal icing taste chocolatey? It seems like a small amount of cocoa powder….I’m hoping the chocolate flavor is enough to really tell it’s chocolate.
Thanks Julia! Yes, I would have liked to put more cocoa powder, but more cocoa powder affected how the icing dried, but yes, it does have a chocolaty taste, but not a powerful one. I guess trying it to see what you think might be the only way to see if you like it. Happy decorating! xo
*Just* when I decided to simplify Christmas this year, lol! Ack. That moss!!
Ha ha, Karen, you make me smile!
Hi
Did I miss the recipe for the peanut butter cookies?
Thanks
Oops I found it. Sorry!
Enjoy baking and nibbling Donna!
Thank you for this wonderful post, Marian! I have learned so much from you over the years. You are amazingly talented – thank you for sharing!
Thank you for your comment Cindy, I’m so glad these posts can help!
Wow, you are amazing and soo kind to share all this information. I have always been too scared to flood a cookie but am really tempted to try now☺☺☺
Thank you so much.
Aww, thanks Jill! In case you didn’t see the link, this playlist of cookie decorating basics videos, might be helpful to start with. Happy decorating!
Thank you so much!!
Wow!! So beautiful and meticulous! Pure talent!
Thank you for generously sharing your wealth of knowledge!
Thanks for commenting Pamela! xo
You are amazing! So lovely!
Thanks so much for commenting Dawn! 🙂
Hi Marian, I would like to try the transfer technique. So say I had a dozen cookies how many transfers would you pipe to allow for breakage? Welcome back you were sorely missed in the cookie realm.
Thank you Andrea! I appreciate you noticing I was gone. 😉
For the transfers I would probably do about 4 extra for 12 cookies. If more than that break, they can still be repaired and stuck on the cookie, it just won’t be perfect. Happy decorating!
Hi Marian, I love this set of Christmas cookies. There are beautiful!! I will try the chocolate Royal Icing Recipe. Thank you!
Thank you Violet, have fun decorating! xo
Wow how truly talented you are! These are just STUNNING I am green with envy (or Moss). Looks like a lot of patience is required especially on the sweaters and lines. No longer happy with my cookies. Time to up my game!
Thanks witty Christy! I’m sure your cookies are awesome!
What beautiful cookies as always. I started learning how to decorate cookies 6 years ago by watching your videos and now I teach through our local parks and recs dept and I recommend your videos to my students. Love the sweater – so simple and beautiful. I’m doing a demo on Sunday for 300 women who love all kinds of cookies and that cookie will be perfect and I’ll recommend your blog again ♥
Cindy, that makes me so glad to hear that you’ve learned from here and are now passing the cookie love along! 300 women, wow! How will you do that? Will there be a video camera and a projector showing what you’re doing on a screen for everyone to see?
You are the absolutely best decorator, love your posts. I keep trying, I’m certainly not good yet. Please and thanks for sharing your experiences and talent.
Carol
Aww thanks Carol! I’m sure you will improve, it took practice and experience but the tips and tricks will help speed it along. Happy decorating and thanks for visiting me here! xo
♥ That’s what they tell me, ha. I hope I’m not shaking too much to pipe the icing. It should be okay, it’s a fundraiser for a historical society through a facebook cookie group I’m a member of so I know most of the ladies on-line but haven’t met many of them.
They’re a very sweet group of traditional cookie bakers. My demo is part of a panel of wedding related topics.
Sounds like it’s going to be lovely! Have fun!
These are amazing! Thank you so much for the tutorial. I’m glad you are back!
Well thanks so much Sara! I appreciate you noticing I was gone for a bit. 🙂
mind officially blown away! You’re so inspiring!
I am still in awe..is there a recipe for white chocolate royal icing?
Thanks Edith! No, I’m sorry, I don’t have a white chocolate option. Great idea though!
Wow! These cookies are stunning!!! You’ve motivated me to keep practicing with my cookie decorating. Thanks for sharing your tips and talent!
Hi Heather,
Thanks so much too, have fun decorating!
Hi Marian! I needed a chocolate royal icing recipe and specifically googled “Sweetopia chocolate royal icing” because your regular royal icing recipe is the only one I ever use! You have a special place in my heart because you are the one who taught me (by way of your blog) how to make icing, how to pipe, how to marble, etc. way back when I was just starting out. I had been just mixing powdered sugar and water and wondering why my icing colors were bleeding, lol! 🙂 I soooo wanted to cookie but knew so little!! Of course, having the proper recipe and learning the proper technique made all the difference in the world! LOVE your cookies and your tutorials! I have recommended your videos to so many newbie cookiers. Thanks for all the inspiration and all the excellent teaching! God bless you! <3
Hi Lisa,
Well that is so nice to read! Thank you very much for taking the time to let me know how my little corner of the world has made a difference in yours! I really do appreciate it. God bless you as well. xo
Hi there, I am wondering if you had trouble with the chocolate royal icing taking a long time to harden? I have read that it can be tricky.
Hi Jasmine,
The test batch I made which I mentioned here, rippled on the surface of the icing, but did dry. The final recipe dried well, perhaps you did to use a dehydrator or fan on them?
Hi Marian!
This might seem like a silly question, but have you ever successfully colored your chocolate royal icing any color other than brown? It looks so light before coloring that I wonder if another color would be possible. I love your blog by the way!
Hi Ellie,
That’s a great question! Any darker color, like black of course, yes, but I haven’t tried with lighter colors. My guess is not really for lighter ones such as light pink, yellow etc. Reds in the darker shades should work too. Sorry my answer isn’t more specific. Thanks so much for your comment!
Hi.
I love your page on FB.
How do you make the plaid red / black pattern, that are in the background on some Reindeer cookies?
Is there any tutorial / video for it?
Happy New Year.
Sincerely.
Linda
Hi Linda and thank you.
I used a plaid stencil on a red base of dried royal icing, and airbrushed the pattern on with black airbrush color. I explain it a bit more in the blog post above… it’s under the section, Buffalo Plaid Cookies.
Hope that helps!
I love it your beautiful job cookie’s, thank you so much
You’re truly gifted!! It’s just amazing what you’re able to do! Merry Christmas and God Bless you!! Thanks for posting instructions! It really helps self taught decorators.
Aww thanks and happy new year Nina!