

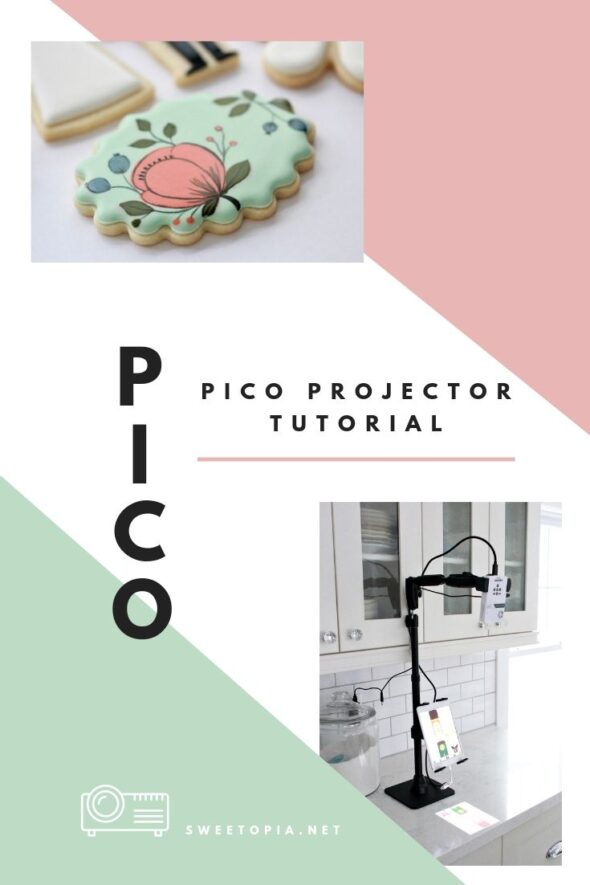
How to Use a Pico Projector to Decorate Cookies
If you can’t see the video, click here.
I’m no artist when it comes to drawing images on cookies.

It is for this reason and others that the Pico projector has been so invaluable to me – I can easily create sugar art without being able to draw images freehand.

If you are somewhat ‘drawing-challenged’ shall we say, or if you’d like to speed up your cake or cookie decorating process, you’ll probably enjoy the Pico projector.
As a quick aside, the Tutorial for these cookies can be found in Downloadable Videos and a PDF HERE. There is also a tutorial bundle, including these cookies, a royal icing and cut out cookie guide HERE.

How to Use a Pico Projector for Cookie Decorating
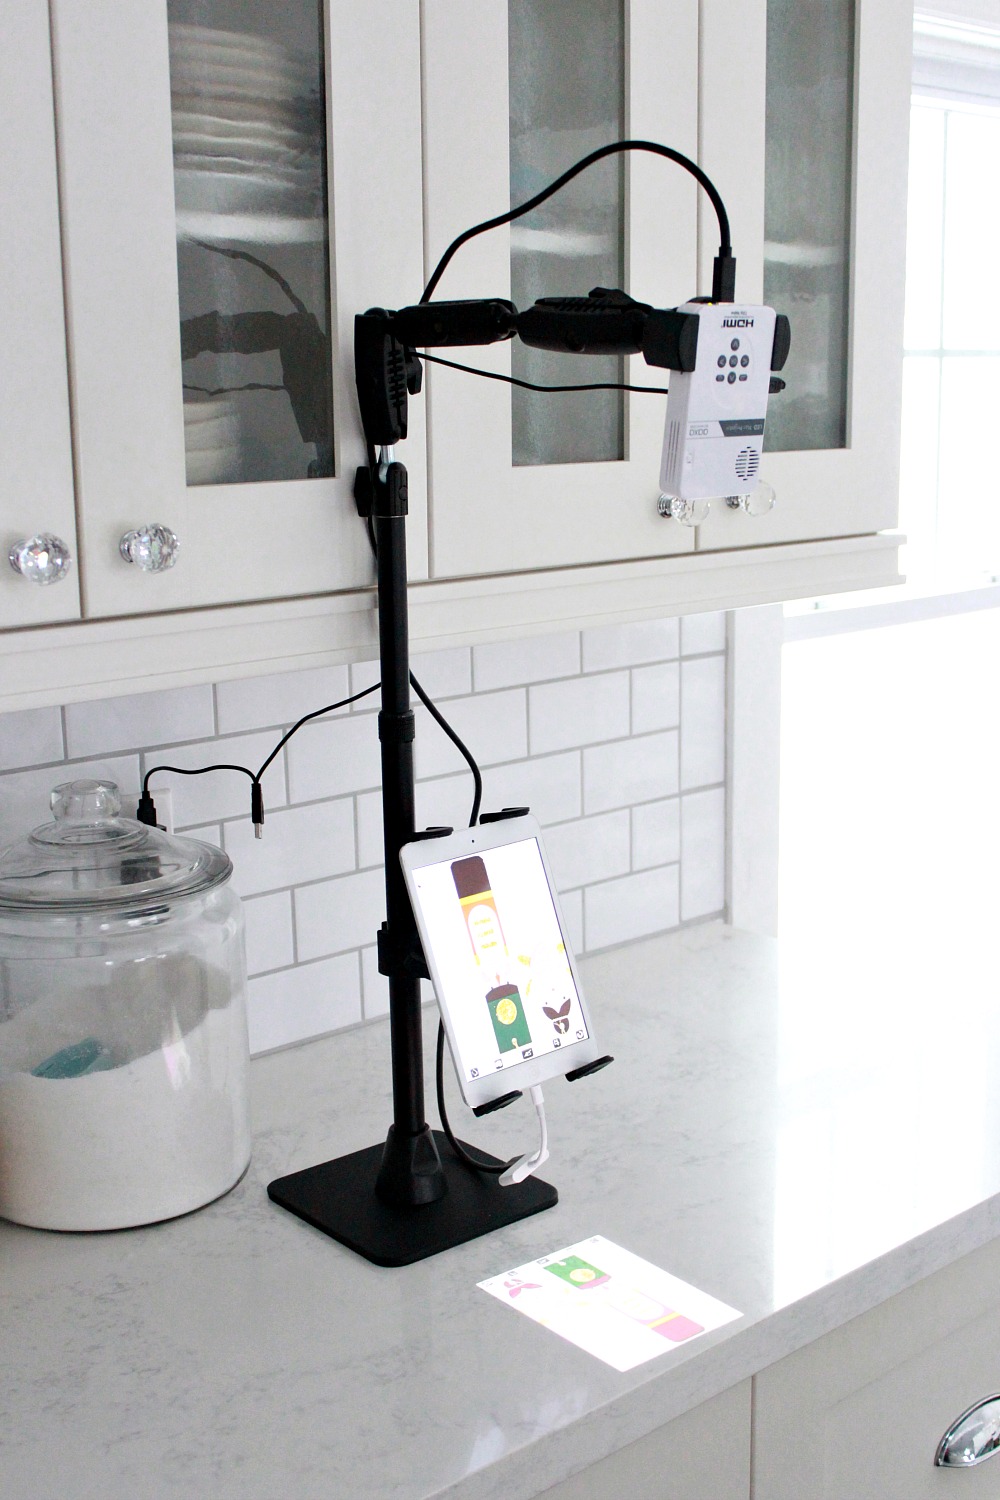
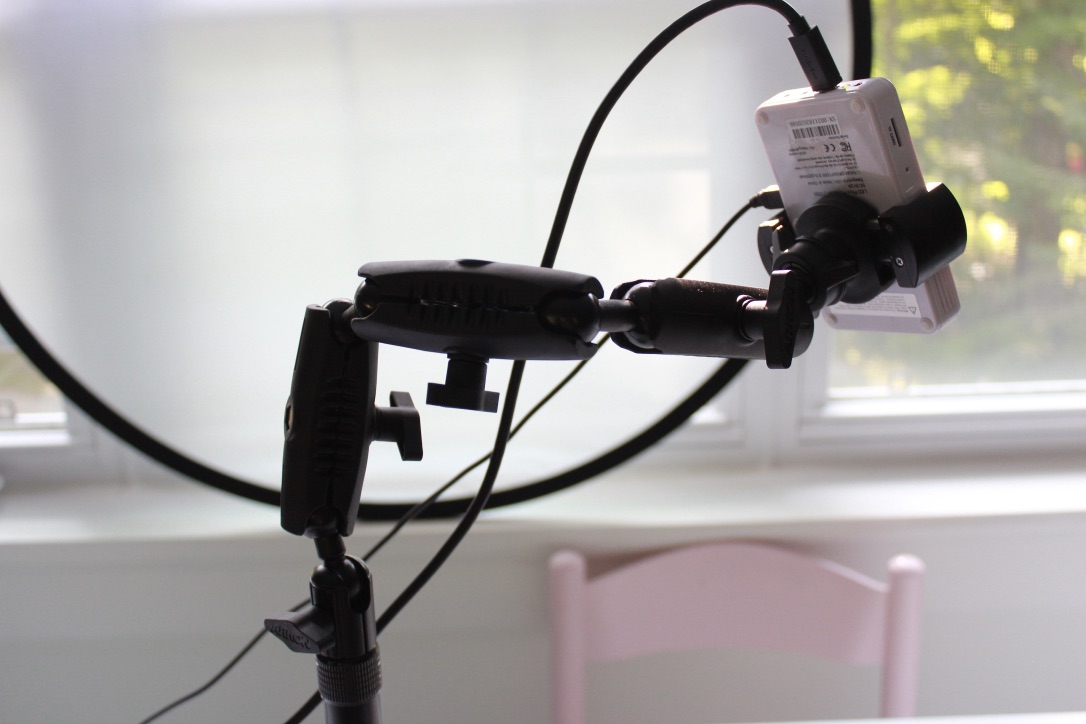
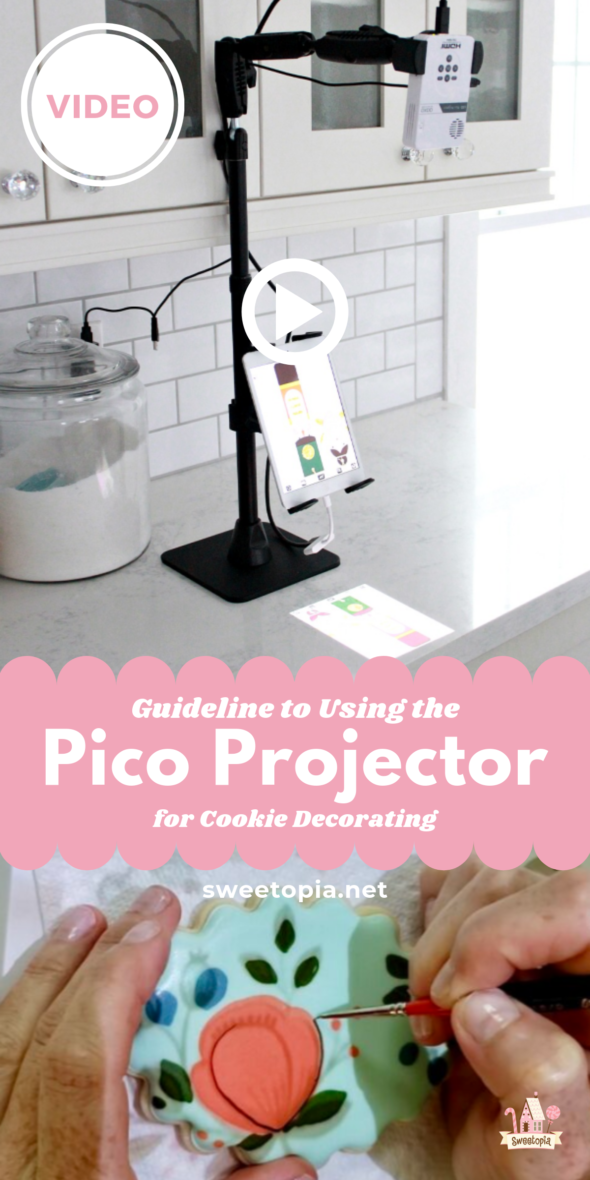
So, what is a Pico projector? It’s a small, handheld size projector that I use to project an image onto my cookie. It’s plugged into my iPad and mounted on this Arkon mount above. The mount is called the Remarkable Creators Phone and Tablet Stand, is $139.99 and you can get it on Arkon’s site here. You can get 20% off with the coupon code sweetopia. You should know I am an affiliate of Arkon and Amazon, but only share products I use and love with you.
The photo above has been brightened a bit, so I’m sharing another photo below without the brightening…you can see the projected image quite clearly, even at the brightest time of the day.
To use it, I just load the image in an app on my iPad called Camera-Lucida, rotate it 180 degrees (the image projects upside down), and I’m ready to go. I go into more detail in the video and below in terms of options. For example, you can use the projector menu to rotate the image and if you don’t have an iPad or tablet, you can use a USB or TF card as your image source.
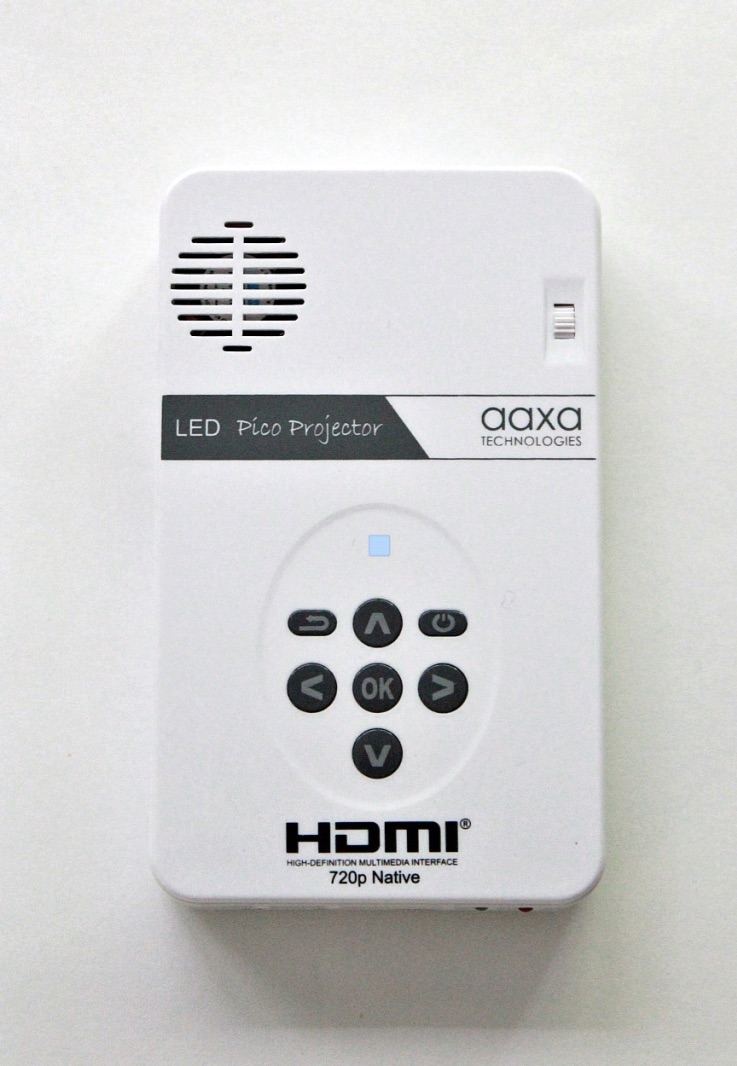
I’m using the micro Pico model above. As far as I’m aware, any Pico mini projector does the job well. You can find other mini, pocket-sized projectors here.
The projector comes on its own, and it’s key to have a good mount to hold it up. I love the Arkon mount… it’s sturdy with a solid base so I don’t need to clamp it to a table and can move it anywhere, it can easily be adjusted to project at any angle and the clamps which hold the projector and iPad are adjustable, snug and tight. The mount will hold any mini projector – the clamps adapt to any handheld device size.
If you’d like to use the Pico projector, here’s a summary of what you’ll need:
The Pico Projector and Tools I Use:
If the Pico is sold out, here are other mini pocket-sized projectors
Arkon Remarkable Creators Phone and Tablet Stand (20% off with coupon code sweetopia)
iPad (You will not need this if you use an USB or TF card)
Mini HDMI to HDMI cable (Doesn’t come with the Pico projector. You will not need this if you use an USB or TF card)
Lightning to HDMI Adapter (Adapter for HDMI cable to attach to iPad. You will not need this if you use an USB or TF card
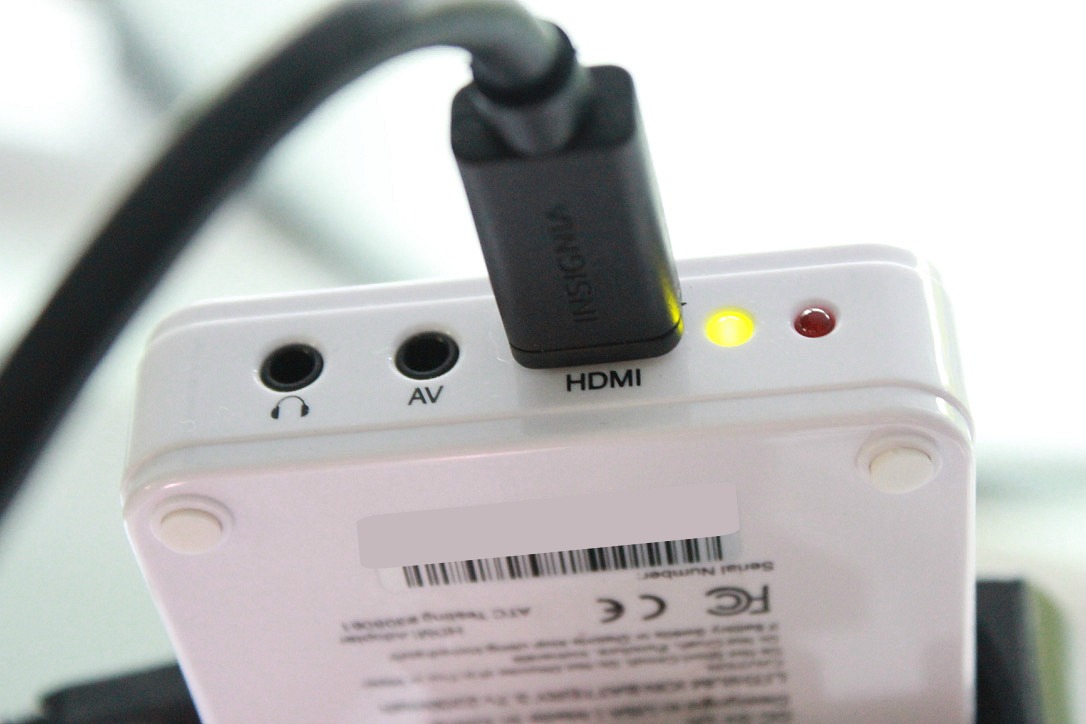
Image Source Options
Quick summary – You can use a tablet, USB, TF card or tablet as your image source. The USB could be a memory stick or can attach to a device such as a laptop. (Would need an USB cord for that).
For the tablet option, I use an iPad because I love using the Camera Lucidia App with my Pico. The app gives me the option to quickly and easily enlarge or shrink, and can rotate the image in any direction. I don’t need to go into the Pico projector settings to change the projection image and can easily even put the image on an angle if I move my cookie around during decorating.
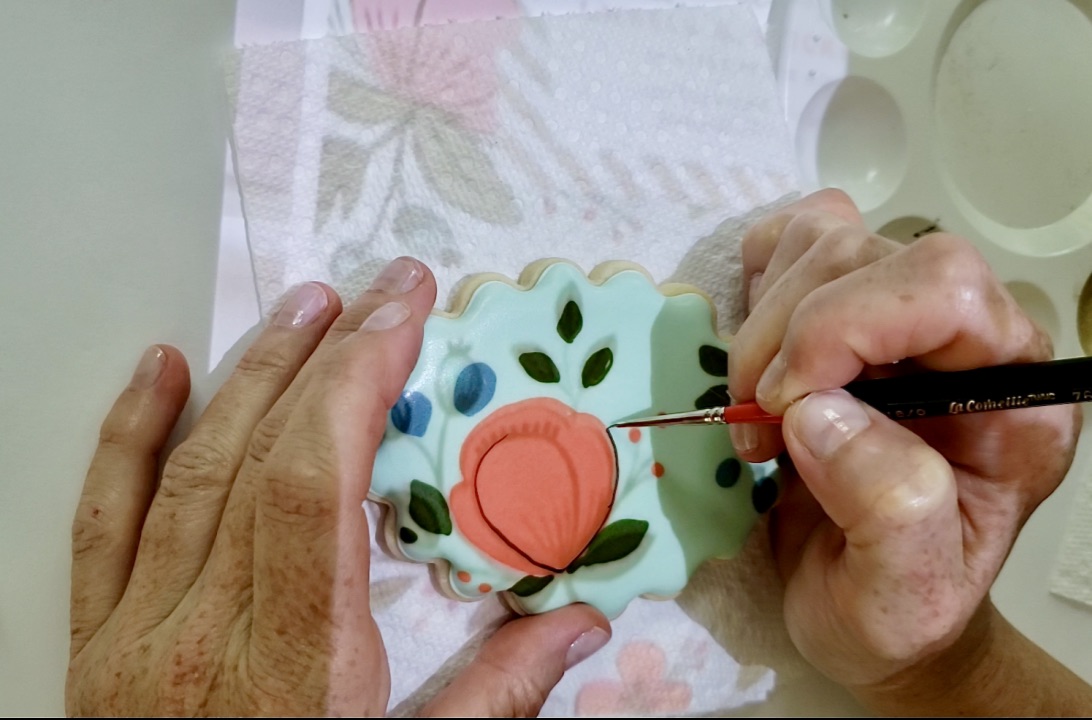
In terms of designs to project, the sky’s the limit! The image source for the flower cookies is Rifle Paper Co.; these botanical labels and stickers. The source for the people cookies (more on them in another blog post soon), is from the very talented Postreadicción.
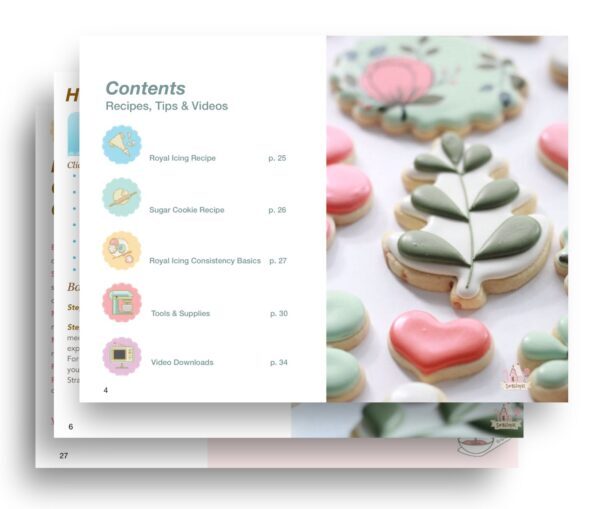
In case you missed it, I have a digital download with videos on making all these specific cookies HERE. There is also a tutorial bundle, including a royal icing and cut out cookie guide HERE.

Flipping Your Image in the Pico Projector
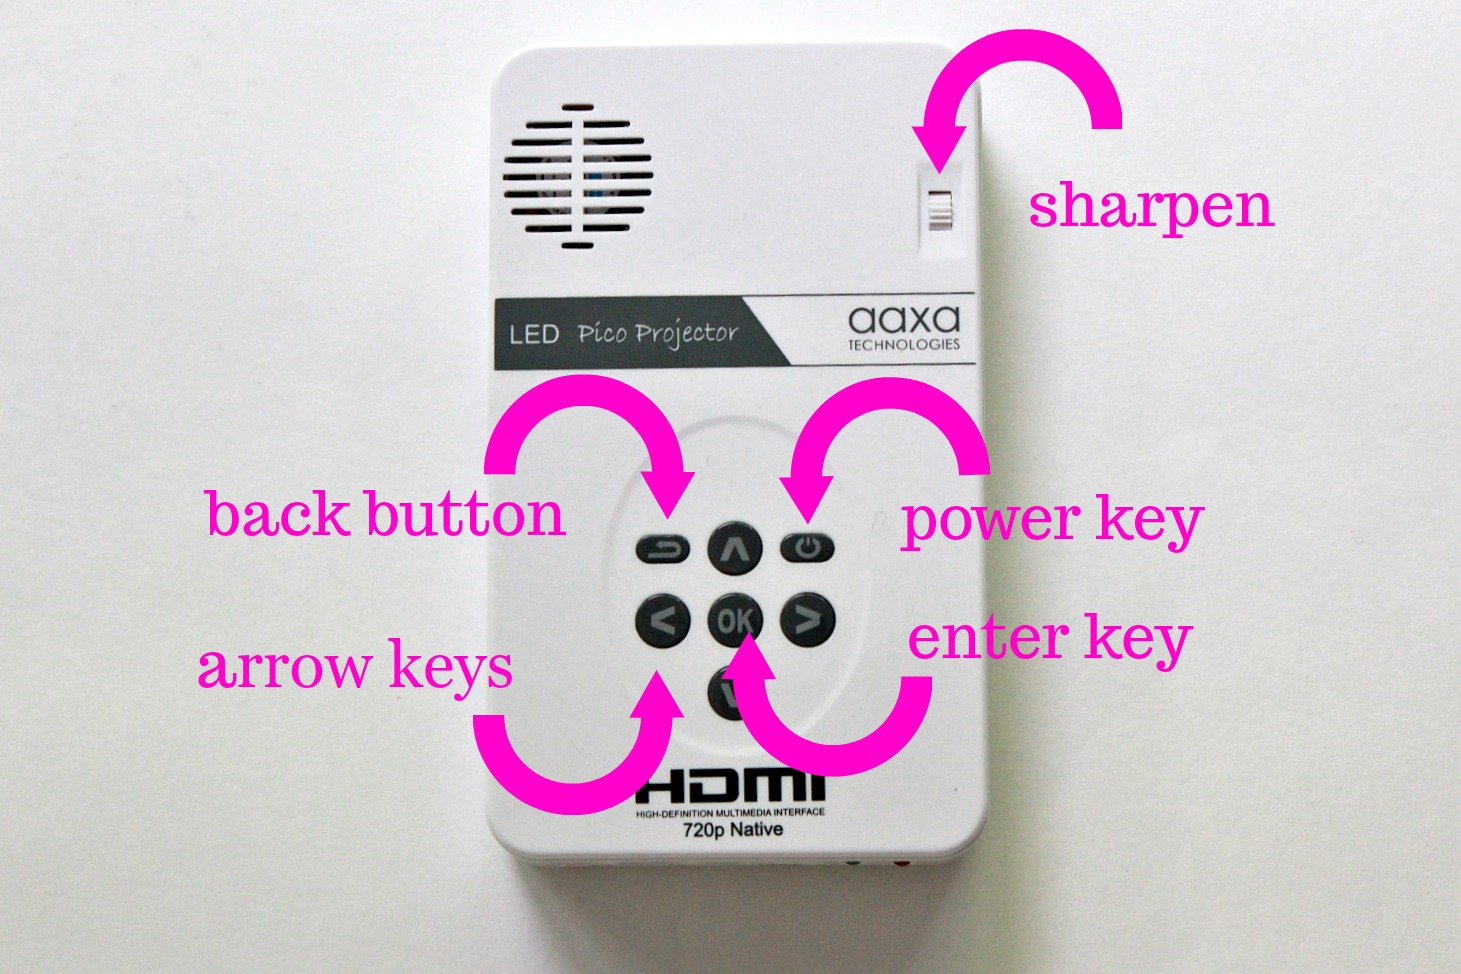
To turn or flip the projection image around (there are 4 directions), once the projector is on, click on Settings (the gear wheel icon), hit the arrow button to go to Projection, hit the arrow buttons to get to Invert forward, which will project your image right side up.
Turning On the Pico Projector
Just a quick note about turning the projector on. You do need to keep your finger pressed on the power button for a few seconds, it’s not just a quick click, in order for the projector to turn on. You’ll see the red and green lights at the top flash, and then give the projector a few seconds to load.
Image Sizing
Adjust the clarity of the image by turning the dial on the face of the projector (diagram above).
Arkon Mount
In case you missed it above, I use the Arkon mount to hold the projector in place and use another one to hold my camera to make videos. The mount is called the Remarkable Creators Phone and Tablet Stand, is $139.99 and you can get it on Arkon’s site here. You can get 20% off with the coupon code sweetopia.
Other Notes on the Pico Projector
- Pico projectors use either an LED or laser light source which effectively eliminates the need for lamp replacement over the useful life of a pico.
- You can use the Pico projector to show a movie etc. as you can easily project onto any surface such as walls, screens etc. I’ve even heard of people who bring them outside and project onto a wall or white sheet for a summer outdoor movie night! Just a note on that, you would likely need to buy portable speakers.

Alternatives to the Pico Projector
I used to use my Kopykake drawing projector to project on images. Here is my KopyKake Projector Tutorial if you’d like to check it out. I find it doesn’t project as clearly as the Pico and is a little more cumbersome, but it still does the job if need be!
There are a few other ideas you could use if you have difficulty free-handing and don’t have a Pico. They are:
Royal Icing Transfers:
Involves putting your image under parchment or a transparency paper and tracing/piping right onto the paper. Smearing a tiny bit of shortening onto the parchment or transparency will help the transfer come off with more ease. When the icing dries, carefully peel it off and adhere it to your cookie (with small dabs of royal icing).
Advantages:
- Inexpensive
- Simple to do
Disadvantages:
- Transfers break easily
- Once you’ve got your base coat of icing you can not trace the top details of the image.
Tracing and Edible Ink Pen:
Page 57 of the book Planet Cake![]() , goes over how to trace letters onto a cake. You could follow the same process for uncomplicated images onto cookies.
, goes over how to trace letters onto a cake. You could follow the same process for uncomplicated images onto cookies.
Roughly based on ‘Tracing Letters’ in Planet Cake; trace the image with 2B pencil onto parchment paper, turn the parchment over and trace the back of the same image. Place the parchment right side up onto the cookie. Lightly shade the parchment paper with the 2B pencil, so that an impression is left on the cookie.
I would recommend trying this method with a food decorator marker![]() .
.
Advantages:
- Great for uncomplicated images
- Inexpensive
Disadvantages:
- Time-consuming
- May not leave a distinct impression/difficult to see lines

The Pico Projector – Is it worth the cost?
I love using the Pico projector as I’m not a skilled artist, so it takes the worry and frustration out of drawing. I definitely wouldn’t have the same cookie results without it! If it’s worth it for you; I really can’t say. It’s a matter of personal opinion. Do you need help in the drawing department? Are you a good artist but would like to speed the process up? If your answer is yes to either of the latter questions you’ll probably like the projector.
I hope you’ve enjoyed my tutorial. Please feel free to drop me a line or ask a question in the comment section – I love hearing your input!
xo,
Marian


Hi Marian,
intersting,detailed information about the Pico Projecte! A must have! Love the design you made on the cookie sample!
Thank you for all the information you give away!
ML
HI Maria,
Thanks so much for your comment, I so appreciate it!
I have that projector and I agree it is a big help. I went and bought the WiFi projector, but I made the mistake of buying an off brand. While very inexpensive it doesn’t come with a manual. My husband had to figure out how to make it work. Unfortunately, I can’t rotate the image from being upside down. I have to buy an app. Moral for readers is don’t buy a cheap projector.
I save the image and then use an image editor to rotate it!
Hi Kate,
Thanks so much for your input! I know, it’s not inexpensive, definitely an investment, but it has been such a time and life saver for me. Thanks again for commenting!
Thanks for sharing Erica!
Hi Marian – I’ve been using a pico for a while but recently tried using it with my ipad. I’m not able to resize the image. Is that why you use the Camera Lucida app? Works great with my phone??
Love the cookies! Can’t wait to see your post about them!
Hi Kim,
I find using the Camera Lucida app much faster than fiddling around with the projector controls. The projector controls are not hard, but I just find the app handy for resizing, turning etc. It’s so easy to use and let’s say I shift position while decorating, I can just turn the image/resize the image by pinching my fingers on the iPad screen. Can’t get easier than that!
Hi Marian,
Thanks for sharing this intersting piece of information about the Pico Projecte! Do you mind I take a few words to post on my blog? I sure gonna reference.
Henry
Hi Henry,
Yes that would be okay. Thanks for asking. 🙂
Hi Marian – Do you keep the projector plugged in when you use it? If so, did you buy a separate power cord? The one that comes with it seems awfully short.
Thanks,
Connie
Hi Connie,
Yes, I do keep it plugged in. It is fairly short, so I prop the power bar up that it’s plugged into. See the video at minute 2:47 for how I do it. Hope that helps!
Do you know how to download a video looper on the pico projector? I’m having a hard time trying to figure this thing out.
Hello and thank you for all the great videos. Will Arkon Mounts still honor a coupon code from Sweetopia. I have a stand but it is so clumsy. Thanks again, Sandra Lee
Yes, the coupon code is ongoing. If you have any issues, let me know, Arkon Mounts is great with customer service.
Hello Marian, I have yet to master my Pico. I just can’t seem to find the time to really get the hang of it. I have watched your video and all the other ones on You Tube that demo Pico use but it is a slow learning curve for me.
I have Camera Lucida and never knew you could use it in place of the Pico controls which I hate and can never see or manipulate correctly.
I still am not clear on how this works. Would it be possible for you to review the Camera Lucida to Pico steps?
I guess the first thing would be that you have to be connected to your ipad or phone by the cable and then open the ap and the image you want? Thanks if you have time for a re cap.
Kathy Andersen
Hi Kathy,
I’m sorry for the delay! I prefer using the Camera Lucida as well, it’s much easier to play around with the pic controls. I’m not a camera lucidia pro, but really all I do is take a photo with my phone, open up the camera lucida app, and open the photo gallery (it’s on the bottom left in my version). Voila! There’s the photo that I can enlarge, turn etc.
Hope that helps!
Do you have issues with your hand covering up your image when using the projector. It almost is not helpful to me at all as I can’t see what I am trading because my hand blocks most of the image. Am I doing something incorrectly?? Thank you.
Hi Jamie,
You can’t completely avoid the overlapping of your hand or piping tip and the shadow at some points while you’re tracing the image; there a few seconds where my piping tip’s shadow is right over the line I’m trying to trace. I find that following the flow that my piping/my hand is already going and guiding it towards the part of the image that you can see, helps me bridge that gap. Also try compensating by changing the angle of your hand. There might be a few seconds of ‘blockage’ but it’s doable in terms of judging where to pipe because your hand is already ‘on the way’, if you know what I mean.
Basically, keep your eye on the line you can see and trust your hand to follow the direction it’s already going. Hope that helps!
Hi there thanks for your video!!! It helped so much. I purchase the Botanical book – a hard copy should I have ordered a digital one? If not do I just take pictures of the book and then image it from there?
Thanks in advance
Hi Christine,
That’s great! Yes, I just took a picture with my iPad, and connected the iPad to the projector. Have fun!
what colors did you use to make the green on the plaque cookie that you traced the flower on?
Hi Christina,
The tutorial for these cookies can be found here; https://sweetopia.net/product/digital-download-wedding-cookies-video-tutorial-royal-icing-puffiness-tips/
lbnlzqzrjaorgesbpfvqabqvdsnqnv