It’s deja vu.
You may have already seen these owls in my Top 10 Tips on Decorating Cookies here, but I jumped at the chance to make them again!
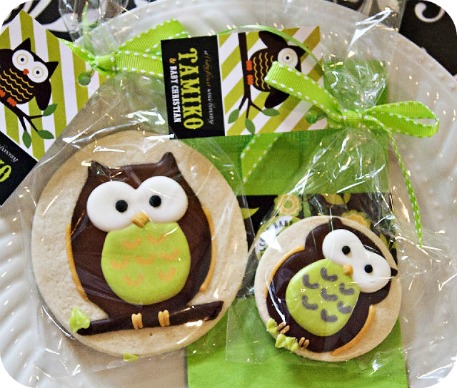
The lovely and talented Jenn of HWTM, needed owl cookies for a baby shower her mother threw, and I was thrilled to make these for her!
If you follow me on pinterest, you might have noticed I’ve got a bit of an owl crush, so much so, that I even decorated my step-daughter’s room with an owl theme. I’m so glad she loves them too!
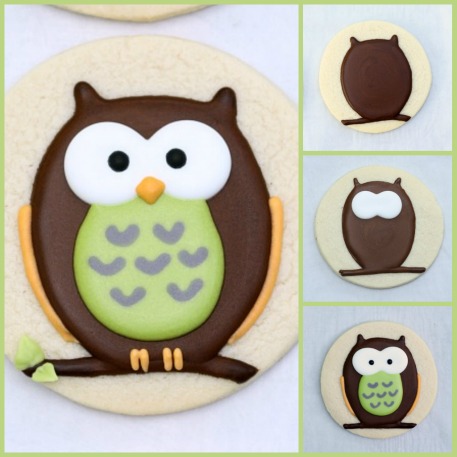
The colours for these owls are different, and this time, I’m sharing the step by step in case you’d like to try them out.
*
How to Make Decorated Owl Cookies
*
For the Cookies, you’ll need:
- Sugar Cookie Dough (click here for recipe)
- Royal Icing (click here for recipe)
- Round Cookie Cutters
- Food Gel Coloring
- Piping Tips (Size #2)
- Piping Bags
- Couplers
- For a vlog on my favourite cookie decorating tools, click here
- Optional – Kopykake Projector
Decorating Instructions:
Because I’m not skilled at freehand drawing, I used a Kopykake projector to trace in each of the following steps, however, the owl shapes are fairly simple, and most likely easy enough for you to do without having to use the projector.
Once you’ve made your cookies and they’re ready to decorate:
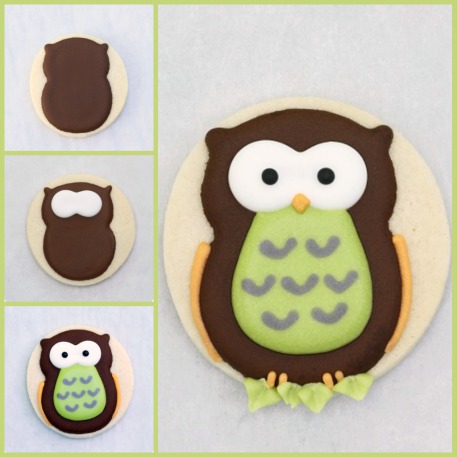
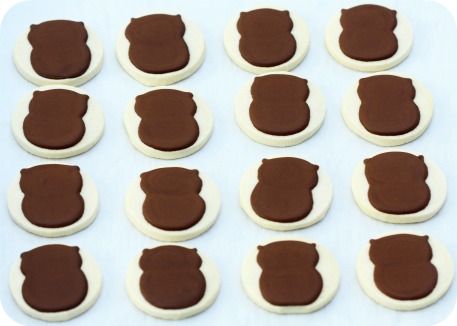
Step One: The Base
Pipe the owl’s body using a #2 tip. Let dry for a minimum of 6-24 hours. The icing basically acts as sealant for freshness, so it’s okay to let the cookie dry uncovered.
The length of drying time depends on the humidity of your environment. I recommend working in a room with air-conditioning and a de-humidifier, especially if you live in a tropical area, or during the summer months in the Northern Hemisphere.
Step Two: The Eyes
Pipe the whites of the eyes and let them dry for a minimum of 6-12 hours.
Step Three: The Belly & Details
Using a #2 tip, pipe the belly and add the ‘feathering details’ right away. (Wet-on-wet icing). Pipe the pupils and wings. You could finish the rest of the owl details at this point, but I waited for the owl’s belly to be dry before I added the beak.
Step Four: Finishing Touches
Add the feet and beak using a #2 piping tip, and pipe the leaves using a #67 piping tip. Let dry for 6-12 hours (less icing), and you’re ready to package or serve!
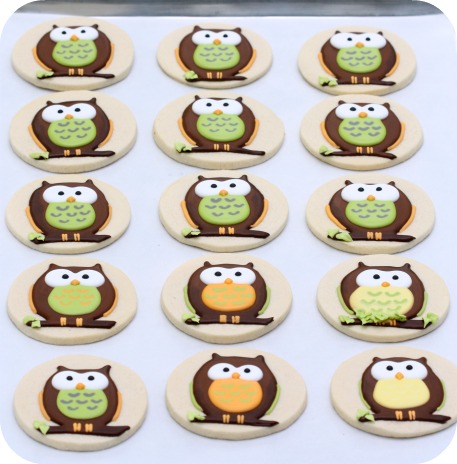
Follow the same steps for the Momma Owl. Her body shape is just a little bit different:
Don’t be discouraged if you make mistakes; with some creative ‘touch-ups’ you can salvage almost any cookie!
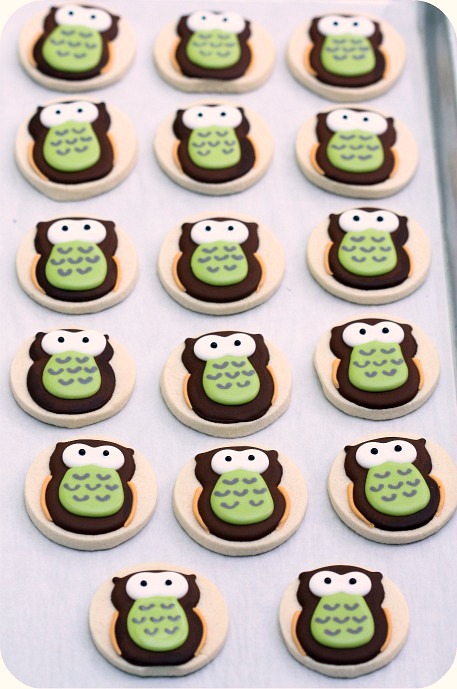
Take a look at one of the owls with the yellow tummy below… I was a little too generous with the icing, and it ended up pooling to the left, so I added a few more leaves to his branch to hide the flaw.
You can find more detailed info. on decorating cookies in my Cookie Decorating Tutorial here.
If you have any questions or comments, please drop me a line below and come join me on facebook, twitter, or youtube.
Have fun decorating!
xo,
Marian









I LOVE THESE and I am obsessed with OWLS!! I have to share this link with my friend! 🙂
Question….you noted to “let dry for a minimum of 6-24 hours”…I know that extended time is needed in case of humidity but in the event that I am keeping my cookies under a fan to dry faster and my icing isn’t very thick, how many hours after can I begin my second layer of icing? Will I run the risk of bleeding if adding white on top of brown if the cookies have been drying for 5-6 hours? Should I wait longer? And for something as small as adding a detail such as a teeny tiny flower on top of the SECOND layer of icing, how long of a drying time do I need to wait? These cookies seem to be a 3 day process…and while although I made the cookies on Fri…my first layer of icing was finished by 3 p.m today and I need them done by tmrw morning at 10 am : / Sounds like I may need to get up at 5 am to add that tiny flower detail? That small touch shouldn’t take but a few hours to dry I’m assuming? Thank you for your feedback Marian!
I’m your fan on Facebook and Sonia Carter has shared this link with me
Que preciosidad de galletas y que preciosidad de niñaaaaaaaaaaaaaaaaaaa!!! Me encantan guapaaaaa
It’s sweet ! I put a link to your article on my french blog
These are so beautiful! Thank you for sharing such wonderful things.
I’m making these for a friend’s daughter’s birthday and they are so fun to make! Thanks for the idea. I check your website daily (or several times each day)!
these are so cute! where did you get the customized plastic bags?
@ kelly: Gosh, it’s been a while… These ones weren’t necessarily customized, I just buy a bunch of sizes so that whatever cookie I’m making ,I have lots of bags to choose from. I’ve gotten the bags from the following sources in the past – (search term is cellophane bag)- Online at Amazon and locally at a store called Creative Bags and McCall’s Baker’s Warehouse. Hope that helps!
Wow! All that drying time. I live in Phoenix so humidity isn’t a problem. My cookies seem to be dry enough for the next layer in an hour or so. I’ve never had bleeding issues. EEK! We’re thinking about moving to Colorado so I’ll have to remember that my “one evening” cookies may now take days!!! 🙁
I also live in the Phoenix area macKenzie, question I need tips for writing on cookies with royal icing, so frustrating to get just right consistency from spreading, even when using a 1 or 0 tip I can’t seem to get a nice fine line, I’m good doing it on wax paper then once I try to actually write a word I struggle, it is truly an learned art. I’m not giving up. Love your work Sweetopia!
Kim
Cakepops101
Gosh! These are unbelievably cute Marian! Especially loved those branches with lots of leaves…never imagined that was an effort to cover up a flaw:)Dying to try these out…
I love these cookies! I really want to try to make cookies but, I just can’t get over the drying time. Does it really take about 2 days to make royal iced cookies? Thank you for all you do, it’s so helpful and I can’t wait to get started!
@ Dawn: It can, yes. The factors to consider are humidity and the design of your cookie.
If it’s a simpler design, you may very well be able to decorate in one shot and just let them dry.
Humidity – If you live in a humid area, you will need to follow the drying times above.
If it’s not too humid where you’re decorating, the drying time will be shortened.
You can keep a cookie or two for ‘testing’ purposes, and press the icing to test here and there to see if it’s dry. Even biting into it, or cutting it will help you figure out if the icing is dry.
If you live in a humid area but want to speed up the drying process… work in an area with *both* an de-humidifier and air-conditioner.
If you haven’t seen it, this video on drying cookies, might be helpful for you: http://www.youtube.com/watch?v=pzg4VwOe8Dg&context=C382a383ADOEgsToPDskKMfoOJxy2I-91p1xZlm3o_
Regardless, making decorated cookies is definitely a baking ‘project’ which is a little more involved than, for example, making chocolate chip cookies. It will take you a good chunk of time to make the dough, cut and bake shapes, make and color the icing and then decorate and dry.
That being said, I personally really get a lot of satisfaction out of decorating. It’s a stress-reliever for me, a creative outlet and the cookies are so fun to give away as gifts. That’s just me though!
To give you an idea of a ‘cookie decorating schedule’ I use, here’s a post you might find useful as well:
https://sweetopia.net/2011/11/cookie-making-schedule-free-printables-ballet-tutu-cookies/
I hope you have fun decorating!
All the best! xo
Love the owl cookies! They look so professional. I have never heard of a Kopykake Projector before, but will need to look into using one for decoration.
I love the owl theme idea for my sister and my son’s christening in May. I noticed that you used an almost “chocolate” brown. How can you get the royal icing to that color without the icing being too bitter?
Hi @ Joyce: I have a tutorial on it in my tutorial section which may help you as well.
@ Anny Cakes: You can add cocoa to it first if you like. My fave brand of gel coloring is Americolor, which I think makes a difference in taste as well.
@ marian:
ME ENCANTAN!!!!!!
Where did you get the image for the owls? Do you have a link to the image of the mama owl? Thanks.
I am having trouble with my lines. Any tips on how to make good straight lines? I do drop and lift my icing. I think my “writing icing” may not be of the proper consistency. I use a 1.5 tip. Should I use a different size tip for making lines?
Hi @ Anna: I will definitely share them somehow when I find them again… I know they are somewhere! We are in the process of renovating our home and 3/4 of it are in cubes outside the house.
@ Martha Lander: Here is a video for you:
https://sweetopia.net/2011/12/video-how-to-pipe-lines-with-royal-icing/
Your designs and recipes are the best. Thank you for sharing them. I had a question about piping dots, like the pupils. How do you avoid the peak on the top, so they do not look like mini, mini candy kisses? I have tried to use a toothpick to fix, but not happy with the results. Any other suggestions? Thanks so very much!
Hi @ AMB. Yes, make your icing a little bit runnier, and the dot should fall back in on itself. Happy decorating!
Amazing job !!!
I definitely going to make it ! 🙂
did you use 2 different of icing consistency to every color?
for example- one brown icing with a thick consistency, and the other brown icing bag with a less thicker consistency ?
So those cookies takes 3 days to get ready ? 🙂
thanks,
Keren
Hi Karen,
I used the same icing consistency for every color. My videos (the yellow youtube button is on the top right of my site), show how I decorate, and I have one video which explains consistency, if you’d like to check it out.
The cookies could take less than 3 days if you leave less drying time in between. I’m usually making them while I work as well, so just let them dry while I go to work etc.
xo