
It’s deja vu.
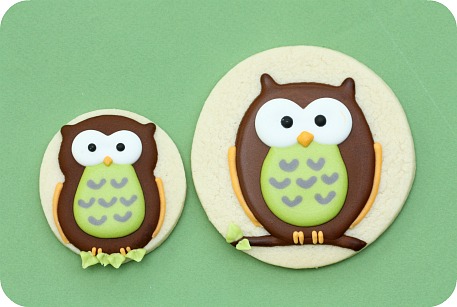
You may have already seen these owls in my Top 10 Tips on Decorating Cookies here, but I jumped at the chance to make them again!
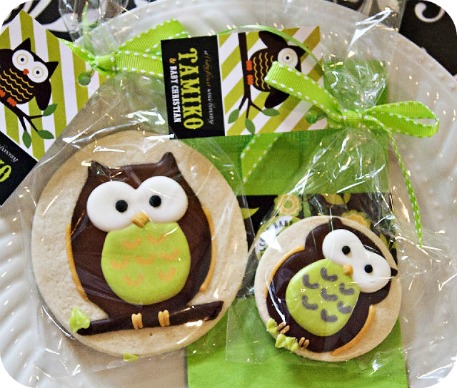
The lovely and talented Jenn of HWTM, needed owl cookies for a baby shower her mother threw, and I was thrilled to make these for her!
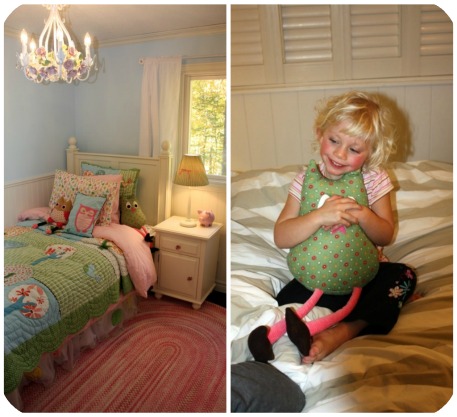
If you follow me on pinterest, you might have noticed I’ve got a bit of an owl crush, so much so, that I even decorated my step-daughter’s room with an owl theme. I’m so glad she loves them too!
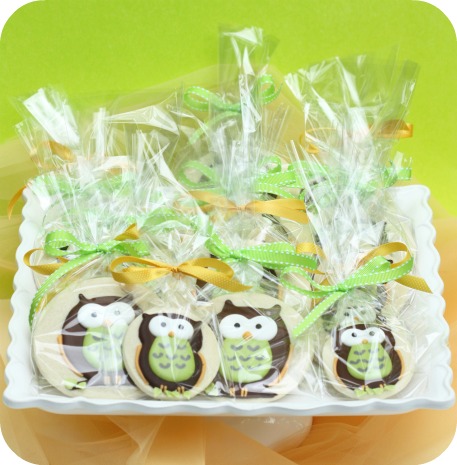
The colours for these owls are different, and this time, I’m sharing the step by step in case you’d like to try them out.
*
How to Make Decorated Owl Cookies
*
For the Cookies, you’ll need:
- Sugar Cookie Dough (click here for recipe)
- Royal Icing (click here for recipe)
- Round Cookie Cutters
- Food Gel Coloring
- Piping Tips (Size #2)
- Piping Bags
- Couplers
- For a vlog on my favourite cookie decorating tools, click here
- Optional – Kopykake Projector

Decorating Instructions:
Because I’m not skilled at freehand drawing, I used a Kopykake projector to trace in each of the following steps, however, the owl shapes are fairly simple, and most likely easy enough for you to do without having to use the projector.
Once you’ve made your cookies and they’re ready to decorate:
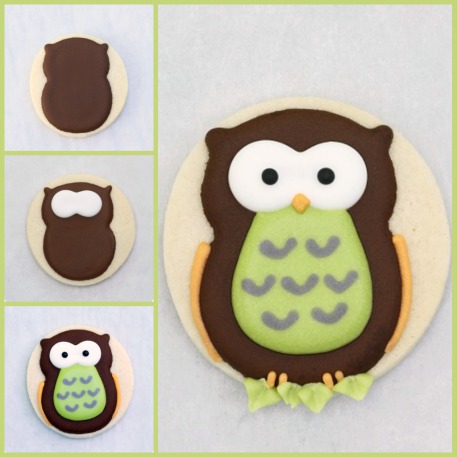
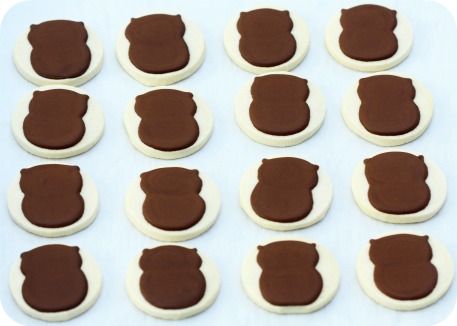
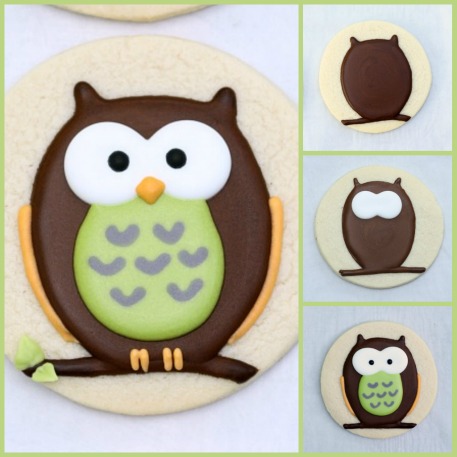
Step One: The Base
Pipe the owl’s body using a #2 tip. Let dry for a minimum of 6-24 hours. The icing basically acts as sealant for freshness, so it’s okay to let the cookie dry uncovered.
The length of drying time depends on the humidity of your environment. I recommend working in a room with air-conditioning and a de-humidifier, especially if you live in a tropical area, or during the summer months in the Northern Hemisphere.
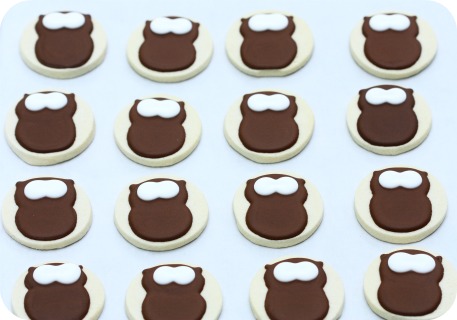
Step Two: The Eyes
Pipe the whites of the eyes and let them dry for a minimum of 6-12 hours.
Step Three: The Belly & Details
Using a #2 tip, pipe the belly and add the ‘feathering details’ right away. (Wet-on-wet icing). Pipe the pupils and wings. You could finish the rest of the owl details at this point, but I waited for the owl’s belly to be dry before I added the beak.
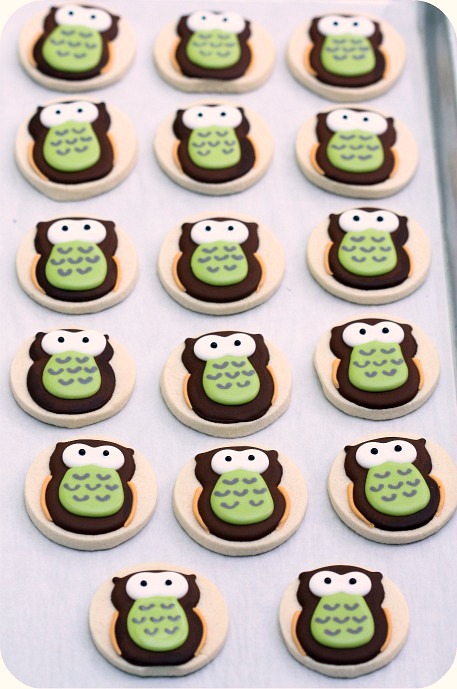
Step Four: Finishing Touches
Add the feet and beak using a #2 piping tip, and pipe the leaves using a #67 piping tip. Let dry for 6-12 hours (less icing), and you’re ready to package or serve!
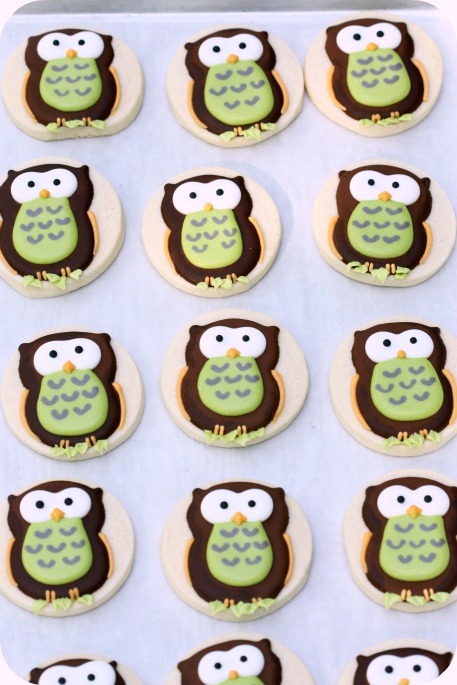
Follow the same steps for the Momma Owl. Her body shape is just a little bit different:
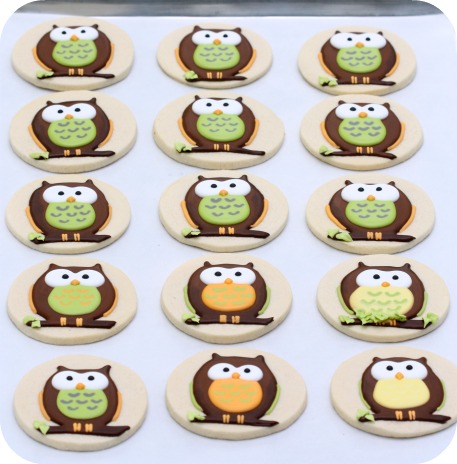
Don’t be discouraged if you make mistakes; with some creative ‘touch-ups’ you can salvage almost any cookie!
Take a look at one of the owls with the yellow tummy below… I was a little too generous with the icing, and it ended up pooling to the left, so I added a few more leaves to his branch to hide the flaw.
You can find more detailed info. on decorating cookies in my Cookie Decorating Tutorial here.
If you have any questions or comments, please drop me a line below and come join me on facebook, twitter, or youtube.
Have fun decorating!
xo,
Marian

Happy Monday Marian 🙂
This tutorial is awesome, I am sure now everyone can get close 2 your owl cookie creations because of your wonderful how to’s!!
Thanks so much for sharing misssss..!!
xoxo..
9er
You are so talented, and come up with the most DARLING cookies!! Thanks for sharing the tips!!
Amazing…I loved them….Thanks for sharing the tips.
Nice, nice, nice!!!! Thank you….:)
I love these cookies with owls! Thanks for sharing the tips, you make it look so easy, eventhough I know it’s not, I still may have to try!
I’ve seen your owl pin board so I knew you had a thing for them 🙂 These cookies are really cute, but no surprise. You are so talented Marian! BTW, your step daughter is a real sweetie too!
Haha….I *did* notice your owls on Pinterest! 😉 I love owls, too!
Your cookies are just precious…as is your step-daughter! And isn’t she lucky to have YOU and that darling room?!?
Super duper cute! I have always wanted to do owl cookies, but was too intimidated to do so. A great tutorial like yours always takes the load off. Thanks!
As always, your tutorials and cookies are awesome. Your step-daughter is adorable and I’m sure she just loves her sweet bedroom.
Thanks for your sweet comments!
I always love your cookies, but who knew you decorated rooms too??? That is the most adorable room…your creativity is inspiring!
What a beautiful cookie idea! I am sure my kids will be thrilled with the result. Thanks for sharing!
This so cool, thank you for sharing!!
Marian,
Thanks for sharing! These owls are just so cute-I love them. They would be perfect for a baby shower. Thanks for sharing the tip about using a de-humidifer. I have problems with bleeding sometimes and I will have to try this.
As always-loving your site.
Thanks, erin
I love these, so very, very cute! Thanks for the tutorial!
These are just adorable- thanks for sharing
Thanks for your feedback!
This was a WONDERFUL tuto! LOVE owls!
I always love your owl cookies! Thank you for sharing!
Thanks ladies! =)
Simply A-Do-Ra-Ble!!!
Will be making them!
I do not know if you feel the same way, but I have always considered these cookies as your signatures cookies.
They are the cutest cookies ever.
Thanks a lot for this great tutorial.
Have fun @ sneige!
@ Estelle: They’re one of my faves for sure =)
Thanks!
Those are so sweet!! I am starting to really like owls…might use these for Halloween this year and do an owl theme!
My goodness they look adorable and easy to make. I would love to try them, thanks for the tutorial
You are a real pro. I know it isn’t easy to decorate cookies using sugar glaze, but you make it look easy. I just looked at all of your photo submissions on Foodgawker. I’m so impressed. They are all so adorable. I took several cake decorating classes back when I had a lot more time and I really regret not learning this art.
These can’t possibly be any cuter. One of my favorites! I had to link on edible crafts.
Thanks for the sweet comments!
Meaghan, thank you for the feature!
These are beautiful!
Hello, these are soooooooooooooo cute!
I knew a few months ago that I would be creating an owl-themed 1st birthday party for my daughter. So, I’m now on the hunt.
I will definitely be using these cookies as one of the favors we will distribute to our guests.
Quick question for you…I’ve never decorated sugar cookies before, but I was wondering if I could make all of the “parts” of the owl separately and beforehand on parchment paper, then assembling the cookie after they dry? Does that make sense?
Thanks!
These are the sweetest! We love them so much we’re reposting them to our friends on Facebook! Come check it out 😀 http://www.facebook.com/redpathsugar
Thanks for a great post!
Oh my goodness, those are so cute! Love the step by step!
@ Lize: That’s a great idea! They are more fragile, but I love doing it that way too! Here’s a post on it:
https://sweetopia.net/2011/01/valentines-love-cupcakes/
And a video on youtube:
http://www.youtube.com/user/sweetopiautube?blend=9&ob=5
@ April, @ Kendel: Thanks!
Thanks so much for sharing! We love owls too! Absolutely gorgeous! x
I shared this cute idea on my FB page!! Love it!! Thank you so much for posting it!
http://www.facebook.com/pages/BabyCakes-by-Rachel/254972944517218
These are beyond words adorable!
AH-DORABLE. I am LOVING the owls these days. Funny how popular they’ve gotten, even with jewelry and whatnot. They ARE such cute little things. 🙂
Thanks so much everyone!
Wow, this looks amazing! I would love to make them, but it’s not easy at all. You are really an expert 🙂 There’s an interesting story about the owls – My bf’s name is Vasilije, and we call him Vaso, as a nickname, and his buddies call him for fun ”SOVA”, and probably you don’t understand how this has do with owls. But when you read the word ”VASO” with the letters mixed from behind, you get this word ”SOVA”, which means ”owl” in serbian language. Maybe, it’s stupid story, but everytime i see something made in a shape of owl, i remember him and his nickname and always buy that to him 🙂 So, beacuse of that i would like to learn how to make this little creatures 🙂 cause as i already said, they look perfect.
Aw, thanks for sharing! xo
These are the cutest cookies ever! I really would love to try making them! Thank you!
I posted them on my fan page on Facebook,https://www.facebook.com/pages/Mom-Whats-for-dinner/299010871219
@ momwhats4dinner: Thanks so much!
These are the cutest AND the cookie that started my cookie decorating obsession! 😉 Thanks!
Oh, I’m so glad that they inspired you to try this… obession for me too! =)
These are adorable! A question though – how do you manage your icing with such long periods of drying? Do you make it and color it once and keep it for the 2-3 days it takes to decorate? Or do you make it new with each level of detail and match the colors as best you can? thanks!
These are adorable! A question though – how do you manage your icing with such long periods of drying? Do you make it and color it once and keep it for the 2-3 days it takes to decorate? Or do you make it new with each level of detail and match the colors as best you can? thanks!
Hi Mollie, that would be waaaay too much work to make it every day. Thank goodness we don’t have to do that. Here’s a post which will help you:
https://sweetopia.net/2011/01/how-do-you-store-royal-icing-and-how-long-can-you-keep-it/
What’s your Pinterest username? I searched sweetopia, but I found the images not you 🙁
The word pinterest in the post above is a link to my page (just in case you didn’t realize it).
Also, Sweetopia Net is my pinterest name and here’s another link:
http://pinterest.com/sweetopia_net/
See you there!
Thank you for the link! I have no idea how I missed that post – since I generally hang on your every word! @ marian:
These are the cutest things I’ve seen in a long time!
How cute. Thanks for the great tutorial.
What a wonderful tutorial! The owls are so cute.