Hi! Hope you’re enjoying your summer (or winter), wherever you are.
I’m excited to finally be doing another giveaway!
It has something to do with the tip I’m going to share with you about fixing your cookie edges, a little bit to do with cupcake fun and even some cake decorating.
A veritable smorgasbord of sweetness for you.
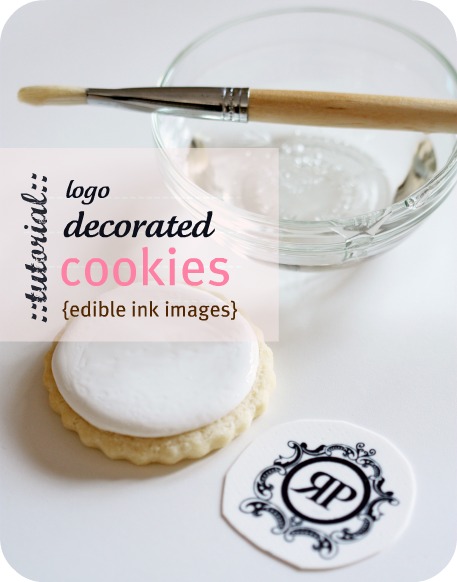
But first, a little tutorial on making logo cookies.
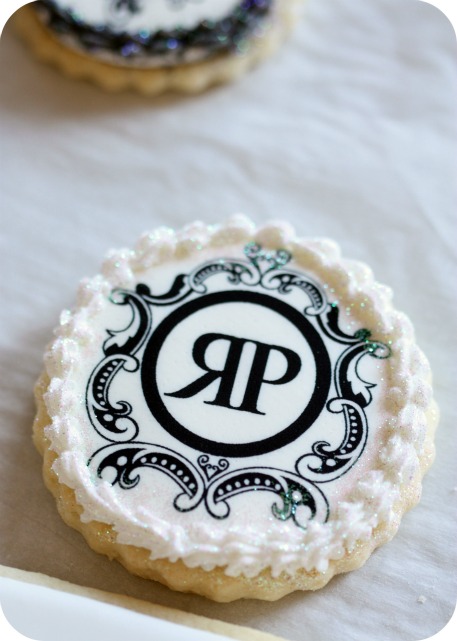
Erika and Ryan of Rowell Photography know how to take fantastic photos, and as a part of my thank you to them for taking lovely photos such as these here and here, I made edible ink cookies of their photography business logo.
*
How to Make Logo Cookies
There are a few ways I make edible ink logo cookies. Both involve using frosting sheets but the difference is in how they’re applied.
Putting the frosting sheets onto wet icing is one fast technique, but I find it a little less neat than my second method, which I’ll be sharing in this post, and have also shown here.
If you’d like to make logo cookies too, you’ll need:
- Sugar Cookie Recipe here or Gingerbread Recipe here.
- Royal Icing Recipe here. *White is the best colour to tint your icing. Any other colour as the base tends to cloud the image when applied to the cookie.
- Edible Frosting Sheets
- Edible Ink Printer
and Food Coloring Cartridges
- Edible Marker
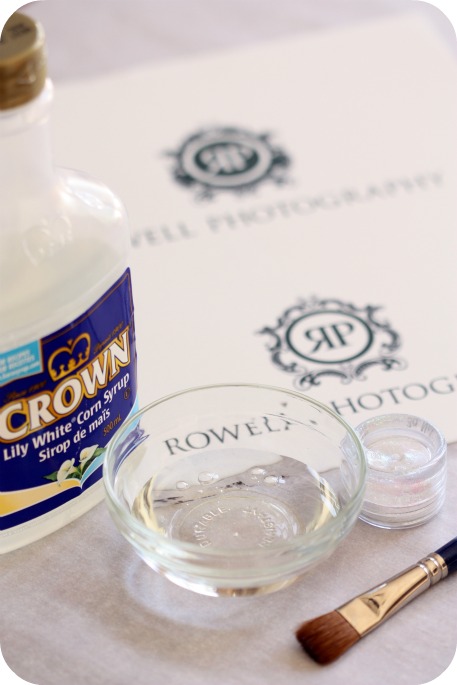
- Clear Corn Syrup
- Paintbrush or Foam Brush
- Piping Tips (#2, star tip #14)
- Coupler
- Piping Bag
- White Gel Colouring
- Optional – Disco dust
*
Instructions
Before decorating:
- You’ll need to print your image onto frosting sheets using an edible ink printer
. If you only have a few images to print and don’t want to invest in a printer, check your local bakery shop to see if they can print a sheet for you. Where I live, the Sobey’s store prints them for $10.00 per sheet.
- Cut cookie shapes according to image size & shape.
*
Ready to decorate:
Step One: Flood your cookie with tinted white royal icing and let it dry for 12-24 hours. The length of time depends on the humidity of your area. Have a test cookie so you can ‘taste-test’ or ‘poke-test’ to see when your cookie is dry.
If you’d like more flooding instructions please check out my youtube channel here.
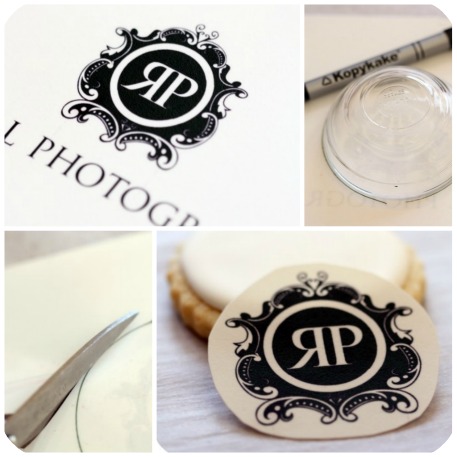
Step Two: Gently cut out wafer paper image. I used a small bowl and an edible ink marker to draw the outline of the shape I needed to cut out. You could make your own template, or even trace the cookie cutter you’re planning on using.
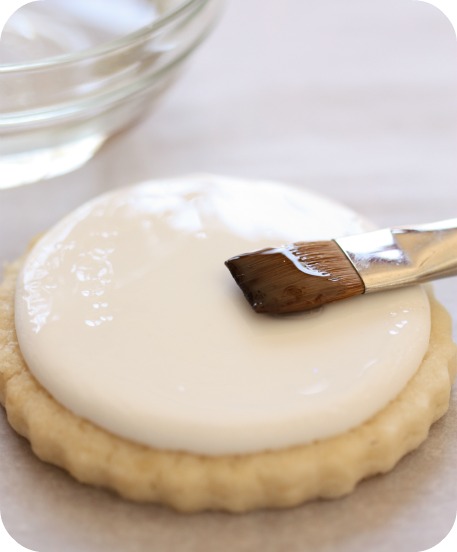
Step Three: Apply clear corn syrup to the back of the wafer paper or onto the dried royal icing with a ‘food-only’ paintbrush.
Apply image, gently smoothing over the surface all the way to the edges with clean, dry fingers. Have a damp & dry cloth nearby to wipe your hands as they can get sticky.
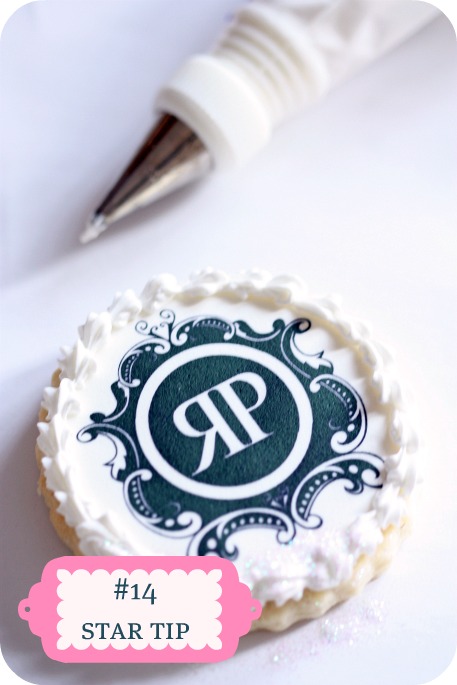
Step Four: Using a #14 star piping tip, pipe a scalloped edge around the borders with thick royal icing. If you’d like to add a little bit of glittery bling, sprinkle disco dust on the edges while the icing is wet. (Update: A note about disco dust for you – Although it hasn’t been always labelled as so, it is now labelled as non-toxic and for decorative use only (depending on which brand you buy, one or both may be listed). If you’d like to use disco dust, perhaps use it on a royal icing transfer or other removable item (gumpaste flowers etc.), and make sure your recipients know about it, or check your bakery supply store for sparkly “food-safe” items. I haven’t personally tried any other products yet, so can’t comment, but I will definitely be experimenting in the future, and will share with you on the blog!).
And you’re done!
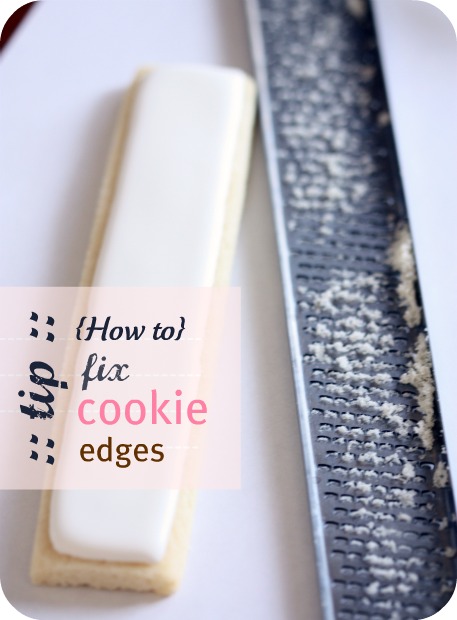
There’s one step that I didn’t mention, because I only used it for this rectangular cookie:
I think you can tell from the photo what my tip is… I love using a microplane rasp zester to file down the edges of a cookie if the edges aren’t so crisp. A neat little idea I have to thank my husband for!
*
GIVEAWAY! CLOSED
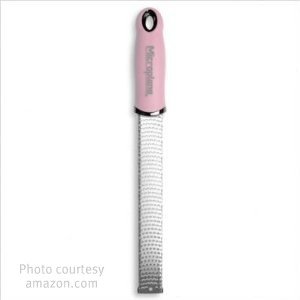
And, I’m giving a pink one away to you! (A rasp zester or Oprah-esque giveaway? Hmm, which would you prefer? Lol).
There is more though.
I’m so excited to be hosting this giveaway for THREE Sharon Zambito DVD’s of your choice! If you haven’t heard of her, Sharon is the talented sugar artist behind Sugar Ed Productions, a cake decorating resource for the beginner or professional.
You may have noticed I mainly make cookies and cupcakes, and am still getting my cake decorating feet wet, but after watching several of Sharon’s educational DVD’s, I feel confident about starting my next cake!
Hop on over to Sharon’s site where she has been so kind as to offer free shipping on orders over $25.00 to USA and Canada, from now until Saturday, July 23rd, 2011. Just use the coupon code sweetopia when filling out your order.
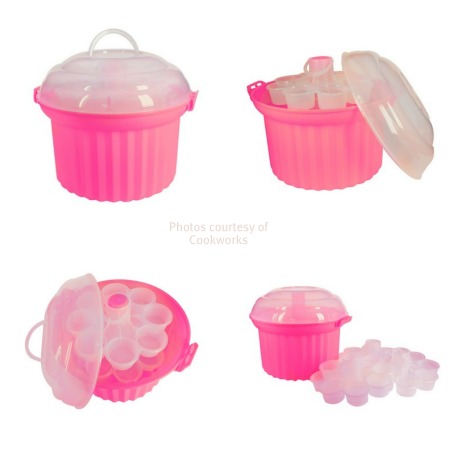
When I discovered this sturdy cupcake carrier (actually called the Cupcake Carousel), I knew I wanted to give you one too. Gone are the days of ‘flopping-over’ cupcakes with this carrier; it’s the perfect way to bring cupcakes anywhere.
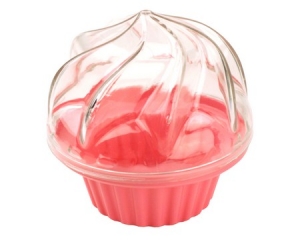
And what if you’d just like to pack up one tasty little cupcake? Here you go, the next giveaway item. This sweet little cupcake carrier. In pink, of course.
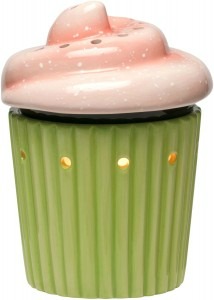
And last, but not least, this cupcake candle warmer from Scentsy. It smells like sweet cupcake heaven!
One person will be winning all these prizes!
How to Enter the Giveaway CLOSED
It’s easy. Four possible ways of winning:

This contest is open to U.S. and Canadian residents (sorry international readers!), and the winner will be chosen randomly at www.random.org. The contest closes at 7pm on Wednesday, July 27th, 2011.
Congratulations to Christina, comment #435 for winning! I will be emailing you shortly to find out where all your prizes will be sent to.

xo,
Marian






I would absolutely LOVE to win this prize package!
I am am new Facebook “like”, and I’m super excited I found ya! Thanks!
I’m a new facebook “like”, and I’m really excited I found your site, loads of info, thanks!!
I would love to win your give a way. The prizes are fantastic. I’m new to the cookie decorating world and seeing all of your tutorials makes me think I can make anything. Thank you for sharing your techniques….
I liked you on facebook.
I’ve Tweeted your site.
I’ve liked you on Youtube.
Hi Marian,
I just noticed on your Facebook that giveaway is still on. I’m so glad!
Thank you!
Hi Marian,
I’m not on Facebook, but I really “like” Sweetopia.
Will this entry count? 😉
What an awesome giveaway! Love your site!
I’m pretty sure you get asked so many questions and can’t respond to all but I am really hoping you have a couple of seconds to ‘lend a hand’. My daughter is turning 7 on Saturday and one of the things the girls are going to do at her party is decorate edible paper with their own creation. I will then place it on , in this case, a cupcake. I want to pre-ice the cupcakes which means they will be crusted over when I go to apply the image. Would you recommend using the corn syrup to apply in this case? And I am fascinated by the idea of using the microplane to smooth edges- do you think this would work on dried gumpaste as well?
Sorry to bother you. Love your site!
@ Michele: Sounds like fun!
What a great idea to use the Zester on gumpaste too- I think that might work, although I obviously haven’t tried it.
For the cupcakes, I haven’t tried that either; how about having the clear corn syrup ready to go to try, but also trying with adhering with buttercream first? I suggest the buttercream first because that’s what you’re putting them on anyways.
Good luck and drop me a line afterwards- would love to hear how it goes and see pics if you care to share on my Facebook page.
I “liked” you on facebook 🙂
Hi there,
Just found your site and it is great. I also tried your logo cookies for my husband’s birthday party. It was a success.
Thanks, keep up the good work
@lovelypromenade.com
@ Theresa: Oh I’m so glad to hear it! Would LOVE to see pics if you care to share them on my facebook page.
Wow I have been decorating cakes as a hobby for many years and I am thinking of trying my hand at making cookies. I am so impressed with Sweetopia, but I am very overwhelmed to say the least. You work is amazing.
Thank You for all you tips
@ Brenda Snyder: That’s so funny Brenda, I feel the same way about cakes! Maybe we just need to dive in and try! {And maybe I’ll be coming to you with questions} 😉
Oh my goodness, I about had a heart attack when I was checking up on this post. I guess there must be a lot of Christina’s out there in the world. I hope it wasn’t me that you were trying to contact all these months!
@ Christina: Lol. No, the winner has received her prizes… If the original winner doesn’t respond within a week or so, we go to random.org to chose another one. It’s only happened once while I’ve been blogging here, but I can’t remember if it was this one! (probably not if that makes you feel better. 😉 Thanks for checking back and stay tuned for some big giveaways coming soon!
Hi Marian! I am trying the logo cookies, but with a picture for the first time. My husband just purchased the Cannon printer, edible ink and circle sheets for me. I printed them and followed the directions, though when I went to peel them they didn’t release very easily from the waxy paper. I’m not sure what to expect and how easily they should release? I used an edge and kind of went around the rim of the circle until I could peel it without it tearing. Thanks so much in advance for any tips you could offer with what to expect. =)
@ Michelle: Yes, it’s funny, sometimes they come off easily, and other times it feels like the frosting sheet won’t separate easily from the base it’s sitting on. What I found helped was to flick the edge of the paper a bit, and it seemed to make the edge easier to separate. Sorry I don’t have better advice than that!
Ok, so i am the executive chef for Hospice of North Idaho. I am going to start doing logo cookies. I have watched your videos am I am confident that I can do it. My question is that instead of plain sugar cookies i am making molasses sugar cookies. And after frosted they will be to die for. So my question is my cookies have deep cracks like molasses cookies do. So do I need to fill them before I flood them or do you think it will level out?
Hi @ Phil, nice to ‘meet’ you.
That sounds delicious! I would fill in the cracks first. Just run a small palette knife of r.i. accross the top, and fill them in (kind of like plastering, huh?! 😉
Once you finish all your cookies, the first one will be ready to flood.
Btw, you might like a chef on YouTube called Albarock. Awesome desserts and plating! Are you on YouTube?
I have given the frosting sheets a few tries. Each time i made the cookies, covered in royal icing, applied the frosting sheet (when the royal icing was wet and tried with corn syrup when icing dried) and let them dry for a day. Problem is: When I packaged them in clear boxes or cellophane bags, they always stuck to the plastic! When I tried to separate them, it tore the image off.
I love the idea but had to turn down many order due to this problem….. any fixes???
@ Miriam: Is it the corn syrup sticking? If so, you can adhere the edible image to the wet royal icing instead of using corn syrup. The only issue I have with that is that sometimes the edges curl while it’s drying, so I have to put a thick border on to cover the curled edges.
Humidity can wreak havoc on cookies either method of applying the image though. If you live in a humid climate, the edible image will get sticky no matter how you applied it, so it’s hard to package in cellophane bags. You would probably have to use clear boxes, where the surface of the cookie won’t touch anything.
Hope that helps!
Oh My Goodness!!!! The micro plane idea is so invaluable! I decorate cakes and cookies for fun, and it has now become a side business because I get so many referrals. I can’t stand when my edges don’t come out perfect on my cookies. I just made a batch of cookies from your shortbread recipe, and I now have micro planed the edges. They are absolutely perfect! I always sat with a paring knife or whatever I could use to smooth the edges. I’ve tried recutting the warm cookies when the spread. I’ve done it all. Now I have something that is fool proof. Micro plane magic. Thank you so much for your wisdom. Thank you to your husband!
@ Jayne: Haha, that’s great to hear!! Happy decorating to you. 🙂
Marian,
I am a huge fan of your blog! Thanks for the great post. I have a question, have you ever had problems with the photo cracking? I tried to make some and about half of them had small little cracks in them….Any ideas about what I might be doing wrong?
Hi @ Mogen: Yes, seems to happen if I’ve stretched the image a bit by manipulating it too much. Try and put the image on and just pat it down as quickly and as little as possible, and you’ll have the best results. Hope that helps!
I just discovered your page 2wks ago and I absolutely love it!! I recently decided to dive into the world of sugar cookes and I would love to make these cookies. I want to try my hand at the logo cookies before investing in the supplies and found a website that sells/ships edible images I can “paste” on to the cookies. My question is how long do edible images last? Do they go “stale” after a period of time or become hard & difficult to use? I would hate to purchase edible images and have it dry out during the shipping time. Thanks!!
Hi @ Christy: As long as the frosting sheets are stored in the airtight, ziplocked bag they come in (it’s a silver coloured, very thick ziplock bag), I haven’t had an issue with the sheets going stale. That being said, I haven’t had them longer than 6 months.
When they’re applied to the cookie, the frosting sheets ‘melt’ into the icing, so they don’t dry out after applied.
Hope that helps!
We do logo cookies a lot. We put the icing sheets in the freezer for a couple of minutes. They peel right off. I don’t use corn syrup to adhere. When the royal icing on the cookie is dry, I use a barely damp sponge across the cookie and adhere. When we package, we use squares of parchment on the images as we have had the same issue with sticking and put them in individual bags. I hope that helps….
That’s awesome, thanks SO much for sharing!
Hello! I’m a fan of your beautiful work and appreciate that you take the time to create such lovely tutorials! I would like to bring something to your attention, though. Disco Dust is made of finely ground plastic and is not an edible product. As the bottle states, it’s for decorative use only. I strongly urge you to consider updating your tutorial. My local health department went to the FDA when it was brought to their attention that some bakeries in our area were using DD on cupcakes and cakes, and the FDA/HD ordered the immediate cessation of the use of this plastic product on food. Happily for us sparkle-holics, there are edible alternatives out there! Gum arabic-based food-safe glitters are a great alternative, as are Crystal Colors, both of which are safe, edible food products. 🙂
Thanks so much – I will update!
Question: If you have to let these dry for 24 hours are they covered to prevent them from going stale?
p.s. very pretty!!
HI Laura,
This video will answer that question and hopefully be helpful in other ways too. xo
https://sweetopia.net/2012/01/video-how-to-dry-cookies-decorated-with-royal-icing/
Hi Marian,
What type of printer can be used for the edible print ink?
Do you print like you would a regular document or picture?
Hi Marian,
In your tutorial, you refer to the edible image as “wafer paper” and as “edible frosting sheets”. Can you please clarify which one it is that you use? Thanks so much! Love, love, love your tutorials!
Hi Brenda,
For this one, I used frosting sheets. For the wafer paper, I use those when I buy the edible ink images already done (usually from FancyFlours.com). Hope that helps!
xo
These are gorgeous! where could I get the fonts and designs to do monogram edible images?
Do you ever have trouble with your corn syrup taking a long time to dry on the edges of the edible paper? It doesnt seem to lose its stickiness even over a couple of days. Any ideas?
Hi Susan,
Yes, I do! I don’t think it ever dries 100% actually, which is why I often do some sort of a border to cover any corn syrup “leaks”.
Amazing! It’s really beautiful, I love your blog!
Awesome article about cookies logo printing. Thanks for sharing this.