Pesky air bubbles in icing – They can leave tiny bumps on the surface of your smooth flood icing, contribute to craters forming in small spaces, and can ‘poof’ out of your piping tip, or disrupt a line of icing you’re piping. All in all, they can be annoying.

In my quest to figure out what was causing craters in my icing, I stumbled upon a solution to help get rid of air bubbles in icing. And do you know where I learned it?
At the dentist.
Yes, even the dentist and the hygienist are not spared from hearing all about cookie decorating from me. I have tried to keep my sweet cookie talk for only you, and have definitely improved, but this conversation with the dentist and hygienist was over a year ago. That’s how long it took for me to share this tip with you… But in my defense, I was testing and testing to see how things worked.

I had already hit up the science teachers at our school, who by the way are some brilliant people, but had no expertise in the area of craters in icing or similar scientific mysteries. I wonder what they thought when I approached them with the issue. Lol. Scratch that, I think I know what they thought.
Anyways, the dentist. I was at the dentist’s office and I asked the hygienist, while she was cleaning my teeth, how they made the moulds for teeth, because I was thinking that air bubbles in teeth moulds are definitely not an option, or left to chance. The conversation went a little like this:
Me: Ahhh, Raahheh, I waaa hhinging aout aaahh uuuhhuhh in maa iiching hha cookiess nn uuunggering how che gaa riiii aa ee.
Rachel the Hygienist: Are you okay?
Me: Yech.
Rachel (pausing her cleaning): What were you saying?
Me: Um, well, I was just wondering how you make moulds for teeth without air bubbles getting in the mould?
Rachel: Ohhh!
And she explained. She’s a very nice lady.
And before you think I’m too crazy, or that the hygienist and dentist were probably whispering later how strange I was, the dentist came by later to check my teeth, and he really got into the conversation too. Apparently they don’t get to talk about making moulds to others much. My dentist even went so far as to get some mould examples and a dental vibrator (you’ll see in a second!), to show me.
Removing Air from Icing
Soo, I’ll just keep the explanation brief (like this post so far – haha), and share with you that one of the main ways to avoid air pockets, is to vibrate the mould mixture in a bowl sitting on a dental vibrator. I of course, immediately wanted to go home and order one off of Amazon to use for my royal icing, but the price held me back. At the time, I couldn’t find any under $250.00! Kind of expensive for an experiment. The good news I found out while writing this post, is that there are cheaper ones available
now. Yay! Mine’s on the way in the mail.
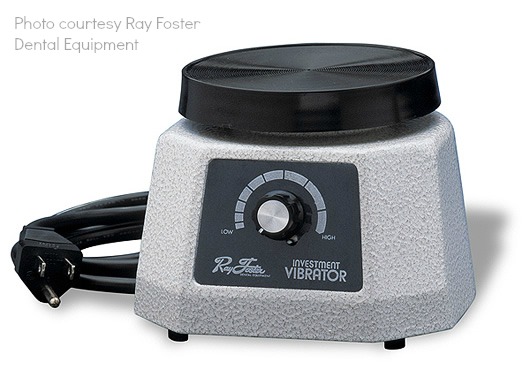
Now, it doesn’t mean that I’ll be using it for every batch of icing I make – it’ll be for more intricate cookies with small areas to flood or for when I’m using tiny piping tips. I can’t wait to try it out! Rachel even mentioned that you could put just your icing sugar (powdered sugar), in the bowl and vibrate the air out, and/or put your finished royal icing in the bowl to vibrate air out.
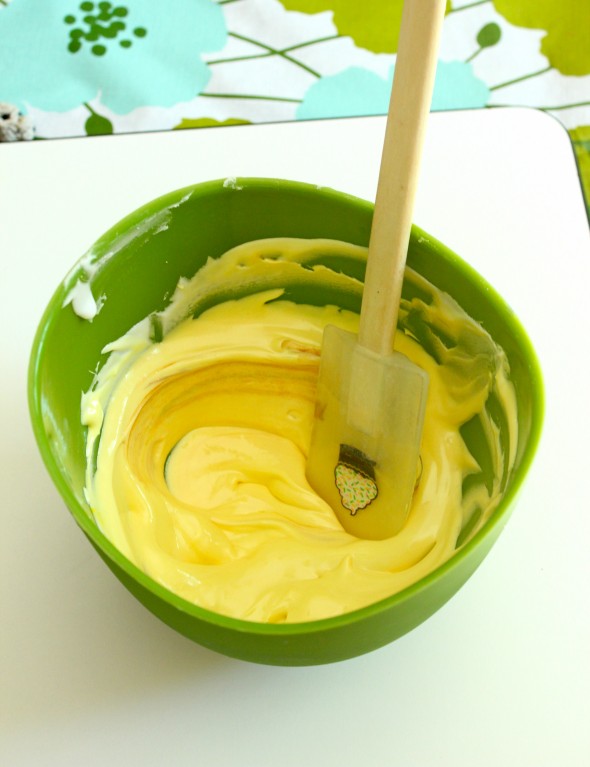
For the next new tip, I need to first explain a step I’ve already shared in this post here; Paddle your icing with a broad spatula. Paddling the icing means you’re doing a paddling motion on the icing, instead of a stirring motion. Even better than just explaining, here’s a little iPhone video clip of my dental hygienist demonstrating how she does it with the mixture used to make moulds for teeth (Which, by the way, is even further proof that she and my dentist didn’t think I had gone around the bend. The video, that is. 😉 ).
Removing Air from Icing Video
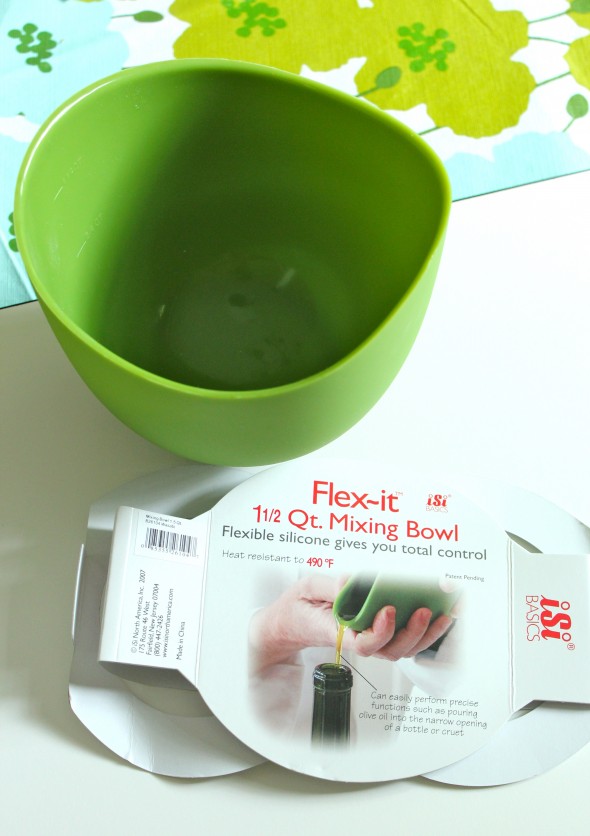
And the other new tip, so when you’re paddling the icing, use a silicone bowl! This is the one which I’ve been testing out for a year or so, and it really does seem to make a difference! Because the bowl is pliable, Rachel explained, while you’re paddling the icing, the give of the bowl really helps. As a side note from me, it’s really handy to be able to bend the bowl to pour your icing out as well.
My suggestion is to use the bowl when you’ve got an icing you know you’ll be ‘working’ a lot. For example, I had to experiment quite a bit to get the shade right for the mustard color icing for my princess Jasmine cookie.
For more tips on how to deal with air bubbles in icing, click this post here and here.
Drop me line in comment section if you have any questions or comments and I’d love to hear from you – what are you tips for air bubbles and icing?
Have fun decorating!
xo,
Marian


Thank you thank you thank you!!!! Also I find my RI goes alot beter if I can make it and put it in to the squeeze bottle a few hours prior to tusing and let it rest, but Im gonna vibrate it first now!
A side question….
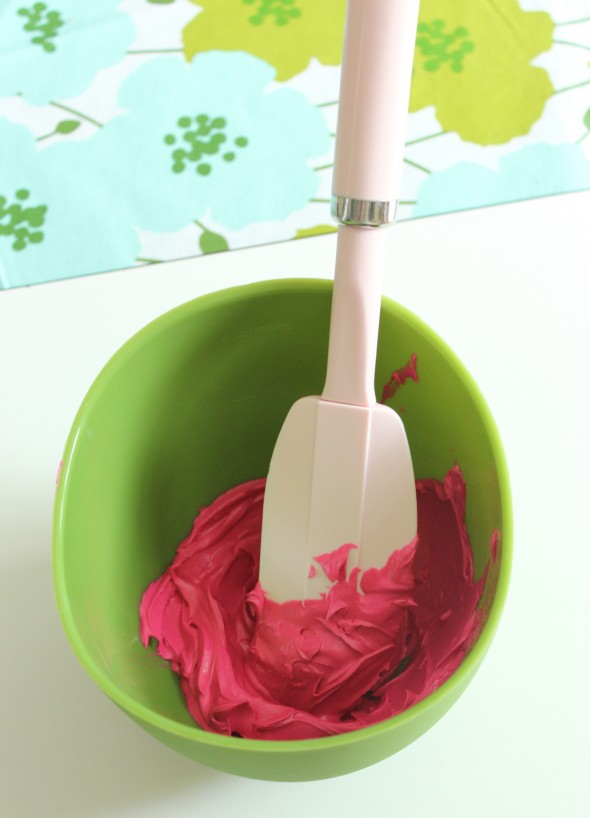
Can I ask what pink that is in the last piccie?? Its gorgeous and must get my hand on some immediately!!! Mwa!
This has been such a huge help! Thank you 😀
Great tip! A sonic jewelry cleaner works as well – just put the lid on and set the bowl on top! Thanks for sharing all your great tips.
Great tip! A sonic jewelry cleaner works as well – just put the lid on and set the bowl on top! Thanks for sharing your talent with us.
Hi Marian,
thank you so much for sharing your thoughts and advice regarding air bubbles.
That is SO helpful !!
Wishing you a lovely start into the week!!
Much LOVE, xoxo
niner 🙂
Thanks for another great tip! I recently purchased a food dehydrator in my never-ending quest to rid my cookies of craters and tried it out this past weekend. It worked, I couldn’t believe it! There were no craters on my lego cookies, and the icing dried so shiny. Also, drying the cookies in the dehydrator didn’t dry out the cookies.
Love the silicone bowl idea! Icing gets everywhere when I try to pour it in my bottles… going to the store soon to get one!
I am a huge fan of those silicone bowls…they are all I use. Great post, I am going to paddle more!
Hilarious that you would think to ask the dentist!! I love it!
I used to work in a shop making chocolates and we had those vibrating tables to get the bubbles out of the filled chocolate molds. I’ve been searching for an affordable version just for icing de-bubbling (yes, I made that word up) and had given up. Thanks for sharing your source & experience with this. I need to tell Santa that I’ve been good and maybe he will bring me one 🙂
This post, you are, hilarious. Not to mention full of great information. Love that Rachel let you video her *paddling* the mould mixture.
Obsessive well maybe. Result oriented absolutely. It would never have occurred to me. I so appreciate your sharing.
You never sieze to amaze me. I think I have a whole category of bookmarks devoted to your site.
I bet you made all A’s in science classes!! Thank you for all your research.
When I took my cake decorating class at a bakery, they taught us to do the “paddling” with buttercream. Since buttercream is thicker, they plopped a bit on the practice poured and smoothed the buttercream in a back and forth motion.
Since Amazon is out of the bowls, this is the bowlmaker’s site, http://www.isi-store.com/product_list.asp?skw=flexsilbowl
how amazing to think of asking your dentist….. thank you for sharing your talents.
ML
Oh thank you!!! What a great idea! Let us know how long you let it vibrate once you conduct your experiment.
Brilliant! While reading this I was thinking of something I’ve seen on home improvement shows. When they pour cement counter tops into their “molds” they will often take a sander (without sandpaper) and run against the bottom of the table holding the mold to vibrate the bubbles out of the cement.
Wonder if I can really save money and just put the bowl on top of my cell phone (set on vibrate) and just call myself several times??? haaaaaa… just jokin’!
That’s really cool about the vibration bit. I just thought about using the bowl being held for a few minutes on top of a running dryer. It works on babies, maybe it’ll work on RI too! Well, at least its worth a shot and a darn sight cheaper too.
I’d also love to know how you achieved that gorgeous hot pink in the last photo. I always have trouble getting a really rich, bright pink like that, no matter how many Americolor colors I try/combine. In fact, I think it would be awesome if you could create a cheat sheet for your legion of loyal fans re: what colors you mix to create your shades of RI. They are always so amazing and bright! Thanks!
that is just too funny, how cool is your dentist staff.
@ Emilie:
Hi Emilie. I read your comment about a color chart and thought you may find the one Callye (Sweetsugarbelle) made helpful. Here’s a link to it:
http://www.sweetsugarbelle.com/blog/2011/03/color-chart-and-printing-help/
Marian,
I actually laughed out loud. You are hilarious!
xo Amy
Wow, you sound just like I do at the dentist! No clearer communication than when someone’s hand is fully in your mouth. Thanks for the tips — will have to try!
OMG you are too funny. I didn’t even know a dental vibrator existed, can’t wait to see my husband’s face when I put that on my xmas list!
@ Deborah:
Thanks for going to the trouble to link that, Deborah. Actually I refer to Callye’s chart often — it’s SUPER helpful. But I’ve found that her “favorite pink” isn’t a REALLY hot pink like the one in Marian’s photo. Or maybe it is, and my computer screen is playing tricks on me!
I love you for sharing everything with us here! Great tips! You r the best.
OMG Marian, that is without a doubt the single most amazing tip I’ve ever heard with regards to cookie decorating. That is genius. Thanks so much for sharing your secret. Love, Rachel ;)~
Hi @ Traci Tritsaris: I mixed Americolor deep pink and red to get that color. I couldn’t tell you exactly how much, but definitely less red… just touches until I was happy with the shade.
My pleasure! @ ThisBakerGirlBlogs.
What a super idea to use a sonic jewelry cleaner, @ Donna Linnane! Thanks for sharing!
@ niner bakes: Thanks for your comment. 🙂
Wow, @ Maria, a food dehydrator… brilliant. May I ask where you bought it from?
@ susie: I agree. So far I only have one, but I’ll definitely be getting more silicon bowls.
A bit of a nut sometimes, I know I am @ shelly (cookies and cups). Lol. 🙂
So true, @ Heather S., chocolate needs to have the bubbles taken out too! Thanks for your insight… never thought of that either. Oh and btw, de-bubbling is perfect ;-D
Thanks, @ Paula! Appreciate your comments, as usual. 🙂
Aw, thanks, @ Brian @ A Thought For Food, I’m completely honored you’d say that!
Not so much (A’s in science hehe), but I did like some aspects of it. Thanks for the link, @ Georgia.
Thank *you* @ Maria Theresia!
Will do, @ breabella.
Actually, not a bad idea, @ Deborah! Haha!
@ Amy: Hope all is well! Are you back to school?
@ Sandi. Always fun conversing there, isn’t it!? 🙂
I know, @ Brantcookies! Such a random thing… My husband isn’t too phased anymore… Not so sure it’s such a great thing though hahaha.
Hi @ Emilie: I used Americolor deep pink and a little bit of red.
@ Rachel Solero, @ Samantha Lee: You guys are so sweet. xo
Okay, I just heard that you posted this and I started to laugh! I thought I had such a unique idea as I have been using a dental vibrator to get the air out of my RI for about four years and I can say that it works wonderfully! I was trying to figure out how to save time from tapping my bowl on the counter over and over and over again and thought that there had to be a better way. I researched centrifuges to see if a spinning effect would be best and talked to a scientist about his thoughts. I decided that the spinning was not the way to go. I needed to shake it, but quickly and in a small range of motion. What shakes things well enough? After some research, I came up with the same thing! A dental vibrator! Too funny! I had been holding on to that idea for a possible future blog so I might have *something* unique to share and you beat me to it! :0) It is great, isn’t it? I love mine! My husband actually gave me mine one Christmas as he saw that I did not want to spend the money. It has been one of my favorite Christmas gifts! LOL
How awesome is that, @ TracyLH! I think it’s safe to say that we share the same cookie decorating ‘obsession’! I love that I’m not the only one who thinks of these things! I’ll have to let my dentist know the next time I’m there. Btw, do you have a blog you’d like to share here? I tried to click through your name but it’s not hyperlinked. It’s been so long since I’ve been in touch on flickr! Hope you are well. 🙂
I think that we do indeed! My jaw dropped when I saw that someone mentioned that you had talked about a dental vibrator. A what? Oh, nuts! I thought I had something unique to add to the Cookie World! It is funny how people will think if the same design ideas, but I thought I had a new one time-saving idea there. My dentist cracked up when I told him about the idea, let me into the back room to play with their model… and then he asked for cookies. LOL His office staff thought it was hilarious that I wanted to turn it on to see just how strong it was. I told my husband last night that you thought of the same idea last night of using a dental vibrator and he pointed out that although a dental vibrator was what I had showed him, he had actually gotten me a sample agitator, along the lines of one that you would see in a lab. He was just able to get a good price on one. I looked at mine and lo and behold, it says ‘sample agitator’, but it is the exact same idea and looks just like the dental vibrators that I looked at, so I thought that was what I had. Leave it to a finance guy to find something cheaper.
Here is a funny story. I told another friend of mine about the idea as she wants to learn to do cookies. She is a former dental hygienist and she told the dentist that she had worked for about it and he gave her a spare. The funny thing is that it is huge and SO powerful. We turned that baby on and it about danced across the room. Her air bubbles will be out lickety split! So funny! The one that you show is perfect and I am certain that many people will now be doing this. I am still smiling that we thought of the same thing. It is a pretty unique idea too! :0)
I can second the use of a dehydrator as well. I tried it after seeing LilaLoa mention it. That is now my other ‘must have’ tool and also really speeds up the process. I have a square shaped one to hold more than the standard round one and love it. It dries my base coat faster so I can do detailing sooner, reduces bleeding and dries my RI transfers so much faster as well. It allows me to get my cookies packaged, heat sealed and on their way in a much shorter amount of time. It does not dry out your cookies at all or affect the taste. (I am pretty Type A about taste and quality). I am very happy with mine. Here is mine: http://www.amazon.com/Nesco-FD-80A-Square-Shaped-Dehydrator/dp/B0090WOCM6/ref=sr_1_2?s=kitchen&ie=UTF8&qid=1351079214&sr=1-2 I bought extra trays as well.
How awesome, @ TracyLH! I laughed when I pictured you two watching your friend’s powerful machine vibrate the icing! What a great hubby you have – so resourceful. The two of you must be such a brilliant pair!
Thanks for sharing the links and info., I love it all!!!
xo
Thanks for all that you show! I have sent many people here to your site who want to learn how to make cookies as you cover so very much and do such a wonderful job! (and yes, the machine was hilarious!)
Thanks @ TracyLH! Your cookies are beautiful and I appreciate the kind comments! Thanks for sending people over btw!
I know this comment is off topic, but I really need an answer soon. I heard that icing darkens after 24 hours. I am making blue icing for the first time and I am just wondering if the icing will darken while I let it dry overnight.
Hi @ Vannessa: Yes it does slightly deepen with time. It does depend on how much coloring you’re using… If you only use a little, you can’t really see a difference overnight. If you’re using, say for example, a ton of red food gel coloring, or another dark color, you will notice a difference over time.
Having read all of this very useful information from all posters, I have one out-of-the-box idea to share: hand-held mini-massagers (about $5-$6 at WalMart). I needed a quick fix this evening and recalled we have three of these gathering dust on a shelf. Flipped each one upside down in a bowl, plopped a covered tub of icing on top of each (stabilized with a towel)…voila! I have three mini-tubs of icing, vibrating away. Cheaper than a dental vibrator, and you can do more than one container of icing at a time!
Hi @ Alice: Well isn’t that just brilliant!! THANK YOU for sharing!! Another cool idea to try. Keep us posted on more of your results pls. xo
Marian,
Thank you for the amazing tip. I’ve tried so many different ways to get rid of the bubbles that it almost drove me crazy. I stopped making royal icing covered cookies for years and am now getting back into making them to give my students more options for cookie designs. You are absolutely amazing, and I hope that I get to meet you at one of the cake shows soon.
Wow, thank you, @ Debra J. Mosely! I hope I get to meet you too! xo
Hi Marian, I recently posted a question on the Cookie Connection about bubbles and Ali’s Sweet Tooth recommended the dental vibrator. I did not have one and needed something until I could find one or something like it. I tried using my Homedics back massager and it worked. Very awkward but in a pinch it did the job! I had to lay the massager on a folded towel and hold it with right hand while holding the small bowl of icing in left. I was laughing while I was doing it. What we “cookiers” come up with to achieve the results we need. I am going to try this with my cakes too! My husband gets tired of hearing me bang every time I make a cake! By the way, you responded to one of my comments when you did your Q&A with Julia. I am so new to this in respect to time I have actually spent making cookies, but I got my first “real help” from your “Sweetopia” blog and appreciate you so much!
That’s wonderful, Jamie, thanks so much for sharing!!
Hi Marian,
I love the pink in the last shot. I am looking for this pink and was wondering do you remember what colors did you mix to get this. Looking to match a color?
Hi Asmita,
From what I remember it was Americolor deep pink, with a touch of red. Happy decorating!
Hi Marian, thanks so much for sharing! it’s really creative of you to ask the dentist! The yellow spatula used in the video seems perfect for mixing icing! do you know where to get one ?
( love your tutorials! keep up the good work!)
Thanks Jacqueline! I don’t know where to get one, but I will ask the next time I go!
For how long do you vibrate the icing?
When did folks choose it was okay to fly or prepare in sweats, dirty http://www.neuvechaussuremodel.fr jeans or articles of clothing that do not suit them? Am I the only man who considers that when touring you should appear great?
Thank you so much Marian. You’re such a real deal icing guru (Also my gratitude to Rachel who shares the paddling technique ☺️)
Hi Sam,
Thanks so much!! 🙂
I’m new to the piping/flooding technique of cookie decorating. For valentines I made 3” hearts & 6” hearts. The 3” I decorated in various royal icing colors to make them like “conversation hearts”. I let the icing harden for more than 24 hours. The flooding seemed to work fine. I got all visible air pockets out with my scribe. I even shook the cookies back & forth, and dropped them gently onto my work surface. The icing appeared to be smooth.
The problem came when I was tracing the lettering onto the hardened icing & my edible marker would sink through. The only way I can think to describe it is maybe there were air pockets hiding underneath the smooth surface. Idk if that’s even possible. I ran into the exact same problem with my 6” cookies. My question is, have you had experience with this & if so, what else can I do to ensure there are no air pockets hiding underneath the smooth & hardened icing? I know you mentioned the dental vibrator but I’m on a fixed income so I can’t really afford to buy one. If you’re not sure of the answer, do you know of someone else who can help me? I really want to figure this out.