

I’ve been decorating cookies for approximately 8 years now, and I still remember how frustrating some of my first cookie decorating experiences were.
I couldn’t get my cookies to look as nice as I wanted them to; the icing was either too thick and dry, or too runny and hard to control. The designs didn’t look as neat and pretty as I had hoped.

Well, after poring over every cookie decorating book I could find, taking a cookie decorating class at the Bonnie Gordon College of Confectionary Arts, and after much experimentation and practice, I (eventually) found tried and true tricks and tips to make the cookie decorating experience easier.

Today, besides showing you how I made this charming wintry fella, I’m going to be showing you one of my absolute favorite keys to cookie decorating success – a necessary basic: How to figure out the right royal icing consistency.
For those of you who like video, here’s a demonstration of how to find the consistency – The 10 Second Rule:
Click HERE if you can’t see the video.
*

For those of you who like written break-downs:
*
Royal Icing Consistency
To test consistency, you’ll need a butter knife and your royal icing.
I’ll be showing you how to make the icing in another video; for now you can find the recipe here in my cookie decorating tutorial.
*
The 10 Second Rule
To check the consistency, all you need to do is drag the tip of a butter knife through the surface of your icing, letting the knife go approximately an inch deep, and slowly count to 10.
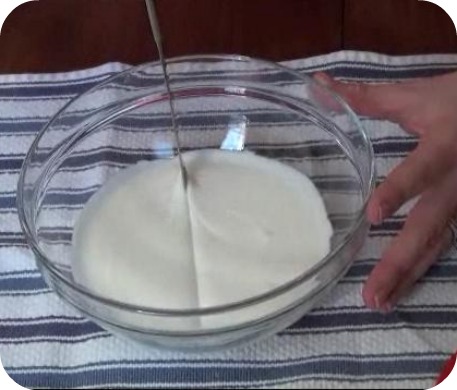
If the surface of the icing smoothes over in approximately 10 seconds then your icing is ready to use. If it takes longer, the icing is too thick. Slowly add more water.
If your icing surface smoothes over in less than 5-10 seconds, it is too runny. Mix your icing longer or slowly add more sifted icing sugar to thicken it.
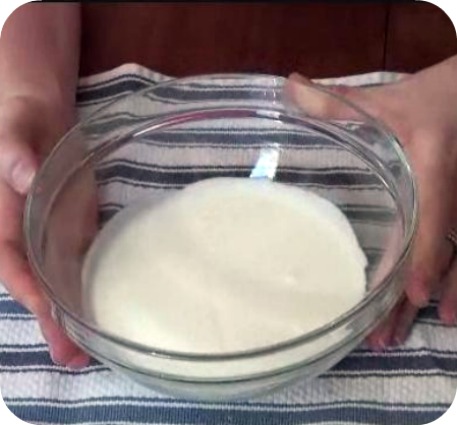
You don’t want the icing to be too thick so that it doesn’t flood, or too thin so that it’s too runny and hard to control.
I should mention that this is what works for me; my preference is that the surface of the icing smoothes over at about the 10 second mark. I like it at this consistency (a bit thick), because the icing holds its shape and doesn’t run too quickly out of the piping bag.
With this thicker icing I can outline and fill in right away; you just have to shake the cookie a bit to help the icing settle. You can see how I do it in this video on marbling royal icing HERE.
If the icing is runnier, you don’t have to shake the cookie because the icing flows easier. I used to do it this way, (prepare two consistencies of icing; one for outlining, and one for filling in). Again, flooding is definitely easier, but I prefer not to have to set up two icings.
{In the video, I normally don’t use a runnier icing like the green example; I was demonstrating the difference between an icing that smoothes over in 5 seconds, and an icing that smoothes over in 10 seconds}.
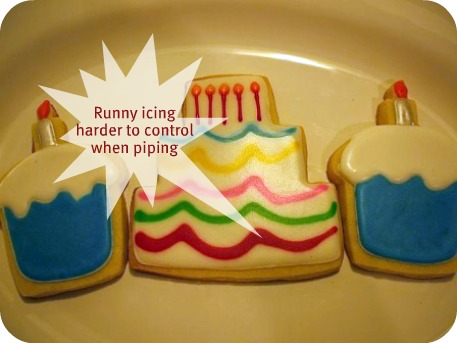
For an example of icing which is a bit too runny for piping details, take a look at the swags of this birthday cake cookie I made when I first began decorating. The lines were harder to control when I piped the icing.
What I’ve shown you today may seem like such a simple thing, but it made a huge difference in my own cookie decorating. It can really help alleviate frustration and improve the overall look of the cookie.
And an update (this has been added in later), I now have an in-depth PDF and Digital Download Video on Royal Icing Consistencies for cookie decorating. You can find it in my shop, here.
Now a little bit about Frosty the Snowman:

This little guy isn’t a cookie; he’s made just of royal icing.
Royal icing decorations, also known as runouts, flood work, transfers, color flow (by Wilton), or run sugar, are basically the piping of a runny royal icing onto parchment paper or acetate paper (sometimes into an outlined shape).
When the shape dries, you have an icing design which you can use for a multitude of decorating purposes; on cakes, cookies, gingerbread houses, cupcakes etc.

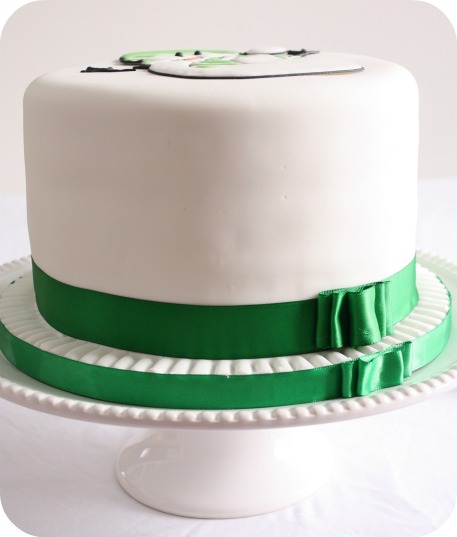
In this case I needed him for an 8″ round cake. As soon as I saw him on these adorable mugs (bought at the end of last winter at Canadian Tire), I knew I wanted to make an edible version of him.
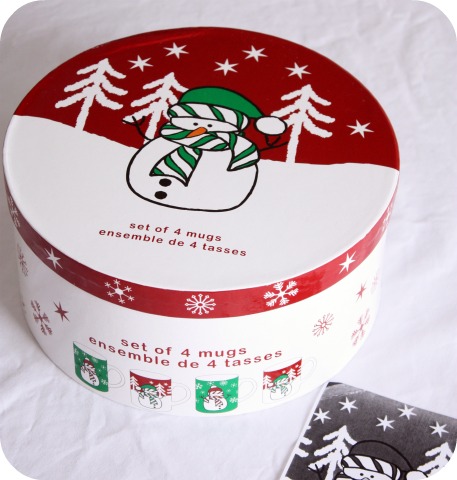
I actually made the first runout of him before Christmas and have been meaning to get to this post since! Just managed to squeeze him in before spring. 😉

*
How to Make Royal Icing Runouts/Floodwork
If you’d like to try making royal icing runouts, you’ll need:
- Royal Icing Recipe
- Icing Gel Colors
- Acetate Paper or Parchment Paper
- Shortening
- Piping Tip (I generally use tip #2)
- Piping Bag
- Coupler
Basic Steps:
- Shortening on acetate paper or parchment paper
- Pipe design by tracing or using KopyKake projector (Can do outline first and let dry)
- Fill or flood design
- Let dry for a minimum of 24 hours
- Gently peel off backing
- Attach with more royal icing

For detailed steps on making runouts click HERE, HERE or HERE.
*
Getting icing consistency right is really one of the major keys to making your cookie decorating experience a fun one. Once you’ve got a good icing basis everything else becomes easier.
If you enjoyed today’s tips please leave me a comment below and let me know what you thought or if you have any questions.
xo,
Marian
p.s. In the last video on Marbling Royal Icing I asked what you’d like to see in the next video. Thank you for your comments!
*
p.s.s. Please let me know in the comment section below on facebook or twitter, what you’d like to see in the next video. Happy decorating!


@ Lucy: Oh yes, that timeline you mentioned is fine! They’ll be good for a week for sure (up to two weeks I’d say).
@ kelly: Thanks for the suggestions Kelly!
Hi Marian, visual cues are so helpful–thanks for the tutorial. After 10 minutes of mixing, my royal icing batch was very thick. I thinned it per the 10-second rule. The consistency was perfect for piping, and I thought also for flooding. When the cookies dried, though, the flooded part “dimpled” in places. Why did that happen? Also, should the confectioners’ sugar be sifted before measuring? After measuring? (This is for the Antonia recipe.).
Thanks!
Hi Jane; Would you be able to send me a picture of the ‘dimpled’ cookies please? I’m not 100% sure what you mean, but a visual would help. My email is [email protected]
I measure, then sift usually. It doesn’t really matter though; if you weigh it, when you measure the icing sugar, it will weigh out 1 kg either way.
Hi Again!
Thanks for the reply. Another question, but probably not my last 🙂 If I am decorating a cupcake cookie and the top is one color and the bottom is another, how do I go about outlining and flooding? Should I let one part dry first? Do I pipe 2 lines next to each other in each color where the colors meet? ie. white top, pink bottom.
Thanks for your help!!! I keep reading/watching over and over so I can get better.
Judy, For the cupcake, I did the top part first (the white icing), by outlining and flooding right away. Then I let that dry and piped the blue bottom by outlining (yes you pipe a line right beside the white), and flooding right away. Once that was dry I added the details on the very top layer. I hope that makes sense!
Great tutorial!! Very helpful.
P.S – The marbled icing link’s broken.
Thank you Avanika for letting me know! (It’s fixed now).
@ Brooke: I feel the exact same way!!! Then by the time I get to decorating, I rush and it doesn’t look good because I am so tired and just want to get it done! One time when I made 2 consistencies of RI, the outline icing was so thick my hand was cramping still the day after. But I already made it and didn’t want to thin down since it was in the bag already and I didn’t have enough extra. It’s hard to plan ahead when you have to make 2 different consistencies. Good luck to you! Keep trying! I’ve done it about 4 times and it’s still a process but I’m determined to learn.
I’m SUCH a visual learner Ü, so thank you for the video! My icing was always too stiff, then I’d thin it out too much and it was a total disaster. I’m ready to try again armed with your great tips, THANKS!
@ marian: Thank you! That makes sense and I appreciate how you quickly you can answer our questions! I am ready for my next batch of cookies!
Marian!!!
How do I love thee?!?! This post is fabulous, as usual. Your site has really been such an invaluable resource for me. Thank you!
Quick question: my recent batch of dough (your recipe, and the one I always use) is suddenly spreading. Do you think this might be because the butter wasn’t completely soft when I tried to mix it with the sugar?
Thank you again. How lovely!
jill
Jill; Hmm, baking can be so finicky… it could be a number of things. Let’s try and narrow it down:
*Oven temperature – check it and make sure it’s calibrated
* Baking sheets – did you change them? Thicker ones are better
* Did you chill your dough long enough in between all stages? Are you chilling in the fridge or freezer?
* How long did you mix the butter and sugar after they were incorporated? Mixing longer ‘adds air’ and ‘spreading factor’
* Are you buying a different butter? Different butters have different water contents; could affect dough.
*Are you taking out the baking powder. If not, take it out.
*What temperature/humidity is the envirnoment you were working in?
* Are you certain all your measurements were correct? (Increasing sugar increases spreading. And if your flour was off… etc.)
* Think back to all the meticulous details. What is different this time?
Hope those questions help you brainstorm.
Let me know!
Hi Marian,
I’m so glad you finally made this video. It’s really helpful for me to see exactly how the RI looked like after 10 sec on video.
Please keep making more video tutorial…I’m waiting for the video tutorial of how to make until place the RI runouts over cookie or cake.
I really want to make vanilla cake with vanilla buttercream like yours. Do you mind to let me know the recipes?
Thanks a lot Marian…really love your work =)
Hi Via,
Thanks so much! I really like Martha Stewart’s buttercream and vanilla cake recipe! (it’s what I use).
Here’s a link:
https://sweetopia.net/2010/08/chocolate-seashell-cupcakes/
Thank you for the recipes….I’ll try them a.s.a.p….
dear marian,
thank you very much for sharing generously. all your efforts in making running this blog and those tutorials are greatly appreciated. after visiting your blog, i’d feel a rush and so much more motivated to do RI cookies now, just gotta try them soon!
however, you mentioned that you’d use Americolor black to get a black RI. do you just add the colour directly into the white RI or do you prepare a basic colour RI before adding in the black colour? please do advise.
thank you very much in advance marian.
** your name reminds me of lady marian in robin hood =)
Adrianne; I appreciate your kind comment! =) I’m so glad the blog has inspired you to feel like decorating cookies!
For black royal icing I just add the black Americolor right to the white icing; lots of it too! It’s as easy as that!
Thank you so much for your advice about my cookies spreading. I think the problem was indeed that I didn’t let the butter come to room temp, so the sugar never got fully incorporated. On my current batch I cut down on the sugar by a tablespoon or two and eliminated the powder, and they were perfect.
Thanks again for your kind response!!
You’re welcome, @ Jill and @ Via! I’m glad I could do something to help!
dear marian,
oh that’s great! =) thank you again..
hugs,
adrianne
Thanks for this wonderful tutorial. I LOVE your blog, it’s very inspirational and I have learned so much from you! I can’t wait to watch the next video!
Wow! I just love your piping work, it’s amazing and very inspiring!
dear marian,
i’m setting out to make my very first royal icing deco, finally and thanks to you again!
i’m trying my hands on flooding winnie the pooh face (using your snoman method) for cupcake fondant toppers instead. i’m planning to do the flooding on top of a piece of parchment paper and leave to dry before use. as my country is quite humid, can you please share:
1)how long in advance can i make them before i use them to decorate the cupcake?
2)how to store them prior to use?
3) can i use wax paper instead of parchment so i don’t have to smooth on some shortening on the parchment?
thank you so much marian **hugs
@ adrianne, @ Mrs. Bakie, @ Andrea: Thank you!
@ adrianne:
1 and 2) As long as you store them in a well-padded, air-tight container, they will last indefinitely! (You can make them way in advance). A trick I learned from my ‘cookie friend’, Haniela, is to put Tyvek silcia gel in the airtight container. Store the decorations between layers of cardboard covered with parchment paper and bubble wrap or thin sponge… just something soft.
3) Wax paper is fine.
Hope that helps!
thank you very much marian!
i will make them soon and hope they come out good =) i will definitely share the outcome with you (if they are successful =p )
**hugs!
Hi Marian,
One more question for you. And I know you’ve answered it somewhere on here before but I can’t seem to find the right thread. How long does royal icing last if you keep it in an air tight container? Do you recommend putting into the fridge or leaving out on the counter?
Thanks a ton,
Nikki 😉
question: you may have been asked already, but, how do you slice the cake when the snowman is on top? by that i mean, i thought royal icing gets very hard. do you have to remove the snowman then? if so, for someone who wouldn’t want to have a solid snowman, is there another way to get the same image on the cake, and be able to slice threw it? i hope that made sense.
Kelly, I did take my snowman off because I wanted keep him; good thing I did cuz I got lots of emails asking if I could show how to put him on a cake (which I’ll do in a future video). Royal icing does get hard and crunchy, but you could still cut through it. Eating it isn’t as nice (in my opionion), it’s basically just crunchy sugar. Cakes traditionally (in England) were and in some places, still are covered in RI instead of fondant. ANYways, I’d probably pick if off my cake if I were eating it.
You could make a softer image out of buttercream or try cutting the shapes out of fondant.
Hope that helps!
10 second video was a tremendous help! Thanks so much for sharing! One thing I would like to point out concerning the quality of video is I had to plug in my earbuds to computer to be able to hear you. Besides that it was well done.
Thanks for the comments! =)
Vicki, I appreciate the feedback! I’ll be fixing that in my next videos.
How do you make your royal icing? Do you use the cream of tartar and meringue powder??? I don’t like the crunchy frosting, and am confused about what to do to have a softer frosting that still sets up fairly quickly to allow for the cookies that require more steps. I’m new to this cookie decorating, but you and several others have been such a help with your tutorials, etc. Thank you so much for all you do for those of us so inspired by your talents.
Hi Sharon,
Here’s the recipe I use for my royal icing (yes I use meringue powder and cream of tartar):
https://sweetopia.net/2009/06/cookie-decorating-tutorial-general-tips-butterfly-cookies/
Royal icing does dry crunchy (If you want to avoid all crunchiness use buttercream or even try glaze… Just a bit different looks to them). I believe Meaghan at thedecoratedcookie.com uses buttercream, and Pam at CookieCrazie uses glaze.
Hope that helps and thanks for your kind comments!
Amazing tutorial! This is by far the best website for royal icing decorating! Kudos to you! Love the site.
Thanks for the kind words John!
Hi Marian,
Thanks so much for your video n post. I was so frustrated in the past due to my royal icing problem that took forever to dry! Luckily I stumbled to your post and I just made the cookies decorations yesterday n the results are very good. The icing dried perfectly 🙂
When I took them out from the oven n left them a bit on the tray, I found that only the edges are a bit crisp but the middle is still a bit soft. Is that the right way to bake?
And I wonder if the iced cookies should still be crisp after we decorated them or a bit soft? Mine are not that crisp after decorating. Did I do something wrong?
Thanks, Marian 😉
Hi Jenni,
When I’m baking my cookies, I take them out of the oven when the edges look slightly golden and the center of the cookies don’t look ‘wet’ anymore. Baking time will depend on the size and thickness of your cookies.
Maybe if the middle of the cookies you mentioned were a bit soft, you need to bake them a bit longer.
Hope that helps!
How do I get the deep black royal icing color with gel paste without affecting the stiffness/runniness?
Colour the icing first, then adjust the consistency.
Here’s a post on coloring icing black.
https://sweetopia.net/2011/05/how-to-color-royal-icing-black/
Happy decorating!
This is an amazing site. I have learned so much from your videos and blogs. What a blessing for me to have stumbled upon your great tutorials. Thank you again and again.
Sweet thanks Brenda! I’m happy to help if I can.
Happy decorating!
Thank you for the video! I’m doing my homework before I even make the icing because I want to avoid frustrations and feel encouraged by my results. My next plan is to make some RI,print some templets, and place them under wax paper, I feel it may be less intimadating if I just practice a while.
Again, Thank you so much. I’m so grateful for all the talented people who are willing to share their tips and ideas.
I hope I do you proud!
Linda
Good luck and have fun!
Thankyou so much for your tutorial on run out icing I feel I can do it now with a little practice.
mary U.K
Just stumbled on your website today and its fantastic. I’m an avid baker and can learn so much from your site. Your work is excellent and I’m going to try some of it. WIll surely have a ton of questions once I copy some of you work.
Anita
been having a real problem with run outs they keep breaking once they have dried and i think that imade the consistency of the mix to firm,Your video was very useful, thankyou
Hi Denise,
They are fragile to begin with. When are they breaking? When you lift them off the transparency/parchment etc.? Try peeling the backing away from the transfer, instead of peeling the transfer from the paper. Also, make sure they are 100% dry.
If you’re already doing those things I can’t think of anything else besides of course being very careful with them (and making extra!). lol
I just used your 10 second rule for my icing consistency and I loved it! I’m not very skilled at royal icing, but I love how the cookies look–this just increased my skill level!
Now I just need to get better icing tools. 🙂
Love your site! My question is about the icing getting too hard when it is dry. I made some marbled cookies and they were great, but the dots I piped around the egdes were as hard as rocks and therefore unpleasant to eat. Any way to prevent that? I have resisted royal icing for this reason…….
this was brilliant thank you so much. I have watched 2 tutorials today but I know I will be back 🙂 x
Thanks for making such an awesome video, it has taken the guess work out and my cookies look simply amazing!
Do you have a tutorial on writing on cookies?
@ Yvonne Jacobs: My pleasure. No, I don’t have one on writing on cookies, but have now added it to my ‘to do’ list. =)
Thank you sooo much! Perfect video. I am very much a visual learner. So instructions plus the video are wonderful! My first experience 4 years ago with royal icing and cookies discouraged me from working with it again. But after watching the video, I am so excited to give it another try! The snowman cookies are beautiful, by the way!
thanks for the 10 second tip! Now I know how thick I should make the icing!!!!
Linda Darling
Franklin
New Jersey
P.S. I love your blog!
Hi Marian
Thank you for your beautiful site – it is by far the most beautiful and inspiring I have found yet.
I tried to make Royal Icing, but in South Africa, meringue powder is difficult to find so I used something called Actiwhite which is supposed to be exactly the same thing. I followed the instructions on the product carefully, but my icing has not dried after 24 hours. It was perhaps a bit thick, (following your 10 second rule) but what else may i have done wrong? surely it would dry no matter how thick it was?
thanks
Janis 🙂
Thank you so much from Quebec city, Canada!!! Your advices are so helpful!
Merci beaucoup!
Geneviève
P.S. Your blog is ”magnifique”!
@ Janis Spear: I’m sorry, I’ve never used that product, so can’t comment on it or help you with it. =(
Merci beaucoup @ Geneviève!
Hi again
Is it possible to mix it so much that it doesn’t dry?
Thanks again
xxx