

I’ve been decorating cookies for approximately 8 years now, and I still remember how frustrating some of my first cookie decorating experiences were.
I couldn’t get my cookies to look as nice as I wanted them to; the icing was either too thick and dry, or too runny and hard to control. The designs didn’t look as neat and pretty as I had hoped.

Well, after poring over every cookie decorating book I could find, taking a cookie decorating class at the Bonnie Gordon College of Confectionary Arts, and after much experimentation and practice, I (eventually) found tried and true tricks and tips to make the cookie decorating experience easier.

Today, besides showing you how I made this charming wintry fella, I’m going to be showing you one of my absolute favorite keys to cookie decorating success – a necessary basic: How to figure out the right royal icing consistency.
For those of you who like video, here’s a demonstration of how to find the consistency – The 10 Second Rule:
Click HERE if you can’t see the video.
*

For those of you who like written break-downs:
*
Royal Icing Consistency
To test consistency, you’ll need a butter knife and your royal icing.
I’ll be showing you how to make the icing in another video; for now you can find the recipe here in my cookie decorating tutorial.
*
The 10 Second Rule
To check the consistency, all you need to do is drag the tip of a butter knife through the surface of your icing, letting the knife go approximately an inch deep, and slowly count to 10.
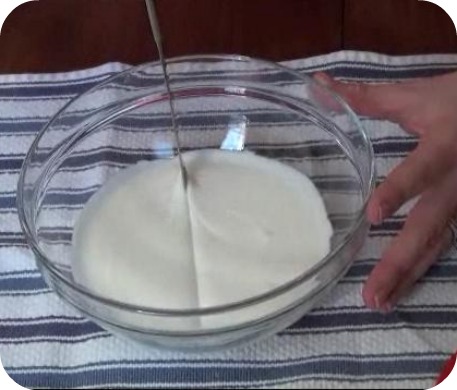
If the surface of the icing smoothes over in approximately 10 seconds then your icing is ready to use. If it takes longer, the icing is too thick. Slowly add more water.
If your icing surface smoothes over in less than 5-10 seconds, it is too runny. Mix your icing longer or slowly add more sifted icing sugar to thicken it.
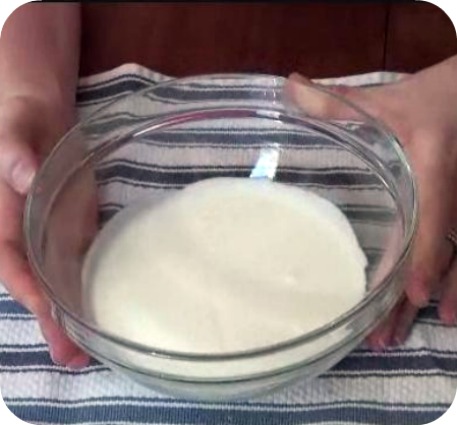
You don’t want the icing to be too thick so that it doesn’t flood, or too thin so that it’s too runny and hard to control.
I should mention that this is what works for me; my preference is that the surface of the icing smoothes over at about the 10 second mark. I like it at this consistency (a bit thick), because the icing holds its shape and doesn’t run too quickly out of the piping bag.
With this thicker icing I can outline and fill in right away; you just have to shake the cookie a bit to help the icing settle. You can see how I do it in this video on marbling royal icing HERE.
If the icing is runnier, you don’t have to shake the cookie because the icing flows easier. I used to do it this way, (prepare two consistencies of icing; one for outlining, and one for filling in). Again, flooding is definitely easier, but I prefer not to have to set up two icings.
{In the video, I normally don’t use a runnier icing like the green example; I was demonstrating the difference between an icing that smoothes over in 5 seconds, and an icing that smoothes over in 10 seconds}.
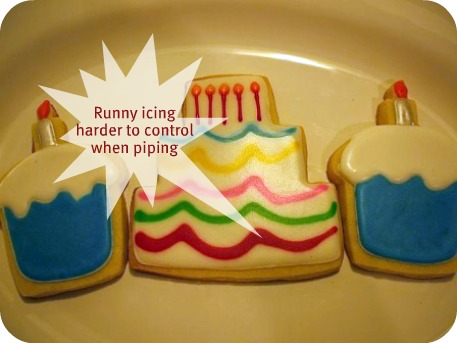
For an example of icing which is a bit too runny for piping details, take a look at the swags of this birthday cake cookie I made when I first began decorating. The lines were harder to control when I piped the icing.
What I’ve shown you today may seem like such a simple thing, but it made a huge difference in my own cookie decorating. It can really help alleviate frustration and improve the overall look of the cookie.
And an update (this has been added in later), I now have an in-depth PDF and Digital Download Video on Royal Icing Consistencies for cookie decorating. You can find it in my shop, here.
Now a little bit about Frosty the Snowman:

This little guy isn’t a cookie; he’s made just of royal icing.
Royal icing decorations, also known as runouts, flood work, transfers, color flow (by Wilton), or run sugar, are basically the piping of a runny royal icing onto parchment paper or acetate paper (sometimes into an outlined shape).
When the shape dries, you have an icing design which you can use for a multitude of decorating purposes; on cakes, cookies, gingerbread houses, cupcakes etc.

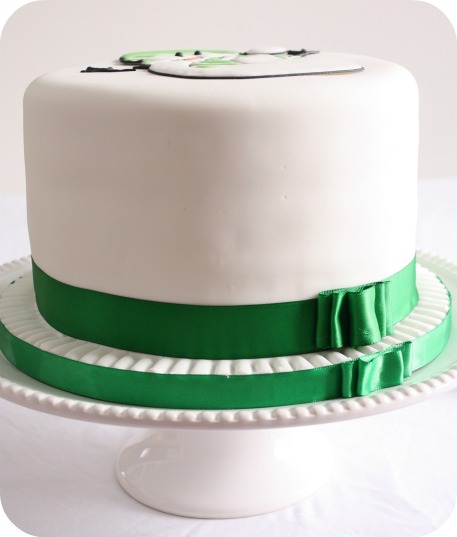
In this case I needed him for an 8″ round cake. As soon as I saw him on these adorable mugs (bought at the end of last winter at Canadian Tire), I knew I wanted to make an edible version of him.
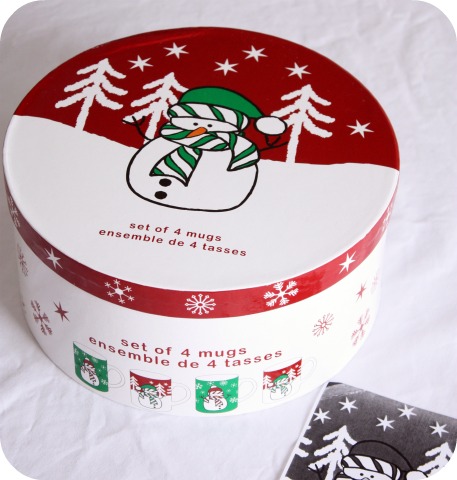
I actually made the first runout of him before Christmas and have been meaning to get to this post since! Just managed to squeeze him in before spring. 😉

*
How to Make Royal Icing Runouts/Floodwork
If you’d like to try making royal icing runouts, you’ll need:
- Royal Icing Recipe
- Icing Gel Colors
- Acetate Paper or Parchment Paper
- Shortening
- Piping Tip (I generally use tip #2)
- Piping Bag
- Coupler
Basic Steps:
- Shortening on acetate paper or parchment paper
- Pipe design by tracing or using KopyKake projector (Can do outline first and let dry)
- Fill or flood design
- Let dry for a minimum of 24 hours
- Gently peel off backing
- Attach with more royal icing

For detailed steps on making runouts click HERE, HERE or HERE.
*
Getting icing consistency right is really one of the major keys to making your cookie decorating experience a fun one. Once you’ve got a good icing basis everything else becomes easier.
If you enjoyed today’s tips please leave me a comment below and let me know what you thought or if you have any questions.
xo,
Marian
p.s. In the last video on Marbling Royal Icing I asked what you’d like to see in the next video. Thank you for your comments!
*
p.s.s. Please let me know in the comment section below on facebook or twitter, what you’d like to see in the next video. Happy decorating!


Oops I missed a few comments… @ Kristy: It’s personal preference really. I like the piping bags because it feels more like I’m holding a pen, so it’s more comfortable and easier to pipe for me.
@ Angela W. East and @ Angela Barton: Thanks!
@ Angela Barton: Good luck with your cake!
Hi Marion
I love getting email from Sweetopia! I really enjoyed the video. You put so much effort into our education. I truly want to thank you for your generosity.
I am in the process of building toward another decorating session. I find that there is so much icing in a batch that one or two batches of cookies aren’t enough to use it all. So I have two large cake cans full of cookies in the freezer, and I am planning to make at least another 2 batches before I make up some RI. Is this what you do? How many cookies do you have at the ready before you mix up a batch of RI? Thank you Marion. Esther in Nova Scotia
How long did you let the black royal icing dry before filing in with the other colors?
Do you have to squeeze very hard to get the “10-second” icing to come out of a #2 tip? I use the same rule for glaze for cookies but it seems hard to pipe sometimes, I was just wondering if royal behaved the same?
Very helpful video. Can’t wait to see your icing(making) video. i’ve been trying to get my royal icing down for a year now and it is so hard. I’m hoping with the help of your blog and a few others, I will eventually get it down.
I love your video and see you in person. You are a beautiful great and patient teacher.
ML
Great video and so helpful. Thank you! 🙂
@ Esther:
Hi Esther, that’s a hard one. I’d say for sure one batch of icing decorates 1 1/2 to 2 batches of cookies. (using the dough recipe I have on my blog). It does depend on how you decorate them as well of course. (If there are layers or if the design is on only part of the cookie etc.) Glad you’re enjoying the tutorials! =)
@ janet Chance: I let the black icing dry for 24 hours. I don’t need to squeeze hard to get the royal icing to come out of the piping bag. I’m sorry I haven’t really used glaze much so I can’t comment on the difference between the two.
@ Kate: Thanks! All the best and please share some pics of your cookies on my facebook page when you’ve decorated some cookies! =)
Thank you Maria! 😉
great video, wish I saw tips like this when I first started making icing, I use a 10 second rule too… seems to work out well 🙂 great to be able to see it on video, I will share you video with others how ask hot to do it, really great!
Thanks so much for the informative video. You have always been one of my favorite cookie decorators 🙂
@ DIane {createdbydiane.blogspot.com},@ Tricia: Thank you for your kindness!
This is fantastic information! Can’t wait to try it out.
Thank you so much, Marian! This is a great video tutorial. Thanks for taking the time to do it and share with all of us. I especially love the snow and scenery at the beginning – you live in a beautiful place!!
Ahhhh thanks a million for doing this video, you are awesome!!
Quick question…for some reason I always way air bubbles in my royal icing. Is there something I’m doing wrong? I’ve followed the recipe to the T and I still get those stinkers when I apply my icing to the cookies. I do try to pop them one by one with a pin or toothpick, but I get a lot of tiny air bubbles. If you have a hint on how to avoid them please let me know.
Thank you again Marian.
@Rosie: Ah yes, it’s still an on-going issue with me too.
I wrote a few posts about it here:
https://sweetopia.net/2010/02/how-to-prevent-air-bubbles-in-royal-icing/
https://sweetopia.net/2010/02/part-2-how-to-prevent-air-bubbles-in-royal-icing/
@ marian:
Thank you, i did not realize that the snowman was still wet. I will try the tip on adding corn syrup for the shiny I want.
Great tip on the humidity nightmare lol.
Please keep giving me (us) tips. They are always amazing and very helpful.
Thanks for the tutorial. It was very helpful! I was wondering if you have any advice on how to personalize cookies. Do you thicken the royal icing? Do you use a 0 tip or a 00 tip? I’d love to see a video about this!!
Marian, this video is just awesome! Thank you for sharing with us! By the way, you are so beautiful!^^
I admire your work so much. I can’t thank you enough for taking the time to share all your knowledge. The video is terrific.
hi Thanks for the tutorial it really helps to get more idea about the consistency. you are awesome Thanks for shearing your talents
@ Lisa C: I’m glad you found it helpful!
I think it would depend entirely on the cookie and the size of the writing… if it had to fit in a smaller area, I’d use a smaller tip. Ideally, or preferably, a #1 or #1.5 for a smaller area. #0 or #00 are great for eensy weensy tiny details, but not so much for writing I think.
@ Katie Yoon, @ Marilyn Sullivan: Thank you!
you make the greatest tutorials! I wish you could do one a day! I’d learn so much.
Thanks for your time!
Thank you!! That was so helpful and I can’t wait to try the 10 second method!!
Thank you Marian! Your video is excellent and very helpful. I don’t know if I could eat one of your beautiful cookies!!!!
@ marian:
Thanks for getting back to me so quickly!! I’ve tried to use a #1 tip, but I just can’t seem to get the neat, clean look that I want. Do you thicken the icing? Or, maybe I just need a bit more practice 🙂
@ anna, @ Allison S, @ Mary Sanavia: Thank you! =)
@ Lisa C: Maybe you do need to thicken it if it’s not as ‘crisp’ as you like. I use the icing at the consistency of 10 seconds for piping letters.
If I can I’ll do them as a transfer first and then place them on the cookie… that way I’m not worried about making a mistake. (Can’t be too delicate for that though!).
If you have to do it straight onto the cookie, practice a bit first on a piece of parchment to get the ‘flow’ of it… My first ones are never as nice! You will get better with each one! Then, do your best not to be too worried about it – that’ll make you nervous and ‘fulfill your negative expectations’ lol. And if you still make a mistake, oh well, it’s only a cookie 😉 You’re probably your own worst critic!
@ Katie:
Hi Mariann,
Once again, I feel as though you really can relate to the girls out here who really need that step by step instructions with video…it really makes a huge difference with me cause I’m just starting out and I really love to bake, I hope I can be as good as you one day, Mary Fetzer (your #1 fan)
Marion once again thanks a lot for such a great and helpfull video, can´t wait for the kopykake video 🙂
Hi Marian,
I want to thank you for creating this wonderful website with so many useful tips and ideas for cookie decorating (and more)! Thank you also for sharing with other people your royal icing tip, it’s really helping me (I just started practicing)and you are doing a great job explaining it.
Bravo and I eagerly wait for more posts and consequently for more learning from the best!
Andreea H.
Marian seriously the best video ever! I loved it! I loved that it started in the gorgeous snow and it was fun to see you and hear you talk so that we felt closer connected to you. I loved that the video was detailed and specific. I would have loved it if it could have been ALL parts. Like seeing you get that transfer off the sheet and onto the cake would have been interesting. Seeing you make the icing and what it looks like when it’s done mixing. Seeing you pipe all of that cute snowman’s details would have been cool, especially on the smaller cookie. I have a new KopyKake and am still trying. I use Royal Icing only for the outline and then my own glaze for the fill. I still can’t get the hang of Royal Icing. It’s SOOO much easier to use, but getting it just right thinned or thickened for tiny details is really difficult. I bought some Greeting Farm digital images with high hopes, but the tiny little details are still baffling to me. Hopefully I’ll get the hang of it. If it’s a simple image, then I have it down, but I want to expand into the gorgeous details you do. That snowman was so adorable and so perfectly decorated! I really loved the video and all your gentle guidance. It was perfect. Thanks so much for sharing your expertise!
Wonderful video, Marian! I loved seeing your beautiful face at the beginning. And then to watch you pipe and fill…..it was very helpful. I do my 10 second rule differently, but then I use glaze and not royal icing. I will definitely send my blog readers over to your site to check out this very informative and fun tutorial. Thanks Marian for taking the time to share with all of us. 🙂
@ Mary K. Fetzer: Mary – so sweet, thank you!
@ Cynthia, @ Andreea H.: I appreciate your kind comments!
@ Cristin (Pinkie): It’s so nice to hear from you! Thank you for your in-depth reply! I will most definitely do videos on the things you suggested (i.e. taking the royal icing transfer off and placing it, piping smaller details etc.) I’ll just break it up into different videos for simplicity though. =) I love those Greeting Farm images too! They’re on my ‘to do’ list! I hope you continue having fun making your pretty cookies and look forward to seeing what you come up with. Thanks for dropping by!
@ Pam (aka CookieCrazie): You are so lovely and kind! Thank you! Glaze is not something I have experience with, but you obviously are a master with it! Thank you for commenting, it’s nice to ‘see’ you here (now that I don’t really have time for flickr. How are you managing that?)
Thanks, I’m still working on getting the consistency right! It’s the hardest part of the process for me. This video helped a lot!
Great video! Always enjoy your tutorials.
Just wondering if you ever have problems filling in between your outlining and the icing runs OVER the outline. I’ve seen some cookies where the RI almost looks “puffy” and I wonder how they get that great look rather than a flat finish without putting so much icing between the outlines that it spills over.
A side note: someone asked how to get shiny royal icing. I read years ago that adding just a bit of glycerin (available at the major craft stores in the cake decorating section) will give a bit of shine. I’ve done this and I love the finish. It does help eliminate that dull, sort of matte finish.
I just watched your royal icing tutorial. It was so very informative and easy to follow. I plan on going back and watching your other tutorials as well as reading all the information on your site. I LOVE to bake so I am sure that once I read what you have shared, I will be re-energized to do something a wee bit more advanced that I have tried in the past. Thanks for sharing.
@ Jeanetta DeBusk: I’m glad to hear it!
@ Julie: It helps to have thicker icing (at 10 second mark). Icing at the 5 second mark tends to run over the sides more. (Yes I’ve done that! lol)
Thanks so much for the glycerine tip! I had heard about that but completely forgot about it It’s good to hear that it actually works.
@ Lori Meade: Thanks! Have fun with it!
Hi- I love getting your emails and watching your videos. I am ready to try Royal Icing this Easter.
My question is about the flavor of the icing. Does it overpower the cookie? And – does the cookie need to be thick?
Thank you in advance.
Missy
Hi Missy; I’d have to say that’s a question of (personal) taste… It’s difficult to answer because what one person thinks is too sweet, another could think is ‘just right’. I don’t usually add vanilla, but I know lots of decorators like to add a little vanilla, almond, orange or even lemon extract to add a different flavour.
I usually make my cookie about 3/4 of a cm thick. Again, I think it’s a matter of preference. Make them how you like to eat them =)
Have lots of fun decorating! No stress, no pressure, just fun! If you have any questions I’m a comment here, an email. tweet or facebook comment away!
@ marian:
Thanks for the fantastic advice!!! I will put it to good use!!
I loved the video, and I always love your blog. I only wish we lived close so we could get together and decorate. Isn’t it fun? Enjoy!
Thanks,
Colleen
This video was very helpful. I am looking forward to trying the royal icing on my Easter cookies this year. I really enjoy your blog!
Hi Marian!
Thanks so much! This tutorial is really awesome. I love video tutorials. I haven’t used the same consistency of icing before but will definitely be using it in future! Thanks 🙂
Thank you again for the video.
It’s help me very.
Bravo!
I just wanted to say thank you!! This tutorial was so helpful!! I decorated cookies yesterday and your tips made it so much more fun – once I got the icing to the correct consistency it was much easier to pipe, and my cookies turned out so nice! Thanks again, I love your blog – your sugar art flawless, you make it look easy! I need lots more practice 🙂
Love your tips and tutorials.
Your so creative and your work is Beautiful.
Diane
This video is exactly what I was looking for! Thank you so much for sharing all of these wonderful tips. Your cookies are amazing and you explain things very well. Your site has helped me so much!
I was wondering if the 10 second icing works with #3 tip for outlining. Does the icing flow out of the tip or is it still stiff enough? One time I made RI and it was slightly leaking out of #3 tip but not #2 but I really wanted to use #3 to outline.
Thanks!
Thanks for all your comments!
Judy, #3 works fine with the 10 second rule. Because the opening is larger the icing will flow out a bit faster but it’s manageable. It’s great for outlining and filling in larger cookies!
Thank you so much for this post. I have been struggling so much with my cookies trying to create separate “piping” icing and “flood” icing… I run out of icing early and dirty up all of my bottles before I get anything done. AND did I mention how much precious TIME it takes? I’m exhausted and frustrated after 5 cookies… LOL. I can’t wait to try again and use the “10 second rule” and pipe AND flood with the same color/bag. Thank YOU so MUCH for sharing your experience and knowledge. It is much appreciated.
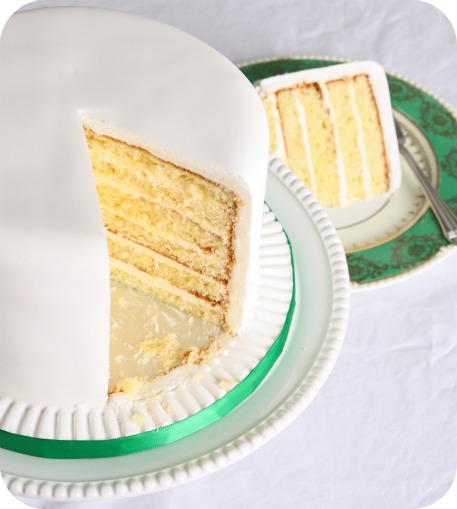
Excellent video!!! keep up the good work Marian! so cute the snowman and the cake looks so yummy! can I ask what kind of cake is it?
BTW: do you know where I can get the kopycake in Canada? I’m just afraid that ordering through Amazon the shipping will be extremely costly for being a heavy machine. Thanks 🙂
Thanks! =) The cake is just plain vanilla with vanilla buttercream.
Rossana; I’ve put a plea out in my KopyKake projector tutorial asking anyone if they’ve seen it being sold in Canada, becaue I haven’t seen it. =( Here’s the post:
https://sweetopia.net/2010/06/decorating-cookies-with-a-kopykake-projector/
Brooke; Thank YOU for your comment! =)
Hi Marian!
Thanks for the great tutorial.
On my tutorial wishlist- I’d like to see you decorate a detailed cookie from start to finish, using the kopykake projector. Start with the outline to the filling, and finishing touches. (like your eskimo girl, princess, etc)
I purchased a kopykake projector, and some cute designs, but I’m feeling overwhelmed and not sure where to start. I look at the design and think, do I outline the entire cookie, or do the face/dry, hair/dry, body/dry, etc. It’s hard to visualize where to start, and what to do without having seen it done.
I’m sure it would probably be a 10 or 15 minute video, but so worth it. Im sure it would help lots of us. There is so much more to a video tutorial than just showing for example how to marble a cookie. Watching them shows us techniques you use from piping (where to start/end, pressure to use), to the actual design details. I personally watch them a few times and try to pick up something new each time.
Thanks again for all the knowledge you share with us!
Debbie
@ Debbie:
Thanks so much for your in-depth reply! I will do that in a future video!
Hi Marian,
I just wanted to know, if I’m making runouts on cookies, how long do you think they’ll stay fresh?
I am making cookies (haven’t yet decided if I’ll use gingerbread or sugar cookies- would there be a difference for my situation?) for my son’s birthday party next Sunday. I want to make them in advance but I’ll be busy from Thursday onwards. Do you think if I made them on Wednesday, let them dry overnight and then put them in cellophane bags they’d still taste okay for Sunday? Any advice is very much appreciated 🙂
I love all of your work. Thanks so much for sharing and for all your tutorials!
Lucy
awesome blog, awesome teacher
excellent snowman
would love more info on frosting cupcakes, i.e. technique, tutorial on tips and bags…
thank you