Hi there! Hope you had a great weekend! Besides enjoying some of the Saturday sunshine, I finished some animal cookies that our neighbourhood’s wee ones were happy to devour. I also made these for you, because coloring icing black may be something you struggle with…
The good news is that it’s easy to do, the not so good news is that you need a lot of coloring.
Which means that the taste of black icing (along with other deep colors such as red and deep brown), can be a bit bitter. Wilton makes a no taste red, however, I like using Americolor food gel colors
because I seem to have less issues with icing bleeding. (For a post on bleeding click here).
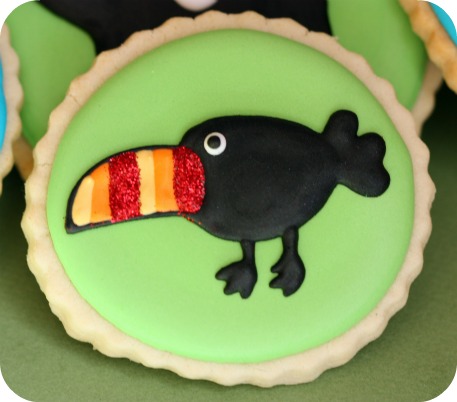
If I’m not using too much of said bitter colour 😉 I don’t worry about the taste, but for cookies with a lot of black, like the bear and toucan here, I decided to make them with transfers (royal icing decorations). I lightly iced them to the cookies, so that they could easily be pulled off.
So, to begin, to tint your icing a deep, dark shade, you’ll need:
Items You’ll Need:
- Royal Icing (for a recipe click here)
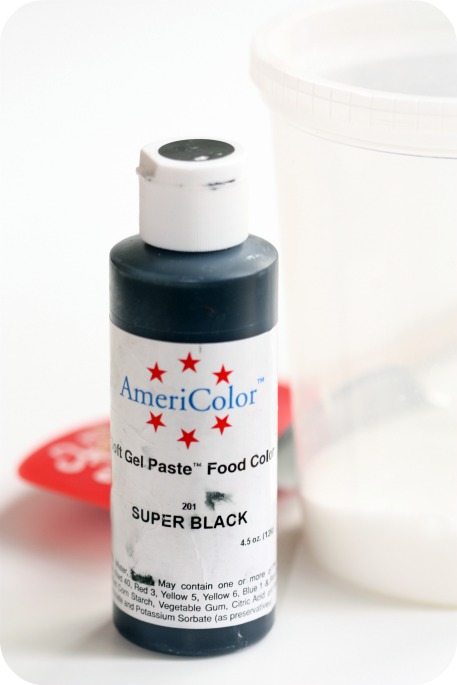
- Black Food Gel Coloring
, 4.5 oz/128g (I like Americolor and I buy the large container because I use so much)
- Spoon/Spatula
- Measuring Cup & Measuring Spoons (optional)
*
How to Make Your Icing Black
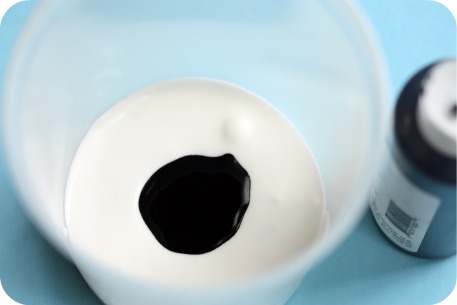
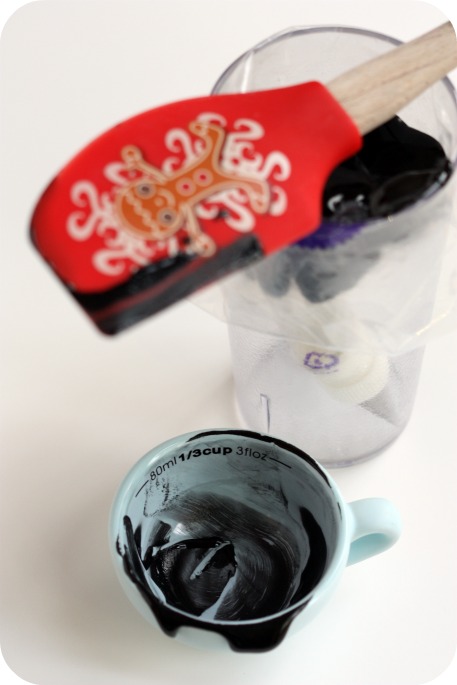
- For approximately 1/3 of a cup of icing (80 mL or 3 fluid ounces), add one Tablespoon (15 mL), of black food gel.
- Note: I have gotten used to how much black food gel to add to my icing, so never measure, however to give you an idea, I’ve given you one example of measurements.
- If you are making more, or less icing, just add food gel until you’re happy with the shade.
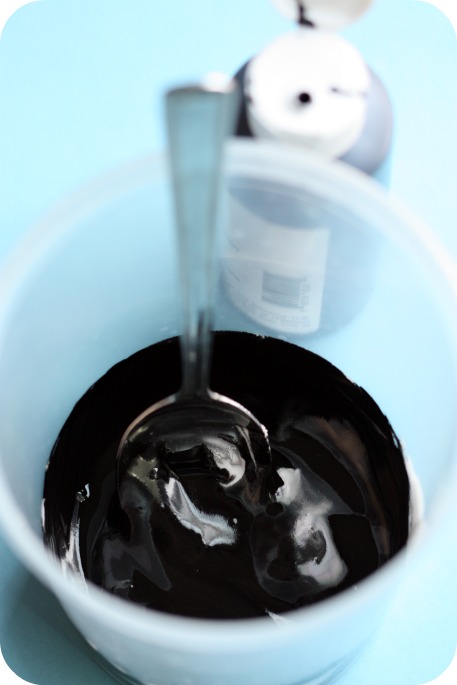
- Stir until all the color is incorporated
- It should be noted that the icing color slightly deepens with time. You can add a little less coloring if you’re concerned about using so much (expensive), and let it sit overnight. Check the color the next day and then decide if you’d like to add a little more or not.
And that’s basically it!
Some other options:
- If you are low on black coloring, you can use another deep shade, such as brown or burgundy, to help darken the icing.
- Some people like to add cocoa powder to their icing to help darken the base (and it makes the icing taste good too!). I’d love to hear from you if you’ve tried it. What was your experience like? When I tried mixing cocoa powder and brown food gel my icing turned out like this (The cowboy’s shirt – it actually kind of worked out well for the look :)):
- Something to watch out for – If you add corn syrup to your royal icing to help give it a slight shine when it’s dry, you might want to omit if for deep colors such as red and black. That and add a little less water to your icing when you’re thinning it out because of all the extra viscous ‘fluid’ you’re adding in (food gel).
If you’d like to make these animal cookies, here’s a basic visual step-by-step guide:
*
How to Make Animal Cookies
I should first mention that a detailed cookie decorating tutorial can be found HERE, and some cookie decorating videos can be found on sweetopiautube HERE.
Once you’ve made your cookies and royal icing:
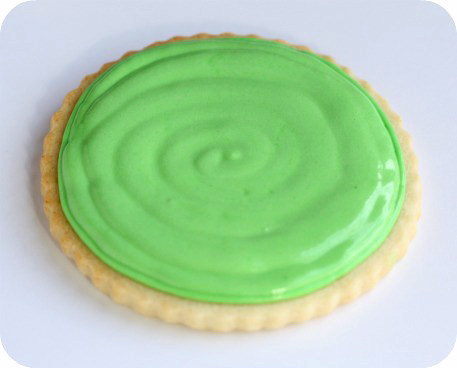
Step One: Outline using a #3 piping tip.
Step 2: Fill in or flood using the same icing and piping tip.
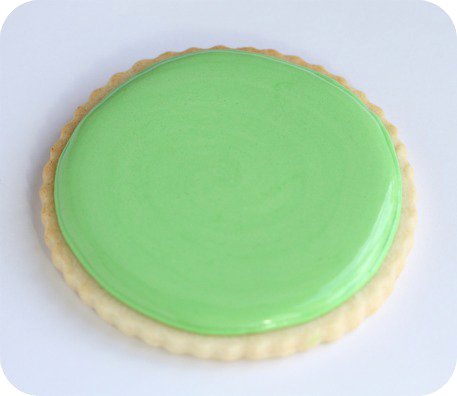
Step 3: Gently shake the cookie to help the icing smooth over.
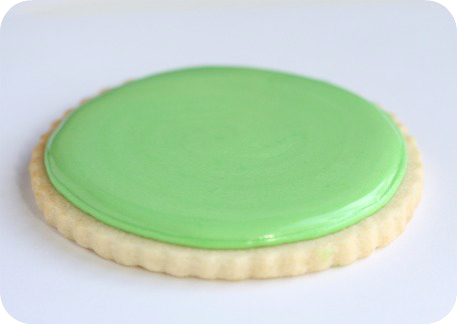
Step 4: Let cookie base dry.
(Side view for those of you who ask how full I flood my cookie).
Step 5: Royal Icing Transfers – They’re very fragile so I’d recommend making extra!
Outline with black royal icing using a #2 piping tip. Let dry.
These shapes are zoo stickers I used with my Kopykake projector.
Step 6: Fill in shapes with royal icing, using a #2 tip. Let dry and then add small details such as the eyes and nose (#1 tip). Let dry.
Step 7: Gently pick up your transfer and put small dabs of royal icing on the back. Sometimes I use tweezers to help pick them up.
Step 8: Gently place transfer on your cookie and slightly press down on it to help it adhere. If you like videos better, you’re welcome to check out this video on making royal icing transfers HERE).
Finished!
I hope you enjoyed this ‘how-to’. You’re welcome to leave a comment below or on my facebook page here if you’ve got any comments, questions or would like to share some tips of your own!
xo,
Marian















Hello, Marian, this is my first time to visit your website!
Thank you so much that you show and teach us how to make icing cookies perfectly!!
You’re really awesome and generous!
I love all your products very much!! 🙂
@ Miu (Fr. Hong Kong): Thank you so much! Very sweet of you! xo
I just wanted to tell you my expierience with cocoa powder and royal icing. I LOVE it! I add the cocoa powder after I’ve already made the icing. I mix it untill its a dark brown and then I only have to add about 3-4 drops of black…..it was perfect and yummy!
@ Kristen Acosta: Super! Thanks for sharing! xo
Hola desde Mexico. Te leo desde hace mucho tiempo y he aprendido muchísimo. Muchas gracias por ser tan abierta y compartir tu conocimiento. Felicidades!!
I love your site and your advice has been invaluable. I am having a problem and wondered what you would suggest. My royal icing colors often seem to try “blotchy” no matter how much i seem to stir>>>HELP!!!
@ Candy: Gracias!
@ Chontelle: This post might help:
https://sweetopia.net/2011/07/how-to-avoid-spots-on-icing/
Let me know how it goes. =)
Hi Marian!
I absolutely love your site and have learned so many new things! You have inspired me!
I am still wary about using black RI to outline my cookies because of the bitter taste. You use it to outline so many of your cookie designs and it looks awesome! Can you taste the bitterness at all when you eat them, or is it off-set by the sweet yumminess of the rest of the icing on the cookie? Thanks so much!
Thanks @ Sippy! When the black is just an outline, no, the taste is fine, but the bear above, for example, wouldn’t taste that great (in my humble opinion 😉 ), so that’s why I made him a removable transfer.
Happy baking to you!
I love your tutorials. Just wanted to let you know that AmeriColor does make a tulip red which apparently is thier code for no taste red. I read this on a blog about making red MMF. Might be worth a try. http://sugarsweetcakesandtreats.blogspot.com/2010/11/recipe-red-marshmallow-fondant-mmf.html
Tara from Valley Kool Cakes
https://www.facebook.com/pages/Valleys-kool-cakes/131353476890032
Ohh, awesome, @ Tara Osmond! Thanks so much for sharing!
hi marian ….im doing these as a gift for a baby shower its safari theme hehe your awesome do you have any suggestions for how to put the gift??
Hi @ Vanessa: Do you mean how to wrap them or do you mean how to how to make a cookie gift please?
like how to give it as a gift such as in a basket or in a bag the shower is on the 13th so any tips…:)
@ Vanessa: I like mine packed individually in cellophane bags, tied with a pretty, matching ribbon. You could put them all in a pretty basket with ribbon too, yes. Many of my other cookie posts show the final ones in bags. Hope that helps!
thanks!!
I just found your site a week or so ago. So I’m going back to view old posts. Love it, thanks. When I was new to decorating cookies I found making the color black to be time consuming and I didn’t like all the coloring I was using. One time I had some left over brown that I decided to turn black. I used such a small amount of coloring to turn the icing black. Now anytime I need black icing I tint the icing brown first (which doesn’t require much colorings) and THEN use black. I have been amazed at how little coloring I need when I do it this way.
I LOVE your blog! It has helped me so much.
Forgive me if you’ve already addressed this. But I’m having a challenge with my black icing. I made royal icing transfers (practicing for my son’s upcoming birthday). I outlined with black and then filled in with two other lighter colors. The lighter colors dried perfectly. But the black never seemed to fully dry. When I removed the transfers, the black didn’t release well, causing the transfers to break. It kind of pulled away and seemed a bit tacking. I waited two days before trying to remove the transfers. Any idea what I’m doing wrong? I want to figure this out before I start preparing for my son’s birthday. TIA!
Hi @ Mindy: Thanks so much for that tip! I’m going to recommend that to @ April right now! =)
@ April: It sounds like the black didn’t dry and that’s usually a result of lots n lots of color and sometimes, a combination of that and a humid environment. Try the tip Mindy shares above. Hope it helps!
Such fantastic cookies! Thanks for the tutorial. I have a question about Americolor. I’ve been using Wilton colors for about 20 years with great results, and just used Americolor for the first time — the Soft Gel Paste Food color (Leaf Green) — to color a white cake batter. I used 7 drops and got a nice light green. To give you an idea of the batch size, this is batter for a 10x15x2″ pan. I tasted the raw batter and found it very, very bitter. This is a cake I’ve made many times and it’s always delicious. I added an extra teaspoon of vanilla and an extra four tablespoons of sugar, trying to mask the bitterness. The finished cake — while nicely green — still seems very bitter to me. In fact, I cannot get the taste out of my mouth, even after brushing my teeth. My family doesn’t seem to taste the bitterness at all. Is this just me? Does anyone else have this experience? I’m guessing now that I should’ve ordered the darker green so I wouldn’t have to use so much. We also ordered the Electric Pink and Electric Yellow for a different cake, and now I’m a bit worried about using them, particularly the pink as red dye is known to cause bitterness. How many drops would you suggest for an average cake batter? Thanks!
Thank you @ Stella! I can’t speak to the bitterness experience personally, and apologize, but I also can’t help with how much to put for your cake batter, as I haven’t tried it. =( Hopefully someone else can help!
Sorry if this is answered already, I looked back at old comments and didn’t find the answer to this: is there a drawback to putting royal transfers in the fridge to make them dry faster? Thanks so much. And I absolutely LOVE your blog and design style.
Thanks, @ Alma!
Yes, the drawback is that the moisture in the fridge will hamper the drying process and possibly also cause colors to bleed.
If you like, I have a video on how to dry (cookies or transfers etc.) royal icing. It’s on my YouTube page, which you can find by clicking the little yellow YouTube sign at the top right of my page.
Good luck!
Marian – I have been asked to do some cookies for a friend (an assistant principal) who saw my cookies for the Fourth of July & loved them. She asked me to make 50 cookies for her to take to school for all the teachers. Recently she asked me to do them as the Amazing Race logo (a reality tv show in the US). The logo is a rectangle with a yellow stripe at the top, a black stripe in the middle and another yellow on the bottom. The yellow stripes are maybe 1/2 in. each with the black stripe 1 in. On top of the black stripe they have the words “The Amazing Race” in yellow but she asked me to just to a block L for the name of the school – Lemme (because I’m not good at writing with the icing yet).
After reading several of your tutorials & some comments I have decided to do the following – 1. Day 1 Bake the cookies & store overnight in an air tight container. 2. That same day make the RI and tint with the colors. 3. Day 2 Flood yellow stripes in the morning and at night flood with the black. Leave them set out on cookie racks to dry overnight. 4. Day 3 Decorate each cookie with the L & let dry completely. 5. Day 4 Bag each cookie & deliver to her.
After reading several tutorials & comments I noticed that you said that the yellow & black will bleed easily, so I will be sure to have my a/c & dehumidifier running. Also, I read that when you use a lot of black coloring it makes the cookie taste bitter, this is what I am worried about. I don’t have the Kopykat printer so can’t do a transfer but I also don’t think it would work for this project.
Are there any other tips you can tell me or should I just deal with it being slightly bitter tasting? Is there a way I could send you a picture of the logo? I will begin baking the cookies on August 12th. Sorry for the short notice!!
Hi Ginger,
It sounds like you’ve really read the blog and have all the steps down pat. (good thing you have the A/C and dehumidifier!). For the black icing, color it the day before (you already were going to), and try to put juuuust enough to color it black, as it will deepen a bit. The next day, decide whether you want to add more coloring or not.
A few things about eating them… the black is in the middle and hopefully you can advise the recipients about maybe taking a bite of the cookie, and then taking off the black stripe? That being said, I would taste one when you’re done, and see if it’s really that bad. Might not be with a small amount. Also, I use Americolor which i find helps with the taste a bit.
Another option, maybe use fondant for the stripes? If you buy the fondant finished (black), they probably have figured out a way to color it black and still have it taste good. (Taste a bit when you buy it). Using fondant stripes might even be a faster way of decorating than with royal icing.
You can send a photo to me through my contact form (On home page… if you can’t attach there just send me a message and I’ll respond… you’ll then be able to attach), or if you feel comfortable, share on social media somewhere and tag me.
Chat soon!
Marian – I just sent you a message but forgot to attach the logo (stupid me). I will try to send it again.
Marian – I just posted the logo on your Facebook page.
Thanks again!
Hi Marian,
Your site has helped me feel more confident about the recipe I want to use for the cookies I want to make. You describe everything perfectly. It’s the decorating part I’m more concerned about now 🙁
Since I’m so new to the baking world, I’m worried about ruining my son’s birthday treats. I do however want to add that extra loving touch to his big day. I’ve tried to just pick two shapes for his cookies. One being a race car I want to color red (Lightning McQueen) and the other being a number 3 that I was planning on coloring black (and putting white gel lines the center to look like a road) but since i’ve read your messages above I’m very nervous. I did like hearing about two ideas above where someone used cocoa to flavor the icing and only needed to use a touch of black or even coloring the icing brown and still only needing a touch of black color. Any idea how much cocoa is necessary if I was to try that route? Also should I worry about the red being bitter as well? If this can be an issue I know I’ll worry about it all week. Would I be better off trying a better (less bitter) color? I had planned to even color the cupcake icing red as well but would hate to ruin a whole batch of icing if the red is a bitter taste. HELP!!
I really want his day to be memorable from start to finish and would feel horrible if my baking left a ‘bad taste’ in everyone’s mouths.
Thank you ahead of time for any advice you can offer.
Ruth
Never seen anything so beautiful!!! You are very talented!!!
Pleasae let mme know if you’re ooking for a aticle writer for
your blog. You have skme really great posts and I belkeve
I would be a good asset. If you ever want to take some
of the load off, I’d absolutely love to write some material for your blog in exchange
for a link back to mine. Please send me an email if interested.
Many thanks!
I have used cocoa powder to make icing black and its taste is so good and I used only a little bit more than a half of a tablespoon black icing color of wilton for a cup of icing and a tablespoon of cocoa powder. first I applied the cocoa and when it was mixed I added the black color. I did it the day before and next day it was really black with a chocolate taste.
I did the same with the fondant.
Excellent piece, i did read it two times so sorry for that, i
have passed it on to my friends, so with any luck they may get
pleasure from it as well.
In the top ten of my favourite posts, thanks!
Hi Marian! Thank you so much for all your information regarding baking and decorating cookies! I truly enjoy your blogs and everything you share with us. I made your Peanut Butter Cookie Recipe for my Halloween cookies and everyone commented on how delicious they were. I also get compliments on your chocolate cookie recipe, too!! You are so talented and creative. Do you use different brands of food coloring? My icing does not every look as vibrant and beautiful as yours do. I tried to look up some info regarding brighter colors, but just couldn’t find anything even on your Facebook page. Could you please help me with this?
Thank you…Fo Harris
Hi Fo Harris,
Thanks for your comments!
I use different brands, yes… Americolor, Wilton and sometimes Sugarflair. They key really is to use a lot of coloring (unfortunately) when I need a vibrant color. Here’s a post on coloring icing red to give you an example:
https://sweetopia.net/2014/11/how-to-color-icing-red-decorated-christmas-cookies/
I made some tool cookies for my sons birthday party using gray and black; everyone that ate them had tinted mouths for a while… Oops! Is there a way to get around this?
Hi Tara,
I’m sorry, I haven’t found a solution yet, besides tinting colors like black and red a bit lighter (which doesn’t always achieve the look I want). That’s a tough one!
I absolutely love love love your website. There is so much to learn from you and I thank you for all your valuable information. But now to my real problem, why does my black icing bleed on to the cookies white base? Please help.