

I’ve been decorating cookies for approximately 8 years now, and I still remember how frustrating some of my first cookie decorating experiences were.
I couldn’t get my cookies to look as nice as I wanted them to; the icing was either too thick and dry, or too runny and hard to control. The designs didn’t look as neat and pretty as I had hoped.

Well, after poring over every cookie decorating book I could find, taking a cookie decorating class at the Bonnie Gordon College of Confectionary Arts, and after much experimentation and practice, I (eventually) found tried and true tricks and tips to make the cookie decorating experience easier.

Today, besides showing you how I made this charming wintry fella, I’m going to be showing you one of my absolute favorite keys to cookie decorating success – a necessary basic: How to figure out the right royal icing consistency.
For those of you who like video, here’s a demonstration of how to find the consistency – The 10 Second Rule:
Click HERE if you can’t see the video.
*

For those of you who like written break-downs:
*
Royal Icing Consistency
To test consistency, you’ll need a butter knife and your royal icing.
I’ll be showing you how to make the icing in another video; for now you can find the recipe here in my cookie decorating tutorial.
*
The 10 Second Rule
To check the consistency, all you need to do is drag the tip of a butter knife through the surface of your icing, letting the knife go approximately an inch deep, and slowly count to 10.
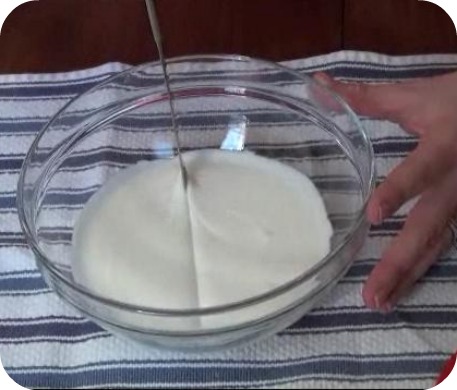
If the surface of the icing smoothes over in approximately 10 seconds then your icing is ready to use. If it takes longer, the icing is too thick. Slowly add more water.
If your icing surface smoothes over in less than 5-10 seconds, it is too runny. Mix your icing longer or slowly add more sifted icing sugar to thicken it.
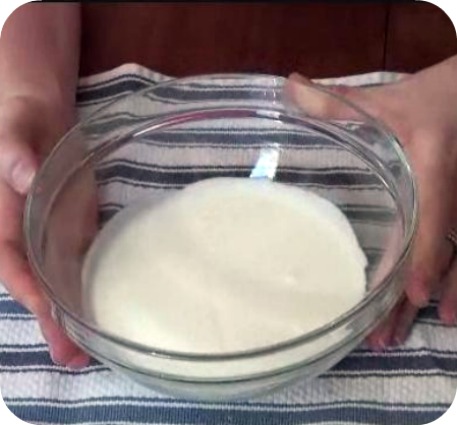
You don’t want the icing to be too thick so that it doesn’t flood, or too thin so that it’s too runny and hard to control.
I should mention that this is what works for me; my preference is that the surface of the icing smoothes over at about the 10 second mark. I like it at this consistency (a bit thick), because the icing holds its shape and doesn’t run too quickly out of the piping bag.
With this thicker icing I can outline and fill in right away; you just have to shake the cookie a bit to help the icing settle. You can see how I do it in this video on marbling royal icing HERE.
If the icing is runnier, you don’t have to shake the cookie because the icing flows easier. I used to do it this way, (prepare two consistencies of icing; one for outlining, and one for filling in). Again, flooding is definitely easier, but I prefer not to have to set up two icings.
{In the video, I normally don’t use a runnier icing like the green example; I was demonstrating the difference between an icing that smoothes over in 5 seconds, and an icing that smoothes over in 10 seconds}.
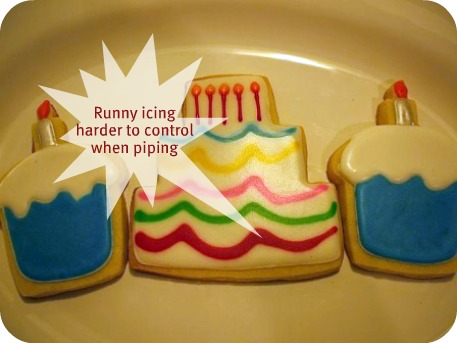
For an example of icing which is a bit too runny for piping details, take a look at the swags of this birthday cake cookie I made when I first began decorating. The lines were harder to control when I piped the icing.
What I’ve shown you today may seem like such a simple thing, but it made a huge difference in my own cookie decorating. It can really help alleviate frustration and improve the overall look of the cookie.
And an update (this has been added in later), I now have an in-depth PDF and Digital Download Video on Royal Icing Consistencies for cookie decorating. You can find it in my shop, here.
Now a little bit about Frosty the Snowman:

This little guy isn’t a cookie; he’s made just of royal icing.
Royal icing decorations, also known as runouts, flood work, transfers, color flow (by Wilton), or run sugar, are basically the piping of a runny royal icing onto parchment paper or acetate paper (sometimes into an outlined shape).
When the shape dries, you have an icing design which you can use for a multitude of decorating purposes; on cakes, cookies, gingerbread houses, cupcakes etc.

In this case I needed him for an 8″ round cake. As soon as I saw him on these adorable mugs (bought at the end of last winter at Canadian Tire), I knew I wanted to make an edible version of him.
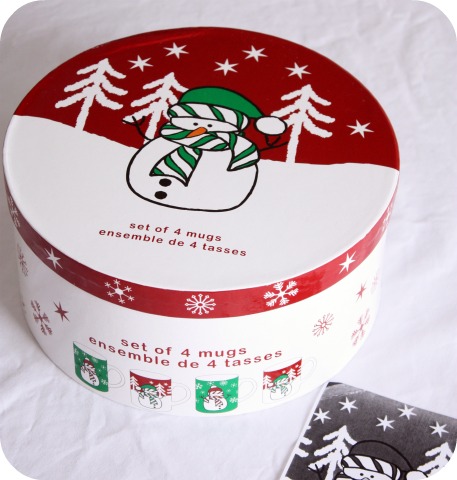
I actually made the first runout of him before Christmas and have been meaning to get to this post since! Just managed to squeeze him in before spring. 😉

*
How to Make Royal Icing Runouts/Floodwork
If you’d like to try making royal icing runouts, you’ll need:
- Royal Icing Recipe
- Icing Gel Colors
- Acetate Paper or Parchment Paper
- Shortening
- Piping Tip (I generally use tip #2)
- Piping Bag
- Coupler
Basic Steps:
- Shortening on acetate paper or parchment paper
- Pipe design by tracing or using KopyKake projector (Can do outline first and let dry)
- Fill or flood design
- Let dry for a minimum of 24 hours
- Gently peel off backing
- Attach with more royal icing

For detailed steps on making runouts click HERE, HERE or HERE.

*
Getting icing consistency right is really one of the major keys to making your cookie decorating experience a fun one. Once you’ve got a good icing basis everything else becomes easier.
If you enjoyed today’s tips please leave me a comment below and let me know what you thought or if you have any questions.
xo,
Marian
p.s. In the last video on Marbling Royal Icing I asked what you’d like to see in the next video. Thank you for your comments!
*
p.s.s. Please let me know in the comment section below on facebook or twitter, what you’d like to see in the next video. Happy decorating!


@ Janis Spear: When the icing is in a stand mixer, (rather than hand mixing… the stand mixer is more powerful), the more/longer you mix it, the thicker the icing gets. Then, to thin it out, you have to add more water.
Even if you mixed by hand, the mixing action doesn’t seem to affect drying time. A few things which will (affect drying time):
1) The moisture in the air/humidity of the environment you’re working in
2) Adding corn syrup, glycerine or a large amount of food gel coloring would make the icing take a long time to dry.
Are you working in a humid environment?
There’s a post you might want to read if you are:
https://sweetopia.net/2011/07/how-to-avoid-spots-on-icing/
Hope that helps!
xo
@ marian:
Hi Marian. Thanks for your help – I am going to have to keep experimenting.
I love the new look on your site – fantastic! I love the inspiration and all your ideas and recipes.
Have a good week.
Janis
xxx
I loved watching your videos. Tomorrow will be the beginning of my cookie decorating with royal icing, but thanks to you ~I think I can~ I think I can~ My granddaughter is having a birthday tea party I hope to have some wonderful cookies for the girls 🙂
Where in South Africa can I buy Meringue Powder because I need it to make Hand Moulded Tee and Coffee sugars. Is there probably a substitute that I can use that will have the same effect as Meringue Powder. Very very difficult to get it in South Africa.
Can you probably help me…. it is urgent. I need to made the little sugars as gifts for a wedding!!
Kind regards
Rina Burger
@ Rina: I’m so sorry, I really don’t know where you could buy it in South Africa, but in terms of a substitute, you could just make royal icing with egg whites instead! Martha Stewart has a good one on her site.
Hope that helps!
Thanks for a great tutorial. I am going to make Halloween cookies with your recipe and tips. Holly, Michigan
Luv the tuts and Luv the video’s cannot wait to see more !!!! 🙂
I learned some interesting things on your site, try to make the snowman but the edge is I mix black with white and desvanesido stay, how do I correct it?
mary wrote:
Hi @ mary: I tried using Google translate to figure out what the word ‘desvanesido’ means, and there was no translation available. Is there another way of describing your question please?
thank you for showing the icing a snowman on the cookie, I found it very interesting, will keep popping by, Gill, x
I think I will be learning a lot from you, I have only just started to do cakes & things like on facebook, so have plenty to learn, Gill,
Can I make the decoration in RI and then transfer to a buttercream frosted cake?
I like the snowman and would like to use it but if you copied it from an item you bought, isn’t there a potential problem with copyright laws. I was told this in cake decorating class… Bea
@ Bea: If you’re selling you’re product, yes there are copyright infringement issues. If you’re a home baker and not selling what you make, it’s fine to use any images you chose. For myself, I’m not selling any of the items and give credit to the source when I post on the internet.
Hope that helps!
@ gill gillard: sweet thanks!
@ Thamara: Yes, you can, absolutely! There are a few things to note though:
a) Put your RI transfer onto the buttercream at the last minute. The RI can soak up the grease in the buttercream
b) You need to make extra transfers as they can easily break.
Here’s a post where I made RI transfers for cupcakes with a bit more info:
https://sweetopia.net/2011/01/how-do-you-store-royal-icing-and-how-long-can-you-keep-it/
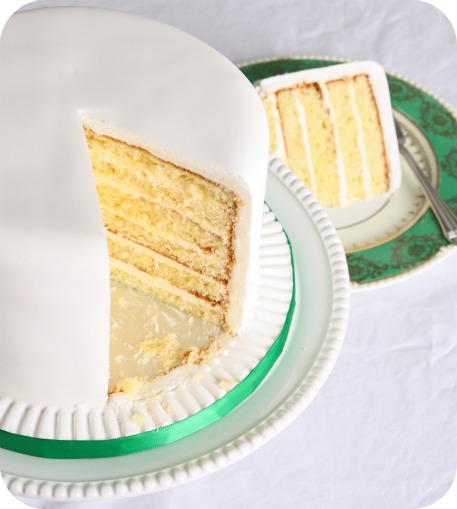
would looove to know how you iced the actual cake, and what recipe you used. how in the world did it come out so beautifully smooth and the ruffles on the bottom, is that more frosting or the plate itself? I have a holiday dinner and would love to impress with a pretty, delicious and smooth finished cake – thanks!
@ dawn: Icing the cake – takes a bit of explanation and i’ll probably have to do a video (some day haha), but you can check out cake central.com They have many informative tutorials to help you out. Another amazing site is mycakeschool.com
The ruffles on the bottom is just fondant all the way around, and using a cake tool (straight edge) or skewer, just press into the fondant at regular intervals.
Thanks so much for the 10 second tutorial. In the past I’ve had problems figuring out when the icing is the right consistency. Your tips will help the next time I’m decorating cookies.
Marian,
I have a question about adding black to white (or other light color) while the icings are still wet…to get the melted into each other look. I did the outline and let it dry and didn’t have bleeding troubles but, I wanted to get a leopard print effect on the cookie and the black is bleeding into the white/cream color. I was hoping that because they were the same consistency and drying together that maybe the black wouldn’t bleed. Any suggestions? I was really hoping for a nice smooth finish and was hoping to NOT add the spots on top of the white.
Thanks,
Tricia
Absolutely @ Tricia: Try making white a bit thicker of a consistency of the black, that way they will still ‘meld’ but since the white is thicker it won’t let the black bleed (as much?) into it. Also make sure the white is actually tinted white. Hope that helps! Let me know how it goes if you don’t mind please. =)
How did you get the icing off of the transparency sheet?
Hi @ cookiegirl11:
I peel the transparency away from the transfer, and not vice versa. Very gently and sometimes at the edge of a table helps. One of my youtube videos – daisy cookie I think – shows the making of a transfer from beginning to end, including taking it off the sheet. Hope that helps!
how can I avoid dips in the RI after it has dried?
How do I avoid dips in The RI after it has dried?
Hi @ giovanna G.: Try filling in the center of the cookie more, you may be adding more to the sides as you flood your cookie.
Hi Marian, just want to send a HUGE thank you your way for sharing the 10-second rule. I had to decorate 3 dozen alphabet cookies for a friend yesterday and I was really dreading it because I’ve always been frustrated with the consistency of my RI but your ‘rule’ took all the guess work out of it. I used the Classic RI recipe because we don’t get meringue powder where I live and it worked perfectly. I enjoyed RI decorating like I’ve never done before. Also followed your advice on how to pipe lines and it worked out great. Thank you so much for all the good work you’re doing here. I’ll be checking back often. Oh and your cookies are out of this world amazing.
Hi @ Marylou Andrew: A HUGE thank you to you for all your lovely comments – I appreciate it! xo
Hi,
Thanks so much for posting your hints! I have looked at a number of sites and am trying to figure out how to make my cookies look the way I want them to. I know you are supposed to pipe the cookies and then flood them- I use the same consistency for both. My problem is that when I pipe and then flood in two separate steps, the outline is distinct from the flooded part of the cookie. I’m not sure if I’m being clear, but I don’t want there to be a separation between piping and flooding when the cookie is set. I tried a small cookie and combined the piping and flooding into one step and it came out the way I want- I’m just worried this may come back to bite me if I’m doing larger cookies or a large number of cookies. Can you help?? That’s assuming you understand my question
HI @ Lauren: Yes, I think I understand. I think what may help is a larger tip for larger cookies, (#3-5, depending on the size of the cookie, you have to play around with what works for you), of course speed (with practice), and shaking the cookie a bit to help the icing ‘meld’ after you’ve flooded the entire surface.
The Eiffel Tower cookie I made a while back was quite large, and there’s a video showing the flooding if you’d like to take a look:
http://www.youtube.com/watch?v=pzg4VwOe8Dg&context=C31578feADOEgsToPDskJPXcoy1-ixEtW1WIWcCn6Y
All the best!
xo
@ marian:
Fantastic! Thanks so much. That video was perfect. Amazing cookies, by the way!!
Hi Marian
Thank you for the info regarding the icing sugar, it was very helpful
I want to know more about the cofee cake projector
If i draw the snow man or something else by hand i will do a bad job, i am assuming that by usung the cofee cake transfer will make a nice and tidy figures or designs, could you please tell me more about it?
It will be great if you could respond direct to my email
Thank you
S
@ Janis Spear:
I came across this post and I wanted to comment since I had the same problem–I had made a bunch of cookies one night and the next day they were still tacky. This was the first time I had worked with RI. I tried using raw egg white and it worked but I was still determined to work with meringue powder. I use a Kitchen Aid and I remembered that the instructions said something about a stand mixer vs. a hand mixer. That may have been my issue b/c I remember beating it on a higher speed, and since I changed that, and beat the RI on a low speed (the lowest really) for about 5 min., I haven’t had a problem! So judging from that, it could be that beating too much could cause the RI to stay tacky. Hope this helps!
Hi @ s: I’ve sent you an email linking to my kopykake projector tutorial. =)
@ Debbie:Thanks so much for sharing! xo
hi,
this is seriously the best site ever!!! i havnt received so many hints or tips frm a single post ever before…the way ur links pop up just when u need them 😀 thank you soooo mch!!! i hav learned sooo mch today!!! loads of blessings ur way…<3
Thanks for the shaking the cookie to smooth the icing. I have been frustrated trying to fill the cookie and then trying to get it smooth.
WOW, you are amazing, makes me want to try working with royal icing again! Thank you for the great tips.
for beginners like me, i am eager to try your cookie with the royal icing, love your work very clean and inspiring
I just tried your royal icing, and I think that I’m in love! Thank you so much for sharing!!
Sarah, Toronto ON