

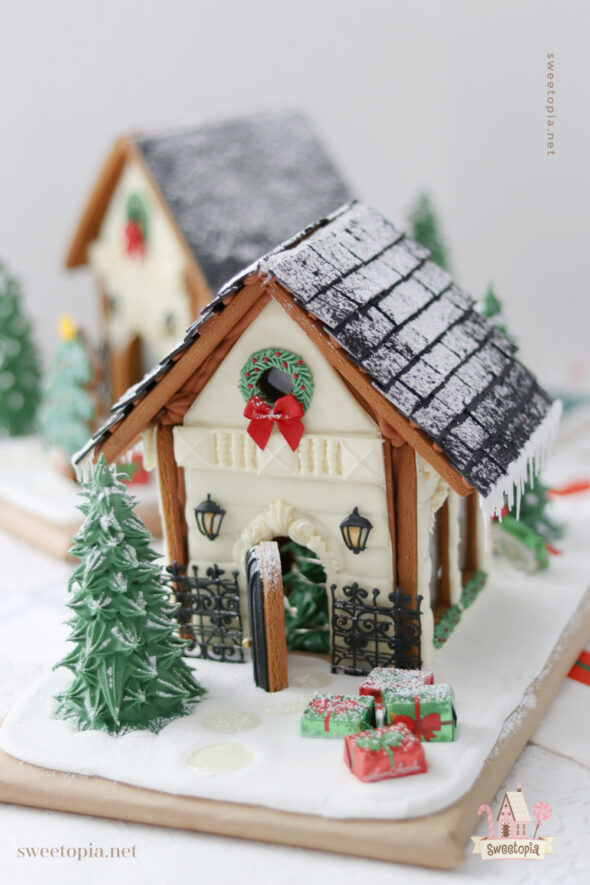
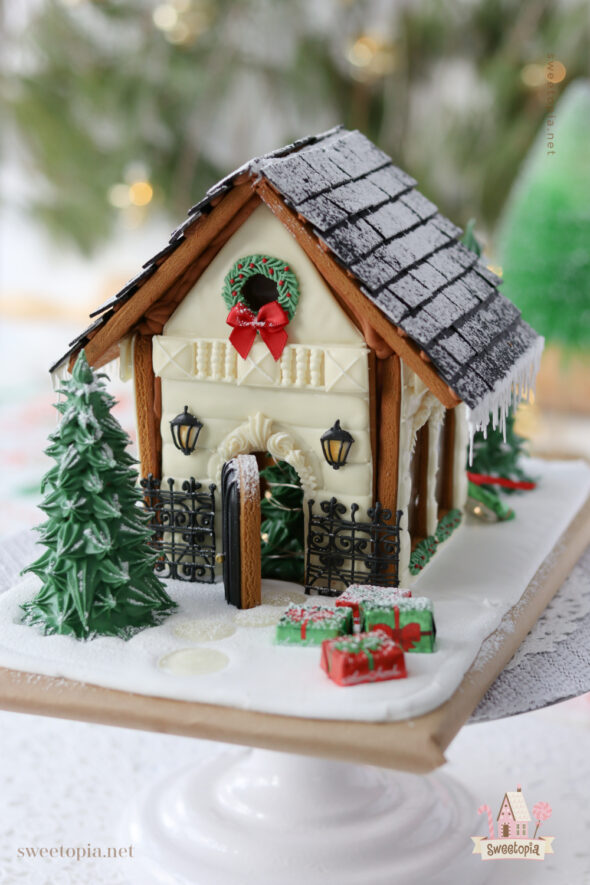
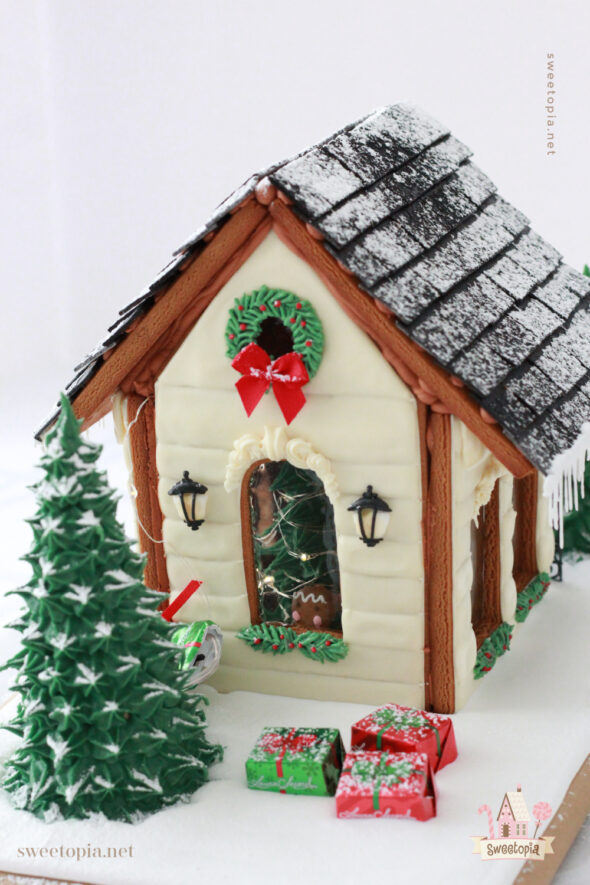
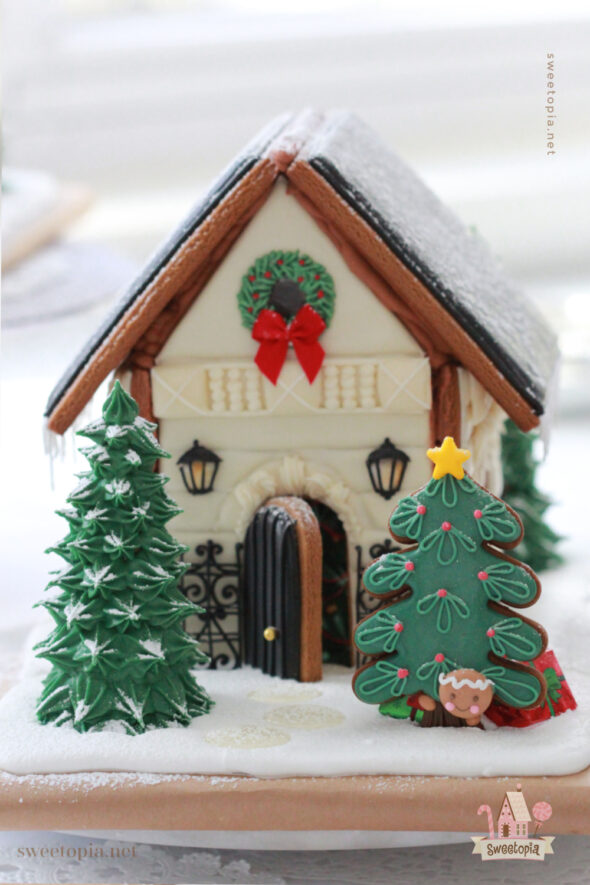
This year’s house is a bit of a departure from my usual pastel color scheme and whimsical style. I’m not exactly sure what style this would be, it is still definitely whimsical, but with a tiny bit of influence from Parisian Haussmann style apartments and French row house architecture. The color scheme and wrought iron details are also somewhat inspired by Henry’s townhouse in the UK.
My main inspiration which led me to begin looking into the latter mentioned architecture was an extremely talented cookie artist I stumbled across on YouTube, YuYu of YuYuCakes. Such lovely and detailed work! I was also inspired by her camera angles and decor, so have experimented a bit in this video with slowing things down and including extreme close-ups. Let me know if you like it (or not), or if you have any ideas and suggestions.
Ok, so without further ado, onto the video and tutorial!
Gingerbread House Video
If you can’t see the video, click HERE.

Gingerbread and Icing Recipe & Template
You can find my gingerbread cookie recipe here and a video on how I make my gingerbread house royal icing here. (Recipe included there as well).
Printable Gingerbread House Template
HERE is the printable gingerbread house template with the flood work details.
Here is the simpler template (minus the design details), to cut the gingerbread house pieces out, along with a video on assembling the gingerbread house.
Assembling the House Pieces
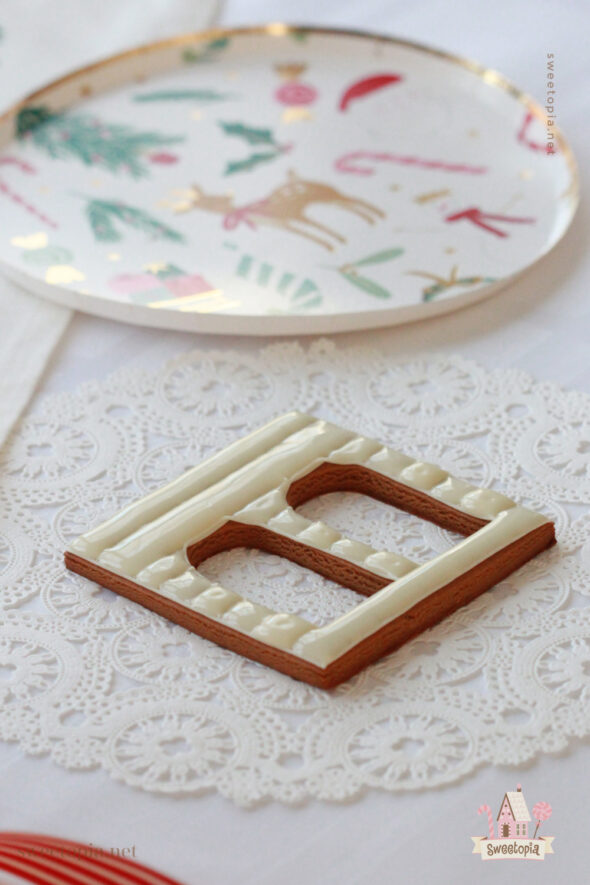
If you want to have detailed designs or flood work on the house, I recommend decorating the walls before assembly.
HERE IS THE VIDEO POST on assembling a gingerbread house.
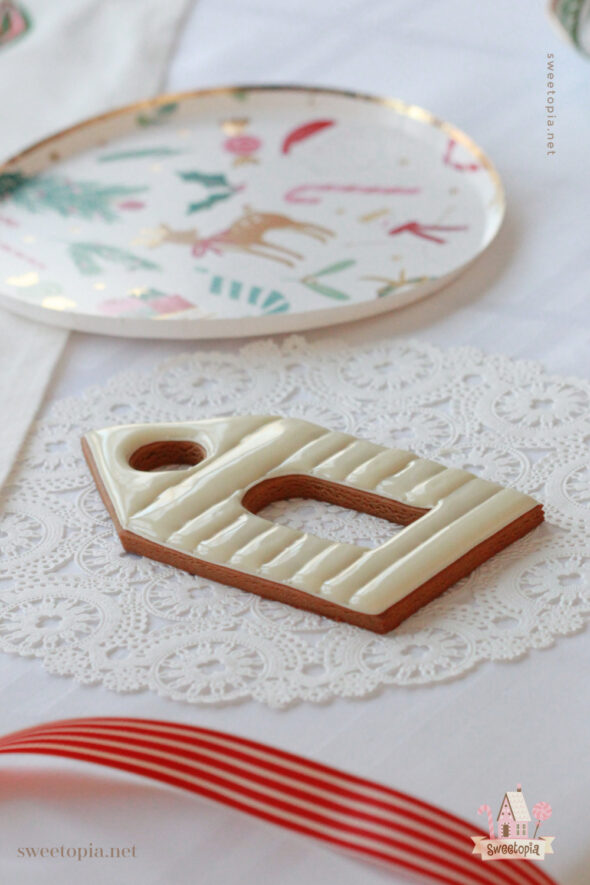
Decorating the Walls – Flooding Pieces
Again, if you want to have detailed designs or flood work on the house, I recommend decorating the walls before assembly.
Cookie Decorating Basics
Here are some posts which take you through cookie decorating basics:
{Video} Cookie Decorating Tools & How to Fill a Piping Bag
{Video} How to Outline and Flood Cookies with Royal Icing
{Video} How to Dry Cookies Decorated with Royal Icing
Royal Icing
You can find my favorite cookie decorating royal icing recipe here. The consistency of icing is key for easy decorating. Click here to see a YouTube video on finding the right icing thickness.
Complete Guide to Royal Icing PDF
You can also find my Complete Guide to Royal Icing Consistency here.
Decorating Items
Basics of what you’ll need (These are Amazon affiliate links):
- Piping Tips – PME #1.5, PME tip 2.5, #32 Wilton
- Piping Bags
- Couplers
- Americolor Gel Colors
- Scribe Tool or Toothpicks
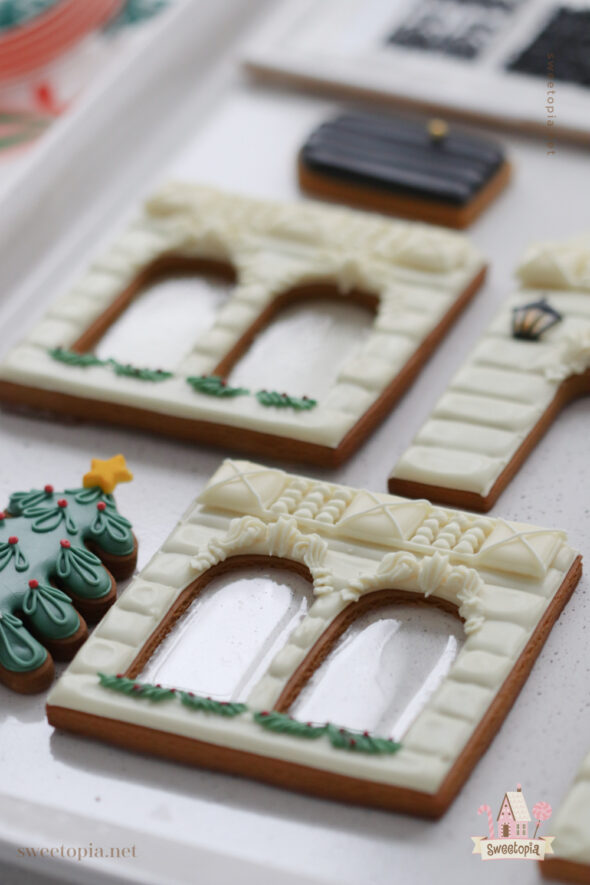
Sugar Work – Royal Icing Transfers – Wrought Iron Fences, Gingerbread Men, Wreath & House Cornices/Details
The sugar work of the house (gingerbread men, wreath, lamps, cornice, wrought iron fence), need to be done at least a few days in advance. If you have a dehydrator you won’t need as much time to let them dry.
HERE is the printable gingerbread house template with the flood work details.
For a post of the basics on how to do royal icing flood work, click HERE.
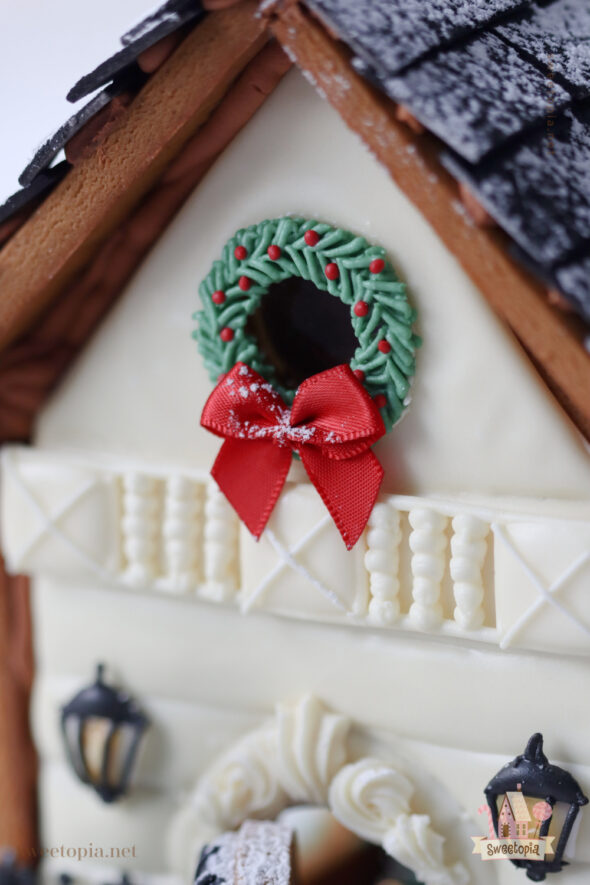
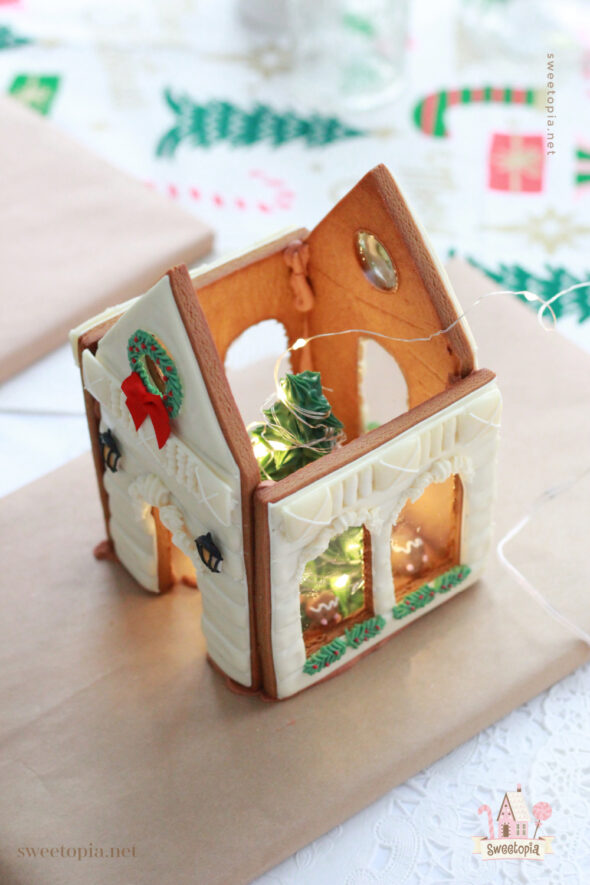
Wreath
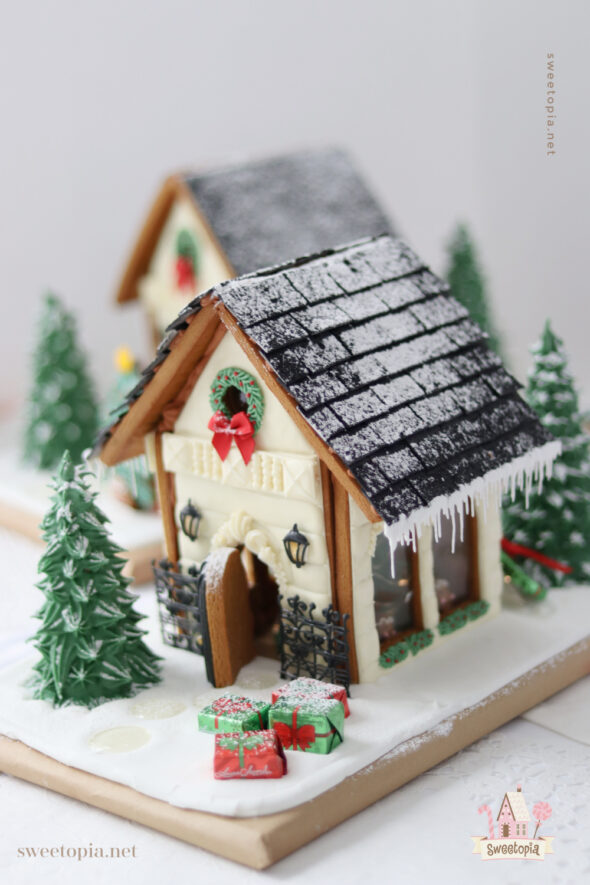
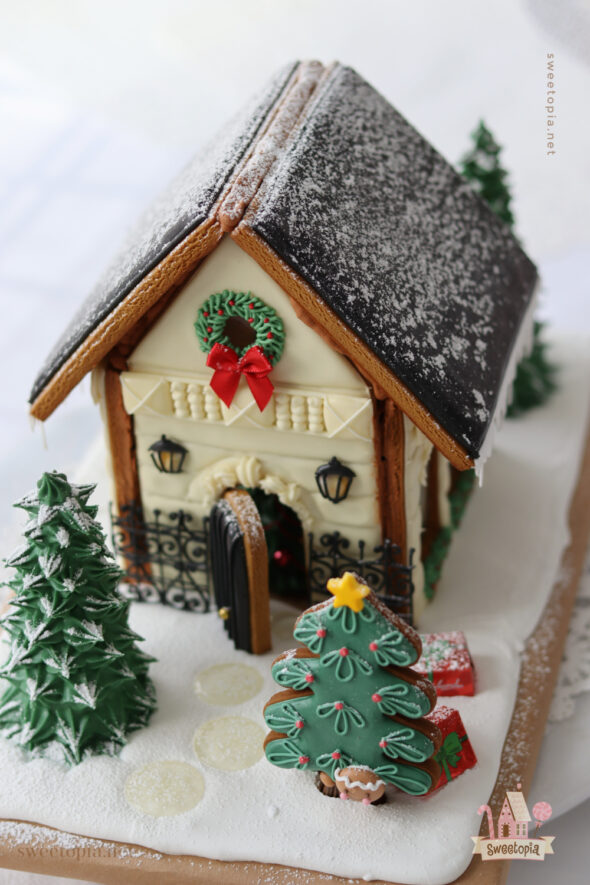
The green base is a royal icing transfer, thick green icing. You could make an icing bow, but in my case I used real ribbon. I used red cloth ribbon bows, adhered with a small dab of thick icing.
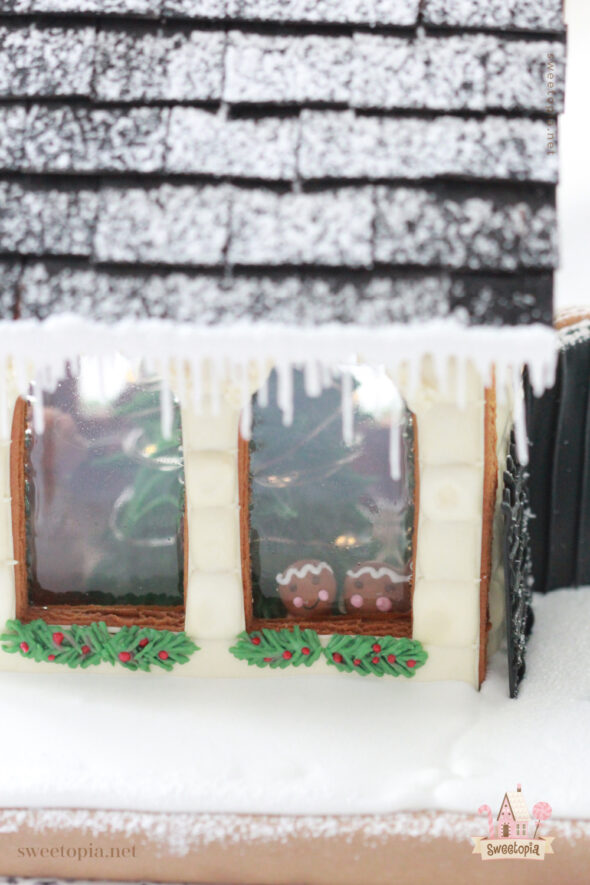
Gingerbread Men
Pipe a dollop of brown icing, circular shape, any size you wish. Let that dry and then use a black edible ink pen to pipe the mouth, then pink and dark brown icing for the cheeks and eyes.

Once the head has dried, adhere a short piece of toothpick to the back with thick brown icing.
Once that has dried you are ready to attach them to the gingerbread house with thick brown icing.
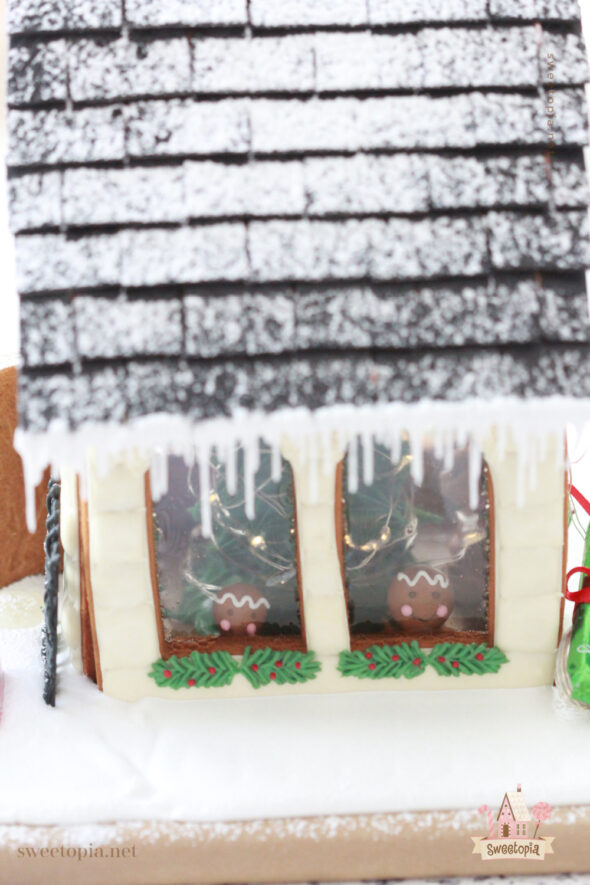
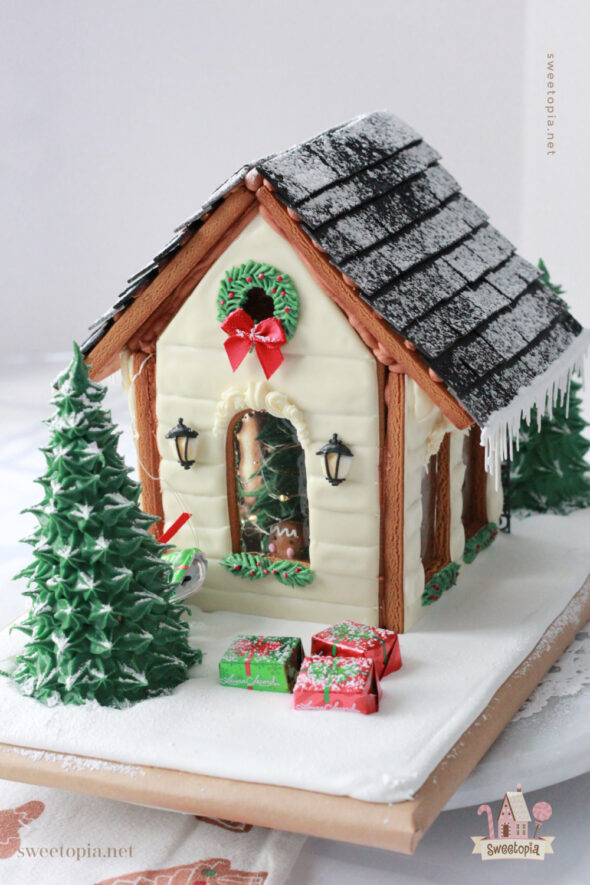
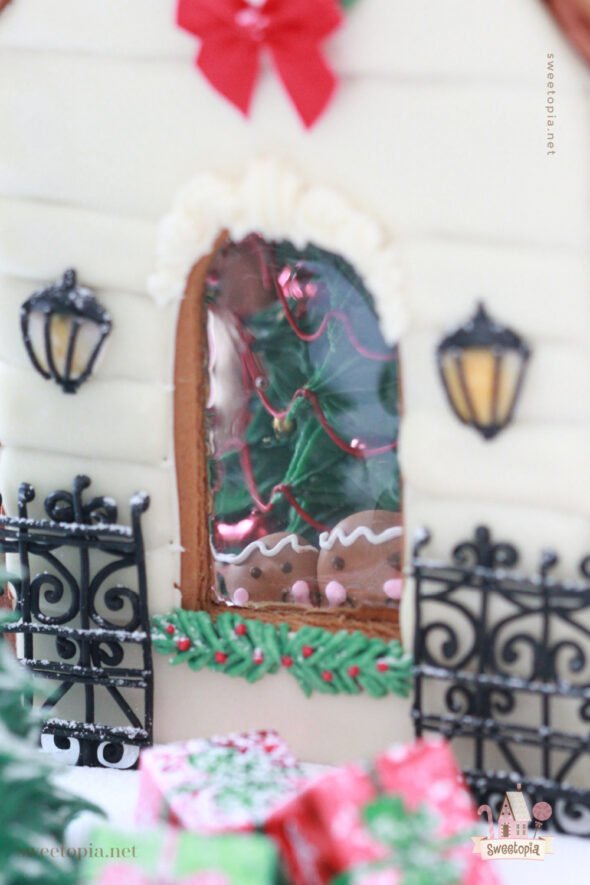
Candy Glass Windows
The windows are made of melted isomalt powder. Isomalt is a sugar substitute, a type of sugar alcohol used primarily for its sugar-like physical properties. It has little to no impact on blood sugar levels. Although it’s much better for your insulin levels, I should warn you that it may cause flatulence, so in such large quantities that I use for the windows, care should be taken to tell your gingerbread house recipients what the windows are made of. It is gorgeous though, and makes such beautiful, clear, candy “glass”.
To make the glass windows, first make sure your pieces of gingerbread are sitting on a stainless steel baking sheet. I melted 1/3 of a cup of isomalt powder at a time, in a glass measuring cup, in the microwave for 3 minutes. I did check it at 2.5 minutes and swirled the glass around to help mix the isomalt powder. Make sure to use oven mitts, the glass gets extremely hot! Another note to mention, I found that the powder melted more evenly in a larger glass measuring cup – my favorite was the 2 cup glass measuring cup.
Once the powder is mostly melted, swirl the glass around until the bubbles subside (about 15 seconds or so), and then pour into your window openings. The isomalt only takes minutes to completely harden.
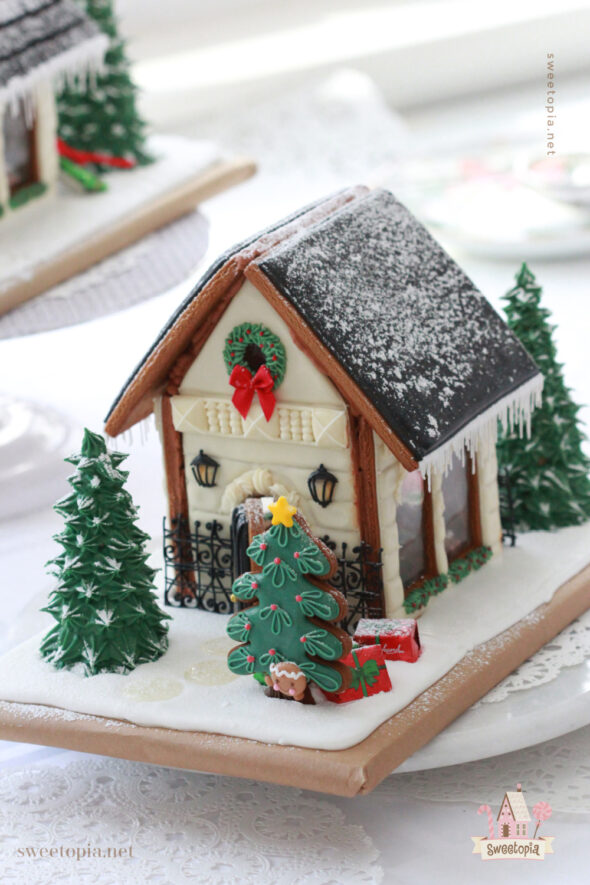
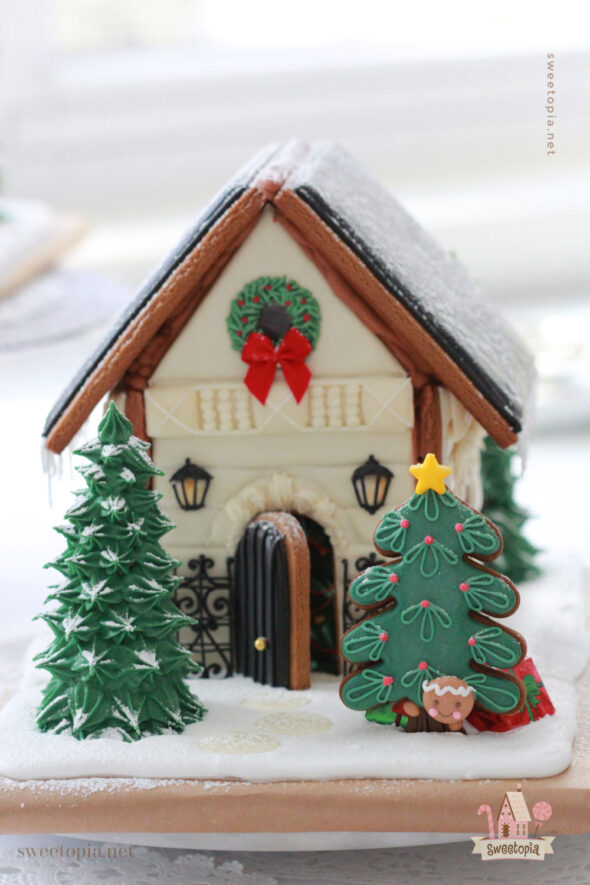
Trees
The trees are made using ice cream cones, piping tip #32 and thick/stiff green royal icing.
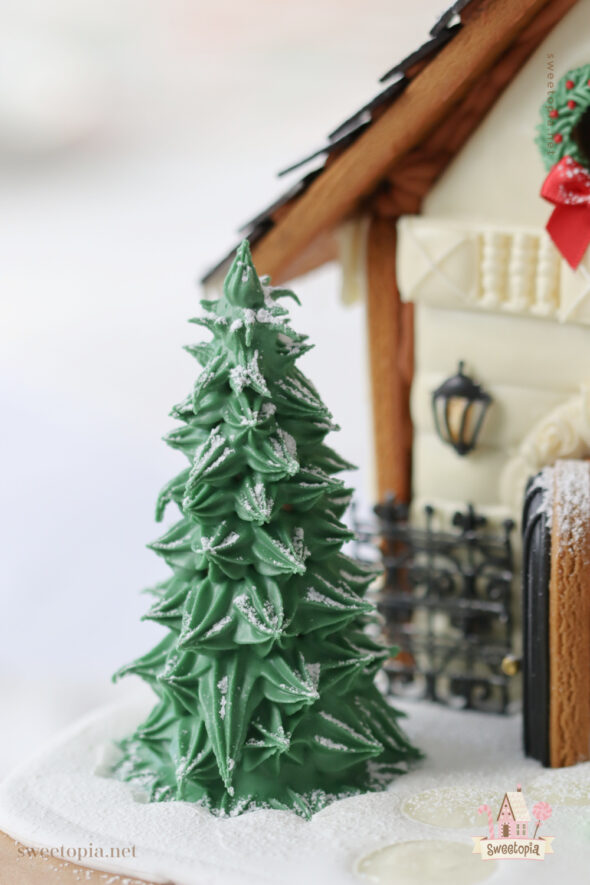
Start from the bottom and work your way up, piping “branches” of icing. Using a mini cookie turntable helps.

If you’re adding decorations, such as sprinkles or dragées, add them while the icing is wet. If you’re piping the swag, make sure your icing is a thick consistency.
Christmas Tree Cookie with Peeking Gingerbread Man
Here is a video tutorial including how to decorate the Christmas tree with the “peeking” gingerbread man.
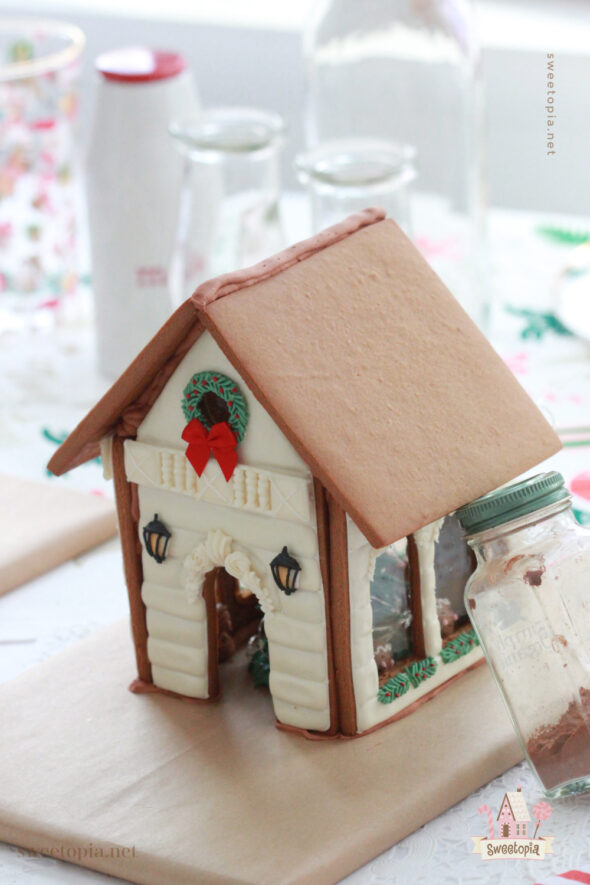
Assembling the Gingerbread House
First off I should mention that instead of the usual white icing I use, I decided to try and have the icing blend in with the gingerbread more, so colored it to match the cookie. I used gel colors Rainbow Pro Gel Chestnut and Sugarflair Honey Gold mixed together.
Again, if you want to have detailed designs or flood work on the house, I recommend decorating the walls before assembly.
HERE IS THE VIDEO POST on assembling a gingerbread house.
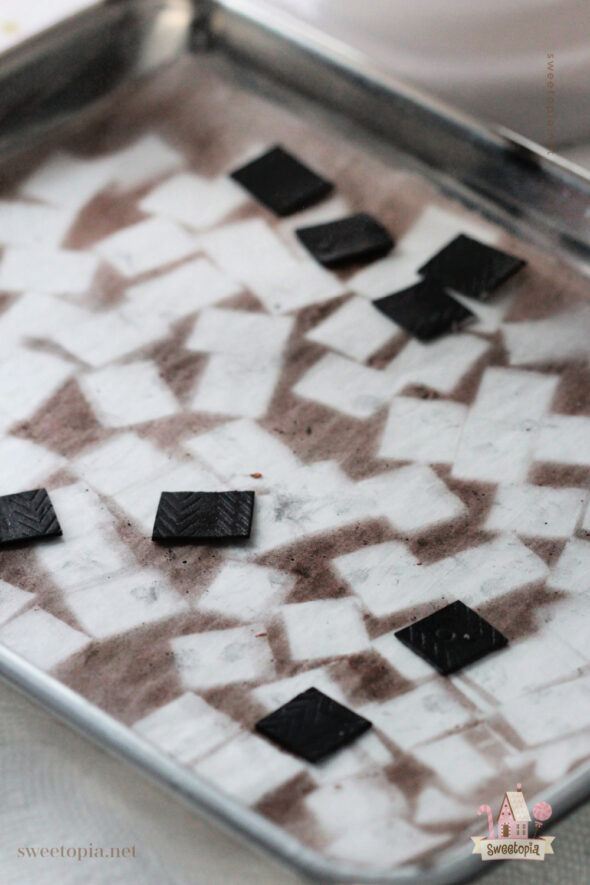
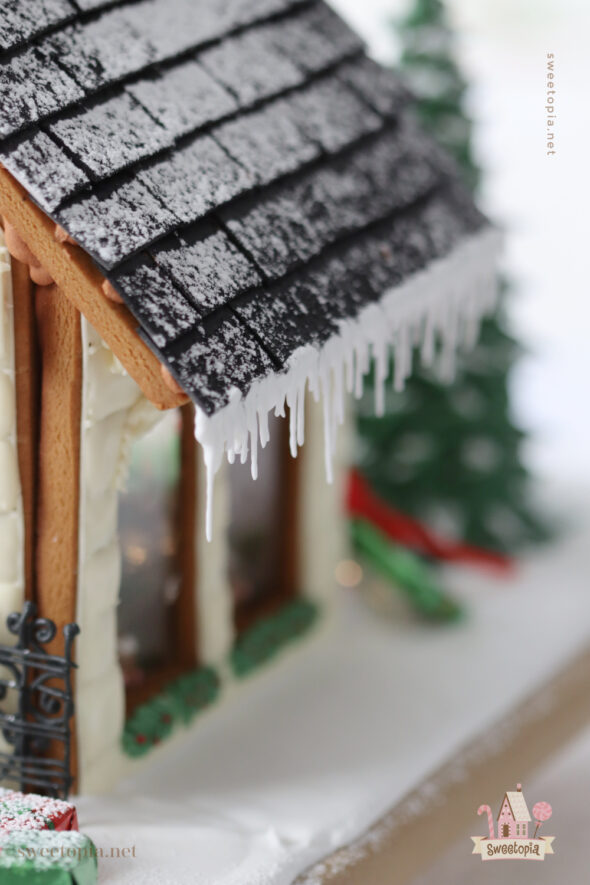
Roof Shingles
The roof shingles are pieces of Black Jack gum, which look like grey pieces of Wrigley’s spearmint gum. I was going to make the roof grey, just like the gum, but decided the house needed a bit more contrast, so airbrushed the pieces black after I had cut them.
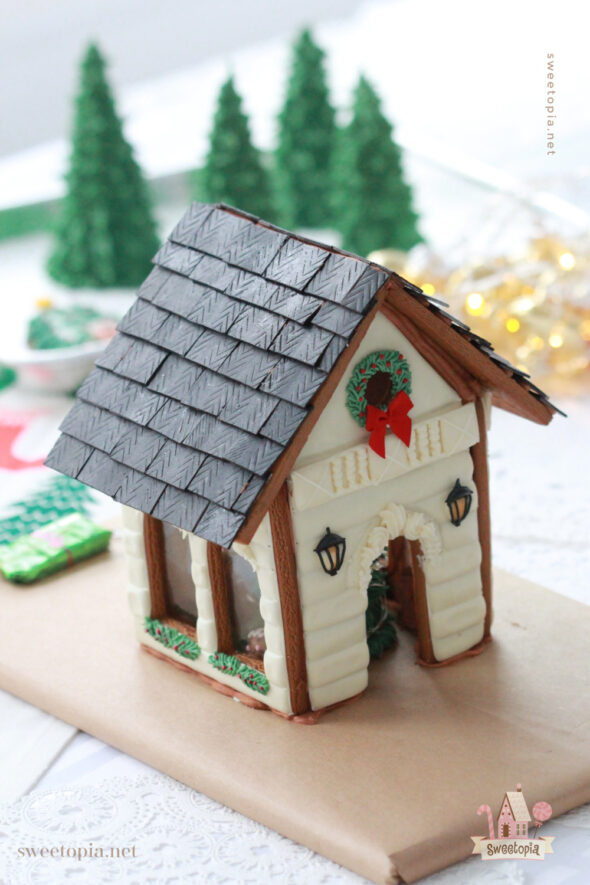
The gum is easy to cut with scissors, which I did if I needed to trim the shingles to fit, but initially I cut each piece of gum into thirds, using an exacto knife and cutting mat.
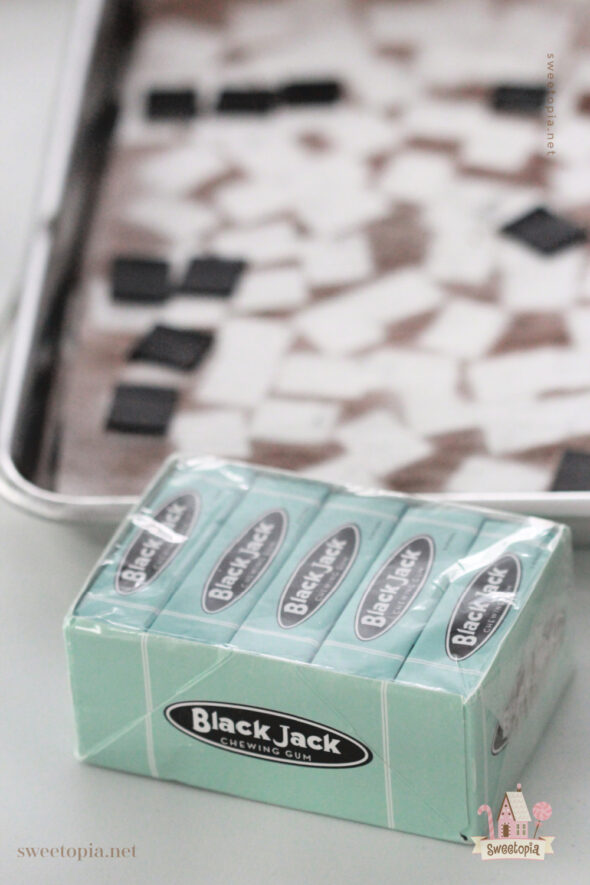
I bought two boxes just in case, but only needed about two thirds of one box. One thing I did notice, is that the moisture from the the gum did not allow the airbrush spray to dry easily. I sprayed them about a week ago now, and they’re still slightly wet to the touch! I therefore wore gloves to assemble and would recommend telling your gingerbread house recipients that the shingles might not be the best gum to chew! I’m sure their tongue would turn black for a time, at the very least!
If you can’t find the Black Jack gum, you could just as easily buy the readily available Wrigley’s gum and airbrush it or dust with luster dust. You could also make the roof shingles with fondant, as in this gingerbread house I made a few years back.
I should note that I added the shingles once the roof had been adhered and dried. I like to have the least amount of weight possible on the roof when attaching to the base of the gingerbread house.
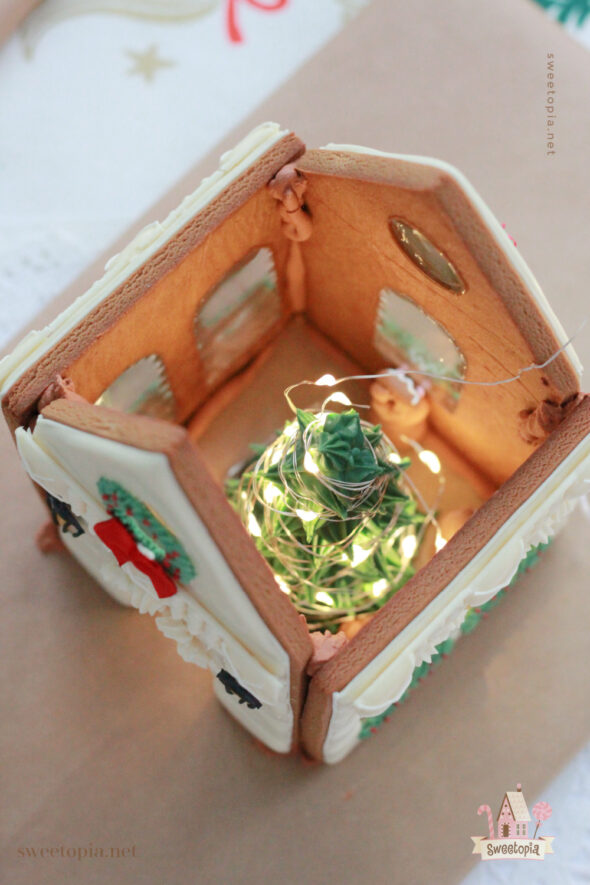
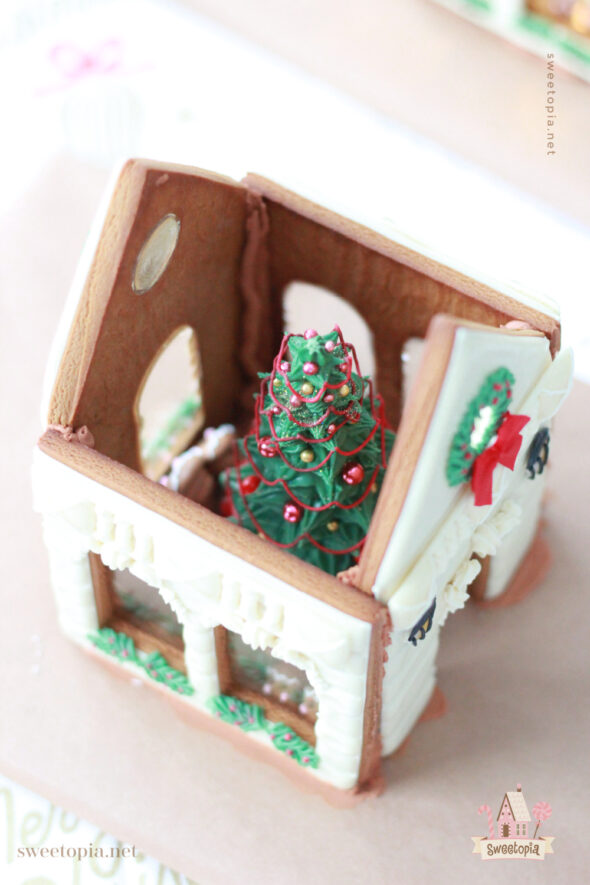
Lighting the Gingerbread House
To light one of the gingerbread houses, I wrapped fairy lights around the ice cream cone Christmas tree and let the battery end of the string hang out the back of the house, before attaching the roof.
I tried a battery operated tea light as well, but preferred the fairy lights. If you go with the tea light, make sure you have a hole in your base, where the tea light will sit. That way you can change the batteries if need be.

To disguise the battery pack, I wrapped it in (Thank you to my friends Mary-Lou and Jo-Ann for the idea!) a wrapper from chocolate squares that look like little gifts and secured it with small ribbon.

I can’t find the chocolates online, but you could wrap it in any wrapping paper.
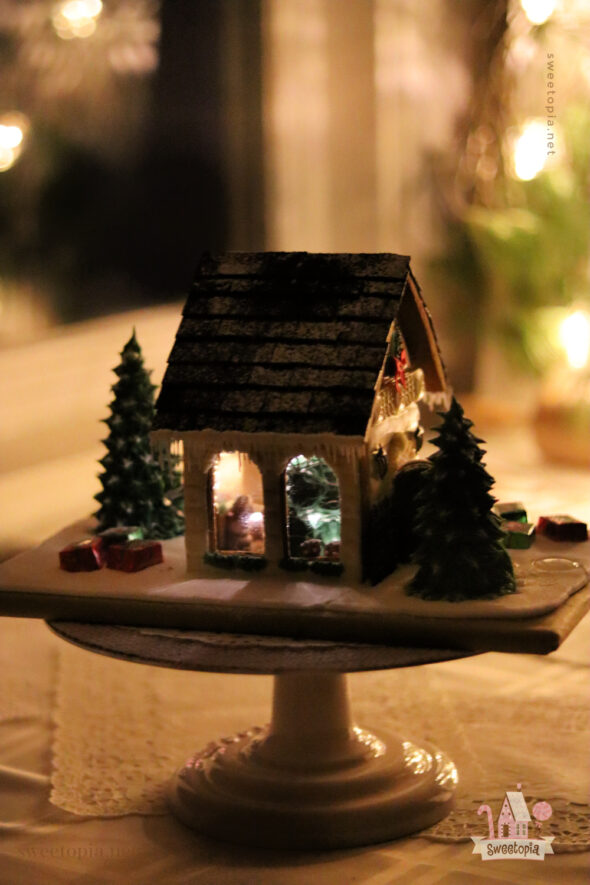
Chocolate Gift Boxes
What a lovely find at Bulk Barn! They have these little chocolates that look like gift boxes, perfect for decorating any gingerbread house with. I couldn’t find them online, but, I phoned Bulk Barn, and the official name of the chocolates are Laura Secord Chocolate Squares Premium Wrapped Gift.

Icicles
To pipe the icicles, use tip #1.5 and thick white icing. Pipe downwards, almost like you were piping a line on a flat surface, then let go of the piping bag pressure and pull away.
Rotating Display
I thought it would be fun to have a rotating display to see all sides of the house. (Especially the peeking gingerbread men!). I found mine on Amazon HERE.
Are you making a gingerbread house this year? I’d love to hear about your gingerbread house experiences, or would love to see pics of your houses too, if you’d like to share links in the comment section below, or on Facebook etc.! You can find me on Facebook, Instagram, Pinterest, Twitter and YouTube.
Have fun baking and decorating!
xo,
Marian


This is just stunning! I just love your work! Merry Christmas to you and yours!
Thank you so much Dawn! The same to you and yours, and of course, Happy New Year!
Really cute house and I love the detail in frosting. But royal icing makes the gingerbread inedible. Have you ever tried it with white chocolate?
It looks perfect as is and would be the perfect Christmas decoration but I think chocolate (any kind) would taste better. Just me, I guess
Hi Mary,
Lovely idea, I haven’t tried it with chocolate, but I think I remember seeing Martha Stewart do that somewhere. Would be yummy!
How do you make the cuts even. Mne is a bit crooked after being baked and if you stand the pieces together, sone are curved.
Hi Divina,
You can use a rasp zester. I have it pictured on the bottom of this post; https://sweetopia.net/2011/07/how-to-make-logo-cookies-fix-cookie-edges-a-giveaway-2/
Your YouTube video can be rewatched endlessly! It’s just magic! You are wizards!
Aww thank you!