

I’ve been decorating cookies for approximately 8 years now, and I still remember how frustrating some of my first cookie decorating experiences were.
I couldn’t get my cookies to look as nice as I wanted them to; the icing was either too thick and dry, or too runny and hard to control. The designs didn’t look as neat and pretty as I had hoped.

Well, after poring over every cookie decorating book I could find, taking a cookie decorating class at the Bonnie Gordon College of Confectionary Arts, and after much experimentation and practice, I (eventually) found tried and true tricks and tips to make the cookie decorating experience easier.

Today, besides showing you how I made this charming wintry fella, I’m going to be showing you one of my absolute favorite keys to cookie decorating success – a necessary basic: How to figure out the right royal icing consistency.
For those of you who like video, here’s a demonstration of how to find the consistency – The 10 Second Rule:
Click HERE if you can’t see the video.
*

For those of you who like written break-downs:
*
Royal Icing Consistency
To test consistency, you’ll need a butter knife and your royal icing.
I’ll be showing you how to make the icing in another video; for now you can find the recipe here in my cookie decorating tutorial.
*
The 10 Second Rule
To check the consistency, all you need to do is drag the tip of a butter knife through the surface of your icing, letting the knife go approximately an inch deep, and slowly count to 10.
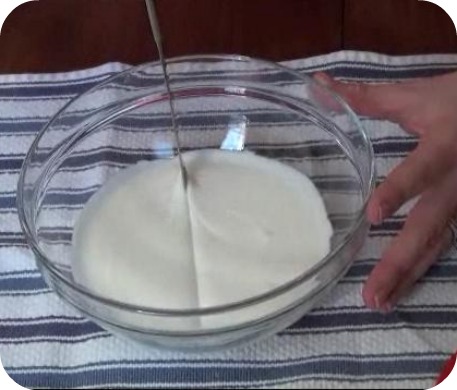
If the surface of the icing smoothes over in approximately 10 seconds then your icing is ready to use. If it takes longer, the icing is too thick. Slowly add more water.
If your icing surface smoothes over in less than 5-10 seconds, it is too runny. Mix your icing longer or slowly add more sifted icing sugar to thicken it.
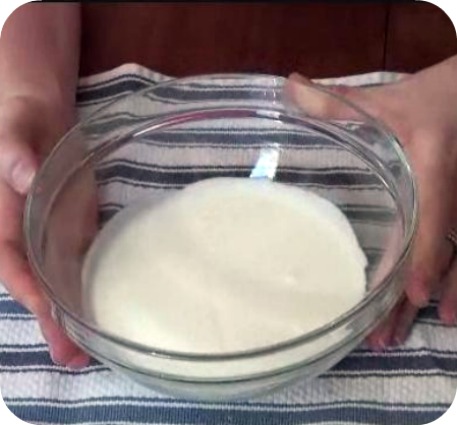
You don’t want the icing to be too thick so that it doesn’t flood, or too thin so that it’s too runny and hard to control.
I should mention that this is what works for me; my preference is that the surface of the icing smoothes over at about the 10 second mark. I like it at this consistency (a bit thick), because the icing holds its shape and doesn’t run too quickly out of the piping bag.
With this thicker icing I can outline and fill in right away; you just have to shake the cookie a bit to help the icing settle. You can see how I do it in this video on marbling royal icing HERE.
If the icing is runnier, you don’t have to shake the cookie because the icing flows easier. I used to do it this way, (prepare two consistencies of icing; one for outlining, and one for filling in). Again, flooding is definitely easier, but I prefer not to have to set up two icings.
{In the video, I normally don’t use a runnier icing like the green example; I was demonstrating the difference between an icing that smoothes over in 5 seconds, and an icing that smoothes over in 10 seconds}.
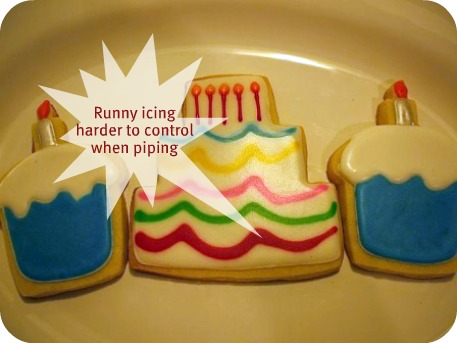
For an example of icing which is a bit too runny for piping details, take a look at the swags of this birthday cake cookie I made when I first began decorating. The lines were harder to control when I piped the icing.
What I’ve shown you today may seem like such a simple thing, but it made a huge difference in my own cookie decorating. It can really help alleviate frustration and improve the overall look of the cookie.
And an update (this has been added in later), I now have an in-depth PDF and Digital Download Video on Royal Icing Consistencies for cookie decorating. You can find it in my shop, here.
Now a little bit about Frosty the Snowman:

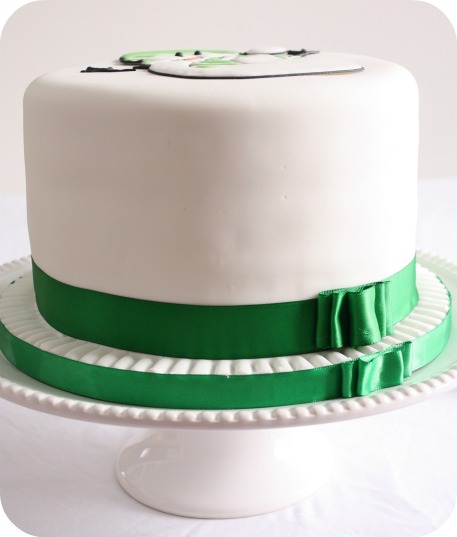
This little guy isn’t a cookie; he’s made just of royal icing.
Royal icing decorations, also known as runouts, flood work, transfers, color flow (by Wilton), or run sugar, are basically the piping of a runny royal icing onto parchment paper or acetate paper (sometimes into an outlined shape).
When the shape dries, you have an icing design which you can use for a multitude of decorating purposes; on cakes, cookies, gingerbread houses, cupcakes etc.

In this case I needed him for an 8″ round cake. As soon as I saw him on these adorable mugs (bought at the end of last winter at Canadian Tire), I knew I wanted to make an edible version of him.
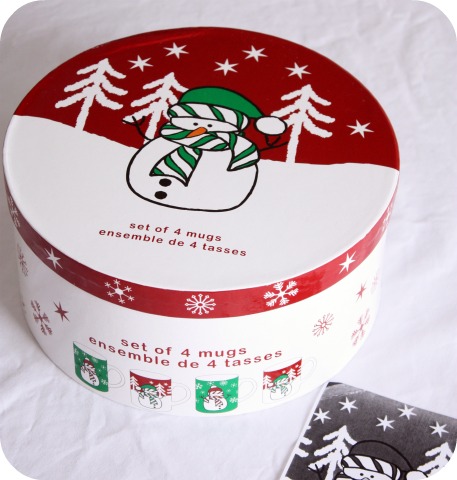
I actually made the first runout of him before Christmas and have been meaning to get to this post since! Just managed to squeeze him in before spring. 😉

*
How to Make Royal Icing Runouts/Floodwork
If you’d like to try making royal icing runouts, you’ll need:
- Royal Icing Recipe
- Icing Gel Colors
- Acetate Paper or Parchment Paper
- Shortening
- Piping Tip (I generally use tip #2)
- Piping Bag
- Coupler
Basic Steps:
- Shortening on acetate paper or parchment paper
- Pipe design by tracing or using KopyKake projector (Can do outline first and let dry)
- Fill or flood design
- Let dry for a minimum of 24 hours
- Gently peel off backing
- Attach with more royal icing

For detailed steps on making runouts click HERE, HERE or HERE.
*
Getting icing consistency right is really one of the major keys to making your cookie decorating experience a fun one. Once you’ve got a good icing basis everything else becomes easier.
If you enjoyed today’s tips please leave me a comment below and let me know what you thought or if you have any questions.
xo,
Marian
p.s. In the last video on Marbling Royal Icing I asked what you’d like to see in the next video. Thank you for your comments!
*
p.s.s. Please let me know in the comment section below on facebook or twitter, what you’d like to see in the next video. Happy decorating!


Your tips are so helpful! I’ve been decorating cookies for about 12 years and still get frustrated with my frosting, thank you!
You.are.amazing! Thank you SO much for sharing all your tips, secrets and expertise. It’s really wonderful to have you, and your website, to assist all of us in the baking/decorating world! <3
Karen
Great tip, Marian. Just simple and easy! Tks
I loved the video… love to see you work and hear your sweet voice!!! And of course, since I am not good with Royal Icing, I learned a lot!! 🙂
Thank you so much Marian!! I asked for the ten second rule, the video is so helpful..
I love your site, i recently made butterfly cookies for my daugther 4th birthday, using the marbling thecnique, and was a tottaly success. Thanks again for sharing!! (please apologize my english)
Thanks for the tips. I’ll have to try it next time I decorate cookies. I’ve always used the 2 different consistencies and it is so much more cleanup which I don’t like. I love to learn new ways that save time.
@ Katie, @ Karen Foust, @ Renata Almeida, @ Amanda: Thank you! I’m glad I can help even in a small way.
@ Nani: I noticed it was you! Hopefully the video helps. Would love to see pics of your butterfly cookies if you’d like to share them on my facebook page or email them to me. =)
Great video Marian.. Very Helpful and easy to learn.. Hope that u will published more videos after this.. Thanks dear for the tips… =)
I so agree with you, after I found your blog I have been a cookie crazy. I finally got the right consistency and that how I flood from then on. I recommend this video. Thanks Marian!
Another great tutorial! You always inspire me!! I got a kopykake for my birthday, and I love it so far…I’m still getting used to it…but I constantly check here for more tips on how to get better!! Thanks again!
Thanks for the video Marian! I actually tried my first royal icing decorated cookies a couple of weeks ago and really had a hard time figuring out the icing consistency even with all the other tutorials I’ve seen. A video tutorial like this is precisely what I needed: a simple trick to test the consistency before you get it in the decorating bag. Thanks so much for making this!
This is a wonderful tutorial! You inspire me everytime I get on your site! Thanks for another great video. I love to see how you do certain techniques as it helps put some of those missing pieces together. Please keep them coming!
Thank you so much!!! I was trying to decorate cookies tonight and I got so frustrated that I decided to try again tomorrow– I’m glad I did because now I’m going to try your tips! Thanks again!!!
This is a great tutorial, but I am still a bit confused. You said that you like to use the same consistency for piping and flooding (10 sec rule) but then you used the green for flooding which was less than 5 sec rule. Will the 10 sec icing flood and level appropriately? Thank you for all of your great tips and tutorials!
Absolutely fantastic Marian! Your explanations are clear and concise and very helpful. I would like to see a video on how you actually make your royal icing. Thanks!
Marian, I still remember posting a comment here when you first started blogging. I was kind of discouraged after a few trials of decorating, but you were so sweet and wrote me an email telling me not to give up. Thank you for continuing to share your cookie-decorating secrets with us!
You’re the best! Still trying to get the hang of making the right consistency frosting and this tutorial really helped. Thanks for sharing your tips with us!
Now, I need your help with the Kopykake! 😉
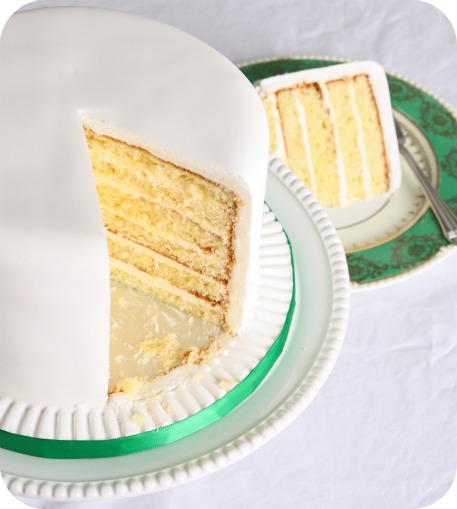
Thank you so much for this video, very very useful…i also outline and fill in with same icing consistency and i love. But my question now is about the cake…is it covered with buttercream then fondant?
Thks again
ROsilet
WOW!!! love love this video Mariam, so perfect. I wish to see more videos, you make decorating so much fun and enjoyable. Thank you xo
BTW you look so pretty!
@ Kendra, @ why anne zack, @ Mari’s Cakes, @ Erin, @ Nicole, @ Brooke, @ za: Thank you for stopping by!
@ Alison: Thanks!
I normally don’t have a runnier icing like the green; I was just trying to demonstrate the difference between an icing that smoothes over in 5, and an icing that smoothes over in 10 seconds. I guess I should have mentioned that! (so much to remember!)
Watch the video on marbling royal icing; I use a 10 second icing to outline and fill in right away. (link is in the post)
Thanks for asking!
@ Yael, @ trinette, @ Rowaida Flayhan: Thank you!
@ Corynn: I remember you =) Thank you for dropping by. Hopefully you’re enjoying decorating!
@ Rosilet: Thanks! Buttercream and fondant.
Today’s video I found revealing. I have only one question: the outline black royal icing is of the same consistency as the filling?
Thanks
Ara
@ Ara: Thank you!
The caption which scrolled across the screen when I began piping the black said, “This icing smoothed over in 10 seconds”.
That means that the black icing was a 10 second consistency and the green icing was at 5 seconds.
I normally DON’T have a runnier icing like the green; I was just trying to demonstrate the difference between an icing that smoothes over in 5, and an icing that smoothes over in 10 seconds.
You can see an example where I outline and fill in with the same icing in the Video on Marbling Royal Icing. (link in post)
marian wrote:
Thank you very much.
Great video and beautiful work!!! Thank you for share.
And, please, can you tell me how can I let the royal icing dry whithout my cookie turns crunchness?
Thanks
correcting,
how can I let the royal icing dry without losing the crispness of my cookie?
thank you
Thank you for this video good.
Great tutorial Marian! I think you did a fantastic job of explaining about icing consistency. Oh how I wish I had this video available to me when I was first starting out! BTW, it was also great to hear your voice! xo
I’m confused. Did you say to grease the sheet down before piping on the Royal Icing snowman for the cake? Doesn’t grease break down Royal Icing? I’m learning, so please don’t think I’m being a butt.
this was FANTASTIC…exactly what I needed…to SEE how it’s supposed to look…..Still don’t think I’ll ever pipe like you..LOL…that as well was a great help to see…Thanks!
Thank you so much!! I decorated my first cookies with RI this past weekend and the icing was too runny!! I was rushing to get it on the cookie because it kept flowing out of the bag!! I made another batch of sugar cookies this morning to try again and then saw your video in my inbox!! PERFECT TIMING!! You are amazing and my cookie-decorating idol!! 🙂 Thank you so much for so many helpful tips and such great recipes. I can’t wait to get decorating!! 🙂
@ Priscila: Thank you!
It may be the recipe you’re using (if you’d like to try the one I use it’s in the tutorial section).
You can try baking your cookies a bit thinner (they’ll be crispier overall), and humidity in the room is a huge factor. Work and let them dry in as much of a ‘climate-controlled’ area as you can (dry, air-conditioned room, or place a de-humidifer in the room).
@ Fanny, @ Susan: Thanks!
@ Rita – Greer, SC: Lol. Thanks for the giggle! A small amount of shortening on the transparency sheet seems to be fine. (The grease isn’t *mixed into* the icing). The posts on run-outs should help you as well(see the links I put… they’re in between the pics of the cakes above).
@ jane: Lovely compliment, thank you, but I’m sure you’ll pipe the same! =)
@ Andrea: Oh, so great!! I would *love* to see your cookies if you’d like to share them on my facebook page!
thank you so much for the video, it was very helpful.
I have a few questions if you don’t mind. Your RI appears to be shiny, mine always dries dull looking. Do you add any thing to your icing to obtain the sheen? also, I live in Texas and the humidty all ways inpacts my icing consistency. Do you have any suggestion for this problem?
Thank you,
Brenda
Thanks Marian!
Great video! I especially love the idea of just using one icing consistency!!!!
You’re my cookie hero:)
Hi Marian,
thank you so much for sharing this video! Now I know the icing I use is too runny (and not easy to handle)! What I would love to know is if you ever have tips (n° 1 or n° 2) that get clogged / obstructed (I don’t know if this is the correct word I’m using?)when you are piping the icing That seems to happen a lot when I’m decorating and it’s really frustrating me… Can you tell me your secret? 😉
Hear / see you soon!
Evelyn
Great video Marian. Very informative and fun to watch. That snowman design is simply adorable.
Dear Marian,
I juz wanna you know that you are amazing. Thank You so much for the tutorial.You answered all my question. I’ll be keeping following you. My God Bless You for all your kind heart sharing all your knowledge.
I hope one day you can come to my country and teach your amazing & inspiring technique cake/ cookie decorating.
Thank you so much.
From Malaysia with Love.
Marian, I so want to do a stage with you!!! Great tutorial video!!!!!!!
I always enjoy watching your videos to see if there is something I can improve on or what I can do differently. I am curious though, do you ever have trouble with bleeding using black as an outline, or do you let it fully dry before using the white and green? I find that the consistency makes a big difference. Thanks as always.
Your video tutorial is wonderful. Enjoyed that you started out of doors and then moved in. The audio is great. I recognized that gift set of mugs LOL and your snowman cookies and cake are delightful. Everytime I visit your blog I start wishing that I had a KopyKake!
Excellent video thank you – it always helps to see a visual. I’m pretty new to the cookie world but enjoying it immensely. Both consistency and steadiness of hand/ getting a feel for the tools have been the hardest for me so this video really helps. I would love a video too about how you decorate ie projector, free hand , practicing designs on paper first etc.
Thanks for all your work – it’s so helpful and so well done!
Thanks for the video! You make it look so simple. I see that you use the piping bags but do you ever use the bottles that you can attach a tip to? I was just wondering if the bags are a personal pref? I would love to see some videos on the KopyKake as well!
Really beautiful!!!!!
Thank You!! You gave me a great idea to help decorate a cake for this weekend. The customer wants the South Carolina GameCock logo on their cake, and i’m dreading the idea of hand piping with buttercream, it is so detailed in the design, so hooray, royal icing here we come! I make cookies too, but I always thin my icing out when I flood, but I probably shouldn’t thin to much, but good to know. Thanks!! I’d love to get a KopyKat machine, but I’ll save my $$ on that for now!
@ Brenda: Thanks! I think you might be looking at the snowman pics when you say the R.I. looks shiny… If so, in this case it’s because I took the pictures when the icing was wet. (If that’s not what you meant just let me know).
I’ve never tried this; (on my to do list! =) but I’ve heard that some people add clear corn syrup to make the icing a bit shinier when dry.
Humidity can wreak havoc with your icing – I hear you! If you find your icing getting runnier with time, maybe make it a bit thicker than 10 seconds to begin with. This post on bleeding (a huge factor with humidity) might also be useful for you Brenda:
https://sweetopia.net/2009/10/how-to-prevent-your-icing-from-bleeding-7-tips/
@ Charlotte Thank you! 😉
@ evelyn: Yes, tip #000, 00, 1.5 and 1 tend to get clogged quickly. I have some ‘tricks’ which help me, yes. Here they are:
https://sweetopia.net/2010/03/how-to-prevent-your-tips-from-clogging-and-what-to-do-if-it-happens-top-10-tips/
@ Renee (kudso kitchen), @ Nurul: Aw, thank you so much!
@ Gail: I *think* I’d like to do a stage with you too because you know I love you, if only I knew what a stage is! lol 😉
@ Paula: Thanks Paula! I do let the outline fully dry before I fill in. If you’d like to see a tutorial on it, it’s right here:
Yes consistency makes a big difference with bleeding too. (Bleeds more if it’s a thinner/runnier icing). I’ve got a post on it here if you’d like to check it out:
https://sweetopia.net/2009/10/how-to-prevent-your-icing-from-bleeding-7-tips/
Hope that helps!
@ Paula, @ SugarMonkey: Thank you! =)
I’m a newbie to cookie decorating, so when I was trying to make my royal icing last night for the first time I was exactly sure what the consistency should really be. The icing on the cookie didn’t look as nice as I wanted probably because I didn’t know about the 10 second test.
Your video really helps out and your site is absolutely awesome!!!
Thanks for much for the great tutorial. I’m going to try your royal icing and use the same consistency for both outlining and flooding. I usually use Martha Stewart’s recipes but I find that outlining with the thicker icing leaves a line when I fill in that I don’t like. Can’t wait to try it! I also find my tip #2 clogs so I’m going to go check out your tips. Your cookies are so inspiring, thanks for sharing.
Marian, Thank you so much for the video. It is wonderful to see you in action! I saw a blog from a Japanese (I think) cookie maker whose all had a pearlized or luster overall appearance. I am just wondering if you know how that look is achieved. It would be beautiful on Easter cookies and wedding cookies.
@ Lorena, @ Alexandra: Glad it’s helpful! Thank you for commenting!