

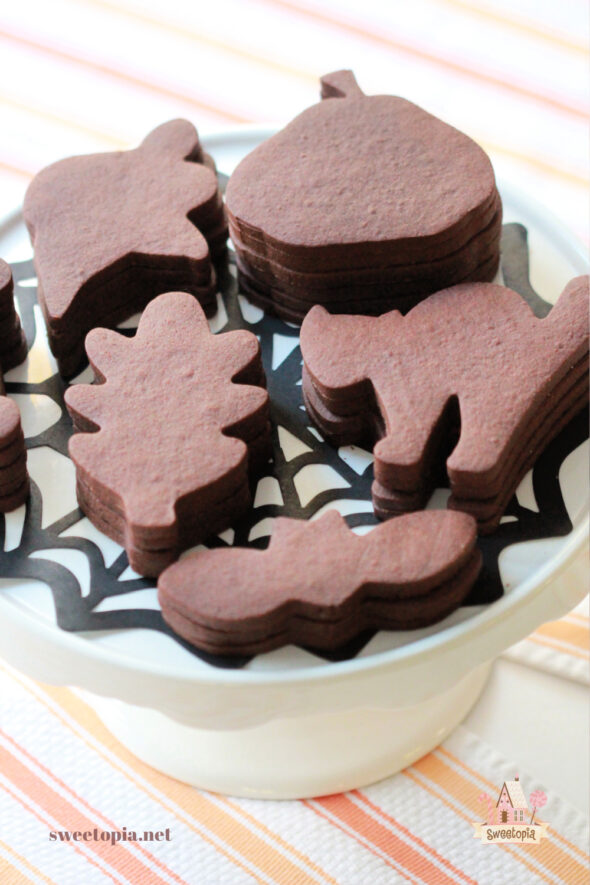
Is there anything better than chocolaty, soft-on-the-inside, slightly crispy on the outside, chocolate cut out cookies? Not much, except perhaps chocolate mint cut out cookies. This is my classic recipe for chocolate mint roll out cookies, perfect for Halloween or any time!
Pair them with classic vanilla royal icing, or add an extra mint kick to your icing recipe with some mint extract, either way, they’re scrumptious to eat and so much fun to decorate!

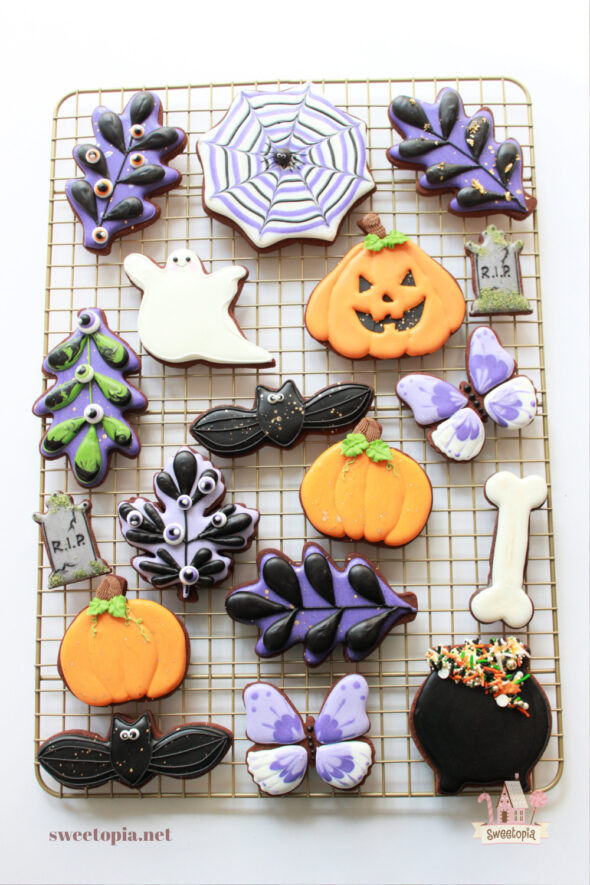
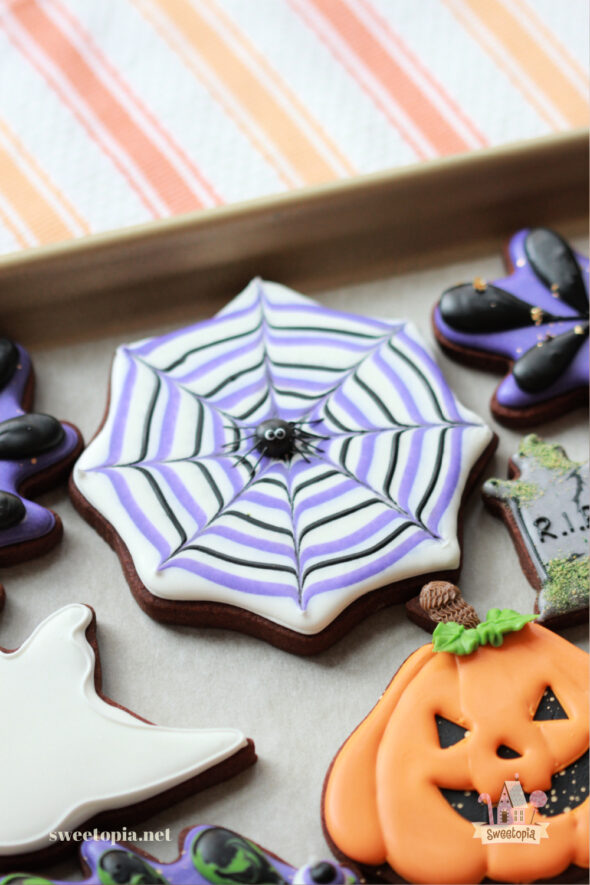
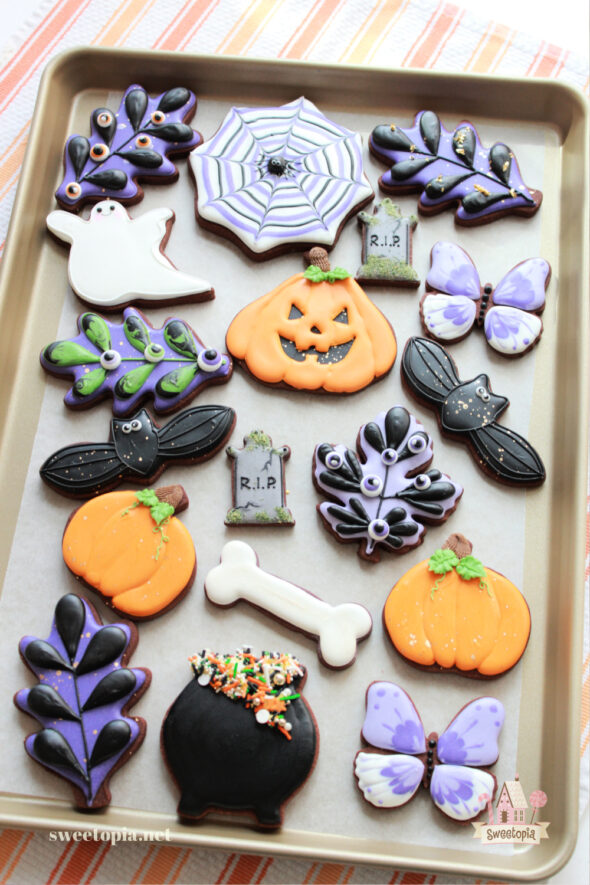
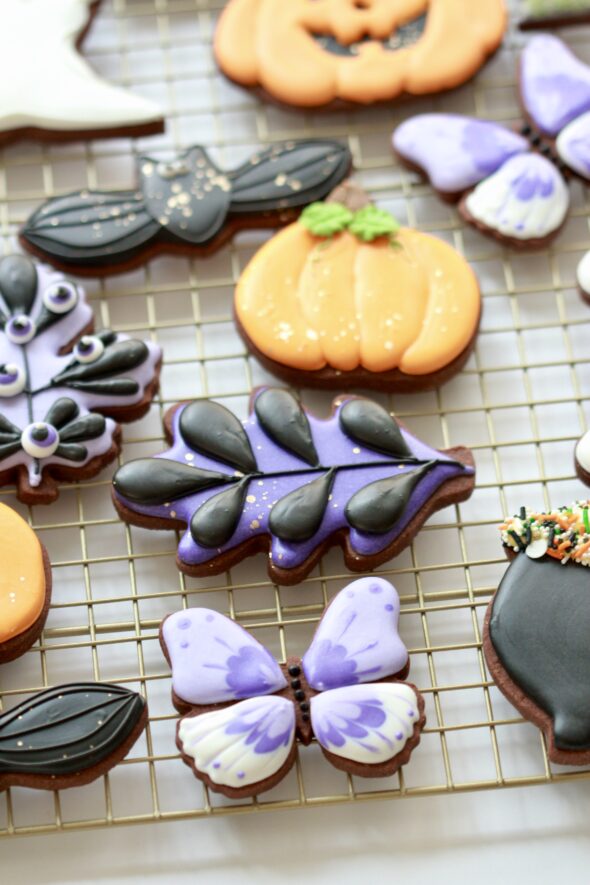
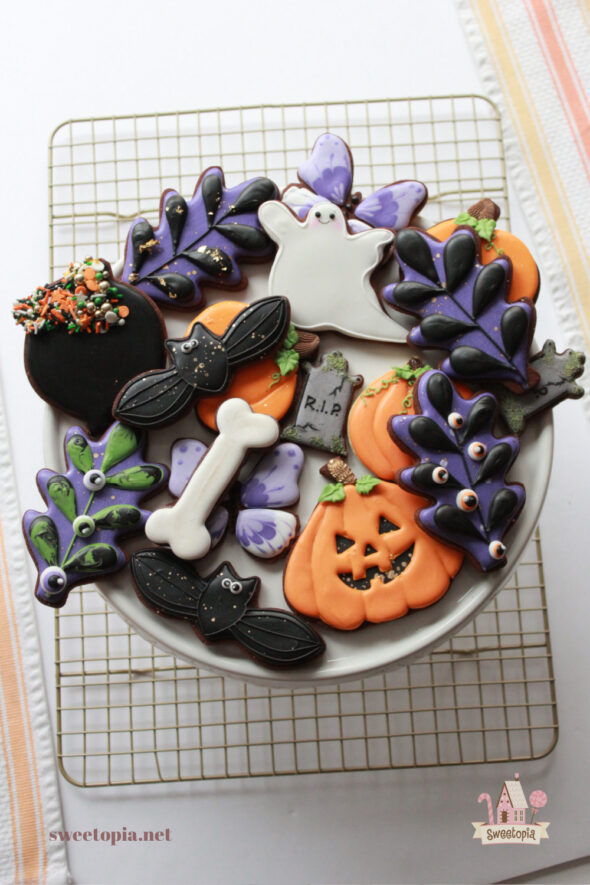
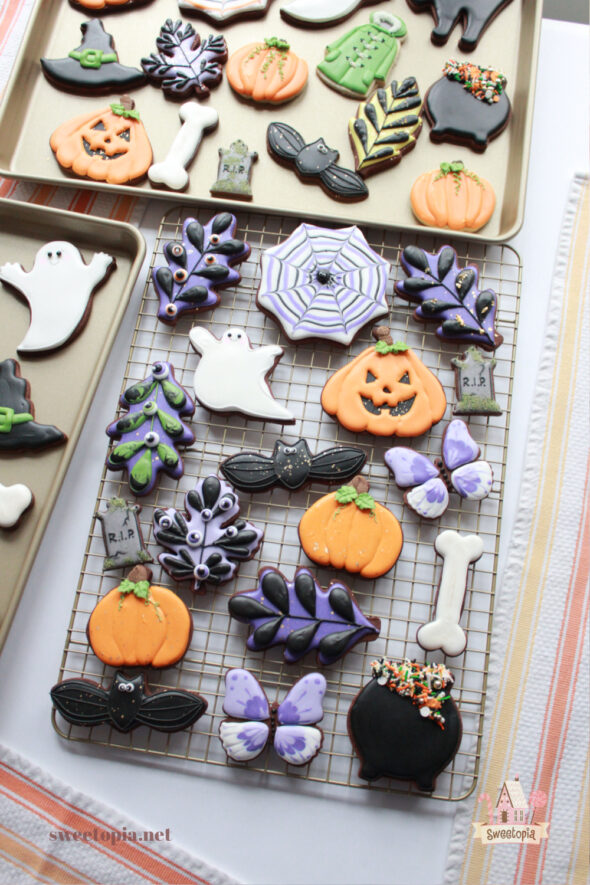
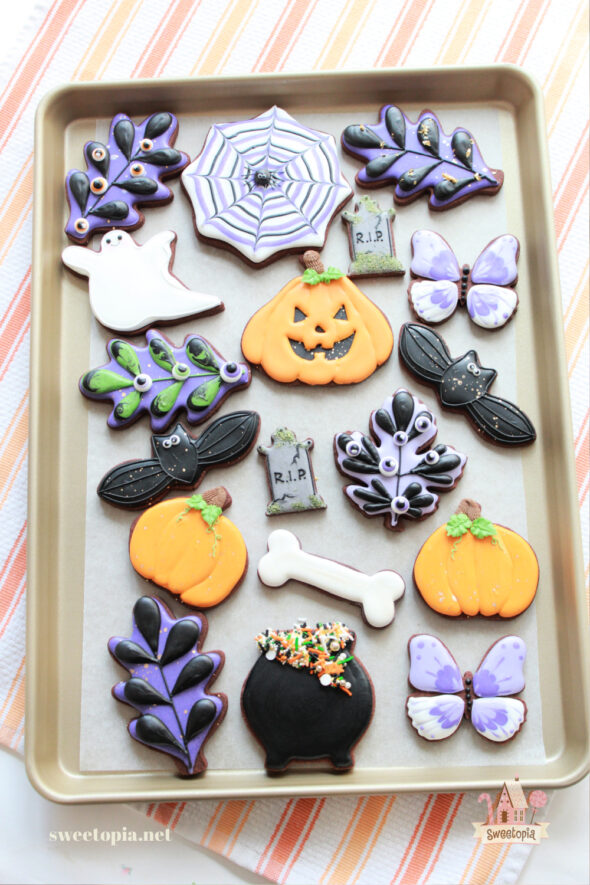
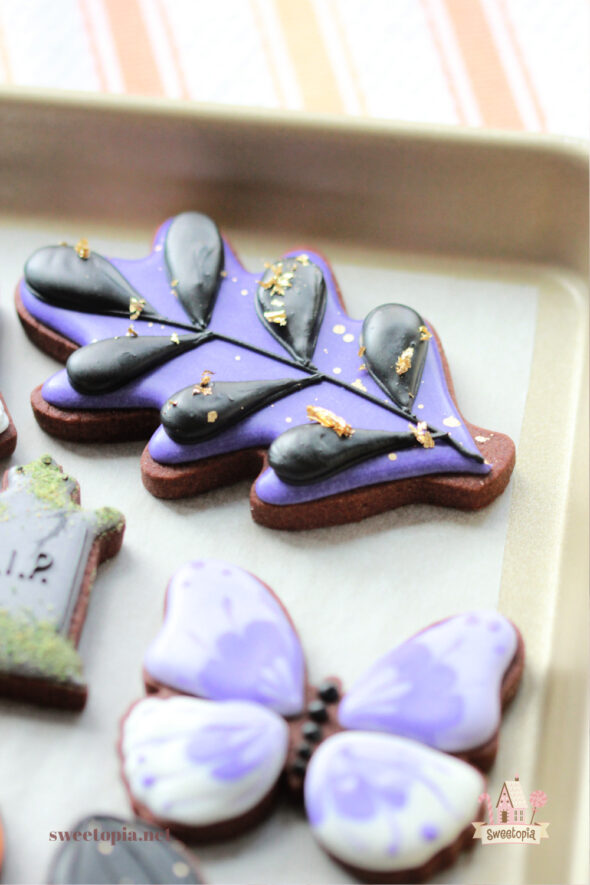
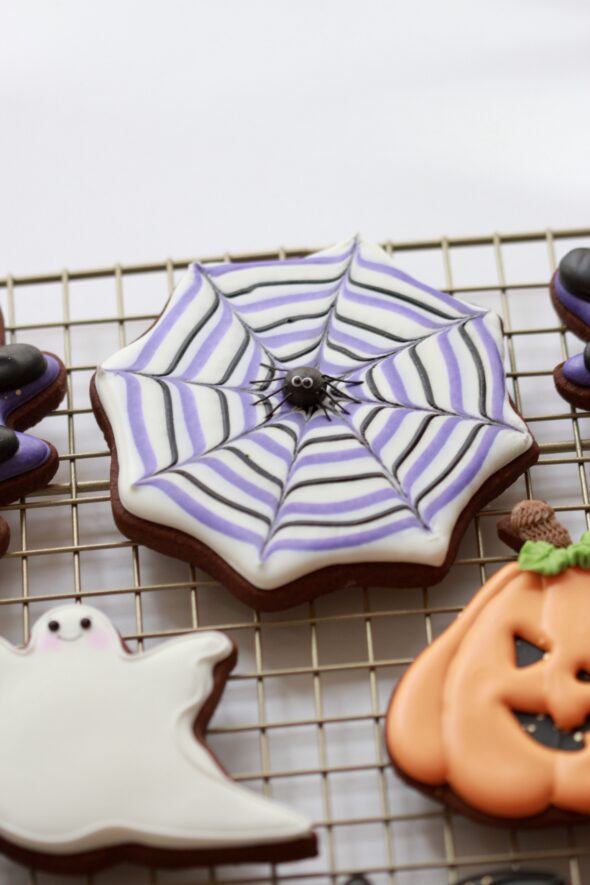
I went with fairly simple designs for this Halloween set, and was blessed to use the best quality baking sheets and racks to make these cookies. I’m thrilled to partner with Williams Sonoma Canada, who shared a few pieces of their elegant Goldtouch line with me. The cookies baked beautifully on these heavy-duty, non-stick sheet pans, they are hands-down my favorite baking sheets I’ve used yet!
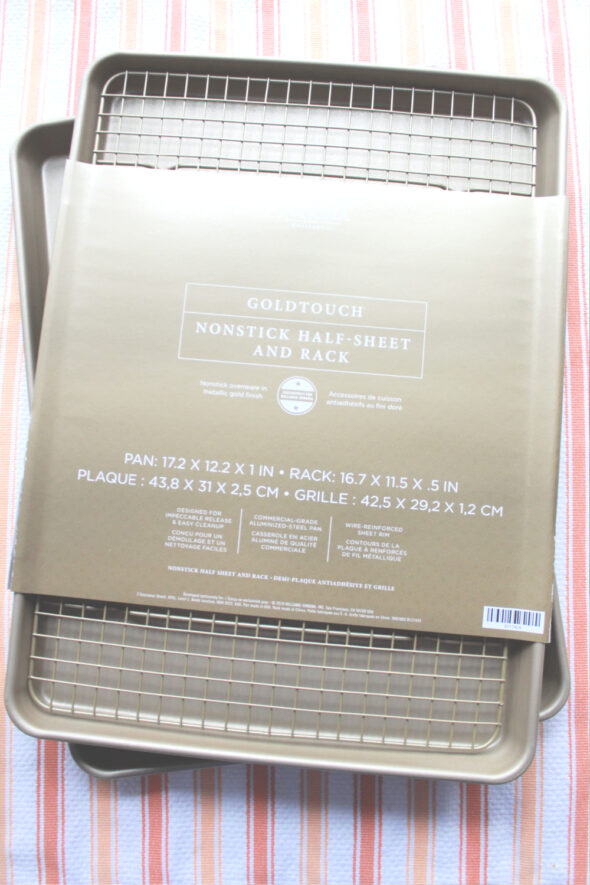
I highly recommend the Goldtouch pans for any kind of cookie or baked goods! Know that I only recommend products that I personally use and love, all opinions are my own. You can find the Goldtouch items HERE, along with so many other beautiful bakeware, cookware, kitchen and home related items.
How nice is this baking rack too, not only is it pretty with a lovely golden touch to it, I know the excellent quailty will help it last through batches upon batches of baked yummies.
I’ll be sharing the recipe for the Chocolate Mint Cut Out Cookies below, and will also first share a few key things you’ll need if you’d like to make these cookies for Halloween too.
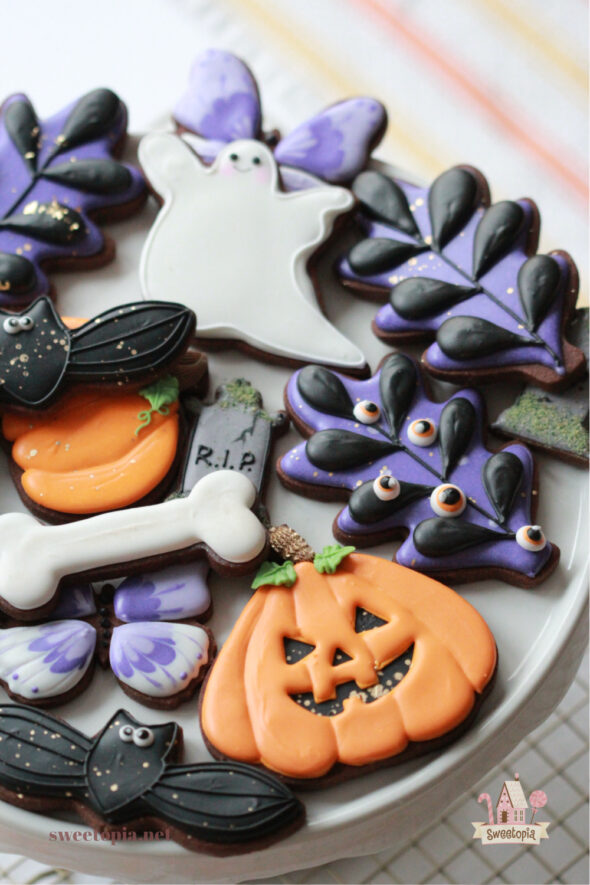
These chocolaty cookies are straightforward to make and fairly simple to decorate, and will be everyone’s favorite treat this Halloween! Enjoy!
Cookie Decorating Basics
Here are some posts which take you through cookie decorating basics:
{Video} Cookie Decorating Tools & How to Fill a Piping Bag
{Video} How to Outline and Flood Cookies with Royal Icing
{Video} How to Dry Cookies Decorated with Royal Icing
This video on outlining and flooding is a good place to start if you’re new to decorating cookies with royal icing. These cookie decorating basics YouTube videos may also be helpful to get you started.
For detailed, in-depth information and secrets on cookie decorating basics, including my complete Cut Out Cookie Guide, How to Make Icing Puffy etc., check out my digital download shop HERE.
Royal Icing
You can find my favorite royal icing recipe here. The consistency of icing is key for easy decorating. Click here to see a YouTube video on finding the right icing thickness.
Complete Guide to Royal Icing PDF
You can also find my Complete Guide to Royal Icing Consistency here.

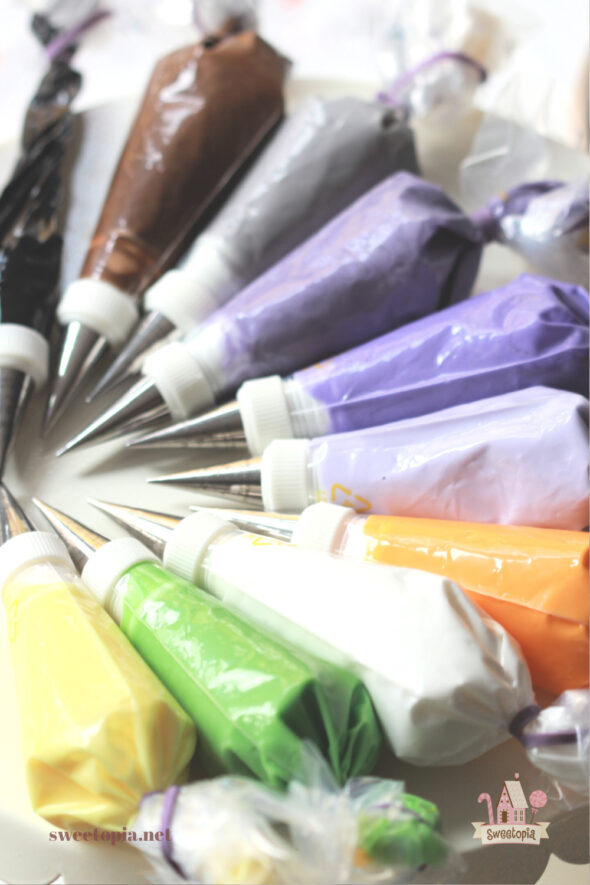
Decorating Items
What you’ll need (These are Amazon affiliate links):
- Piping Tips – PME #1.5, PME tip 2.5, PME ST50
- Piping Bags
- Couplers
- Americolor Gel Colors
- Scribe Tool or Toothpicks
- Coffee Filter
- Halloween Sprinkles
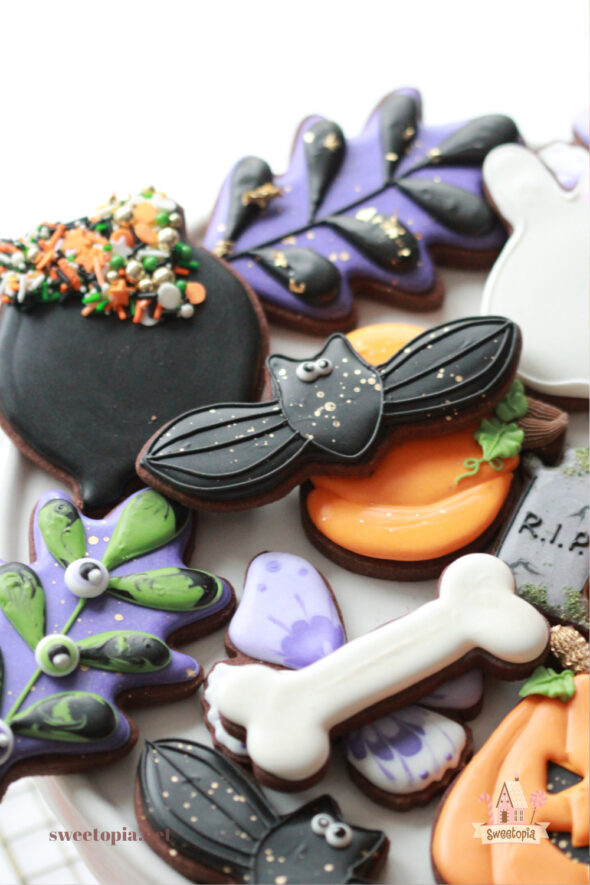
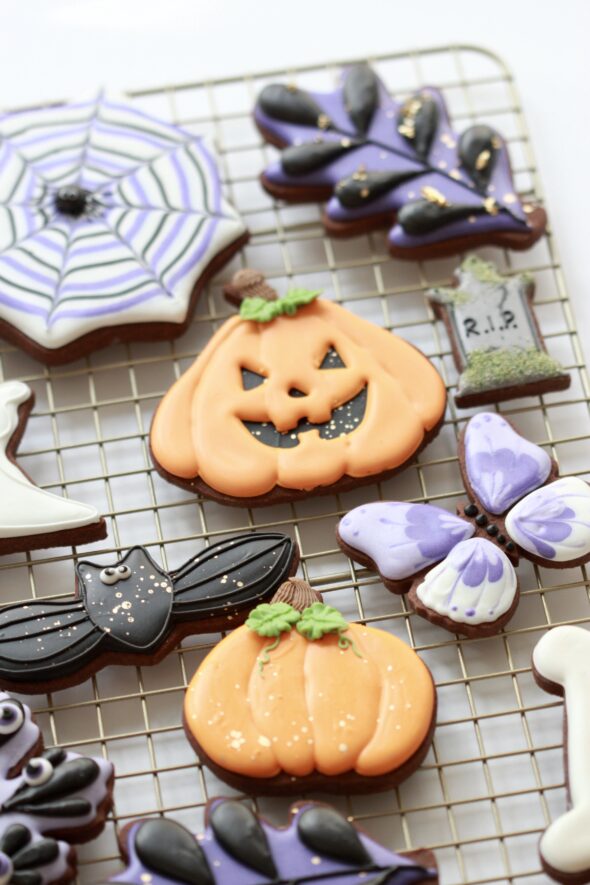
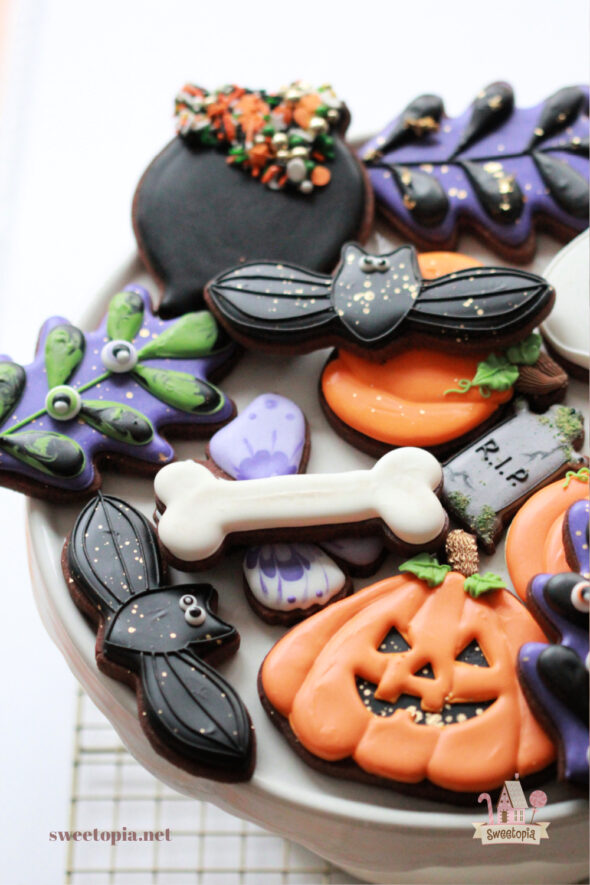
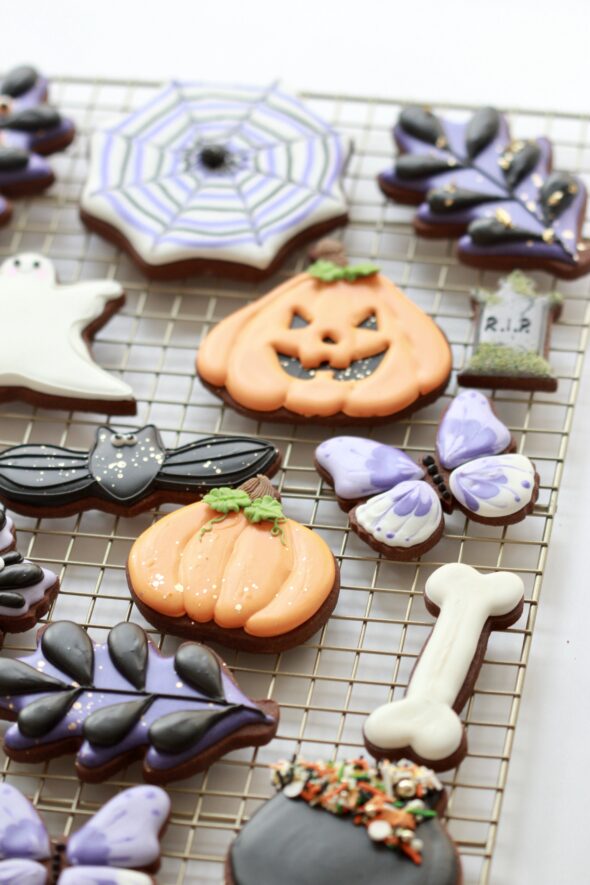
Cookie Cutters
For this Halloween set, find the cookie cutters by clicking on each individual cutter below (Any links to Amazon in this post are affiliate links. There is no extra cost to you) If I could no longer find the exact cutter, I’ve linked to a similar style:
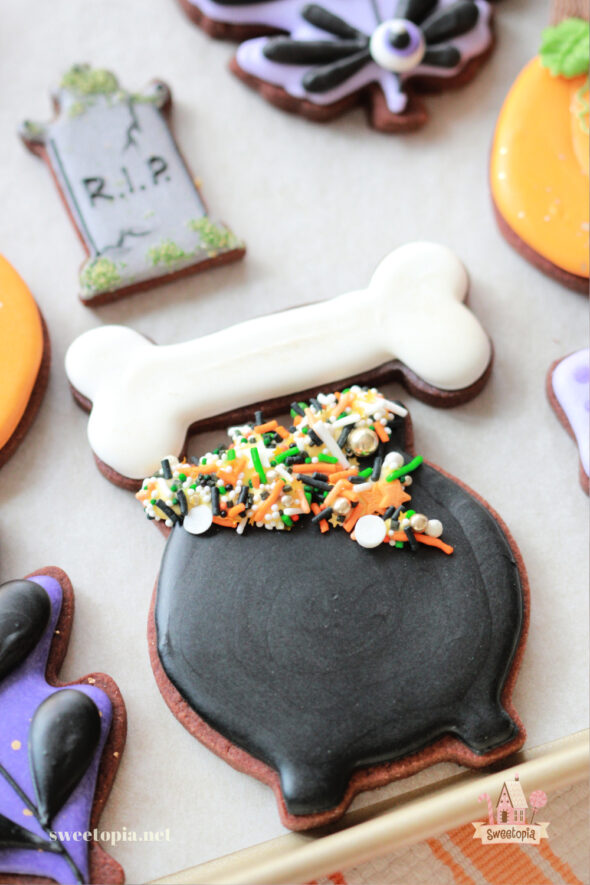
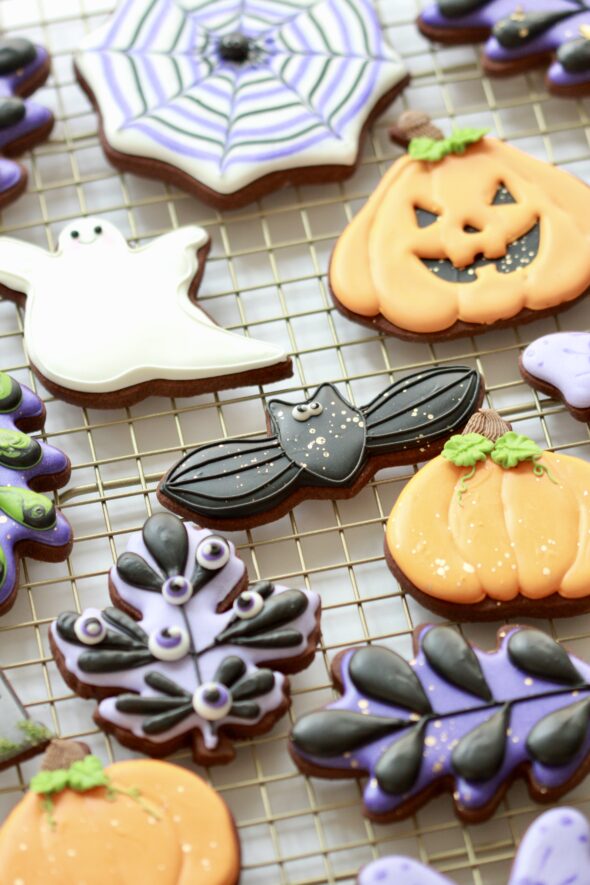
- bone cutter
- cauldron cutter
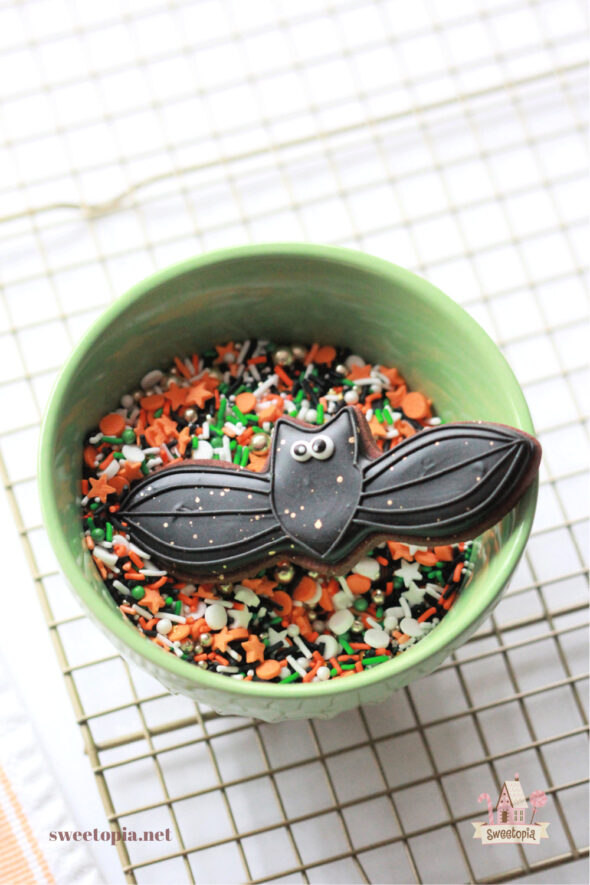
- bat cutter
- butterfly cutter
- ghost cutter
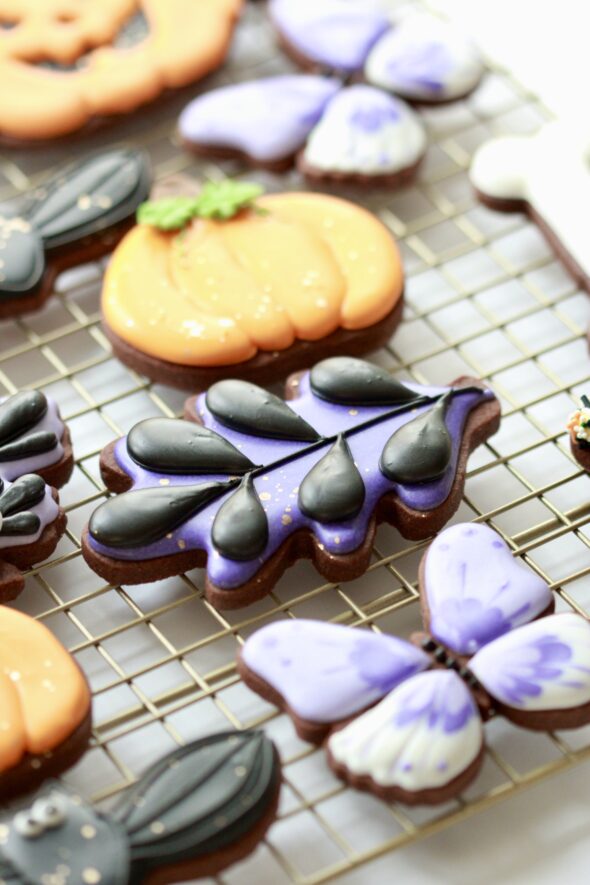
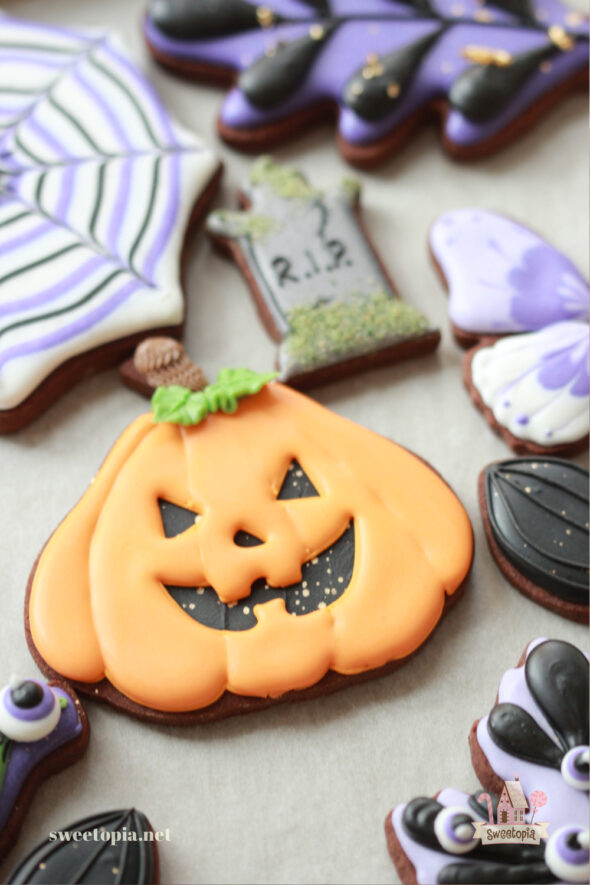
- leaf cutter
- pumpkin cutter
- jack o’lantern cutter
- spider web cutter
- grave stone cutter
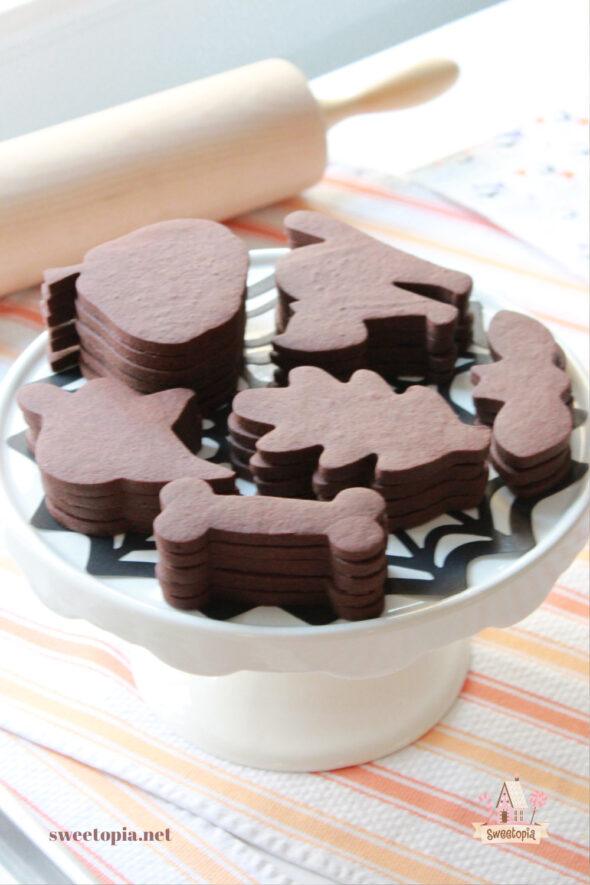
The Recipe – Chocolate Mint Cut Out Cookies
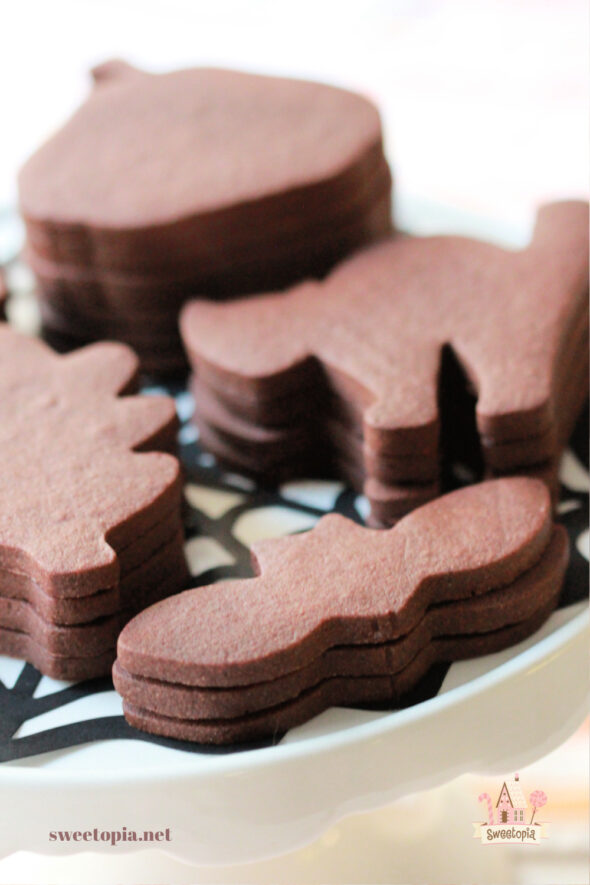
Cut Out Cookies
The recipe for chocolate mint cut out cookies is below, but if you’d like to decorate a different cut out cookie recipe, like classic sugar cookies, you can find a selection of recipes here.
Chocolate Mint Cut Out Cookie Recipe
Ingredients
- 2 cups salted butter room temperature
- 2 cups granulated sugar
- 2 large eggs
- 1 tbsp mint extract
- 6 cups flour
- 1 1/2 cup cocoa powder
Instructions
- Cream the butter and sugar together in the bowl of an electric mixer on low to medium speed (Use a paddle attachment). Mix until thoroughly incorporated – for about one minute. Scrape down the sides of the bowl with a plastic spatula and mix again for a few seconds more. Over mixing the butter and sugar in this step will cause too much air to be incorporated into the dough. If you’d like a light and fluffy cookie, that’s ideal, however the dough will spread more during baking; not ideal if you’d like the cookie to hold its shape.
- Add eggs slowly and mix. Scrape down the bowl with your spatula at least once and mix again.
- Add mint extract. Stir briefly.
- Sift or whisk your dry ingredients together. (Flour and cocoa powder).
- Add the dry flour mixture in 2 or 3 stages to the bowl and mix on low speed for about 30 seconds to 1 minute, and observe the dough mixing. When it starts to come together and the dough clumps around the paddle attachment and peels away from the sides of the mixer, it should be the right texture. You can also test the dough by pinching it between your thumb and index finger. If it’s soft but not sticky, it’s just right. If it’s too sticky when you pinch it between your fingers, add flour, ¼ cup at a time, and mix until you’re happy with the texture. (Different factors can affect the moisture of the dough, from the temperature of the butter you used, to water content of the butter, the actual ingredient brands you used, to the temperature of the room etc.).
- Roll the dough out between 2 large pieces of parchment paper. Place on a baking sheet and into the fridge for a minimum of 1 hour.
- Roll out the dough further if you need to, and cut out cookie shapes. Place on parchment paper-lined baking sheet. Re-roll scraps and repeat.
- Put cookie dough shapes back into the fridge for 10 minutes to 1 hour to chill again. They will then hold their shape better when baked.
- Preheat your oven to 350°F or 176°C.
- Bake cookies for 8-12 minutes or until the center of the cookie no longer looks wet. The baking time will depend on the size of your cookie.
- Let cookies cool to room temperature and decorate!
Notes

If you have any questions about the recipe or decorating process, please feel free to reach out with questions or comments in the comment section below, or you can find me on Instagram, Facebook, Pinterest, YouTube and Twitter.
Happy decorating!
xo,
Marian
p.s. As usual (it seems), played around with photography so have a bunch of photos below. 😊


Hi Marian,
Love your work as always. I am wondering about this recipe.. the flour is 6 cups? Your regular chocolate cookie recipe has 4 cups?
Thank you.
Novi
Hi Novi,
I know right! I generally change up flavours but keep the basics the same for my cut out cookie recipes, and I almost always use 5 cups of flour for sugar cookies and 4 cups (plus cocoa powder) for the chocolate version… I wrote notes while I was making these batches though and I definitely used 6 cups of flour. If you make them add the flour in increments, mixing in between, to make sure you don’t add too much flour. It’s easier to add more than your dough become too dry.
Perhaps your result will be different – there are so many factors ranging from room humidity, to altitude to the actual products used.. it’s best to err on the safe side. Let me know how it goes if you like and happy baking!
Thank you Marian for the response. I will let you when I try it. Have a great weekend.
Novi
You too Novi!
HI Marian:
Thanks for sharing this recipe and helpful tips. Your designs are so great. Just wondering what type (ie. natural vs dutch-processed) and brand of cocoa powder do you recommend for this recipe. Thanks.
Hi Chris,
Either is fine really. If you have a preference in terms of taste, go with that! Happy baking!
Love every one of the shapes and designs. Like always beautiful art work Marian !
I appreciate your talents you’re sharing each time. I like the cookie sheet and rack you are showing from my favorite store!
ML
Thanks Maria! xo
Is there a reason this recipe has 6 cups of flour and most others have 5 cups? I felt like the cookies were very dense, curious the reasoning behind this choice. Thanks for sharing, always love trying new recipes!
Never mind, I see the comment above. It did not load initially : )