

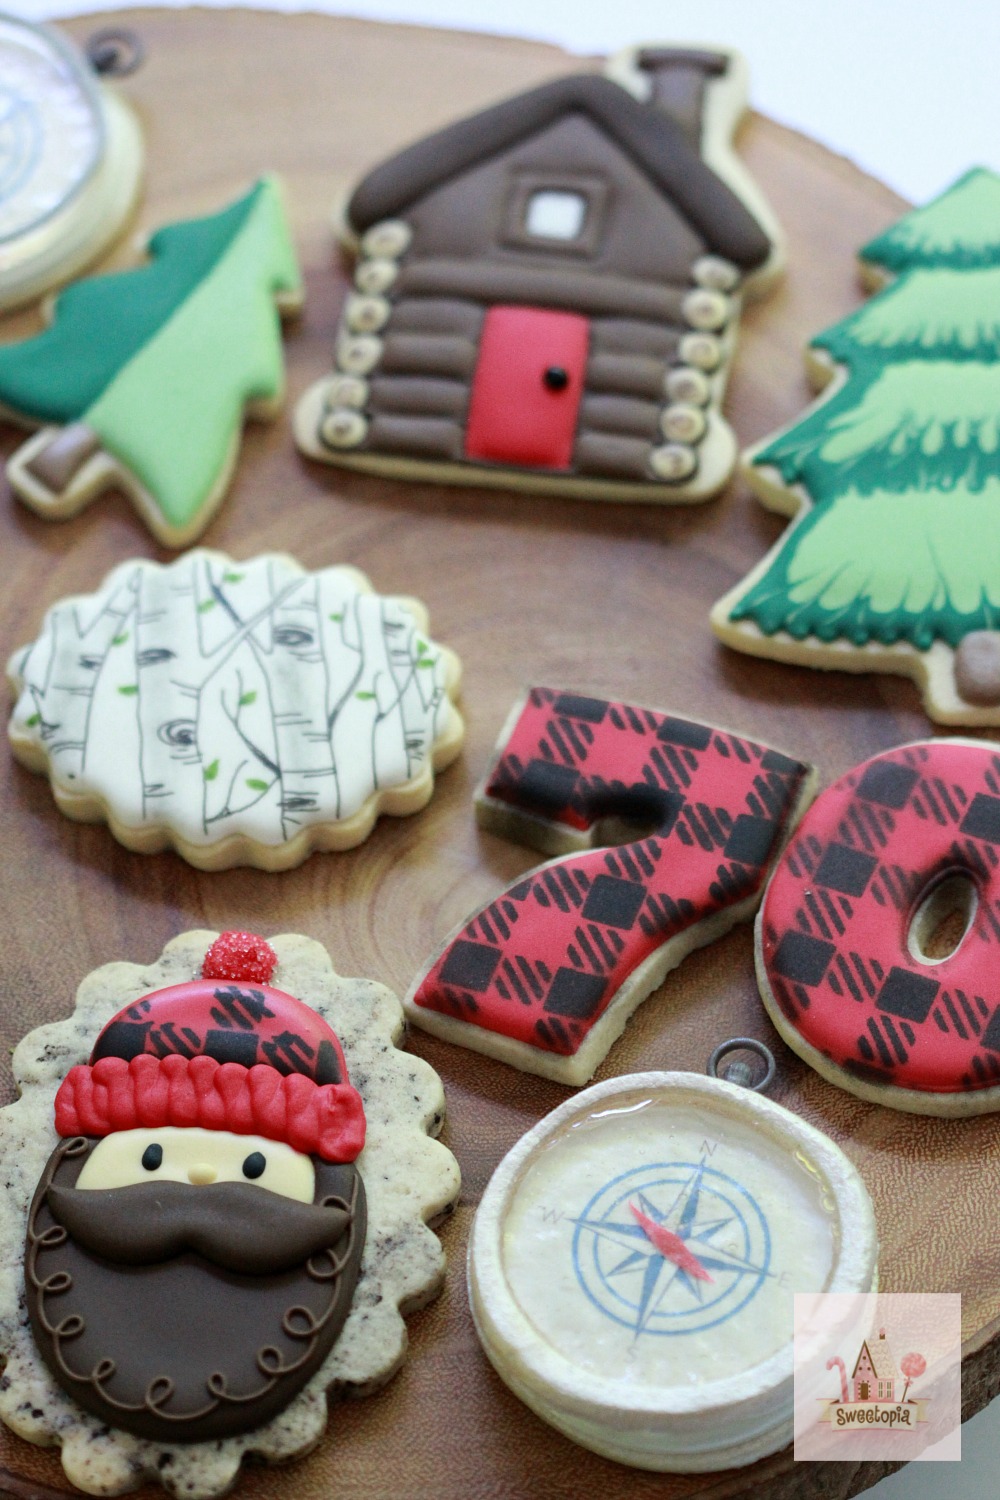
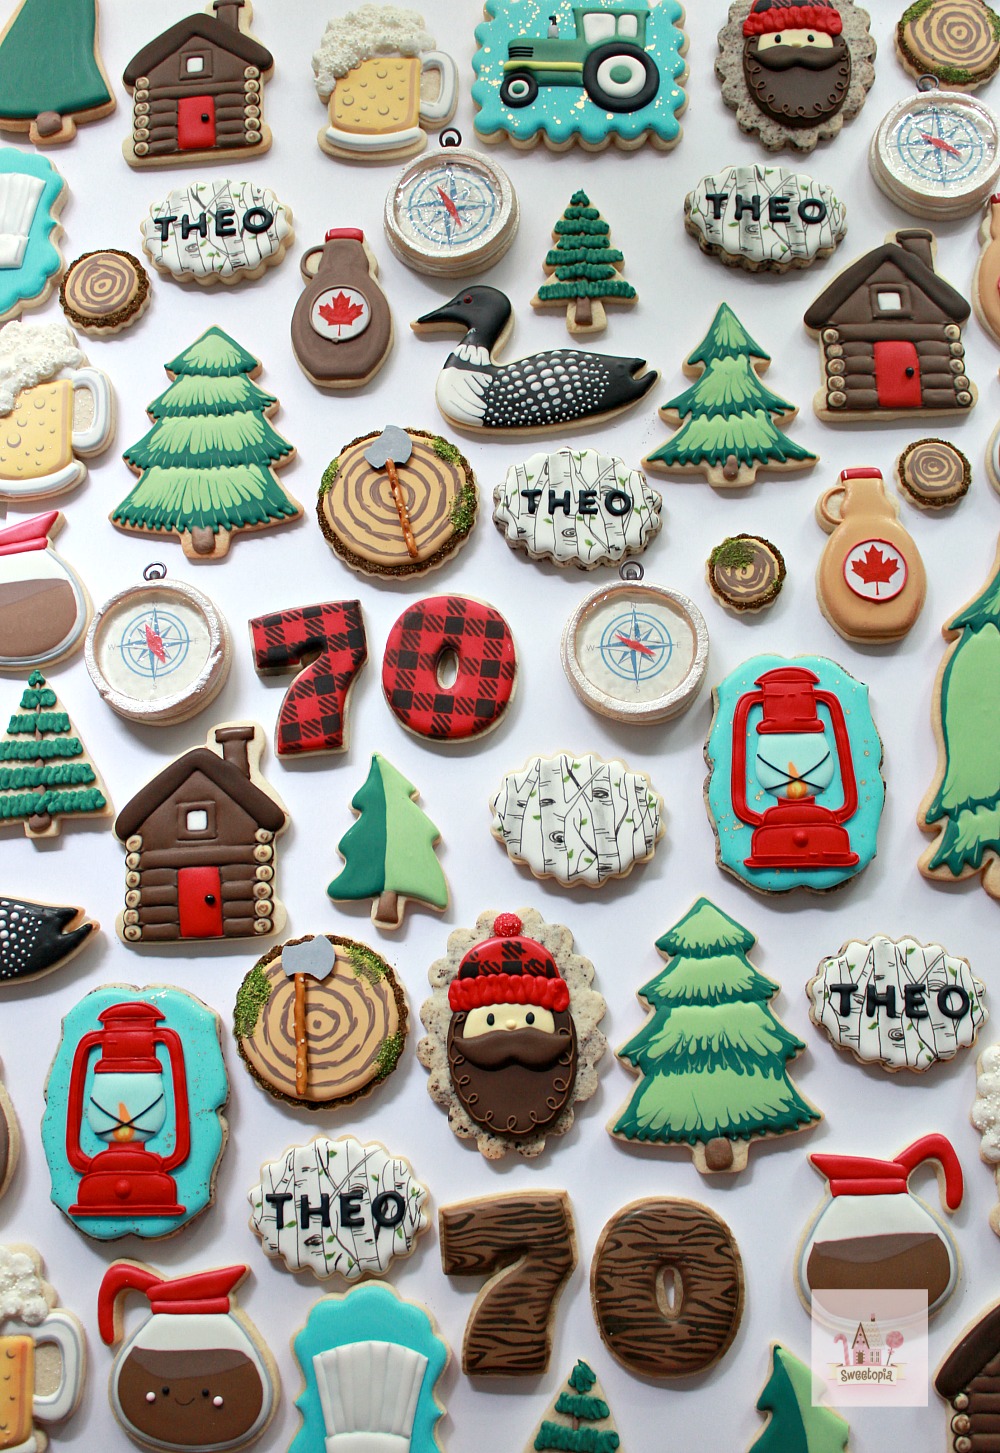
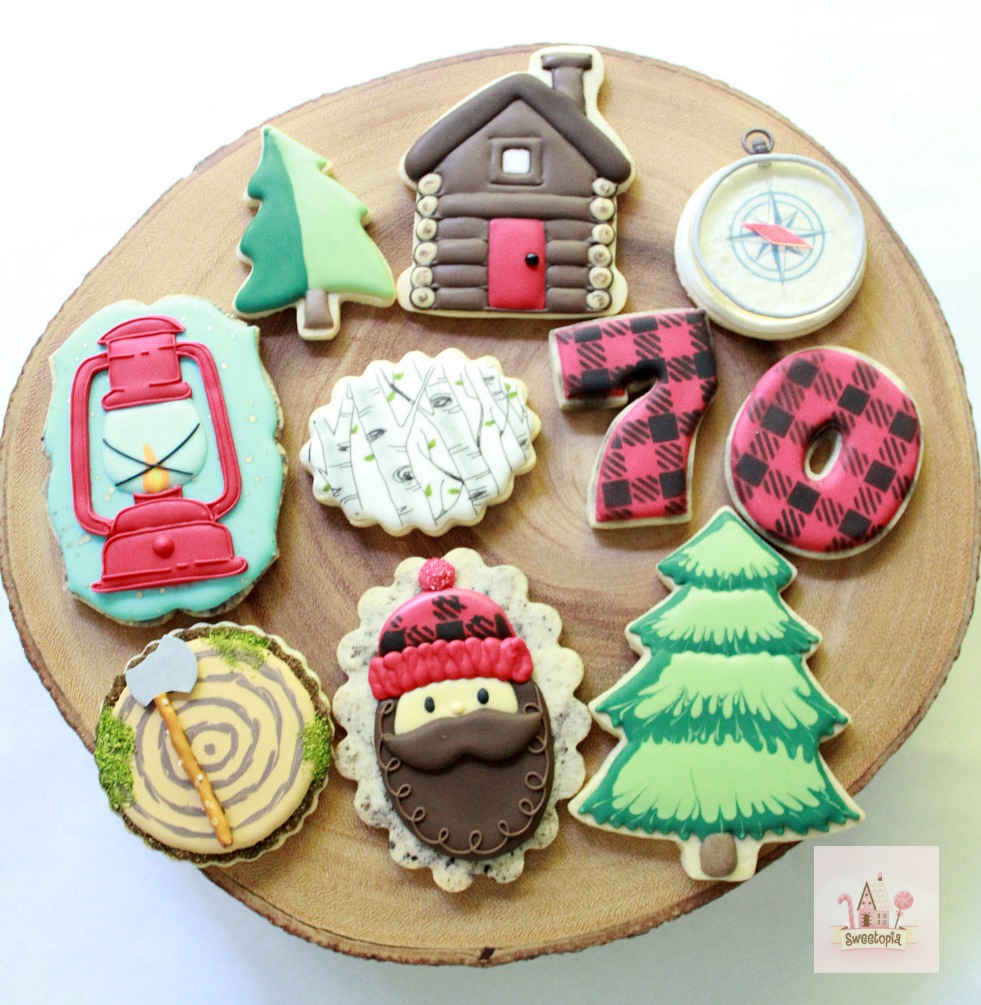
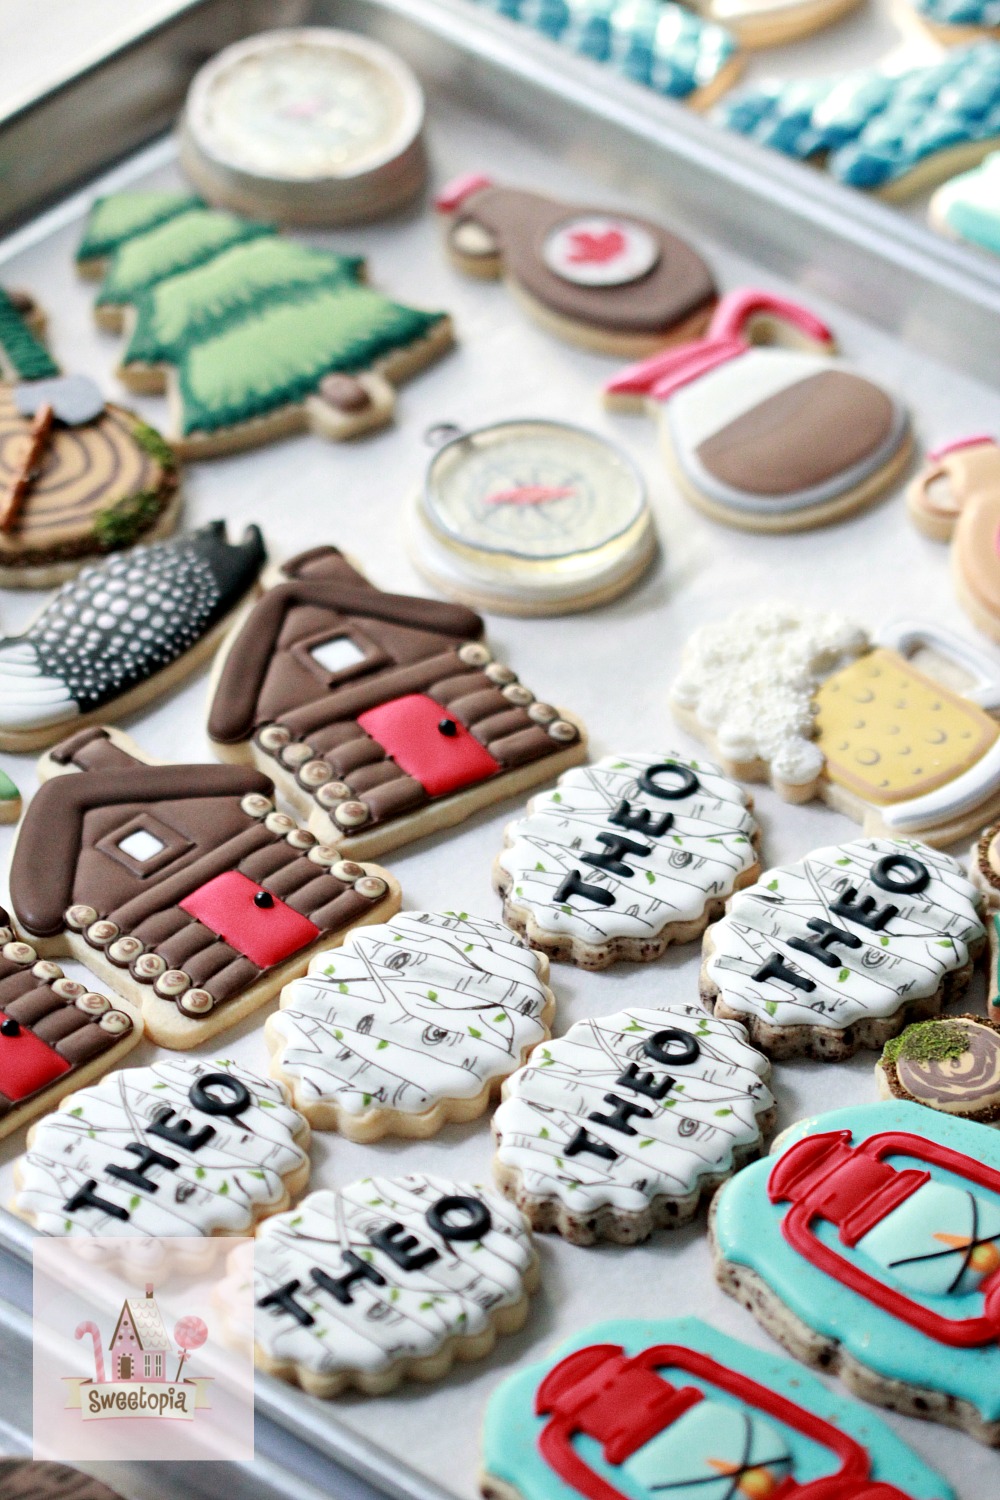
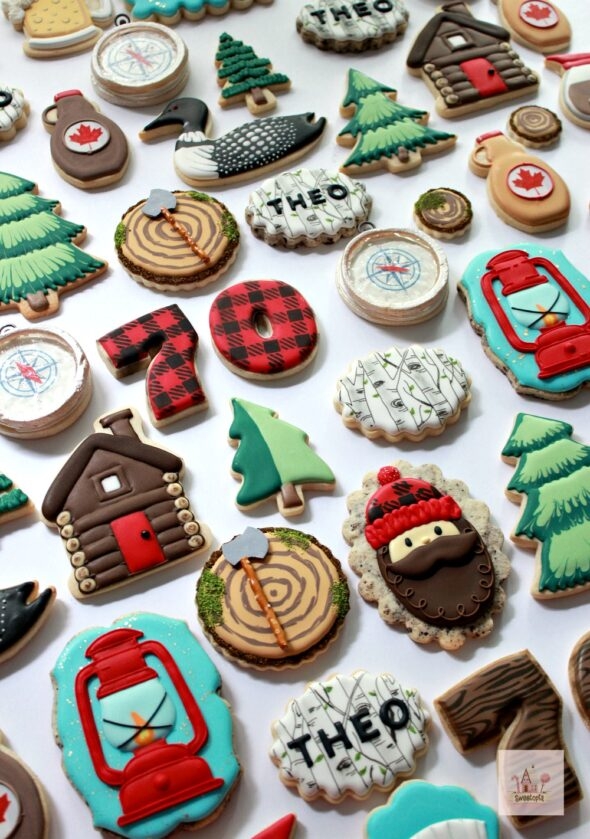
Hello, hello and happy camping! Kind of mishmash of themes; camping, the outdoors, cottage, lumberjack, I wasn’t sure what to call these cookies. They were for my father’s 70th birthday party, so I included cookies which somewhat represent him. He’s a hard worker, having built the wood cabin my parents live in up north in the forest and he’s also a professional chef and teacher, so you may notice some cooking-themed cookies here and there in the photos and video – those will be for another time.
As for the royal icing recipe, I did some experimenting with flavor oils to see if it would affect how the royal icing acted and dried on the cookie, and I’m happy to share that it works well and I love the added rich flavor! I added LorAnn Oils Caramel Flavoring to my favorite royal icing recipe and loved it! I can’t vouch for other brands but imagine it’s fine to use others as well, so if you can’t find LorAnn’s, here are some options. This isn’t a sponsored post, I only share things I love with you, although you should know I am an Amazon affiliate so I do get a small commission from Amazon sales. Another note about the caramel royal icing, it didn’t tint my icing a brownish color at all, and I colored my icing as I usually do.
The royal icing recipe is below, feel free to try it out and add more or less caramel flavoring according to your preference!
Caramel Royal Icing Recipe
Caramel Royal Icing Recipe
Ingredients
- 177 mL (6 oz, 3/4 cup) of warm water
- 38 g (1.3 oz or 5 Tablespoons) Meringue Powder
- 1 tsp caramel flavoring
- 1 kilogram (2 lbs, 8 cups) powdered icing sugar(2 lbs, 8 cups) powdered icing sugar
Instructions
- In mixer bowl, pour in the warm water and the meringue powder. Mix it with a whisk by hand until it is frothy and thickened…about 30 seconds.
- Add in caramel flavoring and whisk for a few seconds.
- Sift the icing sugar. Pour all the icing sugar into the mixer bowl.
- Using the paddle attachment on the LOWEST speed, mix slowly for a full 10 minutes. Icing will get thick and creamy.
- Cover the bowl with a dampened tea-towel to prevent crusting and drying.
- Cover the bowl with a dampened tea-towel to prevent crusting and drying.Tint with food colorings or thin the icing with small amounts of warm water to reach the desired consistency.
And now onto the cookies, I’ll share the basics, a how to video and all the tools for each cookie, below. Please feel free to leave me a comment below if you have any questions.
Hope you enjoy making these, they were a lot of fun to decorate!
Video Tutorial on Decorating Camping Cookies with Royal Icing
If you can’t see the video click here.

How to Decorate These Cookies
I’ll be sharing the cookie cutters, tools, and basic decorating tips first, and then will explain how I made the individual designs below.
Cookie Dough
The cookie recipes used in this post are roll out sugar cookies and cookies n’ cream roll out cookies. You can find more roll out cookie recipes here.
Cookie Cutters
Find the cookie cutters by clicking on each individual cutter below (Any links to Amazon in this post are affiliate links):
Royal Icing Consistency
The consistency of icing is key for easy decorating. Click here to see a YouTube video on finding the right icing thickness for basic flooding and decorating. I used different consistencies for some of the details of the cookies, and have shared each consistency in the Decorating Camping Cookies Video.
Cookie Decorating Basics
This video on outlining and flooding is a good place to start if you’re new to decorating cookies with royal icing. These cookie decorating basics YouTube videos may also be helpful to get you started.
Decorating Items
What you’ll need:
- Piping Tips – PME #1.5, PME #2, PME #2.5 and PME #3 (I used a few more tips and will explain in individual cookie descriptions. Please leave me a comment below if you have questions)
- Piping Bags
- Couplers
- Gel paste colors
- Scribe Tool or Toothpicks
- I’ll be sharing more tools needed to make some of these cookies, in the corresponding cookie how-to descriptions below.
For most of these cookies, the video will show all the details you’ll need to know, otherwise I have shared a few notes, as well as the tools used for each.

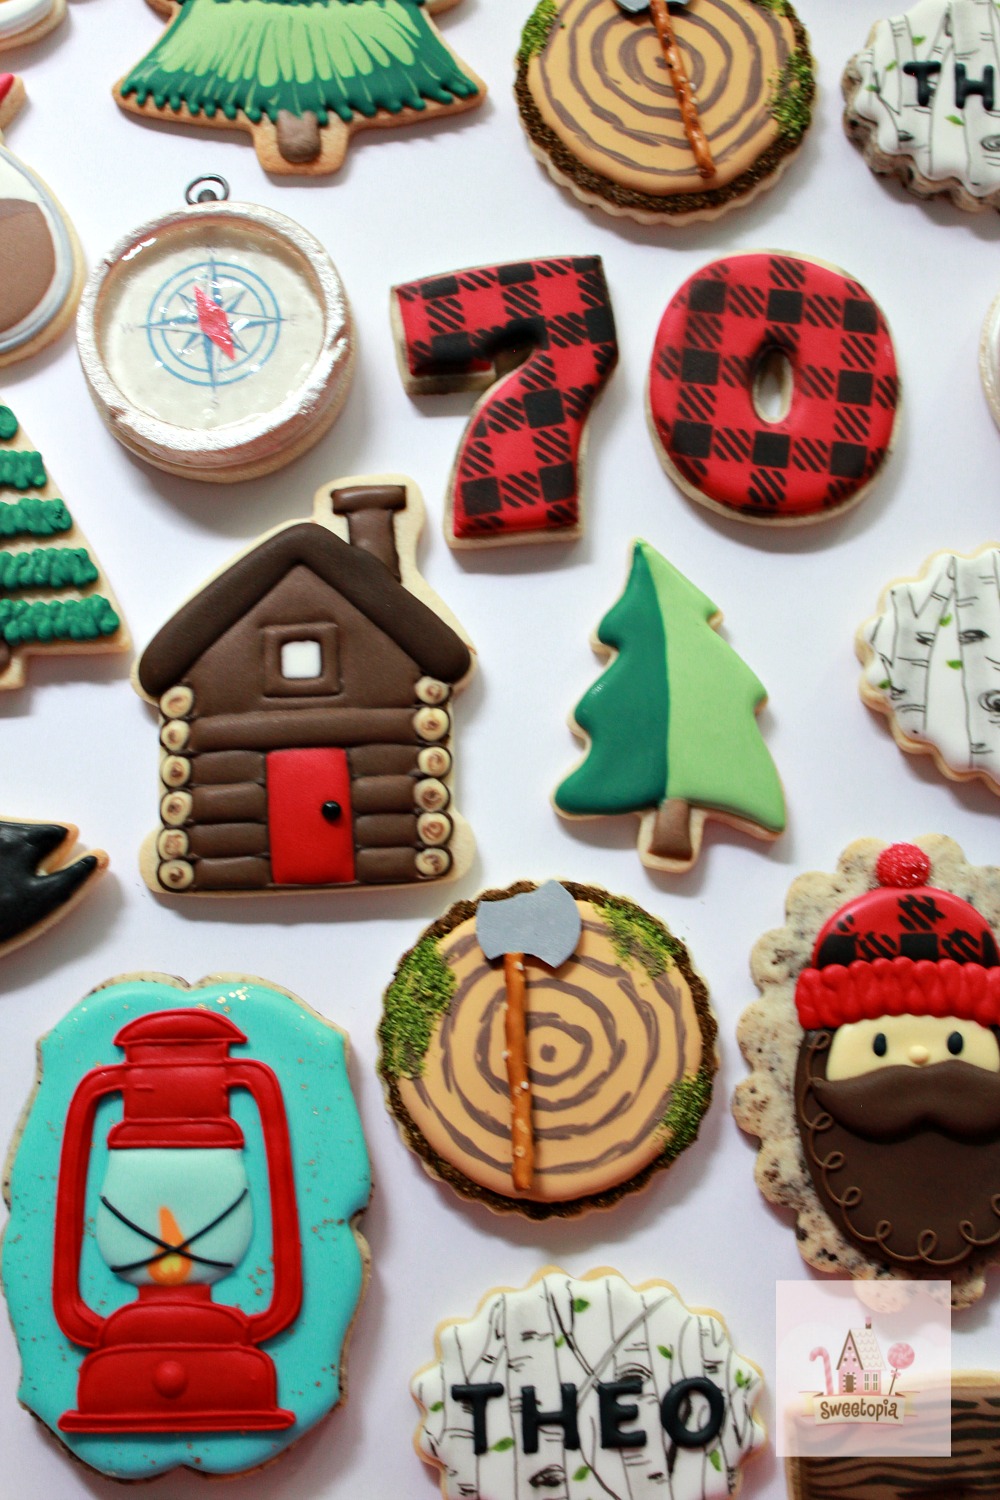
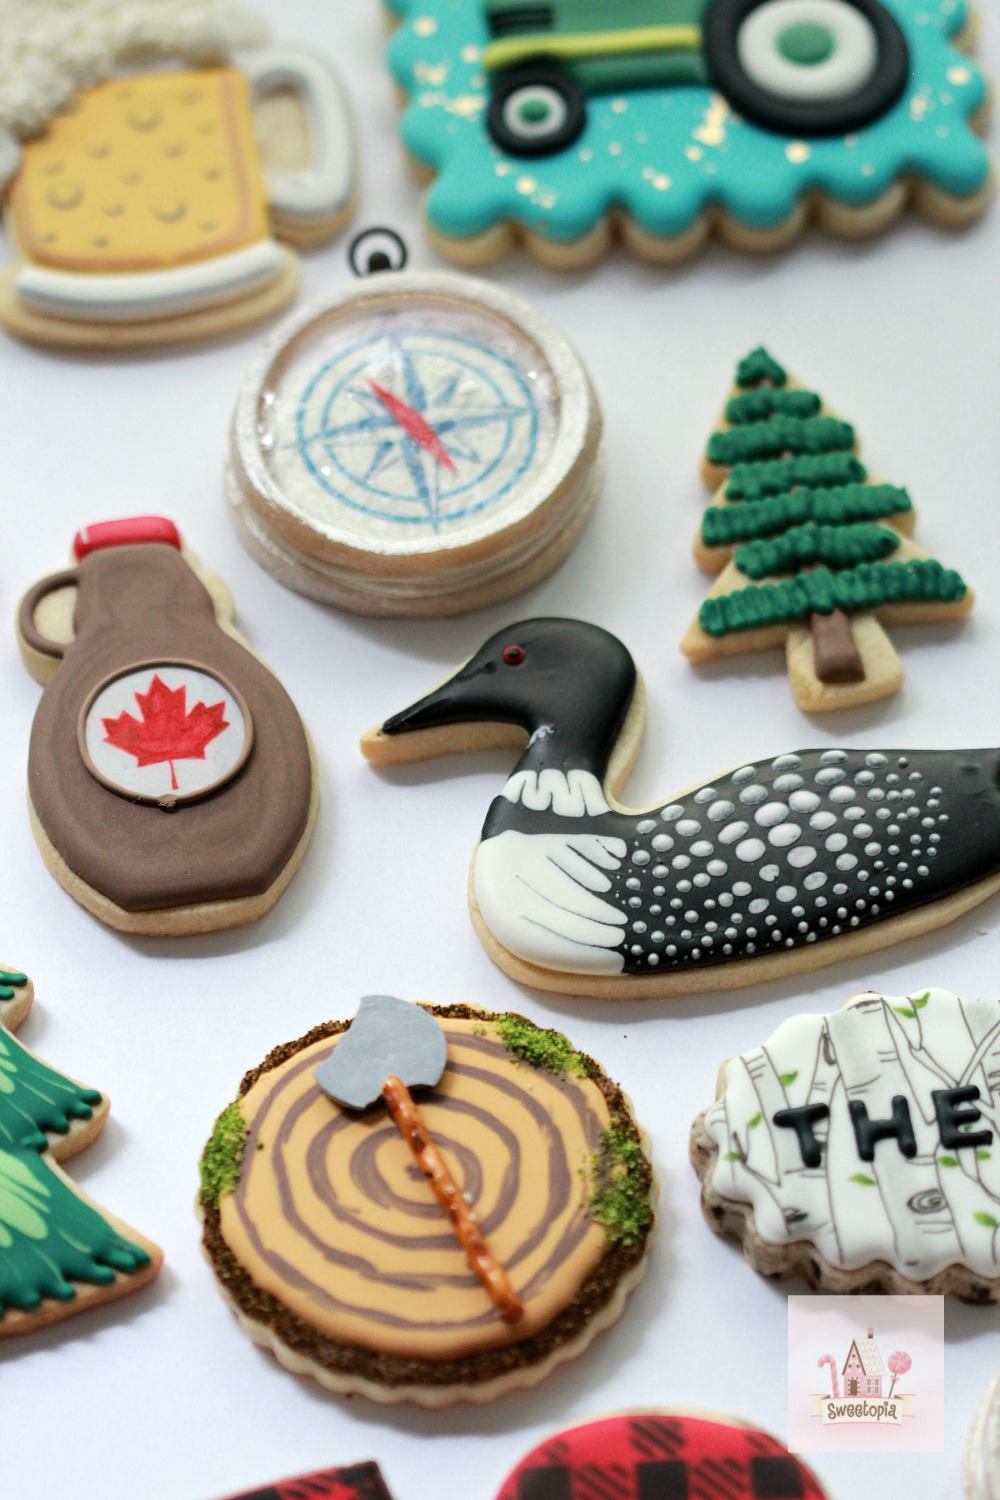
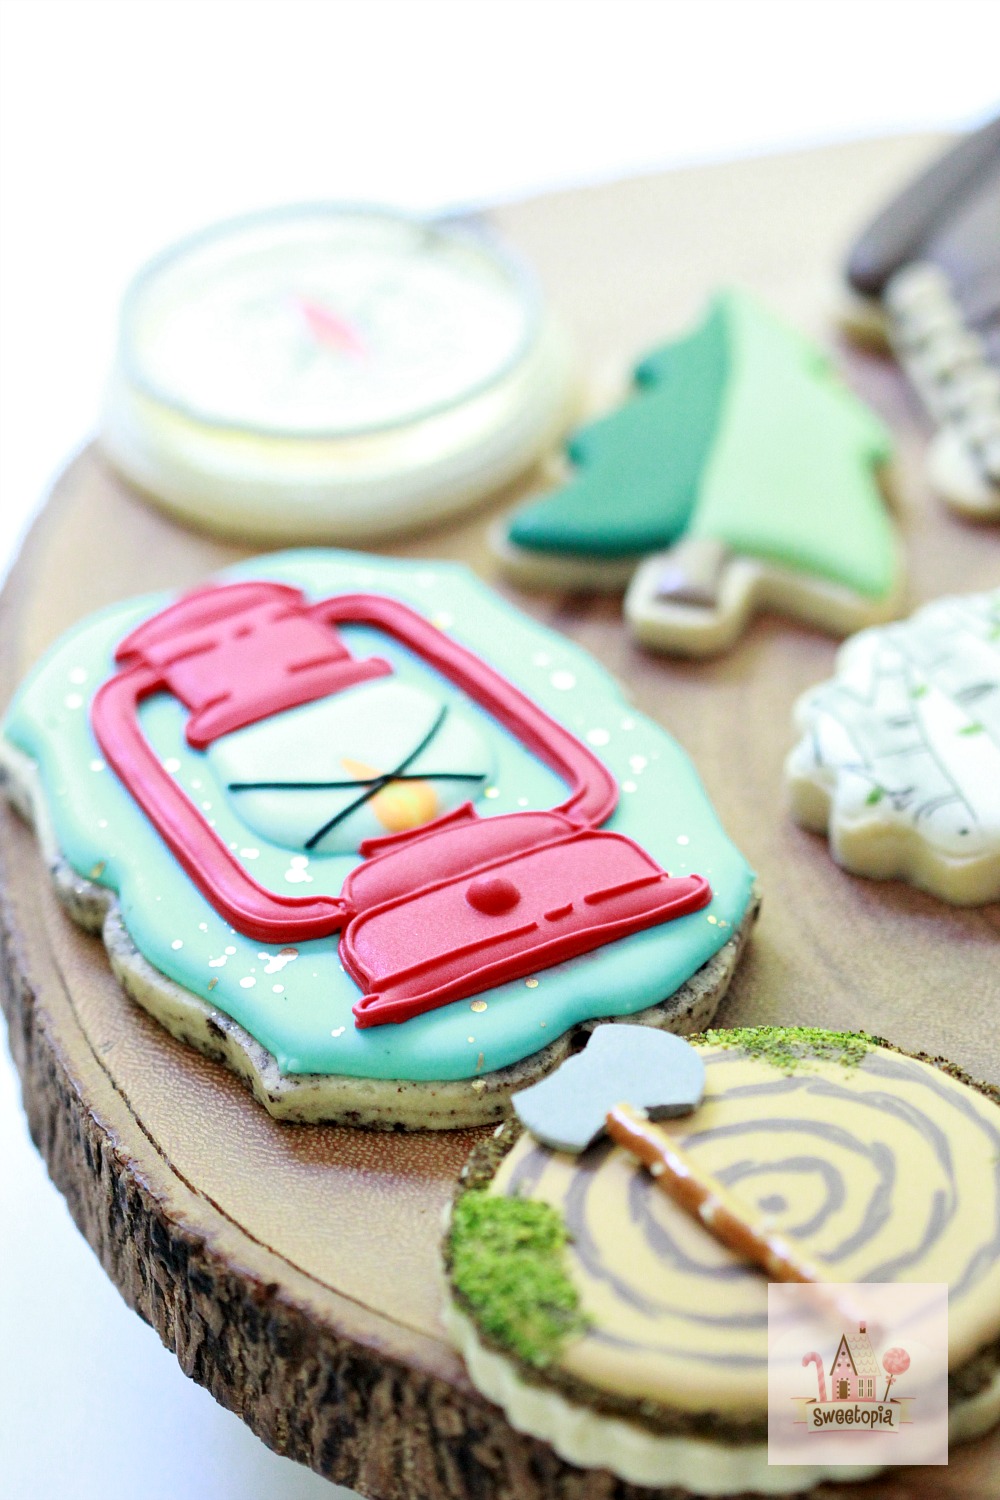
Cross Section of Stump Cookies
To make the cross section of a stump cookies, outline your circle with brown icing and a #2.5 tip. While the icing is wet sprinkle brown graham cracker crumbs or brown sanding sugar on the edges. To make the brown graham cracker crumbs, pulse graham cracker crumbs or crackers in a food processor and add brown food paste coloring and mix. Place on a baking sheet and bake at 200 degrees Fahrenheit for 10 minutes to dry crumbs out.
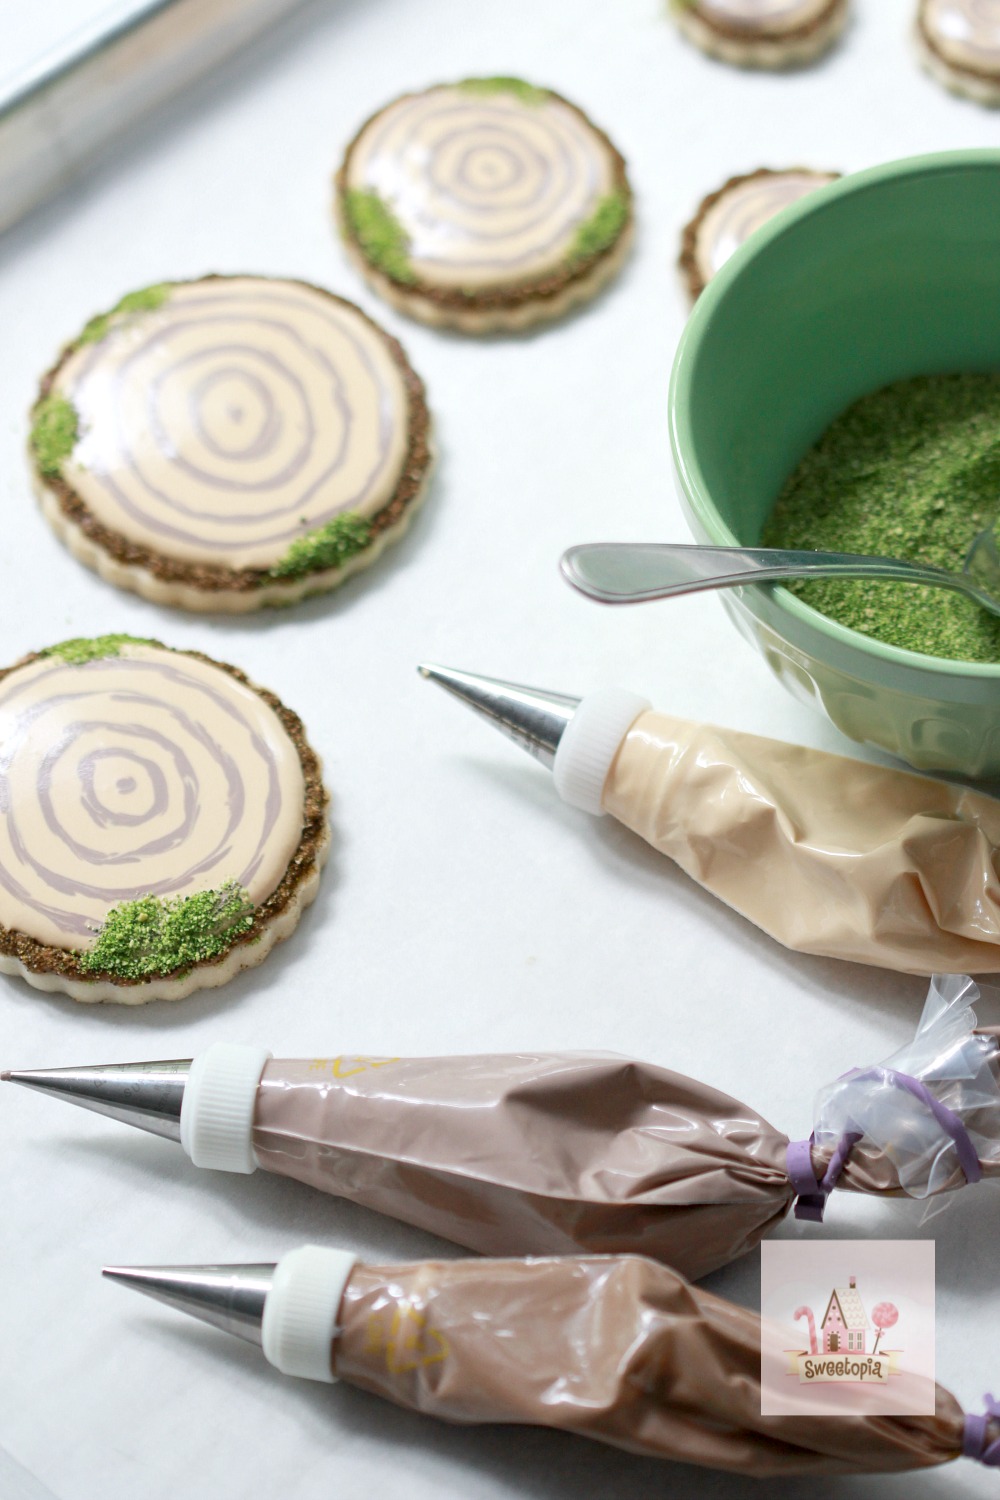
For the edible moss, I ended up pulsing graham cracker crumbs in a food processor and adding food coloring to the mix without diluting it, and then baked the green crumbs in oven at 200 degrees Fahrenheit for 10 minutes to dry them out a bit. Just a note that the moss food coloring I tried at first ended up making the crumbs too dark, so went with Wilton’s leaf green, which is what you see pictured here. I just added food coloring until I was happy with the shade.
The extra “moss” is ready to go in a ziplock bag for the next time. It’s easy to apply by the way – Just ice your cookie, sprinkle the moss onto the icing and let it dry. I placed my cookie on a coffee filter to catch the excess crumbs and pour back into the ziplock bag for the next cookie.
Other items used:
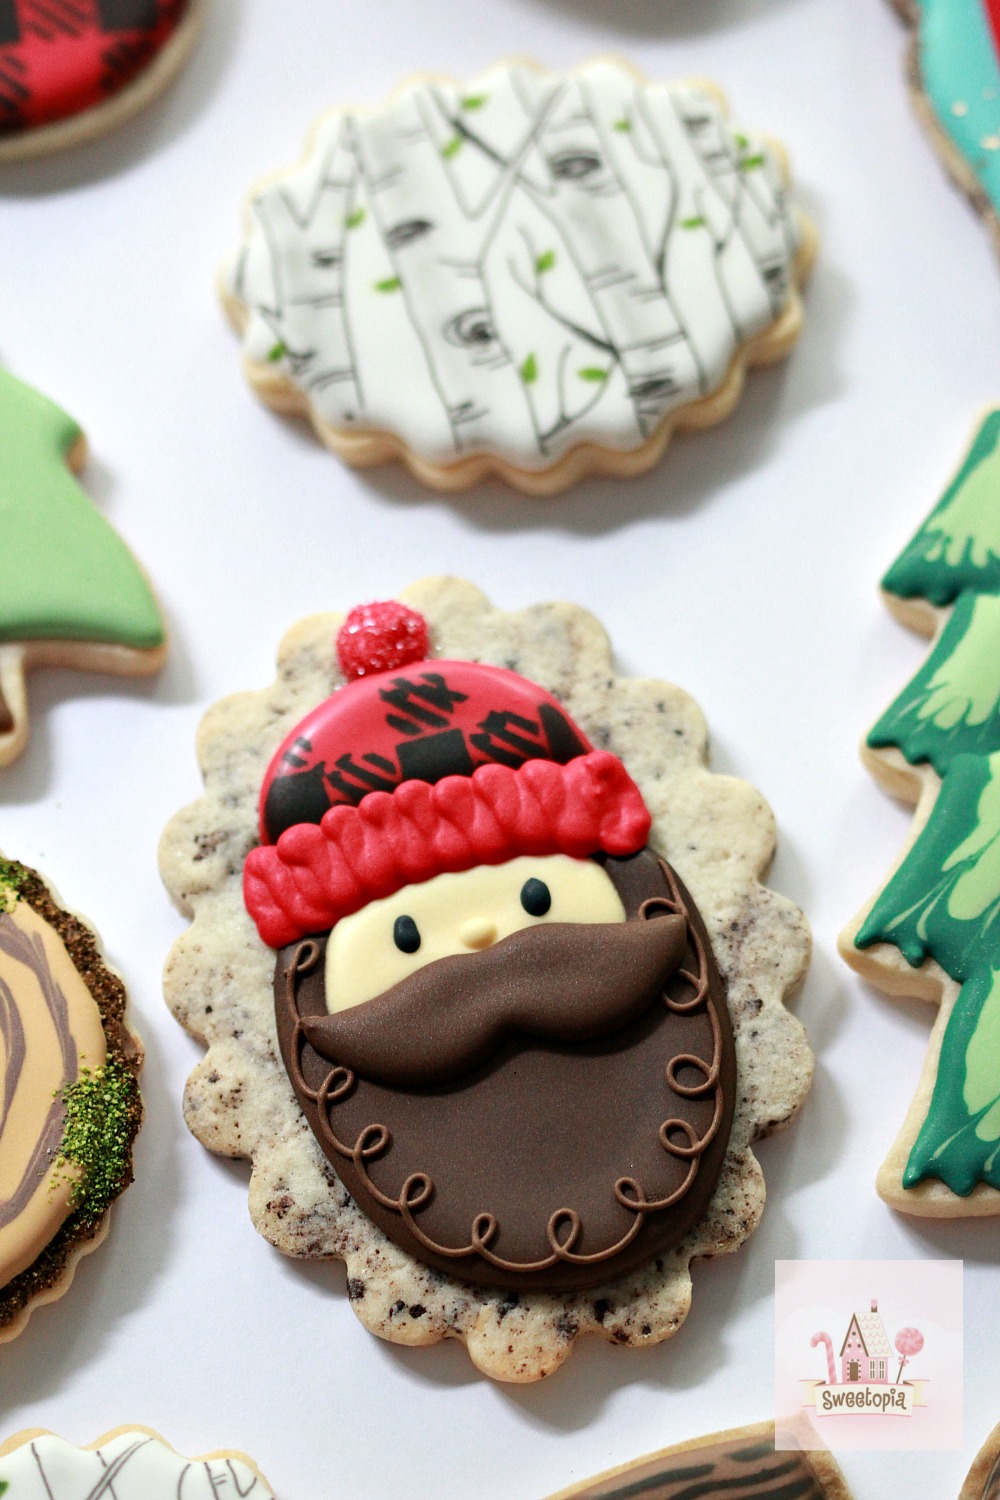
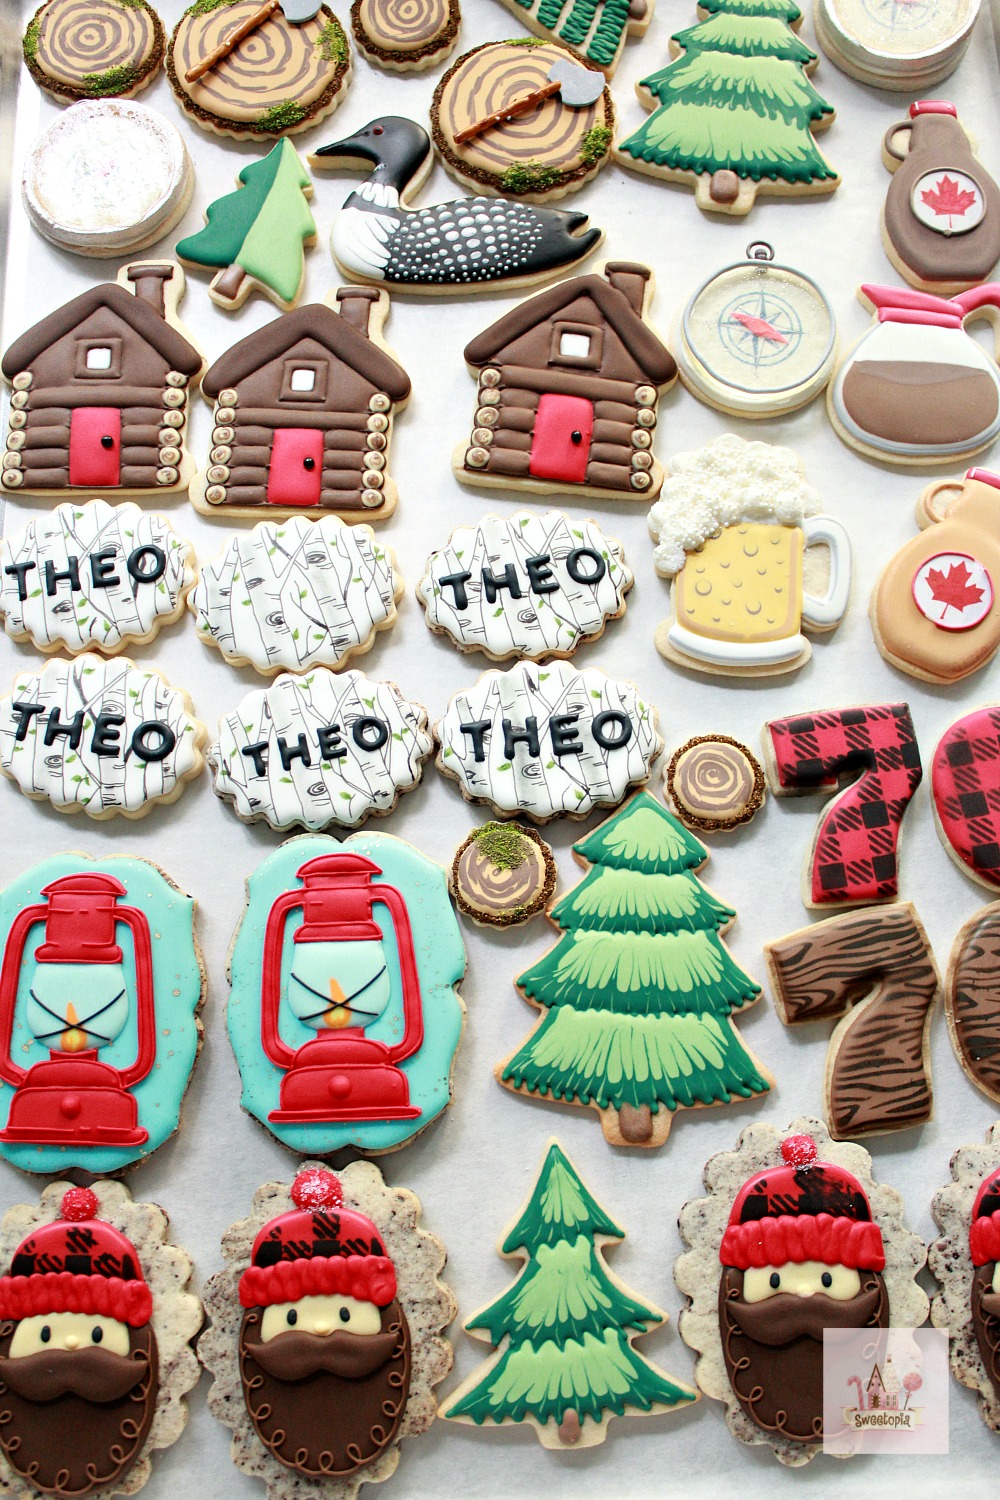
Lumberjack Cookie
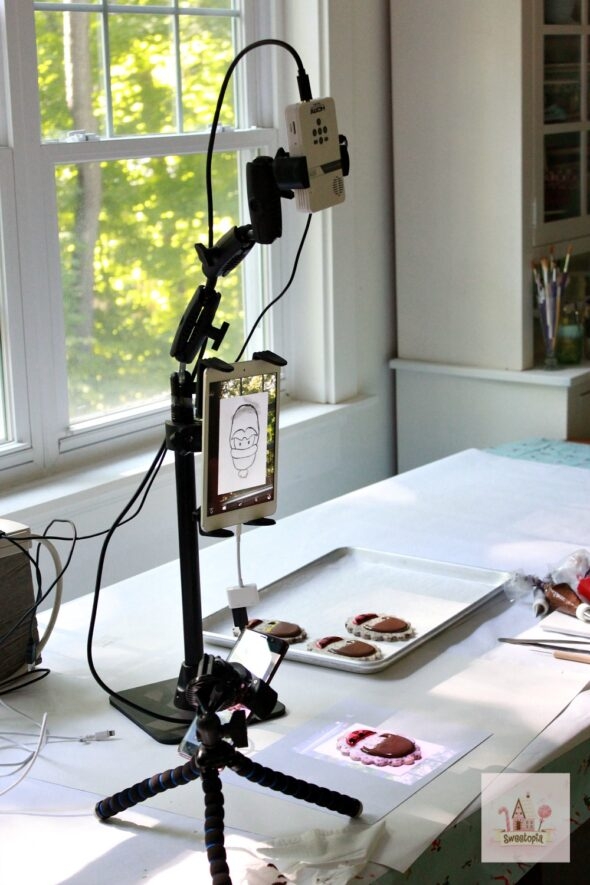
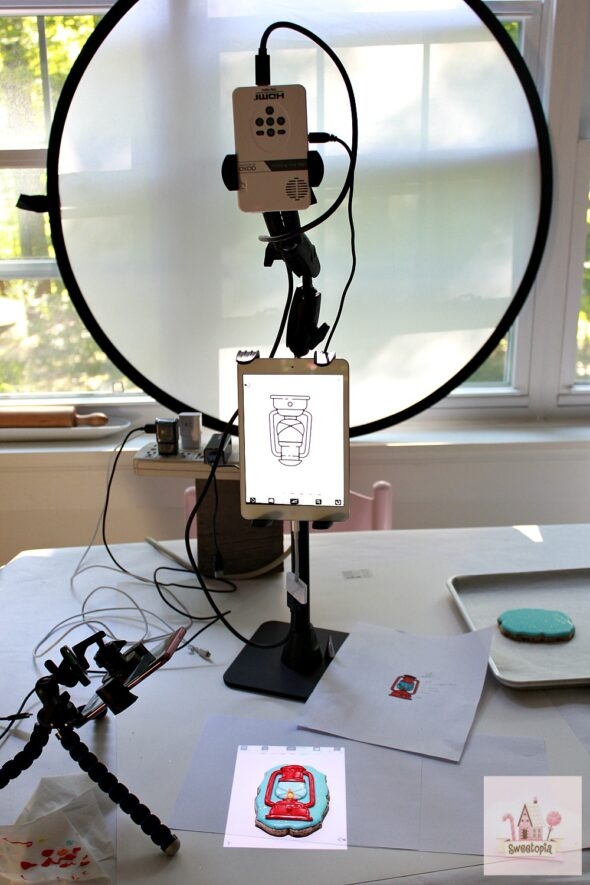
For the lumberjack, I used the Pico projector. It’s a small, hand-held size projector that I use to project an image onto my cookie. It’s plugged into my iPad and mounted on this Arkon mount below. The mount is called the Remarkable Creators Phone and Tablet Stand, is $139.99 and you can get it on Arkon’s site here. You can get 20% off with the coupon code sweetopia. You should know I am an affiliate of Arkon and Amazon, but only share products I use and love with you.

To use it, I just load the image in an app on my iPad called Camera-Lucida, rotate it 180 degrees (the image projects upside down), and I’m ready to go.
If you’re interested in trying them out, here is what I use:
Arkon Remarkable Creators Phone and Tablet Stand (20% off with coupon code sweetopia)
Mini HDMI to HDMI cable (doesn’t come with the Pico projector)
Lightning to HDMI Adapter (Adapter for HDMI cable to attach to iPad)
The projector comes on it’s own, and it’s key to have a good mount to hold it up. I love the Arkon mount… it’s sturdy with a solid base so I don’t need to clamp it to a table and can move it anywhere, it can easily be adjusted to project at any angle and the clamps which hold the projector and iPad are adjustable, snug and tight.
Other Items:
- Lumberjack Template pdf (printable link)
- Nesco Gardenmaster Dehydrator
- Buffalo Plaid Stencil (If sold out at How Sweet is That? Amazon has stencils here).
- Stencil Genie
- Dinkydoodle Airbrush
- Black Airbrush Food Coloring
- Sanding Sugar
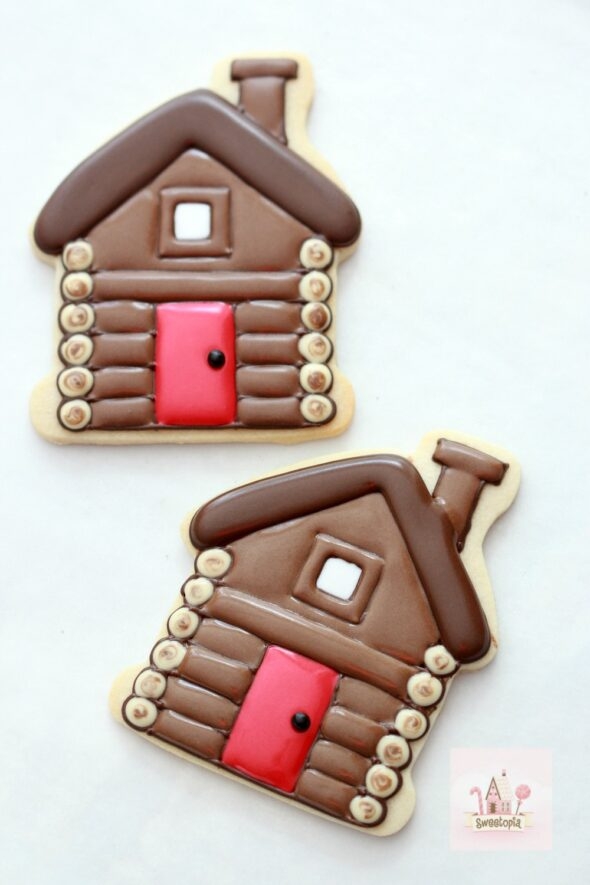
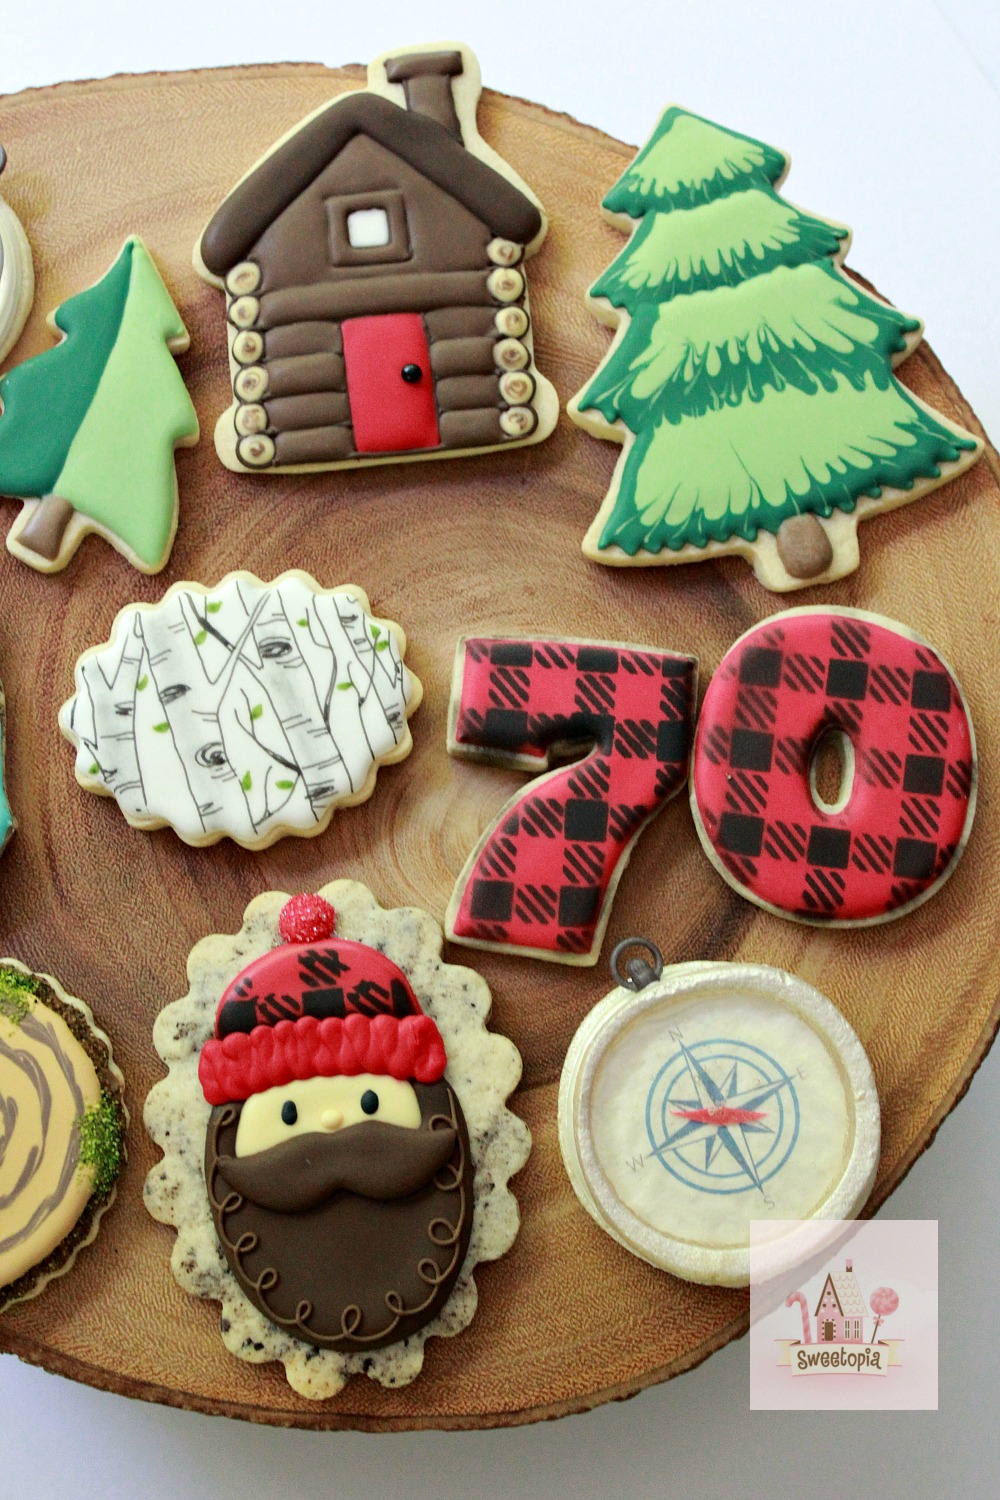
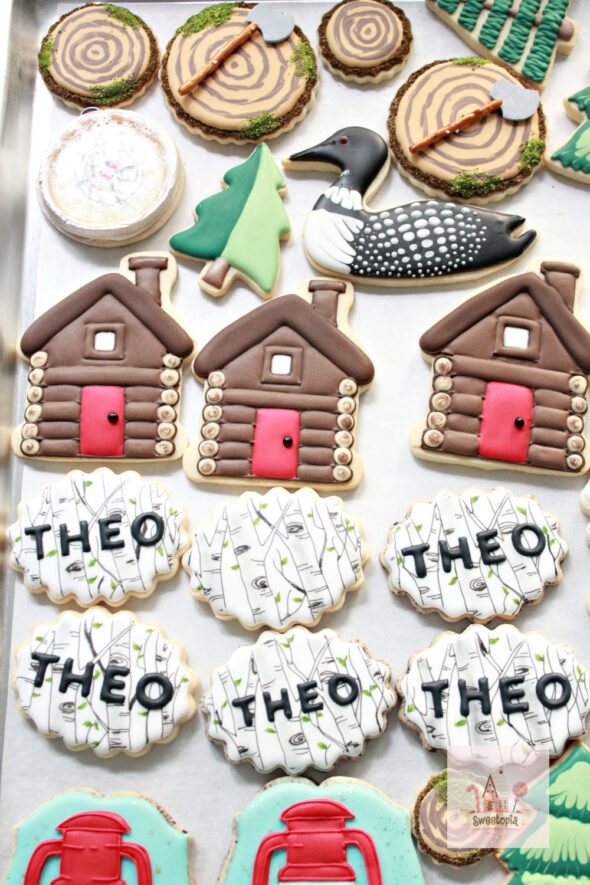
Cabin Cookies
For the cabins, I used the Pico projector. I mentioned this earlier, but in case you missed it, it’s a small, hand-held size projector that I use to project an image onto my cookie. It’s plugged into my iPad and mounted on this Arkon mount below. The mount is called the Remarkable Creators Phone and Tablet Stand, is $139.99 and you can get it on Arkon’s site here. You can get 20% off with the coupon code sweetopia. You should know I am an affiliate of Arkon and Amazon, but only share products I use and love with you.
Please see above in Lumberjack cookies for more detail on the projector.
Other Items:
- ruler
- brown edible pen
- black sugar pearls
- long tweezers
- cabin image (I bought the images, I’m not sure I can share the file here though)
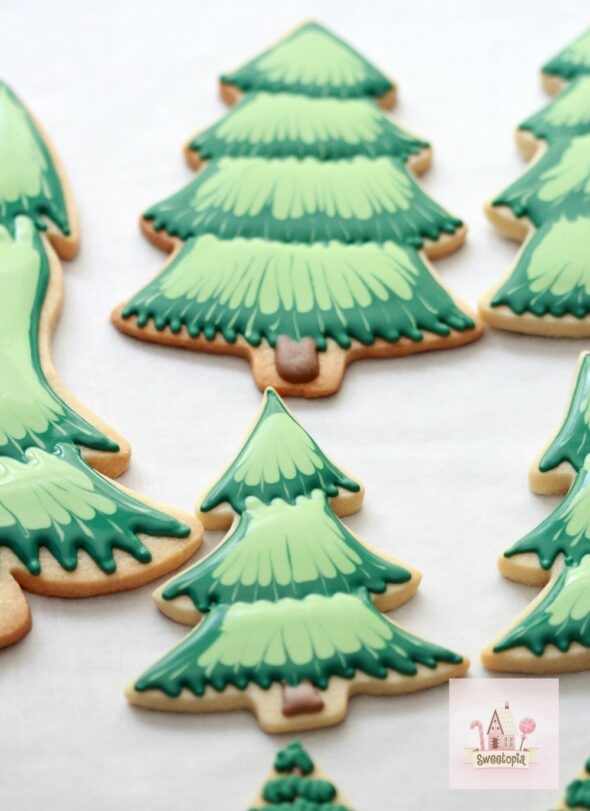
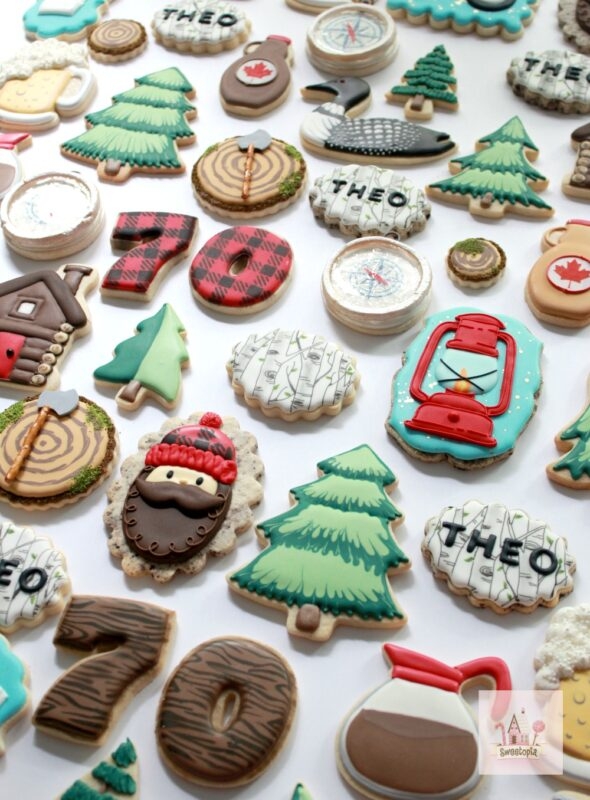
Tree Cookies
No other tools etc. for the trees, although I did do some different designs than what is shown in the video. Please let me know in the comment section below if you have any questions.
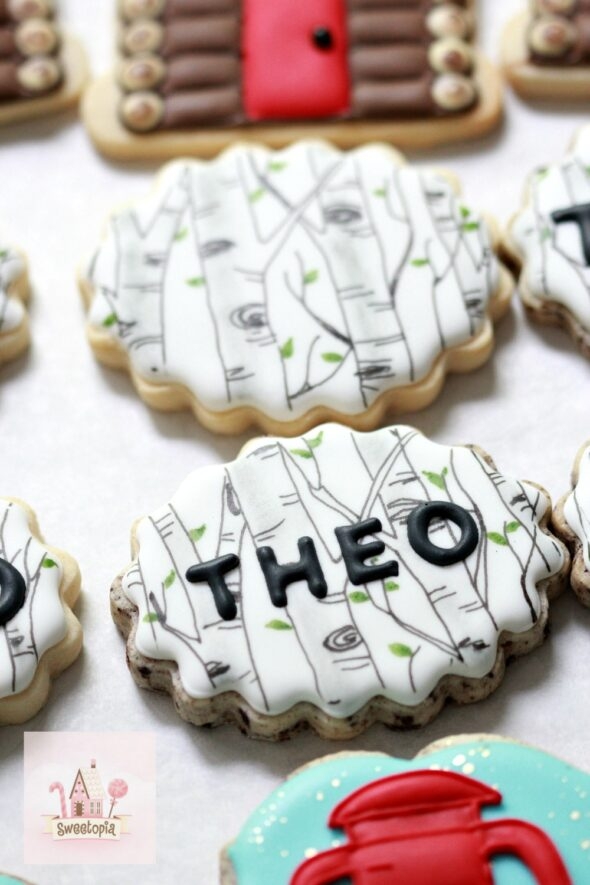
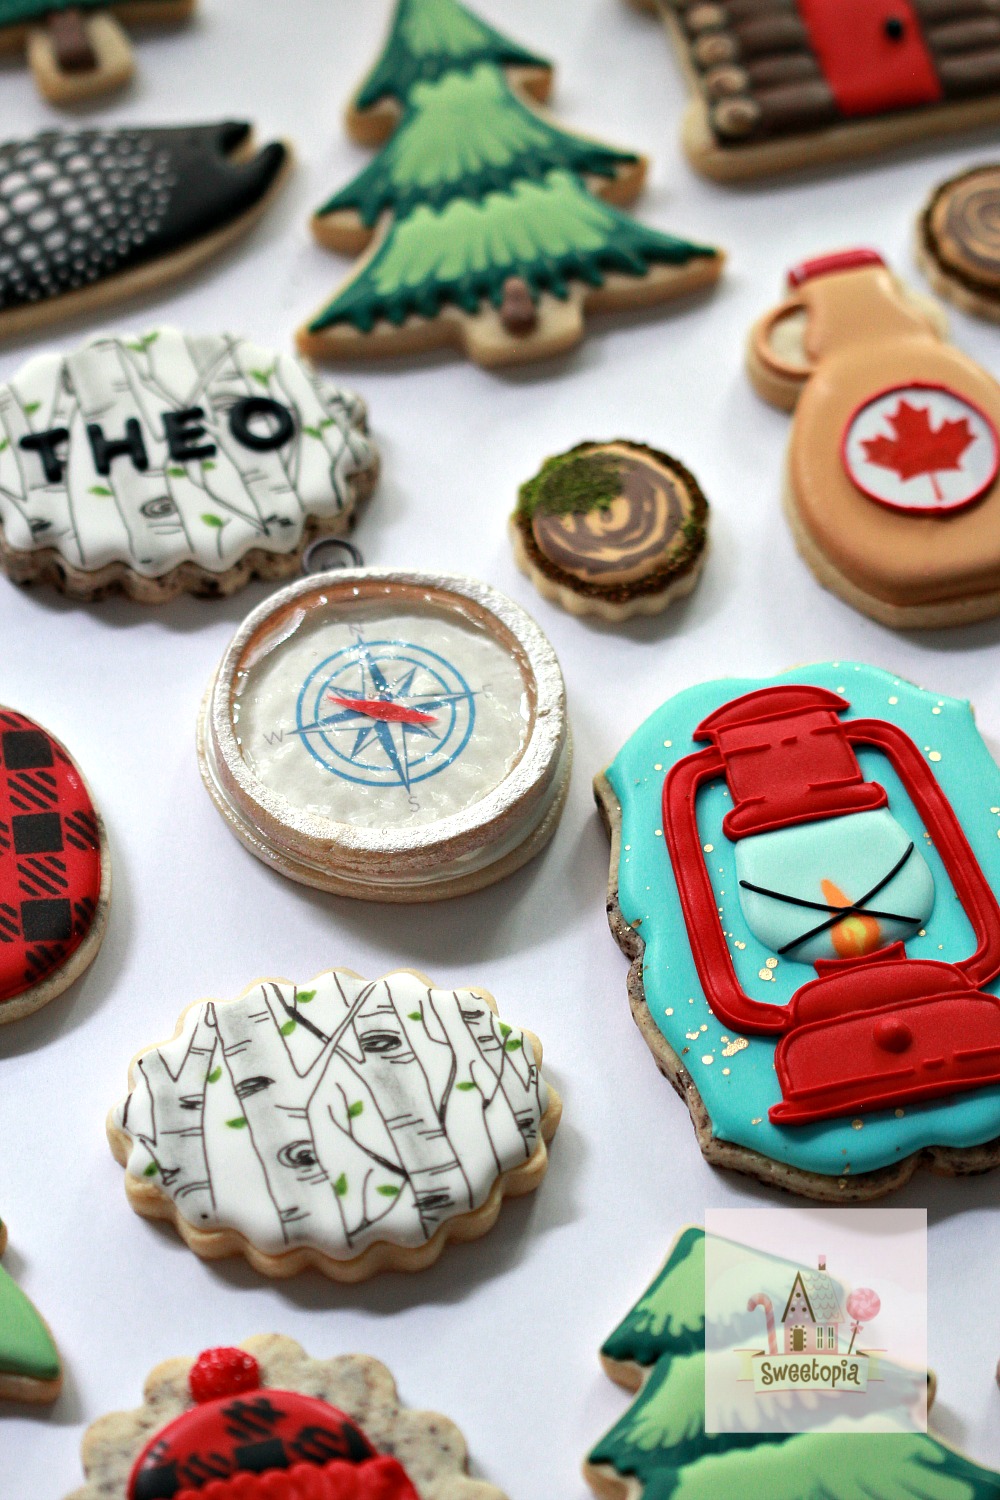
Birch Tree Cookies
For the birch trees, I used the Pico projector. I mentioned this earlier, but in case you missed it, it’s a small, hand-held size projector that I use to project an image onto my cookie. It’s plugged into my iPad and mounted on this Arkon mount below. The mount is called the Remarkable Creators Phone and Tablet Stand, is $139.99 and you can get it on Arkon’s site here. You can get 20% off with the coupon code sweetopia. You should know I am an affiliate of Arkon and Amazon, but only share products I use and love with you.
Please see above in Lumberjack cookies for more detail on the projector.
Other Items:
- black Food Art pen
- green Food Art pen
- grey food powder coloring
- Wilton paintbrush
- birch tree pattern
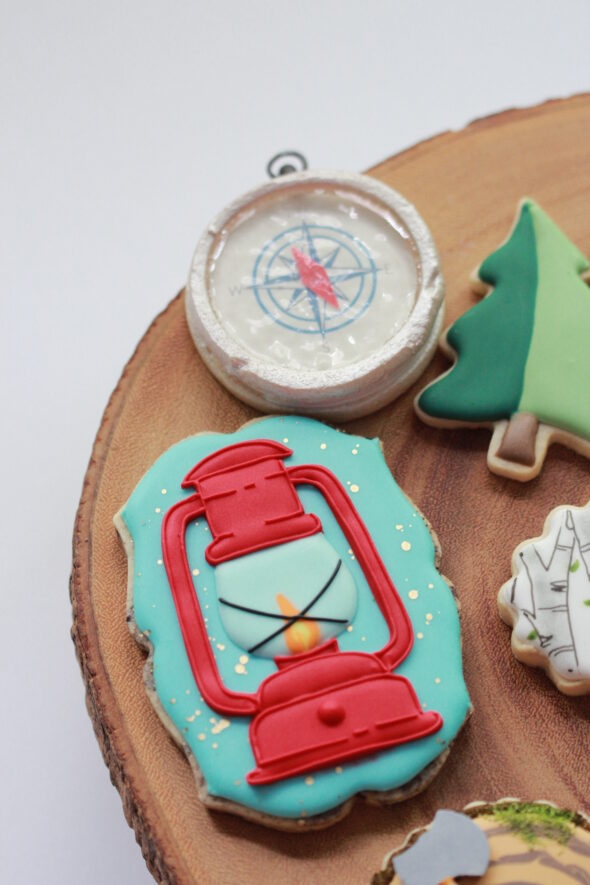
Lantern Cookies
For the lanterns, I used the Pico projector. I mentioned this earlier, but in case you missed it, it’s a small, hand-held size projector that I use to project an image onto my cookie. It’s plugged into my iPad and mounted on this Arkon mount below. The mount is called the Remarkable Creators Phone and Tablet Stand, is $139.99 and you can get it on Arkon’s site here. You can get 20% off with the coupon code sweetopia. You should know I am an affiliate of Arkon and Amazon, but only share products I use and love with you.
Please see above in Lumberjack cookies for more detail on the projector.
Other Items:
- lantern image (I bought the images, I’m not sure I can share the file here though)
- Wilton paintbrush
- paint palette
- edible gold
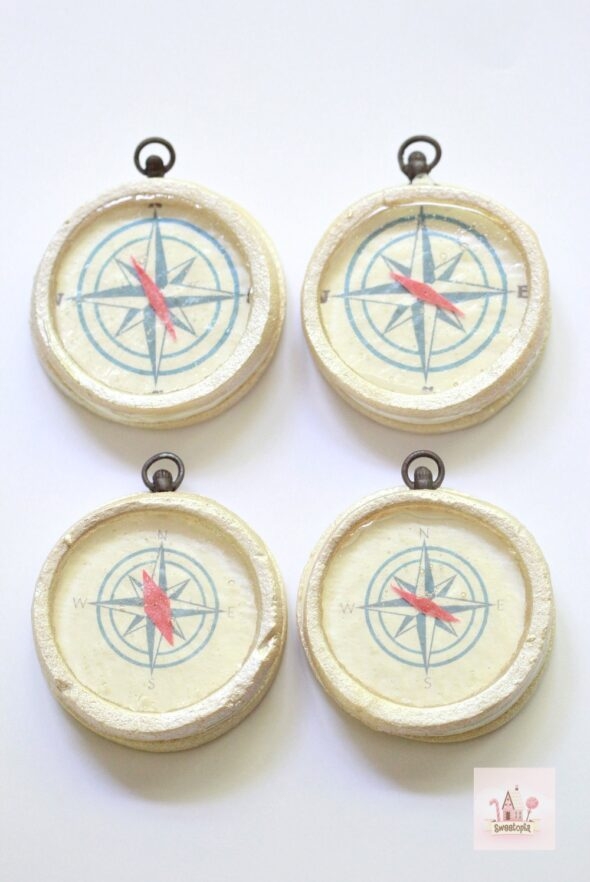
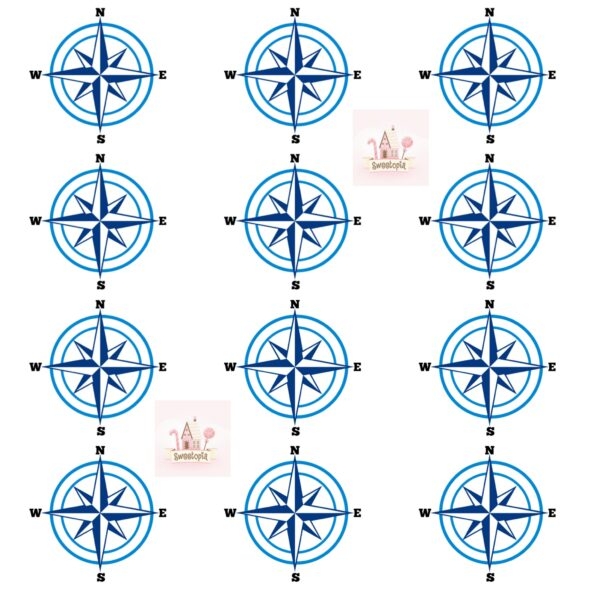
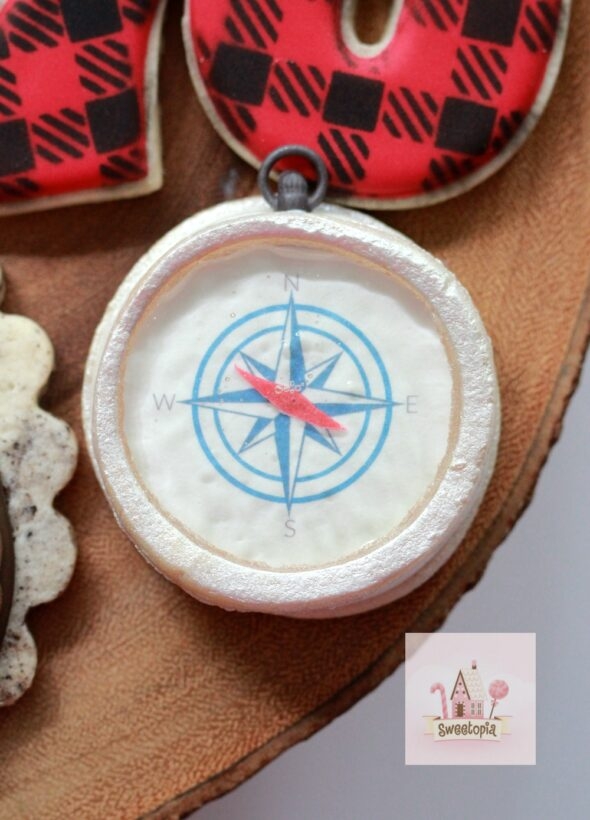
Compass Cookies
The “glass” for the compass cookies is made with isomalt, which is a sugar substitute that has little impact on insulin levels, however, please be warned, it can cause flatulence so should be consumed in small quantities. Eat the compass cookie in small amounts; save for later or share!
Other items:
- PME pearl edible lustre spray
- frosting sheets
- edible ink printer (never use with real ink cartridges)
- edible ink cartridges
- compass rose template 1 (printable pdf)
- compass rose template 2 (printable pdf)
- exacto knife
- compass stencil
- gum paste or fondant (you will likely need to color by hand with gel food coloring)
- small fondant rolling pin
- glass precision cutting mat
- pocket watch silicone mold
- long tweezers
- barbeque skewer
- isomalt crystals
- stainless steel circle cutters
- clear corn syrup
- paper towel
- sponge brush
Compass Rose Template 1
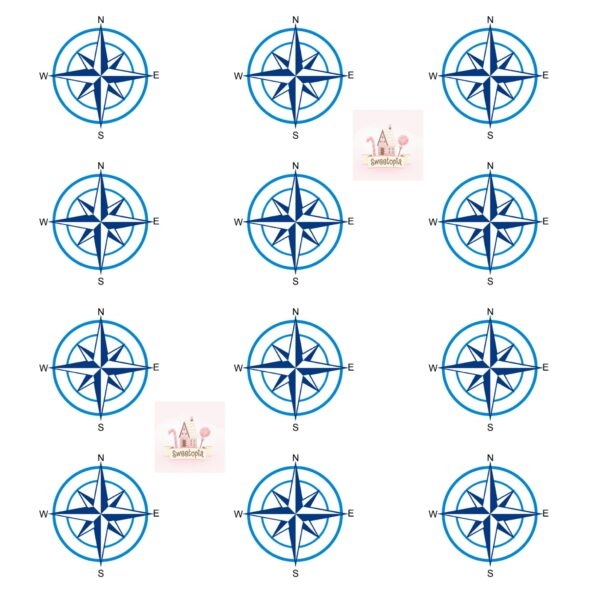
Compass Rose Template 2
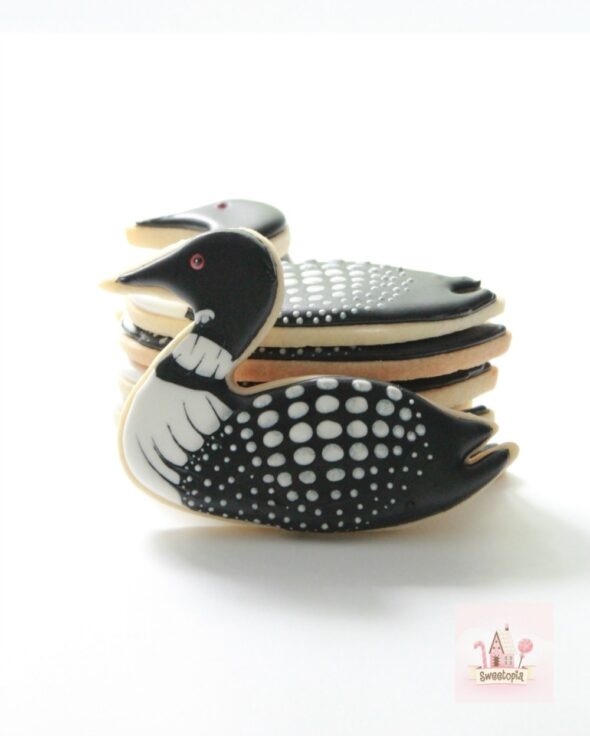
Loon Cookies
- White Chalk Edible Pen
- Design inspiration from here.
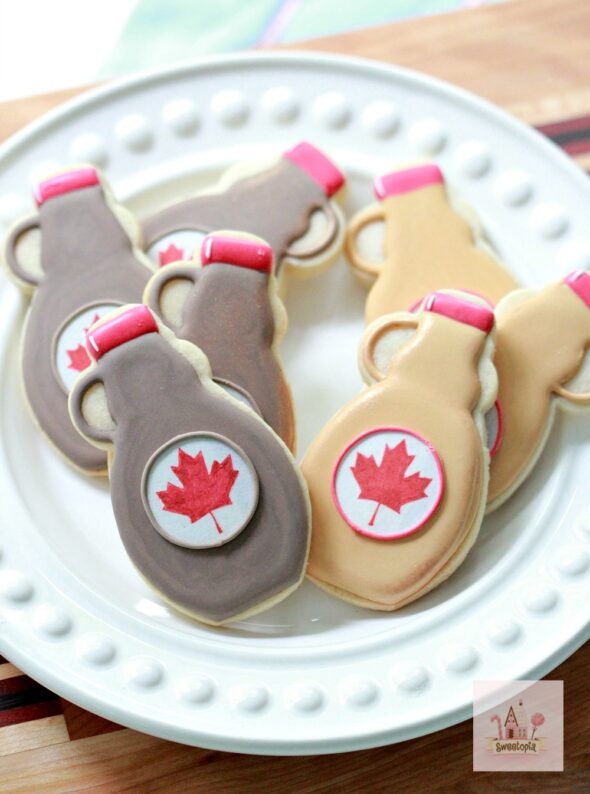
Maple Syrup Jar Cookies
- frosting sheets
- edible ink printer (never use with real ink cartridges)
- edible ink cartridges
- maple leaf clip art and inspiration from iStock
- red food art pen
If you have any questions or comments please feel free to drop me a line below in the comment section or on social media. You can find me on Facebook, Instagram, Pinterest, Twitter and YouTube.
I also have a FAQ section here and a glossary of terms here in case you’re new to decorating. I may have missed some details, there was so much to share in this post, so please feel free to ask any questions below and thanks for visiting me here!
Happy decorating!
xo,
Marian


WOW!! Oh my word, Marian!! These are a tour de force!! Thank you for sharing your delightful gift!! I am certain your dad was overwhelmed!!
Hi Teresa C,
Thank you! They did take a while! Because my schedule didn’t allow me to make them all at once, I decorated and froze them until all done. Thanks for taking the time to comment!
Marian, these cookies are incredible! Your Dad must have been thrilled. You always do such beautiful work!
Thanks Marilyn! I really appreciate it! Hope you are enjoying your Ontario summer! 🙂
Thanks for sharing. I’m always so hesitant to attempt to add color to my royal icing because of the warnings that oil breaks the icing. How can you tell if a flavoring has some kind of oil in it?
Hi Molly P.,
Me too, oil and royal icing are generally not good together. That’s why I was wondering if it would work. I didn’t use a lot of flavoring oil, and even if you added some more, I don’t think it would affect such a large batch of icing (1 kg). I’m going on how it didn’t affect mine at all. I also use a bit of shortening to grease my transparency paper when I’m doing royal icing transfers, and that doesn’t affect the royal either, so, I’m thinking it has to be a larger amount of oil. Let’s say your whole mixer bowl and tools hadn’t been cleaned well after making buttercream, then maybe your royal icing wouldn’t do well in the bowl after that.
My flavoring bottle says LorAnn Oils Caramel Flavor. I think they would be labelled as an extract or just flavoring if they aren’t an oil. (And likely will say oil on the label).
Hope that helps!
To sum it all up: AWE-MAZING!
I call them the “THEO COOKIE COLLETION” haha,
absolutely stunning and creative, my friend 🙂
I loved (!!) the video Marian,
it truly shows the hard work you put into all these designs!
May God bless you. Your talent is simply awesome.
Love and hugs,
Niner
WOW! Your video is mesmerizing. You have some CRAZY piping skills! How did you learn how to do all this?
Thanks Diane!
I started with Peggy Porschen’s book, Pretty Party Cakes, learned some on CakeCentral.com, and also took a course at the Bonnie Gordon Confectionery Art College (not sure if it’s still around), and then just over time. It’s almost 20 years now!! Just caluculated that wow…
Hope you try and have fun with it too!
OK! I put the book in my cart on Amazon, subscribed to CakeCentral.com, and TRIED to subscribe to you! Just FYI, when I put in my info, I get “Not found, error 404.” Thought you’d like to know….
Hi Diane,
Thank you for letting me know! The site is getting worked on in the next few days, and that should be fixed soon I hope!
Where do I see the pine tree tutorial?
Hi MH,
Yes, there are a lot of images, so it’s hard to see! You can find it under the recipe, under the title, Video Tutorial on Decorating Camping Cookies with Royal Icing.
Thanks, I found it!!! (not sure how I missed it before, but it made me watch 10 other cookie videos! It’s addicting to watch you decorate!)
You do BEAUTIFUL work, thanks for sharing.
These are INCREDIBLE and I really appreciate you sharing your talents with us. I have so many outdoors men in our family. I hope to make something that resembles your cookies one day!!
Thank you for generously sharing your talents with us.
Aw thanks Kimberly!
Thank you once again for teaching us such a great set!! You are so generous with your knowledge and I’m so grateful!! You are the reason I started decorating 7 years ago. Thank you so much!!
Hi Christine,
Well thank you so much for your comment, so nice to hear and made my morning already! xo
I noticed that your regular royal icing recipe has cream of tartar but it is not in this recipe is there a reason?
Is there a way to make this into salted caramel flavor?
I absolutely loved your video. But I am only a hobbiest and do cookies to give away as a blessing to others. And as much as I would loved to replicate your talented, artistry and youthful energy with everything you did, as well as all the pricy equipment you used, I was only able to use the caramel icing recipe. But you are so sweet to have shared this with everyone. What a wonderful creation you made for someone you love. I only wish I had started doing cookies when I was younger, instead of 77. God bless you!
Awww, thank you for your kind comment. I enjoyed reading it. May God bless you as well!