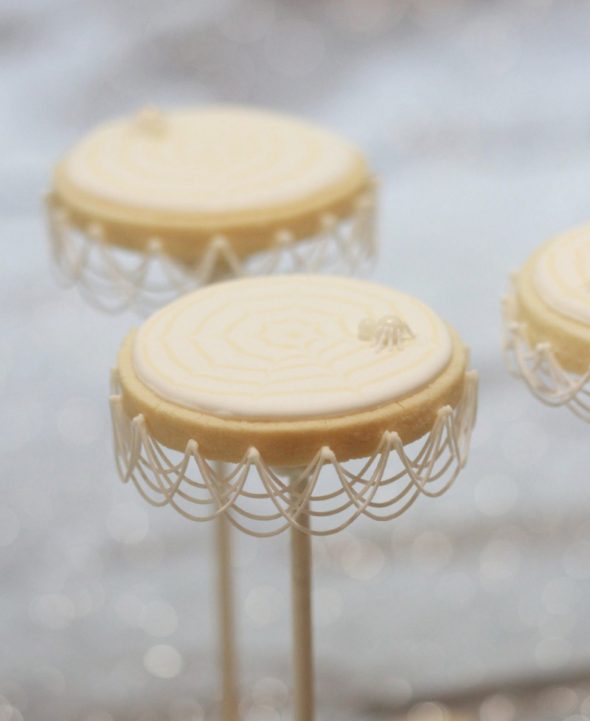
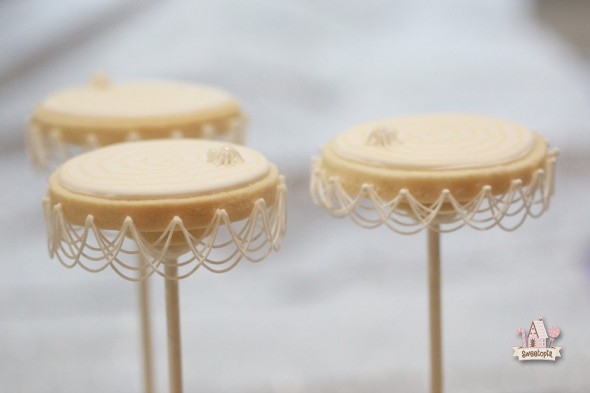
I’ve always admired the beautiful art of royal icing stringwork and wanted to play around with it. Outside of trying the technique at the Bonnie Gordon College of Confectionary Arts, this is my second attempt so I’m definitely no expert (First attempt on this gingerbread house here), but with the right icing consistency and a bit of practice, it was surprisingly doable. Neater and more uniform icing swags are aspects I’d like to work on and I’m looking forward to practicing and trying out gorgeous new designs like these on my Pinterest Stringwork board here.
I learned through experience that the royal icing consistency I use to flood cookies is a bit too runny to easily pipe royal icing strings. A major key to easily be able to pipe the strings is the consistency of the icing. It needs to be fairly thick. To check the consistency – dip a spoon into the icing and lift; the icing should stand straight up. To share the aspects which helped me I’ve created a video, and have step by step photos on making spider web cookie pops below:
*
How to Pipe Basic Royal Icing Stringwork & Spider Web Cookie Pops
Recipes
You can find the recipe for the dough here. The royal icing recipe can be found here
.
Making the Cookie Pops
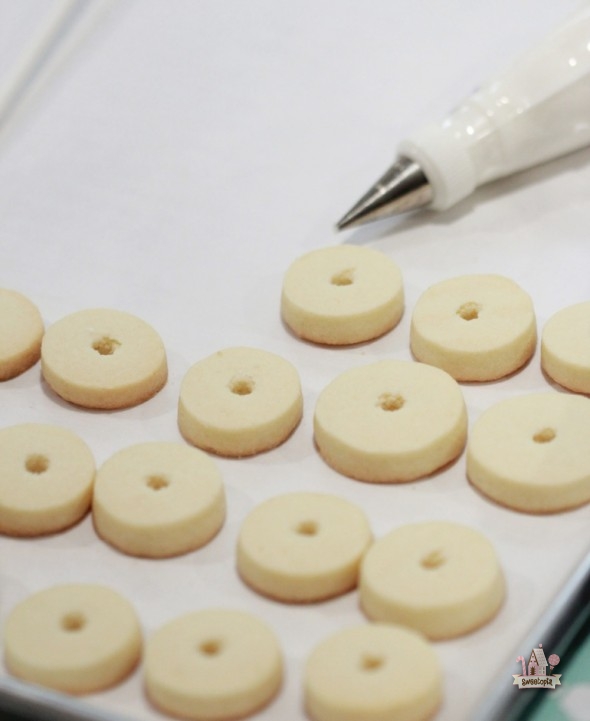
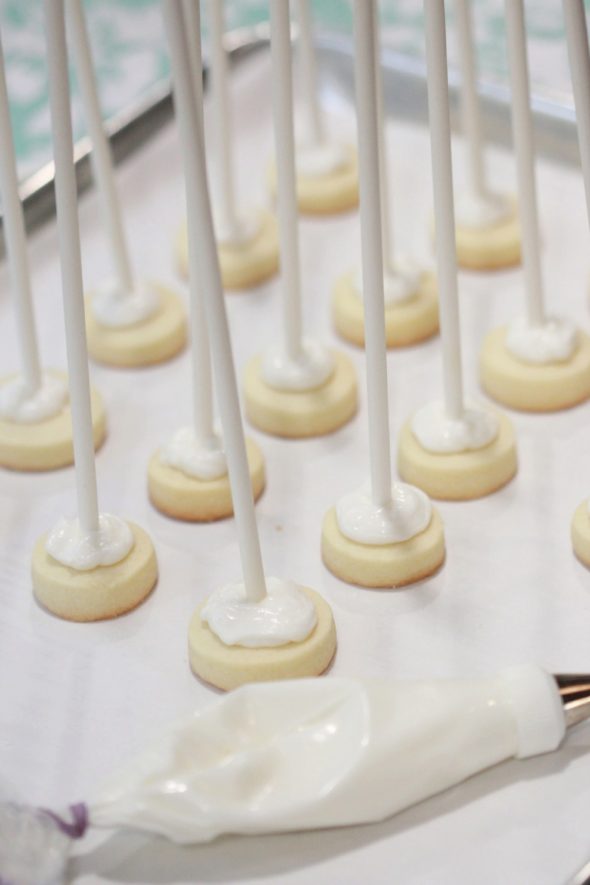
Bake two different sized circle cookies. I used a 3” or 7.5 cm diameter circle cookie cutter for the spider web base and a 1” or 2.5 cm round cookie cutter for support. As soon as the small cookies come out of the oven, use a cookie pop stick to make a hole in the center of the cookie. Let your cookies cool.
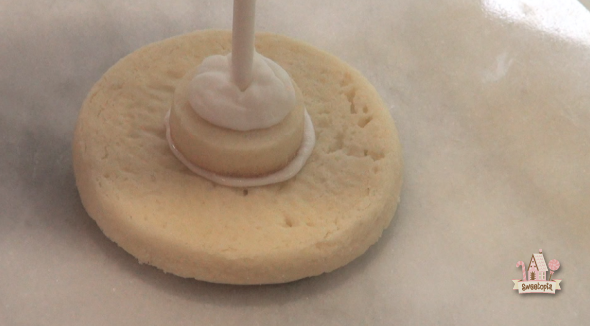
Insert the cookie pop stick into the small cookie and pipe a generous amount of royal icing on the cookie and around the cookie stick. Let those dry for at least 6-12 hours. How long it takes for your icing to dry depends on the humidity in your area. See herefor a video on drying royal icing. Once your marbled spider webs on the large cookies (steps below) are dry, you will attach smaller cookies and stick to it as well.
Decorating the Cookie Pops – Marbled Spider Webs
Tools you’ll need:
- Piping Tips
(two #2 tips)
- Piping Bags
- Couplers
- Toothpick
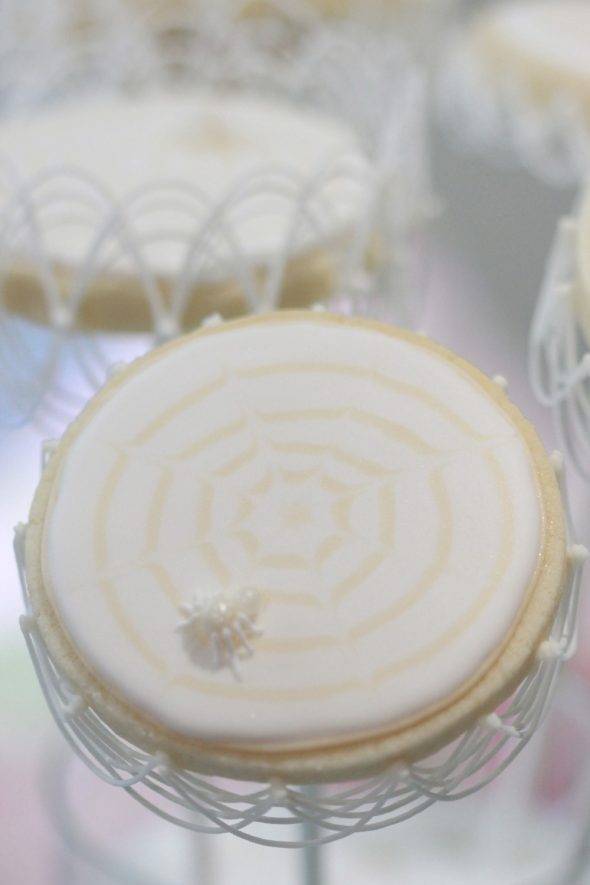
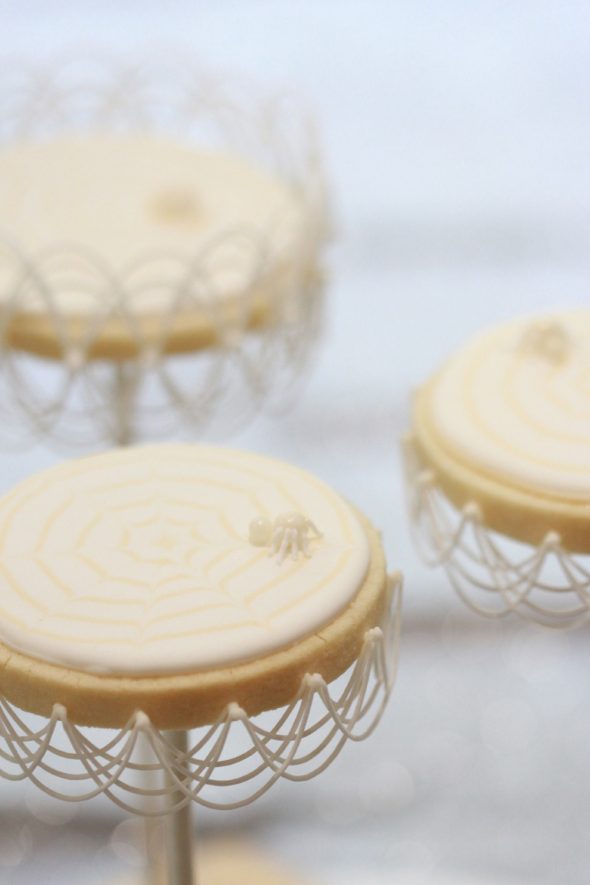
How to Decorate the Spider Web Cookies: You can find a video on marbling royal icing here, and another post on a making these spider web cookies here. Pipe your base color and then add a second color, either as a spiral or a series of circles. Drag your toothpick through the surface of the icing, going from the center outward.
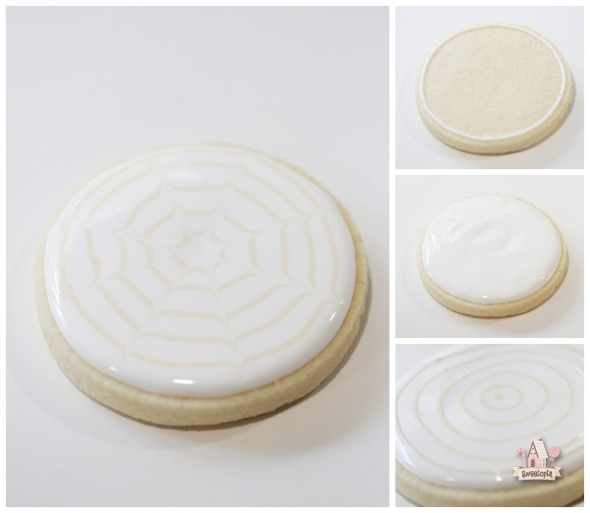
Let your cookies dry for at least 6-12 hours. The surface needs to be hard enough that it will hold its shape when flipped over. Once dry, attach the cookie stick with the small cookie with thick royal icing.
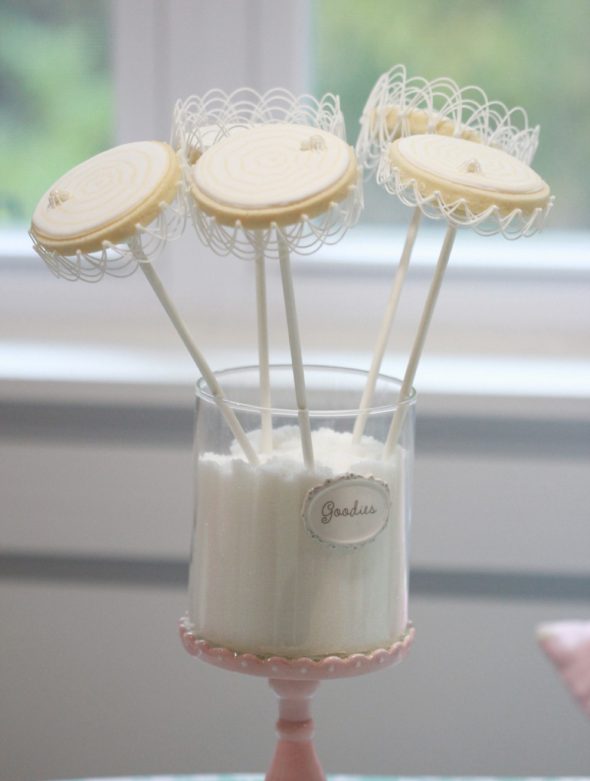
Turn the cookie right side up and place it in a stand of some sort. I have a wooden stand my father made for me, but you can also use a jar filled with sugar, styrofoam or cake pop holder. *
How to Pipe Royal Icing Stringwork
Tools You’ll Need:
- Piping Tip
(#1.5)
- Piping Bag
- Coupler
- Toothpick, Skewer or Needle
- Turntable
- Thick Royal Icing
- Paper Template (Below – Resize in PicMonkey or in your printer settings according to the size you need)
- Stand of some sort. I have a wooden stand my father made for me, but you can also use a jar filled with sugar, styrofoam or cake pop holders
.
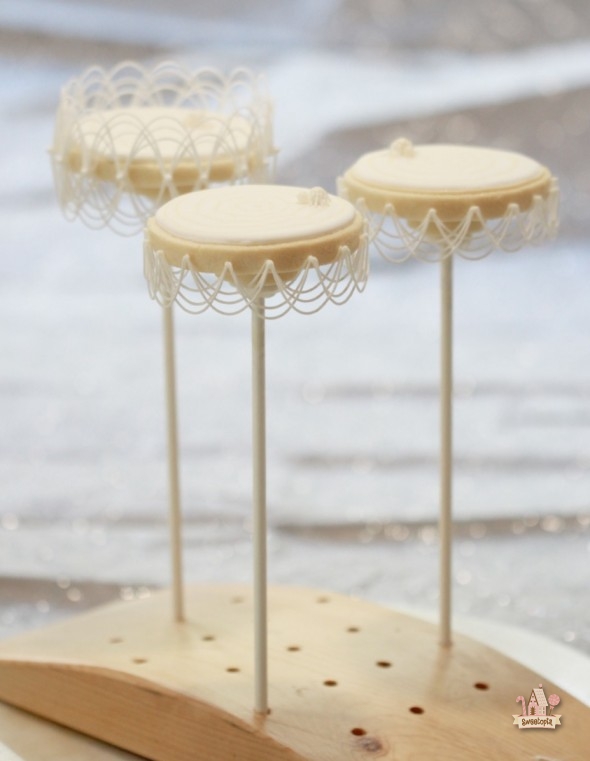
How to Pipe Royal Icing Swags
Before you begin, it’s helpful to paddle your icing to remove as much air as you can from it. See the video in this post for a demonstration. Mark the spots on your cookie where you’d like to pipe the swags. If you’d like, use a template (click here for a printable version), separating the cookie into sections.
To pipe the swags, adhere the icing to sectioned off dots on the side of the cookie, using gentle pressure on the piping bag. Pipe your string as long or short as you like, and adhere it to the next dot by attaching and letting go of the pressure on the piping bag.
Try to pipe the line so that it’s hanging away from, or doesn’t touch, the line below it, and attach the end once you’ve almost finished piping the whole string.
Have your cookie pop stand sitting on a turntable so that you can easily turn and continue piping the next swags.
If you make a mistake, most of the time it’s easy to gently lift away the icing with a toothpick, needle or skewer.
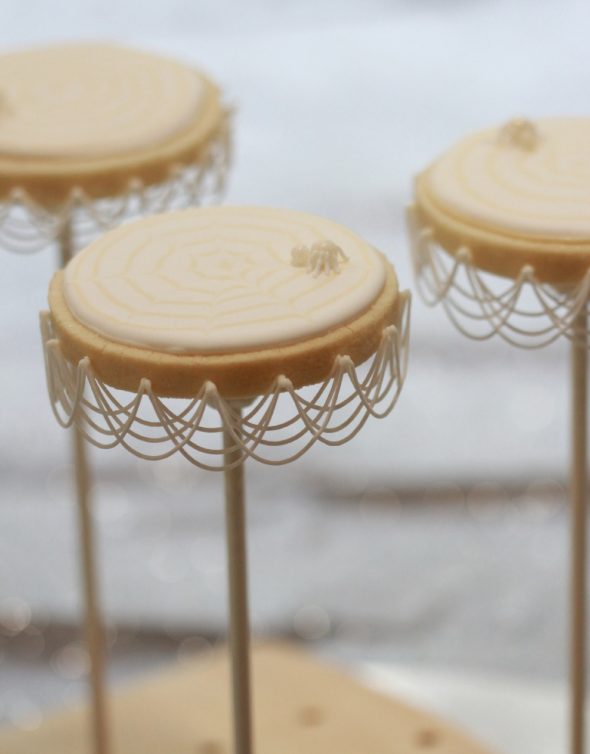
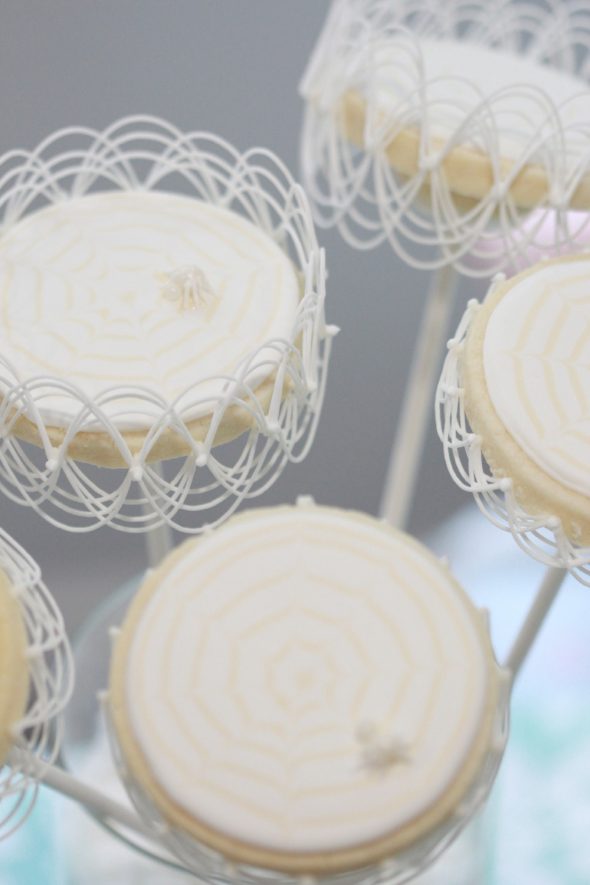
You can pipe whatever you feel like for patterns. For this cookie I piped the second layer of swags in between the points of the first and then kept layering.
If you missed it earlier, there is a video at the beginning of this post which shows how to pipe string work.
Once you’ve finished all your stringwork, pipe dots all the way around the cookie. Pat the points down with a damp paintbrush, toothpick or needle.
Adhere a few candy pearls for the spider’s body, pipe the legs, and you’re done!
In order to make the cookies pictured at the top of the above photo, where the swags or string work curve upwards (in the shape of a rainbow), you’ll need to place your cookie on a glass, and once those swags are dry, turn it around to finish (or begin) the other side. For these spider web cookies, the flood work needs to be completely dry so that the surface doesn’t cave in. 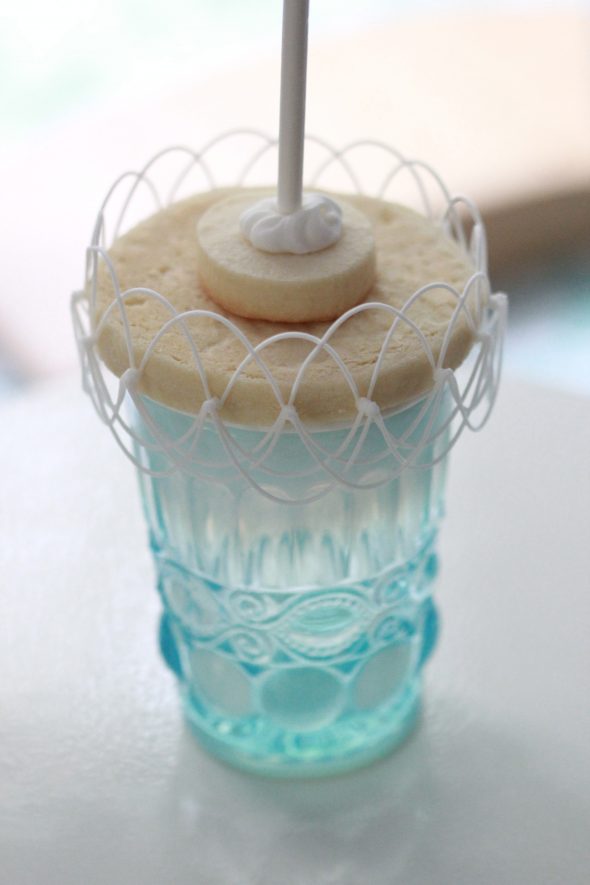
I hope you enjoyed the video and tutorial. If you have any tips which you’d like to share you’re welcome to leave a comment below.
Happy cookie decorating!
xo,
Marian




these are stunning! As usual!!!!
These are gorgeous. LOVE THE VIDEO.
Very creative.
Wow, these are absolutely breathtaking!
Gorgeous!!! Thanks for sharing!
Baiba
WOW!
Those are so so so awesome, Marian!
I would be scared to take them away though, I wouldn’t want the icing lines to break – but still, wow! So precise and puuurfect 🙂 <3
Thanks for your video, I gave it thumbs up of course! 🙂
Much love and xoxo,
niner
Oh you’d be surprised Niner! The icing is quite thick and isn’t hard to attach to the cookie.
Thanks for the nice comments!
These are stunning Marian!
I think I’ll use it on wedding cookies instead 🙂
Thanks for the great idea and the informative tutorial. Love you so much as usual
Such a great idea, Roshini. I think I’ll try them for wedding cookies some day too.
wow….Marian, the cookie pops are gorgeous. I admire how still your hands are when you are doing it. Love the video!
Lots to learn from you. Thank you for sharing your talents like always. Have a great day!
ML
These cookies are gorgeous! Great video!
What a beautiful design. Thanks for the video
Absolutely stunning! Great video too except I laughed out loud when you said you are not an expert!! Your cookies are works of art.
Hi Mona,
🙂 You’re cute! I’m really not an expert at the stringwork though! A close look shows a lack of uniformity compared with seasoned “stringworkers” hee hee. Thanks though!
Thanks for the comments everyone!
Do these travel well? How would you transport them or package them?
How do I make thick royal icing? When I used your royal icing recipe the end result was too runny for royal icing transfers or brush embroidery. I have a kitchen aid, i followed your instructions and mixed slowly (level 2) for 10 mins.
The prettiest Halloween cookies I’ve ever seen! They are amazing!