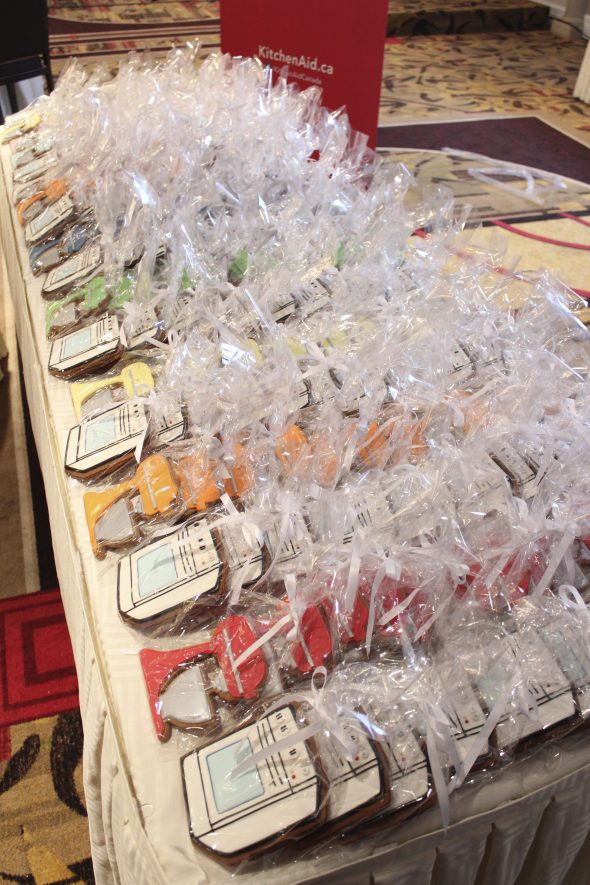
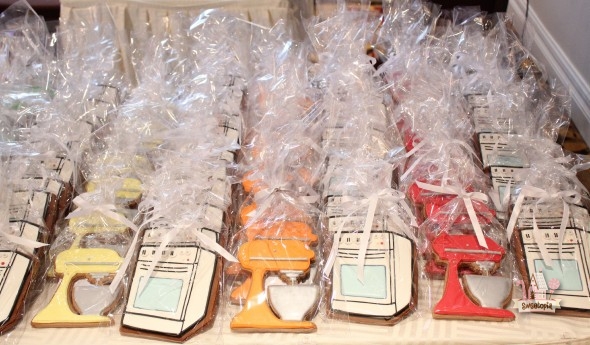
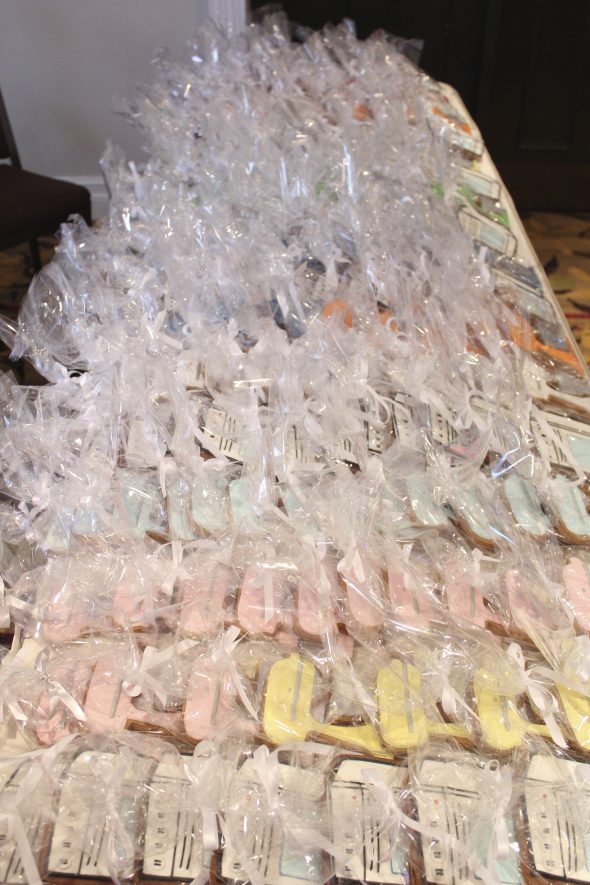
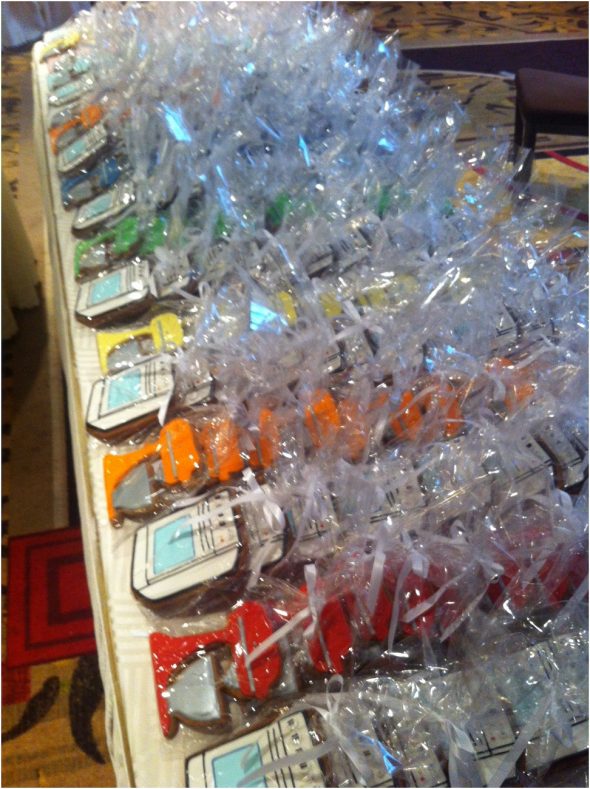
Right off the bat I’ll have to warn you that most of these pics have been taken with my cell phone… pardon the terrible lighting and poor quality! Making 120 oven cookies and 120 mixer cookies with a deadline to meet, didn’t leave me a lot of time for photographs.
I was excited to make these guys though! They were for KitchenAid Canada, who asked me to make them for FBC2013 – the first Canadian Food Blogging conference, and who will be providing the appliances for our new kitchen. I can’t even begin to tell you how thrilled I am about that! If you’re new to reading my blog, know that I only share products I love. Besides stand mixers, I’m also a fan of the KitchenAid large appliances. We’re renovating now, and will be putting new ones in, but my older KitchenAid ones are still working as well as ever, and we’ll be passing them on to a young family member buying their first home.
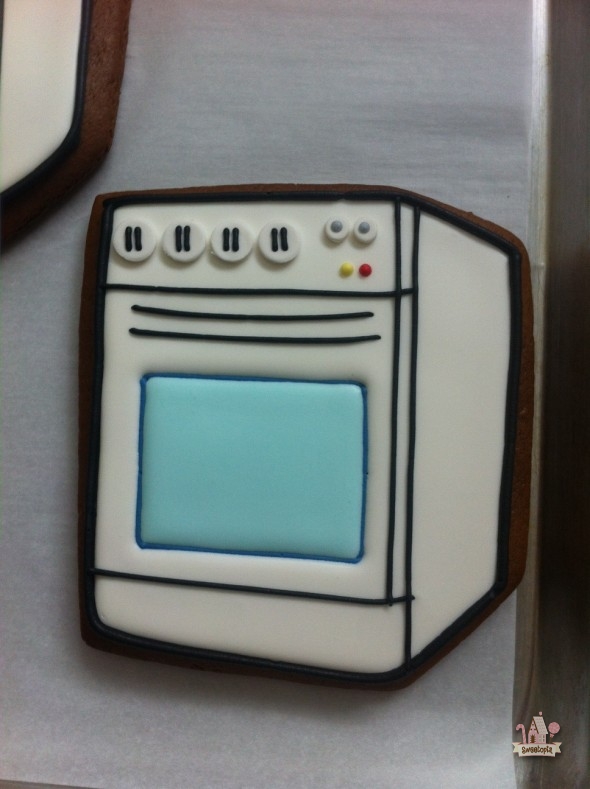
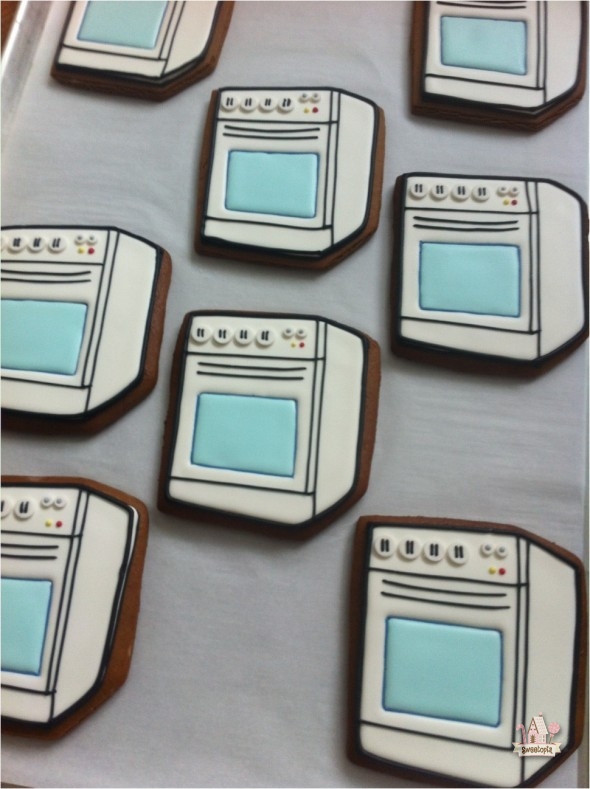
The stove or oven cookies I made here are a retro, whimsical design, which I thought would be best for a decorated cookie. Lots of black icing can have a bitter taste to it, so I chose this design instead. If you’d like to make oven cookies too, here’s a little how to:
*
How to Make Oven Cookies
A few quick notes first:
- Once I had chosen the design, my husband made a cookie cutter, as hand cutting 120 of them would be too time-consuming. Another post coming soon, dedicated to how to make a cookie cutter. If you’re only making a small amount of cookies, cutting out a template using card stock or a transparency works.
- We used this decorating schedule, but with both of us working (other) full time jobs and the amount of cookies made, there were a lot of late nights, including one night where we stayed up until 7:30 the next morning! (That was Sunday, thank goodness!). Hubby helped by making royal icing and with a few other decorating details I’ll share later. Mom even arrived at noon that day to help bag the cookies and tie ribbon. (Thanks Mom!).
What You’ll Need:
- Gingerbread Cookie Recipe (or cookie recipe of your choice).
- Royal Icing
- Gel Colors
of your choice (I used Americolor white, lemon yellow, sky blue, navy blue and black).
- Small fondant rolling pin
- Piping bags
, couplers
, #1
, #2
, #3, #4, #10 piping tips
- Fondant
- Small circle cutter
Instructions:
Step One: Make your gingerbread dough.
Step Two: Once you have cut out your gingerbread cookies, make sure you chill them for at least a few hours before you bake them. I’ve mentioned it in the gingerbread cookie recipe, but thought it was worth pointing out again. These tips on preventing your dough from spreading will also help if you’re new to baking cookies for decorating.
Step Three: Make and adjust the icing consistency. For a video on how to find consistency, click here. Tint your icing using gel paste colouring.
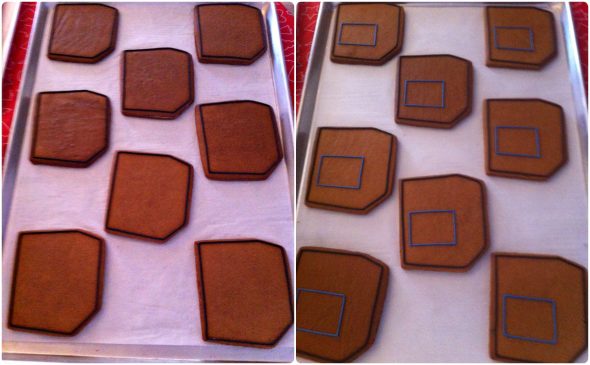
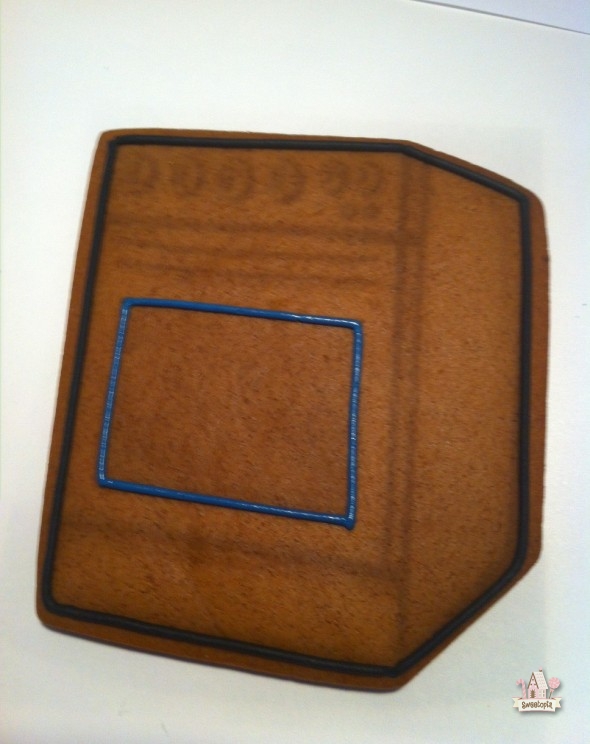
Step Four: Time to flood the cookies! The basics on how to outline and flood with royal icing can be found here. Using piping tip #3, outline the oven perimeter with black icing. Outline the oven window with blue icing. I used a Kopykake projector to help me pipe the lines quickly. Let those dry for a few hours at least, especially because the icing colors are darker, and especially if you’re decorating in a humid environment. See here for a video on drying royal icing.
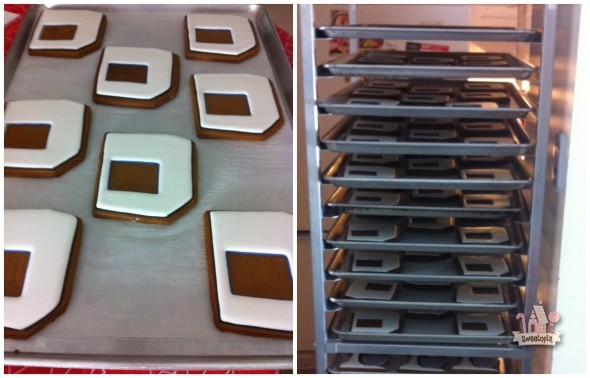
Step Five: Fill or flood the white section of the stove using a #4 piping tip, and icing that is runnier than my usual 10 second rule (4-5 seconds). Note that I could never have done this project without the help of my baking rack. Perfect spot to store cookies and let them dry between decorating stages. And of course, my husband! He was the royal icing making machine… took lots of white royal icing to flood these guys.
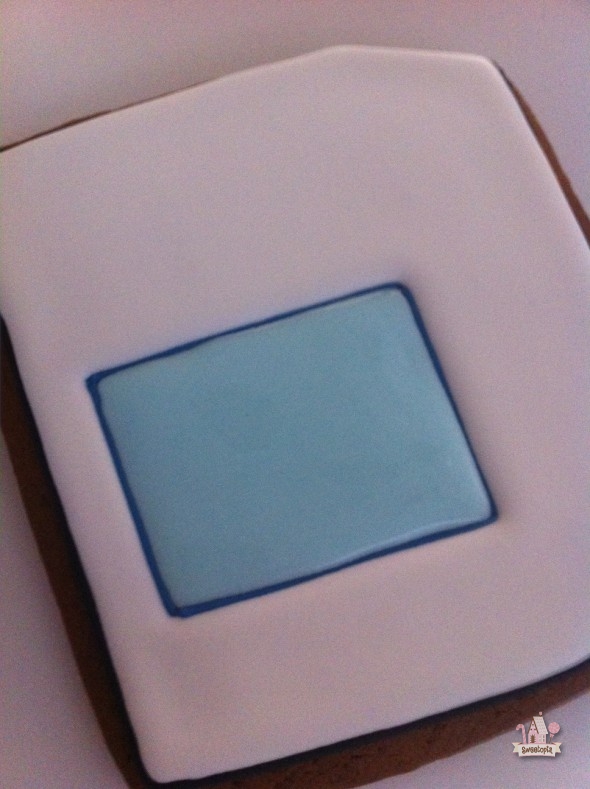
Step Six: Once the white has dried for at least a few hours, flood the “glass” oven door, using a #2 piping tip.
Step Seven: Using a #2 piping tip, pipe the black lines down the sides and front of the oven.
Step Eight: Using a small round cookie cutter, make 4 circles of fondant per oven and using a #10 piping tip, 2 tiny circles of fondant per oven. Gently adhere to your cookie with small dabs of royal icing. (In total, Mr. Sweetopia rolled and cut out 720 fondant circles).
Step Nine: Using a #1 tip, pipe small dots of light grey icing onto the top right knobs, and directly below a small dot of red and yellow icing. Pipe two short lines of black on each larger, white knob.
Let the icing details dry for about an hour or so… Enough time so that they’re hard to the touch so that if you handle them by accident, they won’t break.
Serve as is, or package in cellophane bags and tie with a pretty ribbon.
Hope you enjoyed the tutorial! If you’d like to make the mixer cookies, you can find the tutorial here.
If you have any questions, or just if you’d like, leave me a comment below, on Google+, Facebook, Twitter, YouTube, Pinterest or Instagram. Thank you for reading me here, I appreciate each and every comment, and love to hear from you!
xo,
Marian
p.s. In case you’re wondering, I don’t normally do cookie orders, however, I have a directory of cookie decorators who do. Click here if you’d like to order cookies, and here if you’d like to be on the directory.




Wohoo what a morning!
Thanks so much for your lovely tutorial, Marian.
That was A LOT OF work. So awesome you have wonderful family members who helped you out. To tie ribbon (for so many cookies) is just way too much work for one person.
Mr. Sweetopia (great name haha..) did an awesome job too!
Love the tutorial and all the tips you share. Looking forward to the cookie cutter post.
It is soo rainy over here so thank you brightening up my morning, love.
Much love,
xoxo..niner 🙂
Good morning from London, wow wow gorgeous and amazing work so perfect Marian love xx
Best wishes and wish youna blessed day
You’re incredible! Love the adorable oven and mixer cookies! 🙂
You are a cookie goddess! Just love these.
WONDERFULL!!!!!
Thanks so much for the comments! xo
Incredible!! I love your cookies!
This really was a family project! Love that your husband made you the cutter and pitched in with the royal icing, decorating and the packaging. Once you are done baking and decorating so many cookies the thought of cutting all the ribbons and packaging everything up can be overwhelming. So nice that your Mom came over to help out too. All the cookies look wonderful Marian and I’m sure everyone at the conference and especially Kitchen Aid were extremely impressed.
So cute! Is the pattern available to use with the KK?
Gorgeous! Thanks for remembering us while in the midst of doing all that. I try not to get irritated with relatives and friends who think decorated cookies can be whipped out in a day. (“Why don’t you make cookies for us while we’re all on our vacation together?” “Ummmm….”). I’m looking forward to seeing pictures of your new kitchen.
It’s all in the details, and you, Mrs. Sweetopia, are all about that! We love how you piped so many mixer colors! The conference attendees are sure to be thrilled! If we were to receive one of these I believe we would want it autographed
wow…beautiful! You amaze me with every thing you do… soooo much work and everts you put into!
I loved helping you with the last touches.
ML
Thanks, @ Tieghan!
@ Paula: It was a family effort! It was nice to have Dave help out, actually. He learned all the ins and outs of royal icing consistency, and even found a new way of figuring out consistency, which I’ll share in a video some day. I was really proud of him for figuring out the cookie cutter too. And Mom, she’s my rock! Thanks for visiting me here, Paula, I appreciate it! xo
Hi @ Cindy: The link to the image is above in the post (above the title ‘how to make oven cookies’ – “this design”).
@ ClaudiaIsBaking: Haha, made me laugh, thanks, I get it! That’s one reason I started blogging; everyone wanted me to teach them how to make them, and I didn’t have time to do that with all these different people. Flattering, but not practical. xo
Ha ha, that’s funny, @ Mia / Ticings.com! Thanks for the sweet compliments. xo
Love you, @ Maria Theresia.
What a wonderful family affair:)A lot of time and effort, but so worth it when it’s all done and you can admire your handiwork with satisfaction, plus receive kudos from the recipients:) Your cookies are perfectly beautiful, Marian! Love the addition of the oven to your fabulous mixers~so cute!
Beautiful!!! I would hate to eat it after all the work that went into it!! Would have to frame it and admire it all the time!! LOL!!
Hermos trabajo y muy inspirador me encanta, mil felicidades
WOW!!! Amazing Job! Ya, as “bunny” mentioned – I would hate to eat them after all that work, LOL!
Can I ask tho, How much would you charge per cookie bagged and all?
Thanks!!! 🙂
Thanks so much, @ Sue {munchkin munchies} and@ Bunny!
Gracias, @ yenny!
Hi @ Melissa: I didn’t actually price them out, as part of the partnership with KitchenAid and I was that they sponsored me to go to the conference, and that they’re providing the appliances for my kitchen. Since I don’t normally do orders, I don’t have extensive info. on how to price, but, have you seen Gail’s site? She has a site and blog, called One Tough Cookie. She talks about pricing etc. there.
You are amazing, Marion! How do you have the patience? I can’t imagine the time it took you to make 300 cookies! Can’t wait to see the new kitchen!
Hi @ kelley {mountain mama cooks}, thanks so much! I can’t wait to see the new kitchen too! ;-D
You are truly an amazing baker and artist…but i’m sure you’ve been told that a million times over. Keep up the great photos and blogging. Such a great inspiration to bakers around the globe. ps I’ve have loved using my red KitchenAid mixer for the last 15 years!
Hi @ connie m.: Thanks for your sweet comments.
I wish I was in Vancouver – I would love to take one of your macaron classes! And your site logo, so cute!
Absolutely love these, and the mixers too!
Beautiful. Thanks for the tutorial. Looking forward to the how to make a cookie cutter tutorial. Kathy
One more thing. What size cookie cutter did you make for this? Is it about the same size as the Ecrandal Standmixer cookie cutter? Thanks.
@ Laura (Tutti Dolci) and @ Kathy, thank you!!
@ Kathy: I don’t have the dimensions on me at the moment (I’ll make sure they’re in the cookie cutter how-to post), but yes, I made sure the size matched the mixer cutter.
Absolutely love these. You’re remarkable in the things you come up with. Can’t wait to see the post on how to make cookie cutters!
These were SO. Awesome. It’s really neat to see the how-to behind the genius!
@ Colleen and @ Aimee @ Simple Bites: Thanks so much!
they came out beautiful Marian…I bet you were thrilled when you tied the last ribbon…Thanks to your tips I’m finally getting the hang of the royal icing consistency….and I want to mention that I recently made the lemon cookies from your past post…I have to thank you…they are my new favorite cookie…:)
Hi @ paula:
Yes, it felt so great to get the last one tied up. 🙂
I’m glad to hear I could help you in some way and that you like the lemon cookies!
Have a wonderful day! xo
WOW! That’s a ton of cookies! Love them and I can’t wait to see your new kitchen.
Hey Marian!
What amazing cookies! I’m going after the kitchen aid cookie cutter for a while! You are an inspiration for me and I do try to get amazing results as you do. I’ve just started a blog (www.cook-ies.com) so I can share too!
Thanks, girls!
You are amazing! Do you mind telling me what gauge baking pan you use or recommend? I have a big cookie order and I need to buy pans and a rack and I noticed you used a rack to help with this larger order. If you have a recommendation I would appreciate it.
Hi Sandra,
I got the baking rack from here (p.23) http://www.besales.ca/wp-content/uploads/2013/04/Barrie-SPRING-2013-Ont.pdf
and I don’t see the baking sheets listed, but you could ask them what they have… they only have the one type – in different sizes.
Hope that helps!
Absolutely love your Kitchenaid mixer cookies. They came out beautiful. You did an amazing job.