It’s Holiday Cookie Exchange time!
Just in time for the Holiday season, a few other bloggers and I have teamed up to bring you some favorite cookie recipes and pretty packaging ideas! I’m sharing a simple Christmas tree cookie tutorial and a Vanilla Sugar Cookie Recipe {below}.
Head on over to these links and enjoy some new inspiration!
Jenn | Hostess with the Mostess
Carrie | Half Baked :: The Cake Blog
Christmas Tree Cookie Tutorial
You’ll Need:
- buttercream icing
- vanilla sugar cookie recipe (below)
- tree cookie cutter
- food gel coloring (of your choice)
- piping bag
- coupler
- star piping tip #18
- *sugar stars
*I found these sugar stars from FancyFlours.com but you could use candy stars, make fondant or gum paste stars with a small star cutter, or decorate with any candy of your choice.
Instructions:
Once you’ve made your icing, baked your cookies {recipe below} and let them cool to room temperature, they’re ready to be decorated.
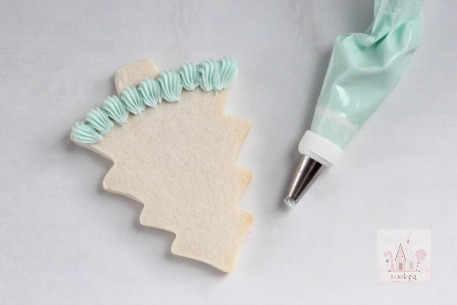
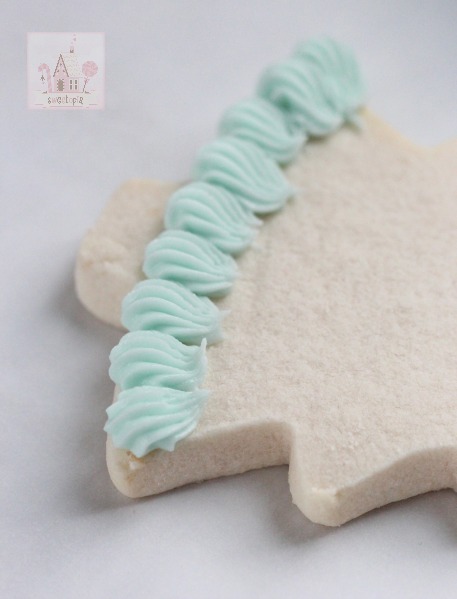
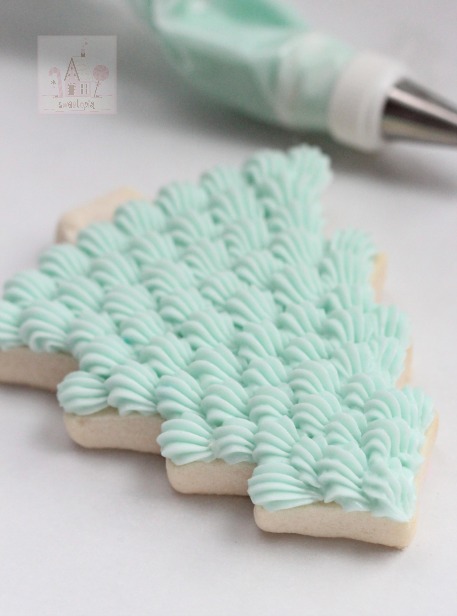
Turn your cookie so that the tip of the tree is closest to you. Using a #18 star tip, start from the bottom of the Christmas tree and pipe a line of shells. Note: Different sized star tips work as well (i.e. #’s 14-21). The larger the number, the larger the shell will be.
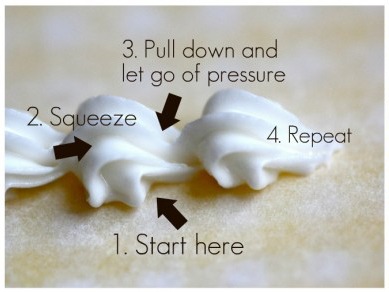
Piping a Basic Shell
To pipe a basic shell, hold the piping bag at about a 45-degree angle, at the 6:00 o’clock position, with the tip slightly above the surface of your cookie. Squeeze the icing out of your piping bag, then relax the pressure and pull the piping tip towards the surface of your cookie. Let go of the pressure completely, lift the piping bag away and repeat.
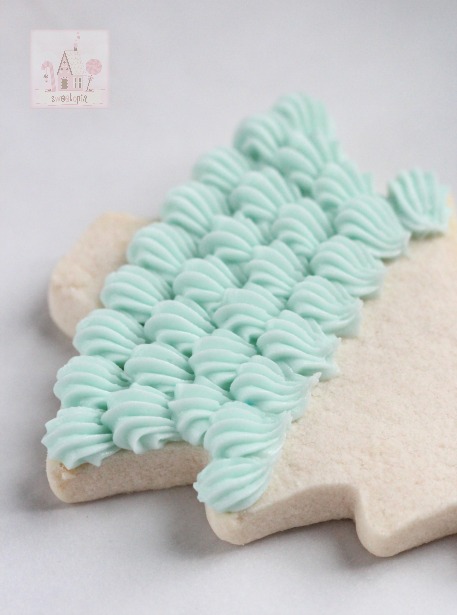
Pipe the shells in rows, staggering each line similar to the pattern of a brick wall.
Each new line of shells covers the tails of the line before it. Cover the entire cookie.
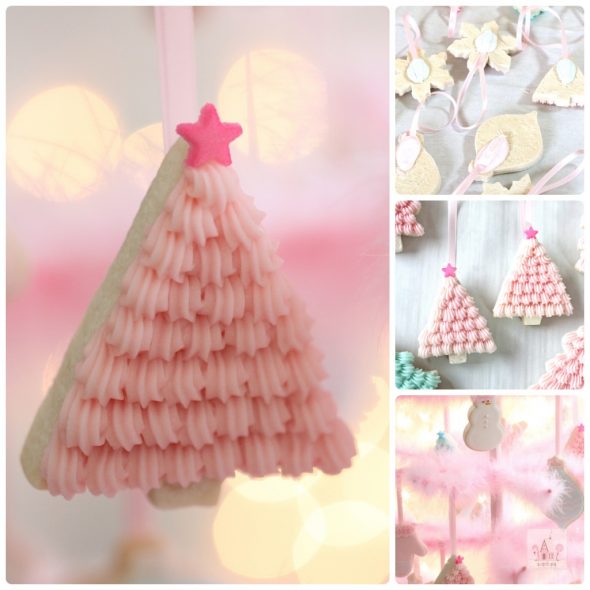
Place a sugar star on top and enjoy!
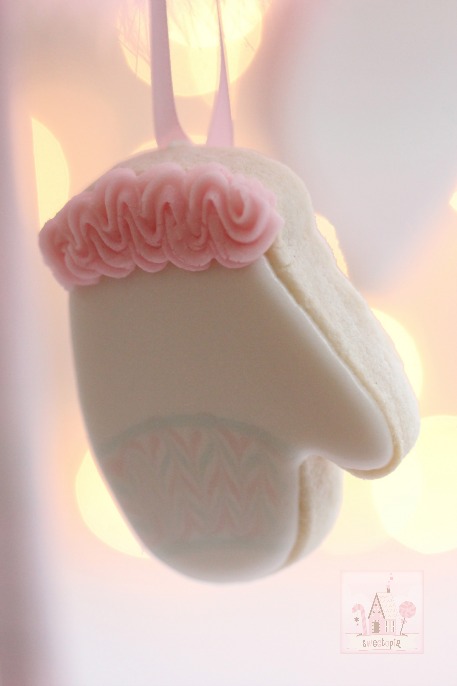
Adhere some ribbon to the back of the cookie with royal icing to use your cookies as Christmas tree ornaments!
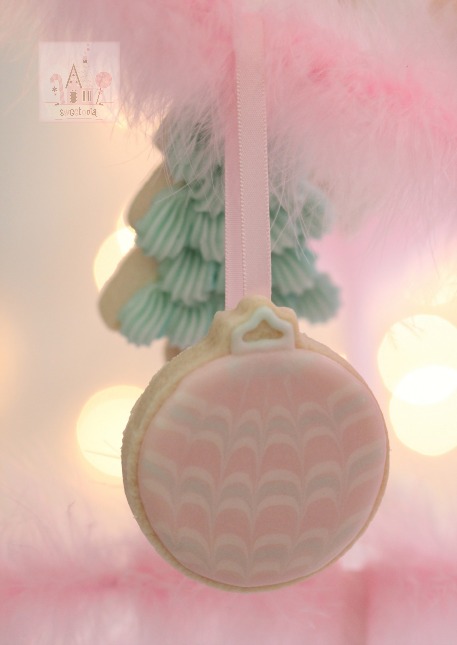
If you’d like to try a variety of ornament cookies, such as these marbled ones below, click here for a tutorial.
Happy holiday baking!
xo,
Marian
Sugar Cut Out Cookie Recipe
Ingredients
- 2 cups unsalted butter, room temperature
- 2 cups granulated sugar
- 2 large eggs
- 3 tsp vanilla extract *or seeds from 1 vanilla bean
- 5 cups all-purpose flour
- 1 tsp baking powder *take this out if you don't want your cookies to spread
- 1 tsp salt
Instructions
- Cream the butter and sugar together in the bowl of an electric mixer on low to medium speed. (Use the paddle attachment). Mix until thoroughly incorporated - for about one minute. Scrape down the sides of the bowl with a plastic spatula and mix again for a few seconds more. Over mixing the butter and sugar in this step will cause too much air to be incorporated into the dough. If you'd like a light and fluffy cookie, that's ideal, however the dough will spread more during baking; not ideal if you'd like the cookie to hold its shape.
- Add eggs slowly and mix. Scrape down the bowl with your spatula at least once and mix again.
- Add liquid vanilla extract. Stir briefly. Alternatively, cut open your vanilla bean and scrape the seeds out. Add to mixing bowl and stir.
- Sift your dry ingredients together. (Flour, baking powder and salt).
- Add all of the flour mixture to the bowl. Place a large tea towel or two small tea towels between the edge of the bowl and the electric mixer so that the flour won't escape. Mix on low speed for 30 seconds. Remove the tea towels and observe the dough mixing; when it clumps around the paddle attachment it's ready. It's also important at this stage not to over mix the dough (the glutens in the flour develop and the dough can become tough).
- Roll the dough out between 2 large pieces of parchment paper. Place on a baking sheet and into the fridge for a minimum of 1 hour.
- Roll out the dough further if you need to, and cut out cookie shapes. Place on parchment paper-lined baking sheet. Re-roll scraps and repeat.
- Put cookie dough shapes back into the fridge for 10 minutes to 1 hour to chill again. They will then hold their shape better when baked.
- Preheat your oven to 350°F or 176°C.
- Bake cookies for 8-12 minutes or until the edges become golden brown. The baking time will depend on the size of your cookie.
- Let cookies cool to room temperature and decorate!








Hi
How many cookies does this recipe make?
Can’t wait to try it out.
About 30 cookies, but of course it depends on the size of your cutters and the thickness of your dough. Happy baking!
I just finished mixing up this recipe. It tastes great. But I’m a little concerned the consistency is, what I would call pastry dough, crumbly. Dud I do something wrong? I did knead it together before rolling it out. Also, my kitchen aid almost struggled with mixing in the flour. We’ll see what happens when I bake them tomorrow. Just curious. Thanks
Hi Tammi,
The texture shouldn’t be like that when made – It sounds like there isn’t enough moisture… Perhaps too much flour or not enough egg and butter. Try warming the dough a little if it’s not holding together, and definitely roll it between 2 sheets of parchment, rather than a floured surface.
Hi, I have some problems with measurements, could you please tell me the measurments of the ingredients but in grams??? thanks a lot
Do these cookies hold their shape really well during baking. Don’t want to waste my time if they don’t
Yes, they do hold their shape. Regardless of the recipe, these tips are important as well:
https://sweetopia.net/2011/04/top-8-tips-on-preventing-cookies-from-spreading/
Does the unbaked dough keep well in the fridge/freezer?
Hi Kristin,
Yes it keeps fine in the fridge for a day or so, and for up to 6 months in the freezer, wrapped well.
I would like to make and gifts theses cookies is there a way of storing and packaging that you could recommend. TIA.
Hello, I just finished mixing up this recipe. It tastes great. But I’m a little concerned the consistency is, what I would call pastry dough, crumbly. Dud I do something wrong? I did knead it together before rolling it out. Also, my kitchen aid almost struggled with mixing in the flour. We’ll see what happens when I bake them tomorrow. Just curious. Thanks
Hi Root,
No, it’s not a crumbly dough. There may be too much flour in it or not enough egg liquid, or butter fat. The temp. of the butter matters too, was it nice and room temperature soft?
You should still be able to cut and bake them. I would underbake them a bit.
Did you roll it out between sheets of parchment?
I would like to make and gifts theses cookies is there a way of storing and packaging that you could recommend. TIA.
Hi Lisa,
I let my cookies dry – here is a post on that; https://sweetopia.net/2012/01/video-how-to-dry-cookies-decorated-with-royal-icing/ and then package each cookie in cellophane bags. I either tie the bags closed with ribbon or seal with a heat sealer. You can see a photo of the heat sealer near the bottom half of this post here; https://sweetopia.net/2018/10/chocolate-gingerbread-cut-out-cookies/
Enjoy decorating and have fun giving them away! xo
I want to make some cut cookies (Royal Icing) for a baby shower. How soon before the event can I make, decorate (and dry)? I am so excited to have found this website. THANK YOU
Hi Bonnie,
Thanks!
Here is a post for you:
https://sweetopia.net/2012/02/how-long-do-decorated-cookies-stay-fresh-what-is-the-shelf-life-of-decorated-cookies/
This is very educational content and written well for a change. It’s nice to see that some people still understand how to write a quality post!Cloud Consulting Services
Really only a deep thinker like you could come out with such wonderful ideas. Great analysis and in-depth thinking. The accuracy and detailed explanation is something which differentiates your piece of work from others.Cloud Consulting Services