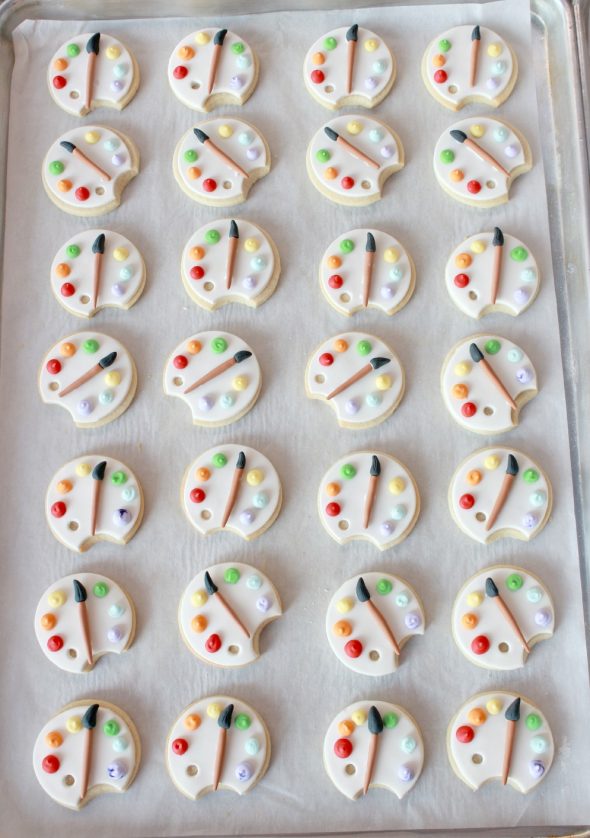
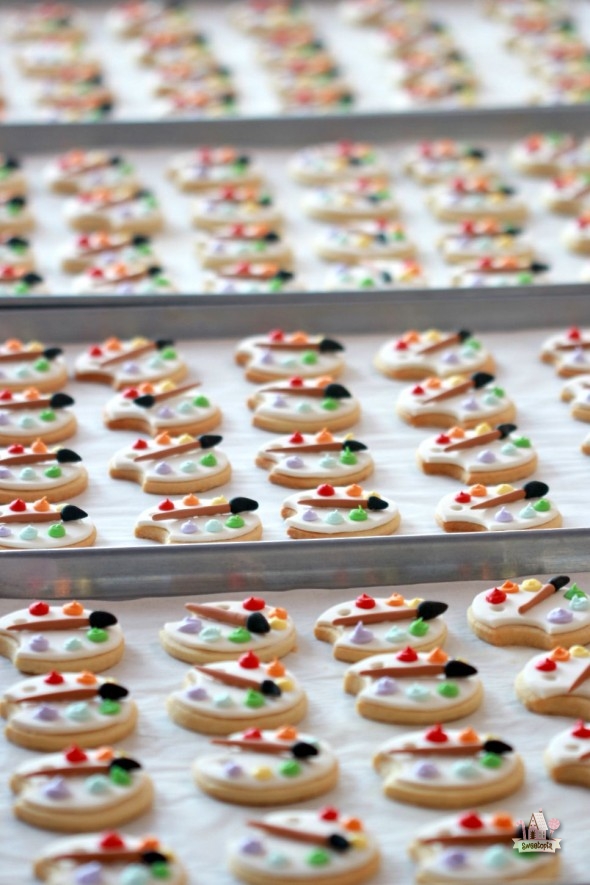
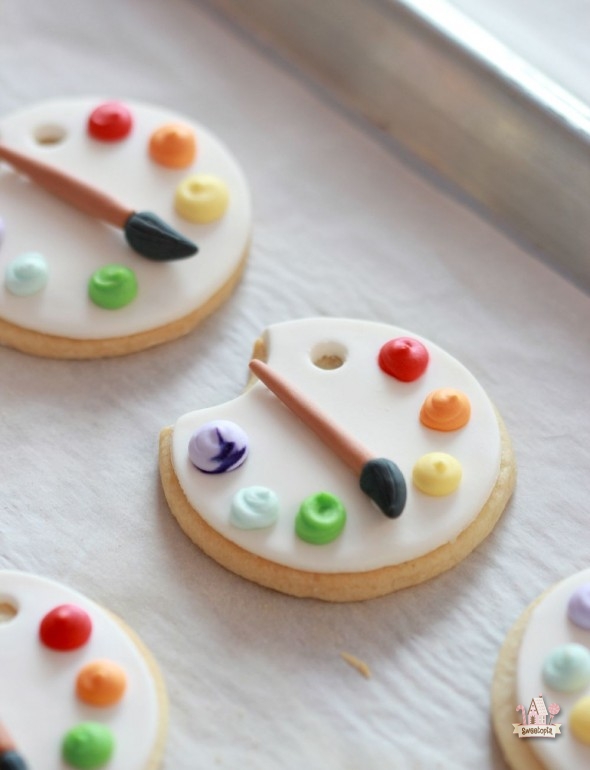
Although fondant isn’t what I normally cover cut-out cookies with (I love working with royal icing), when one of our art teachers at the school I work at, Maureen Egan, asked if she could have some guidance on making 100 art palette cookies for a retiring art teacher, I advised her to go with a fondant base for a few reasons.
For the amount of cookies being covered, it would be much quicker to roll out 100 circles of fondant as a base than to ice with royal icing. The other reason has to do with the circular shape of the cookie. You might think that covering a circle cookie with royal icing would be easy (and it can be with a few tricks – I use them in this video here if you’d like to see), but getting predominently perfect circles done neatly can be tricky and somewhat time-consuming, especially for a first time cookie decorator.
My student, Stefanie Francavilla, is the talented creator of the art palette design and the fondant paint brush. She showed us how to make the paint brush in a few simple steps, which I’ll share with you below. It’s thanks to Stefanie’s design and help and Maureen’s hard work that I’m able to share this tutorial with you. I hope you enjoy making them too!
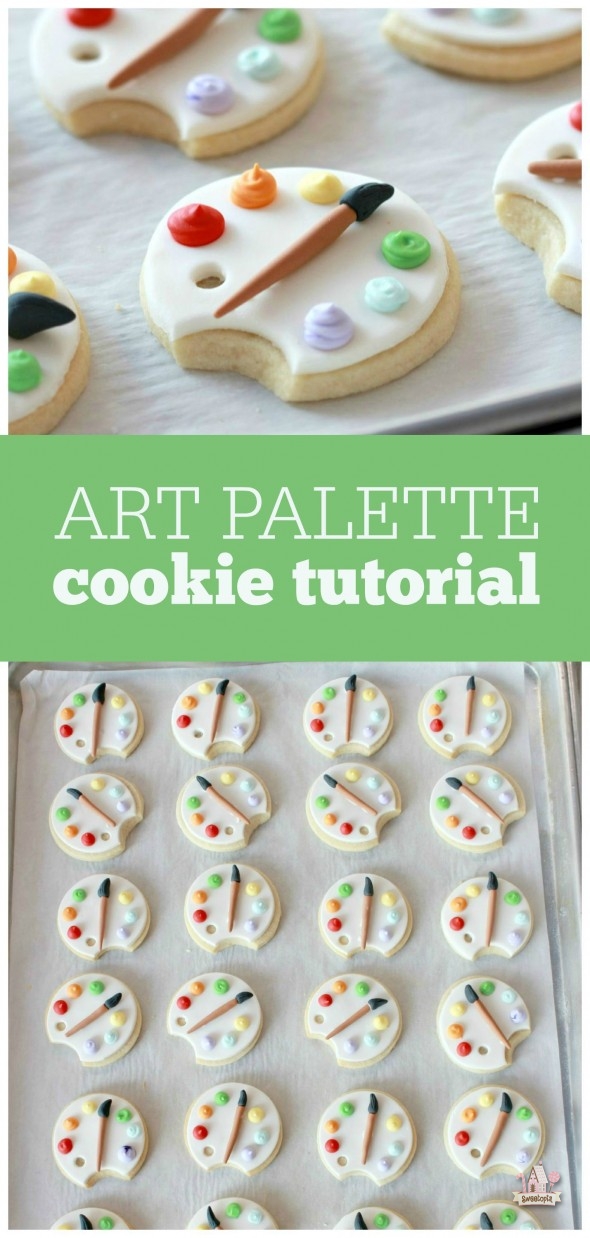
The tutorial is laid out in the steps taken to make these art palette cookies, from the sugar cookie base to the final decoration touches. For your planning purposes be sure you check what’s needed for each step if you’d like to make them to.
Artist Palette Cookie Tutorial
Sugar Cookie Recipe
You can find the recipe for the dough here. If you’d like to try a different cookie base, other recipes can be found here. You can use any size circle cookie cutter as the base. I used a 6.5 cm or 2.5 inch circle with the indentation cutter at 3.5 cm or 1.5 inch.
*
How to Make a Fondant Paint Brush
You can make these ahead of time and store in a cool, dry place.
You’ll need:
*Black Fondant (My favorite brand right now is Satin Ice)
Digital Scale (optional)
Paintbrush (only used for food purposes).
Water
*You can buy white fondant and color it using food gel coloring.
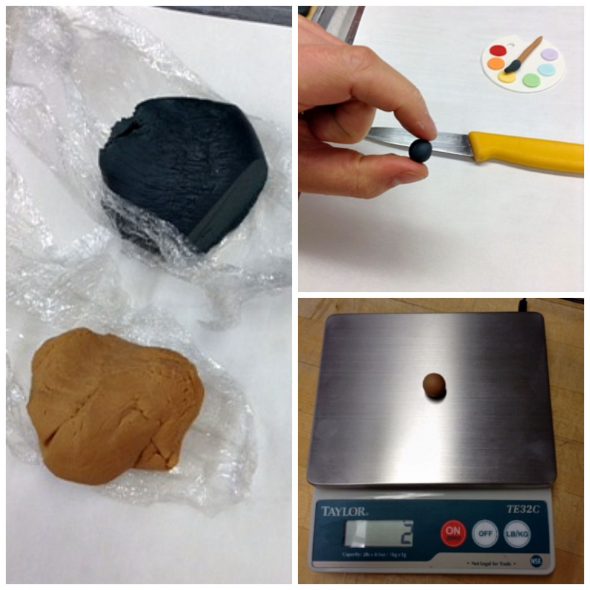
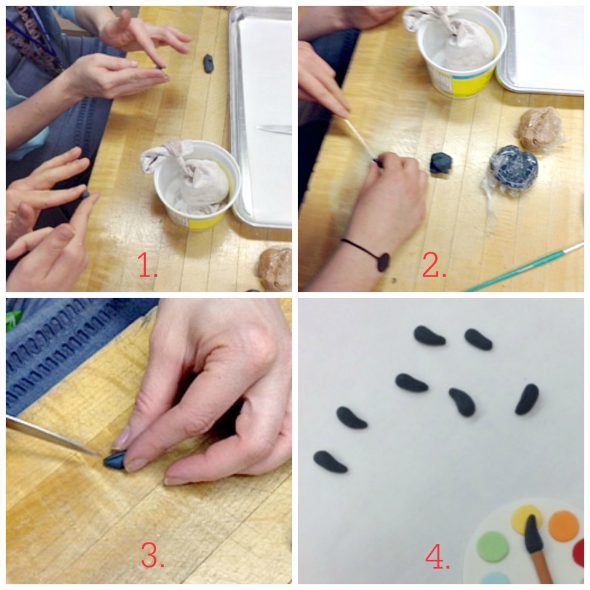
First off, apologies for the poor phone picture quality for the fondant paint brush tutorial. I’ve included close-up photos taken with a better camera below each step by step.
Brush Bristles Step by Step
Step 1: Roll about an ounce of black fondant into a ball first and then, between the tips of your fingers, narrow it on one end to form the tip of the paintbrush.
Step 2: Use a skewer or ball tool to make a little hole or curved indent at the base of the bristles, where the paintbrush handle will attach.
Step 3: Score some lines into the black fondant to make it look like bristles.
Step 4: Let them dry on parchment paper, in a cool, dry place, before you attach to the brown handle.
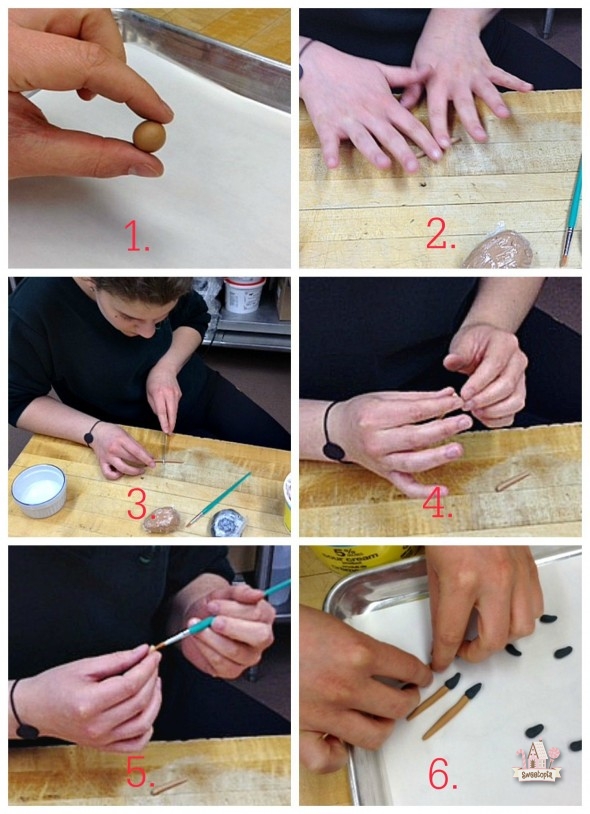
How to Make the Paint Brush Handle
Step 1: Take about 2 ounces of brown fondant and knead into a ball.
Step 2: Roll the fondant into a snake-like shape, with the ends being thinner than the middle.
Step 3: Using a paring knife, cut roughly in half.
Step 4: Round the sharp edges by gently patting down and shaping with your fingers.
Step 5: Using your real paint brush, dab a little water onto your thicker, rounded edge and attach the black bristle piece.
Step 6: Let the fondant dry on parchment, in a cool, dry place, for at least a few hours.
Covering Cookies with Fondant
You can either make your own fondant (recipe here), or buy it ready-made. My favorite brand taste wise is Satin Ice, which you can find here.
You can find a basic video on how to roll and cut out fondant here.
To adhere the fondant to the cookie, you’ll need…
Royal Icing
You can find my favorite royal icing recipe here. The consistency of icing is key for easy decorating. Click here to see a YouTube video on finding the right icing thickness.
You’ll also need:
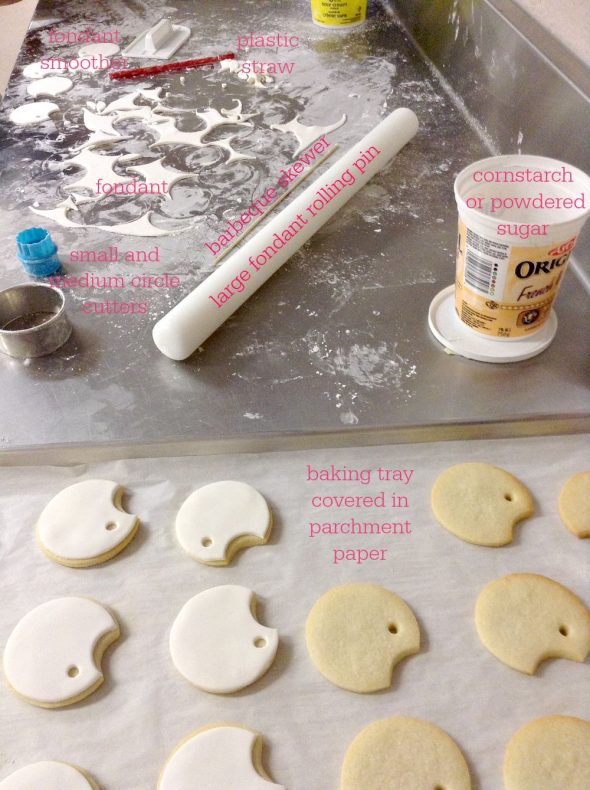
Cornstarch or Confectioner’s Sugar
(Powdered Sugar)
Fondant Rolling Pin (We used a large rolling pin)
Plastic Straw
*We used a 6.5 cm or 2.5 inch circle with the indentation cutter at 3.5 cm or 1.5 inch.
Covering Cookies with Fondant Step by Step
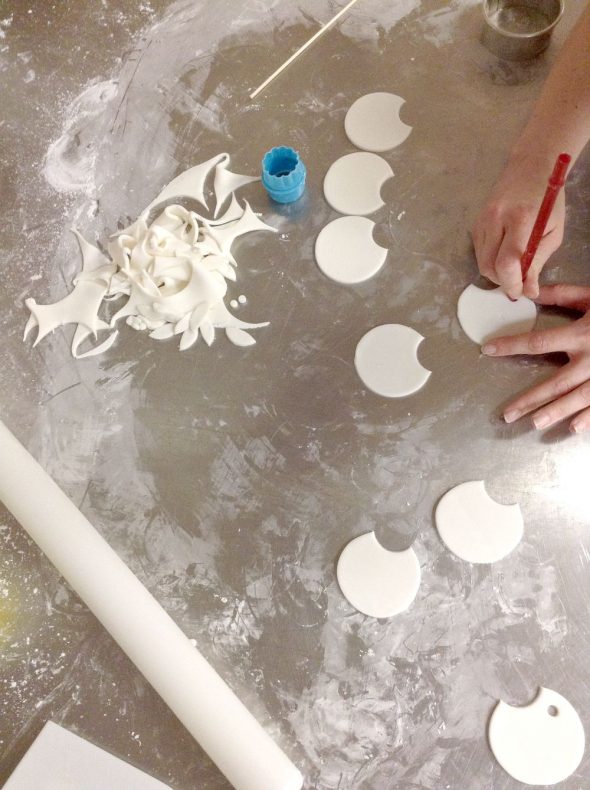
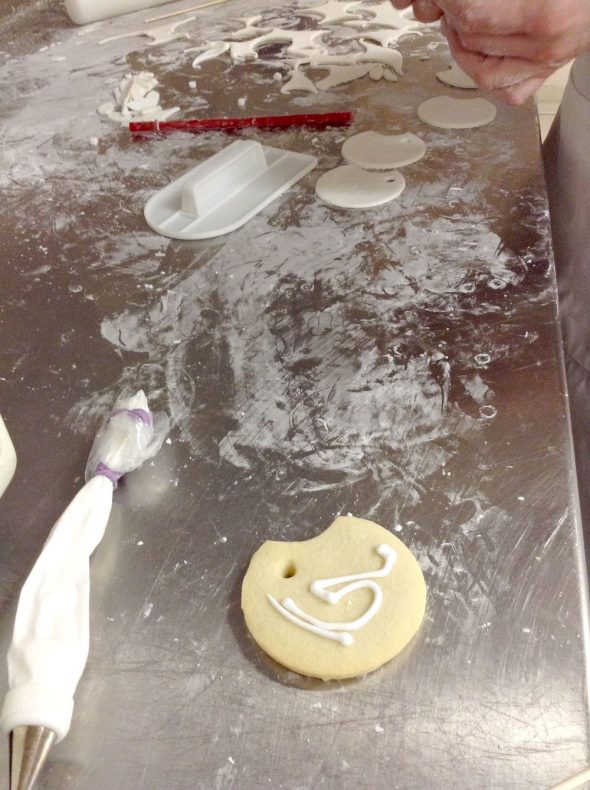
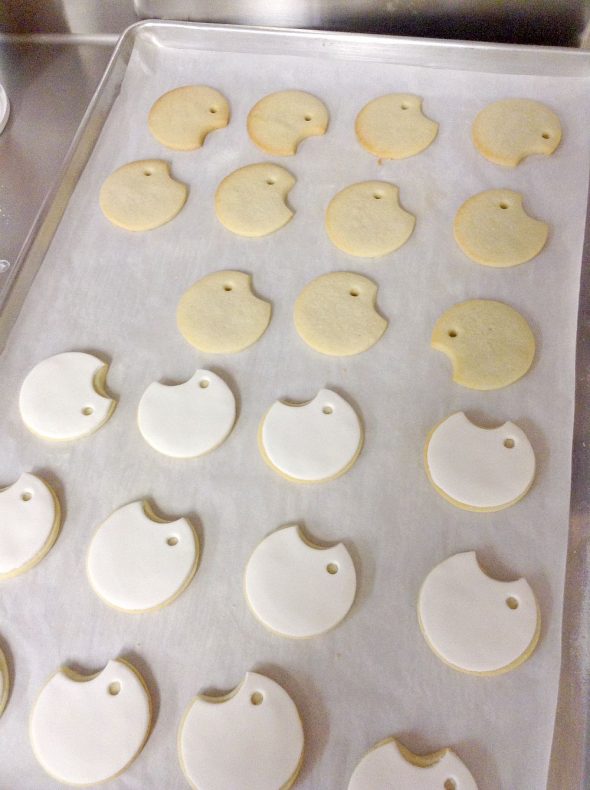
Step 1: Roll out your fondant to about an eighth of an inch or 0.3 cm thick. You can find a basic video on how to roll and cut out fondant here. Cut out your circle shape first, then the curved indentation with the smaller circular cutter.
Step 2: Using the straw, cut one small hole near the indentation. Use the barbeque skewer to push the excess fondant in the straw out.
Step 3: Adhere the fondant pieces to the cookie base with royal icing.
Step 4: Gently press the fondant down, in a circular motion, with the fondant smoother. Place on a baking tray lined with parchment paper. You’re ready to add the colored dabs of icing now. If you’re not decorating the same day, cover the baking tray with plastic wrap to keep the cookies fresh.
Royal Icing “Paint” Dabs
The icing for the paint dabs needs to be a little thicker than flood icing – when you dip a spoon into the icing and pull upwards, the icing should form a soft peak. You can find my favorite royal icing recipe here.
Decorating Steps
What you’ll need:
- Piping Tip #2
, for each color
- Piping Bags
- Couplers
- Food Gel Coloring
Decorating Instructions
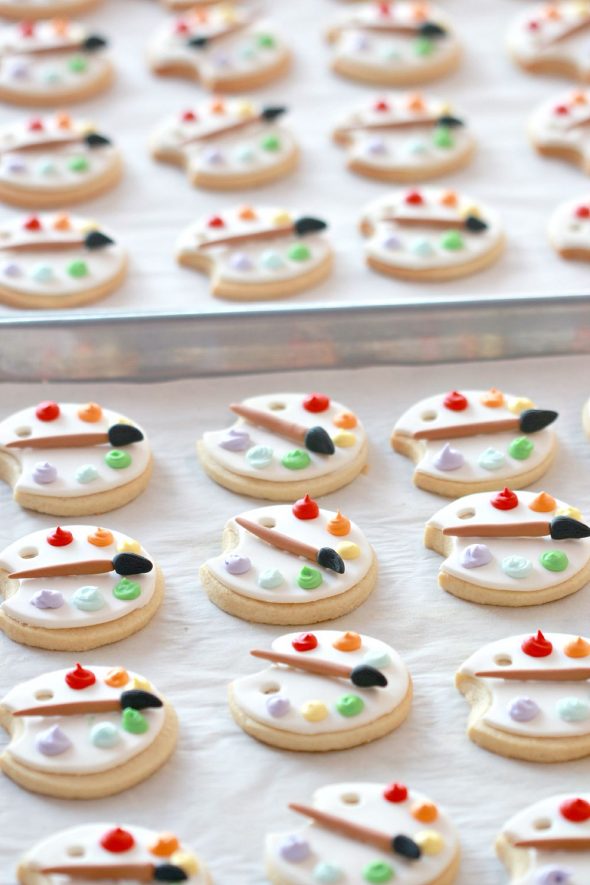
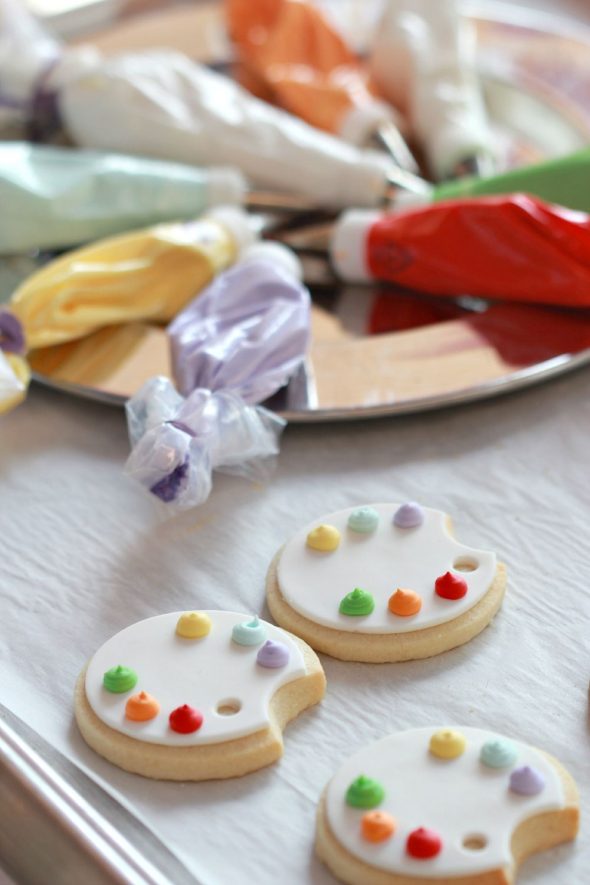
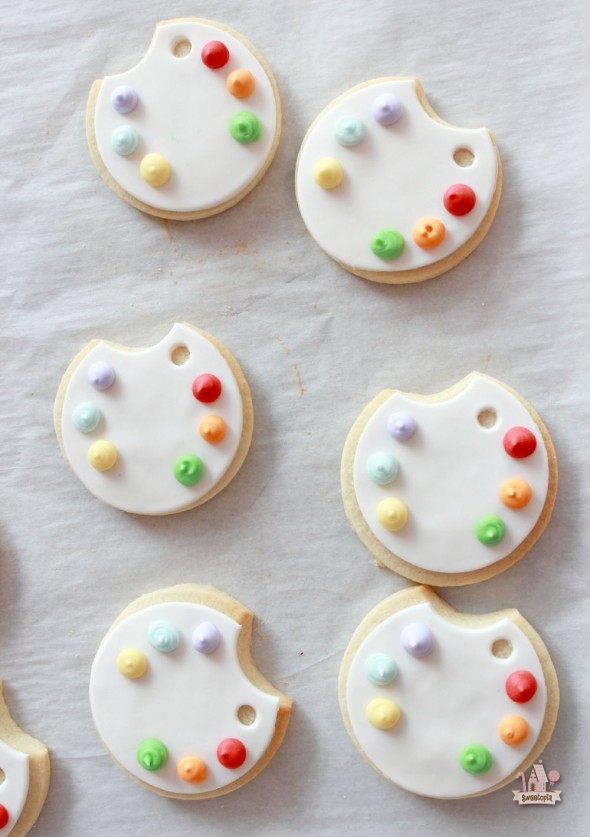
Step 1: Pipe a dollop of each color of icing, in a circular motion until you’ve got the desired amount (you may want more or less than these). You may want to leave a little space in the middle so that the paint brush has room to be placed.
Step 2: Adhere the paintbrush with a little royal icing. You may want to use a little less than we did, as you can see some of the icing below the paint brushes.
That’s it!
Hope you have fun making these!
If you have any questions or comments please feel free to drop me a line below in the comment section or on social media. You can find me on Facebook, Google+, Instagram, Pinterest, Twitter and YouTube.
xo,
Marian







I’m a folk artist from Missouri and have been reading your blog for a few years. I absolutely love these cookies. I’m on a gluten free diet so I won’t be making them, but still admire them! Would it be possible to share one or two photos on my blog with a link to yours?
Hi Catherine,
Absolutely, I would love to see the link if you’d like to share it here when it’s up. Off to see your site…
Wooooow Marian,
what an effort, SO MANY artsy cookies! I admire them!
Thanks to Stefanie and Maureen and to you, for putting this tutorial together.
Honestly: I would have loved to be there to help out and pipe the paint dabs haha, so fun! 🙂
May God continue to bless your life and the wonderful gifts & talents He has given you! <3
xoxo,
niner
Thanks Niner! I would have looooved if you could have been there to do the coloured icing dabs too… would love to be with you in person.
xo
Lovely art palette cookies! Marian, you can adhere the fondant to the cookie using liquid glucose too.
Thanks so much Roshini!
Thanks Marian for your permission to post your Palette Cookies! Here is the link for the post:
http://www.catherineholmanfolkart.com/2015/07/maybe-i-can.html
Hi Catherine,
Looking at your art, I know you could make them! You are so talented! Thanks for the lovely comments. xo, Marian
These are just the cutest! You always have the prettiest cookies!
Thanks for the tutorial. Cute cookies!
Did you bag these? Was the fondant affected (softened) by being in the bag?
Hi Lulu,
Maureen and I bagged them, yes. I’m not sure if they softened as I didn’t take a cookie with me. I will ask her when I’m back to school in a few weeks.
Inspiring as usual Marian, i have learned so much from your blog 🙂 i might give this a try with royal icing instead of fondant because we dont make them in such large quantity we can take our time decorating them xoxo 🙂
Marian, the paint palettes are adorable. I think even I could make these ones. Jen
Wow…very cute cookies again. Love the paint palettes! Your ideas are always very creative. I love your work!
ML
Thanks for your comments everyone! xo
It’s always an inspiration to see you do what you do. Brilliant!
Hi!
I came across this when I was searching for gingerbread recipes with a long shelf life. I have to make 3000 gingerbread biscuits for a client, and I was worried about baking in advance. Anyway, I read your advice and will use your sister in law’s recipe – thanks.
My question is about fondant. If I decorate with fondant will the cookies still last? Or will they go soggy and gross?
Thanks
Laura
Hi there
I live in a pretty humid country. I put the rolled fondant on the cookie.. Decorated the top with some buttercream and placed cookie in airtight container. Cookie became soft. Leaving it in room temp wld soften cookie, I thought. Wld putting decorated cookies in a dehydrator help…? I’m stumped? Even decorating with RI makes my cookie soften.. Help please..?
Hi Marian, I have to make 100 for a wedding. how far in advance can these be made? will the fondant soften the cookie?
Many thanks
Hi Laura, Ray and Naomi,
Humidity in the environment you’re decorating in makes a huge difference. At the time we made these our climate wasn’t humid (summers get really humid here though so I have some experience with it), so we let them dry at room temp. If you’re working in a humid climate, I would let them dry in a room with a dehumidifier, at room temperature. Because my dehumidifier kicks out heat, I have the AC on at the same time. Perhaps keeping the area controlled, such as a small room, is a good idea.
If you try and let cookies dry in an airtight container, the moisture from the icing etc. will soften the cookie.
Once the cookie is dry, I would bag them right away, and keep them in a cool dry area (not the fridge).
I would likely make these about a week in advance if I didn’t have time to make them close to the event.
Great thank you!
I have made the cookies and put them in a container. I have cut all the icing shapes and currently drying. I will then secure to the cookie with royal icing once they have firmed up. I will let you know how they turn out!
Ray – My experience with Royal icing is that once the cookie is decorated you have to leave it around 8 hours to dry before storing them.
Hey Marian, Every time I need advice on cookie decorating,I always go to Sweetopia. I love your talent. When I decorate with fondant,I adhere it to the cookie with clear Karo syrup. It is fast and easy.Thanks for sharing your talent with us.
Hi Kay,
Thanks so much! I’m glad I can help in some way, thanks for coming over to comment, very much appreciated!
How much fondant is needed just for the base (white area) for 100 cookies?
Thank you for this wonderful tutorial. It is wonderfully clear and easy to follow. A dear and talented friend recently won a visual arts award (at age 90) and I made these to celebrate her. This tutorial was exactly what I needed, and, even though I am I seriously inexperienced, they turned out great. I appreciate you!
(And I added the extra 1/2 cup of butter in your sugar cookie recipe – wow!)
Hi GJH,
Thank you for sharing! How nice it was to read your lovely comment. I’m so glad it worked out well, and your friend is fortunate to have you. xo