Have I ever got a treat for you today! The talented Hani of Haniela’s Food & Photography invited me to be a part of a cookie collaboration of sorts, called Let’s Smell the Flowers, where each person was to make a cookie (or cookies), inspired by a particular flower. There are so many purty, purty cookies by 18 other cookie decorators I’m about to share with you. Before we go on to that cookie gorgeousness, my entry…
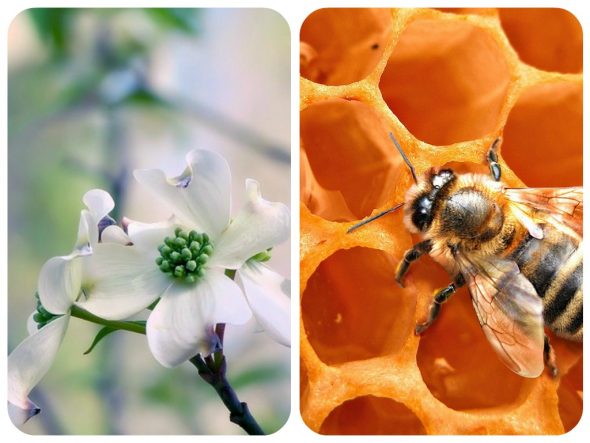
I was given the dogwood flower, and was inspired by this photo of a dogwood, and this photo of a honeycomb for the base (have always wanted to try making the honeycomb, so decided to combine the two):
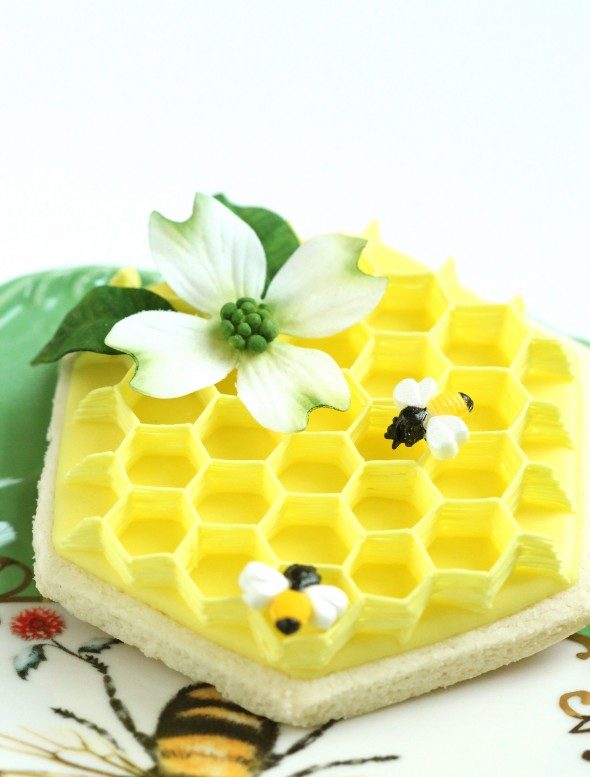
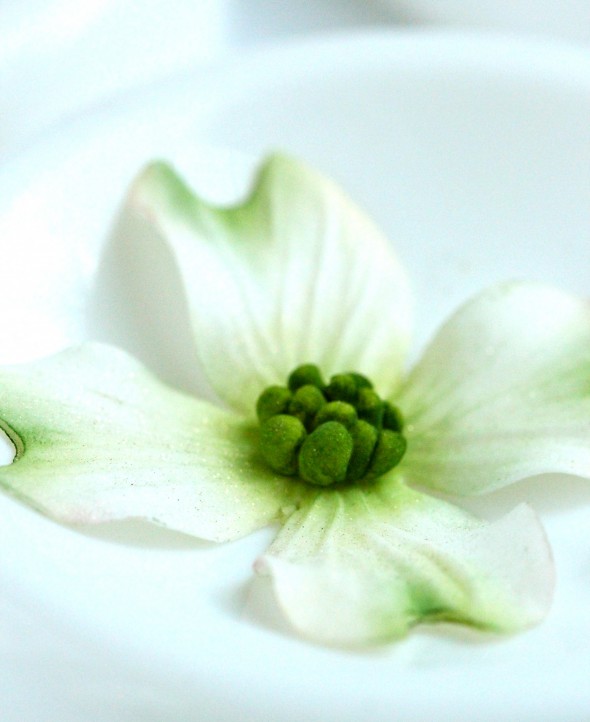
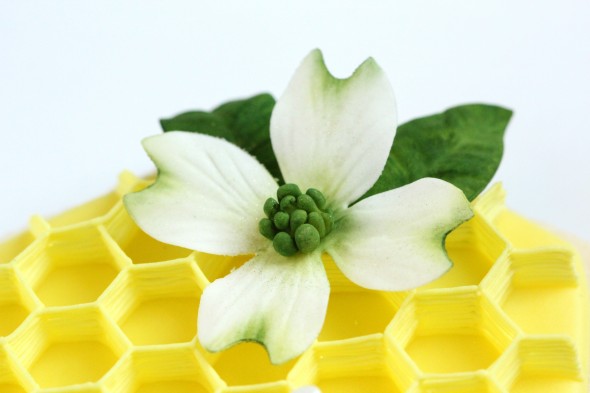
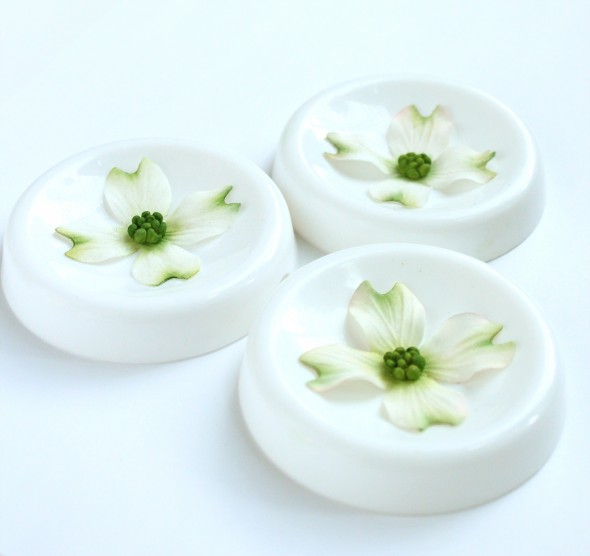
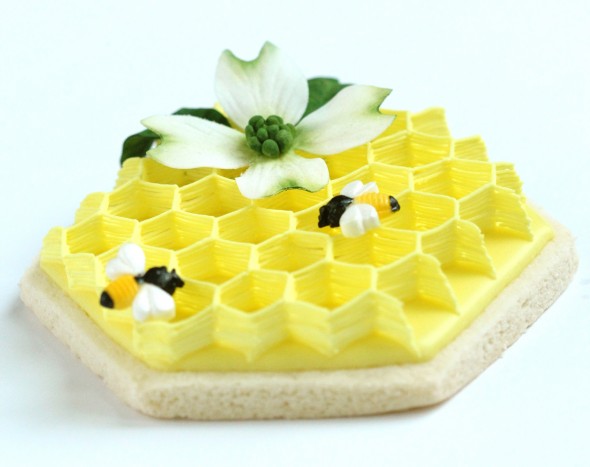
Isn’t the real dogwood flower pretty? I hadn’t actually paid much attention to this flower before, and now that I’ve spent some time ‘with it’, I appreciate its beauty. My version is no where near nature’s, but here’s my attempt:
I decided to step out of my comfort zone and try some different decorating techniques. The first one, the dogwood itself, was a little scary for me. Although I know some sugar flower basics, mine are usually simple and whimsical. I’ve wanted to really get into making sugar flowers, since about almost the same time I started decorating cookies, but cookies kind of took the front seat and sugar flowers a backseat went by the wayside.
I’ve also always admired Jacqueline Butler’s gorgeous flowers, so was thrilled to be able to learn from her through her online course on Craftsy.com. She teaches hydrangea and filler flowers, leaves (and more), in the course, so I tried to use similar techniques for the dogwood, and although mine aren’t nearly as the level hers are, following Jacqueline step by step made everything so much easier. She’s such a great teacher, and so thorough, I highly recommend her online course if you can’t get to a class she teaches in a city near you.
To find more info. on her online Craftsy course, read her blog post about it here.
For information on where she teaches, visit Jacqueline on The Petalsweet Blog or check out her facebook page here.
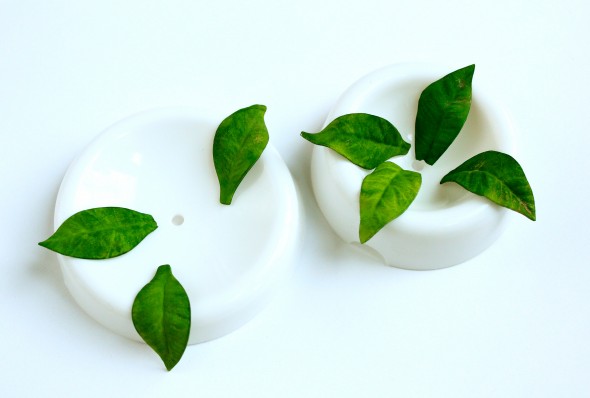
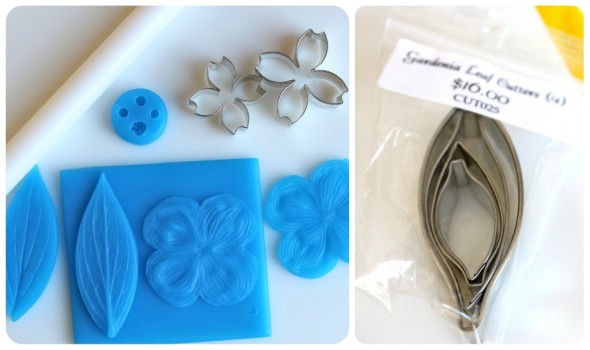
If you’d like to make the dogwood flower, there are a few tools you’ll need. I got the cutters and silicon veiners at Sugar Delites Sugar Art & Supplies. (On facebook here). Jennifer, who runs the shop, was amazing – she promptly answers emails and really knows her stuff. Among other things, she helped me find a great leaf cutter, originally used for gardenias, which works really well for dogwood leaves. I’m not surprised she came recommended by Jacqueline Butler!
Things You’ll Need to Make the Dogwood Flower:
- Gumpaste
- Fondant Rolling Pin
- Dogwood Cutter (I used the smaller one in the photo)
- Dogwood Veining Kit
- Gardenia Leaf Cutters
- Light Green Luster Dust
- Dark Green Luster Dust
For a basic video tutorial on making gumpaste flowers, click here, but I’ll be the first one to tell you, it’s no where near as good as the online course Jacqueline has on Craftsy.
How to Make A Honeycomb Cookie
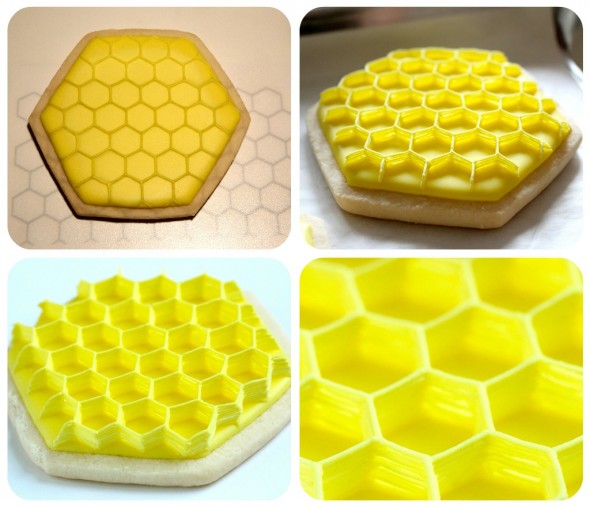
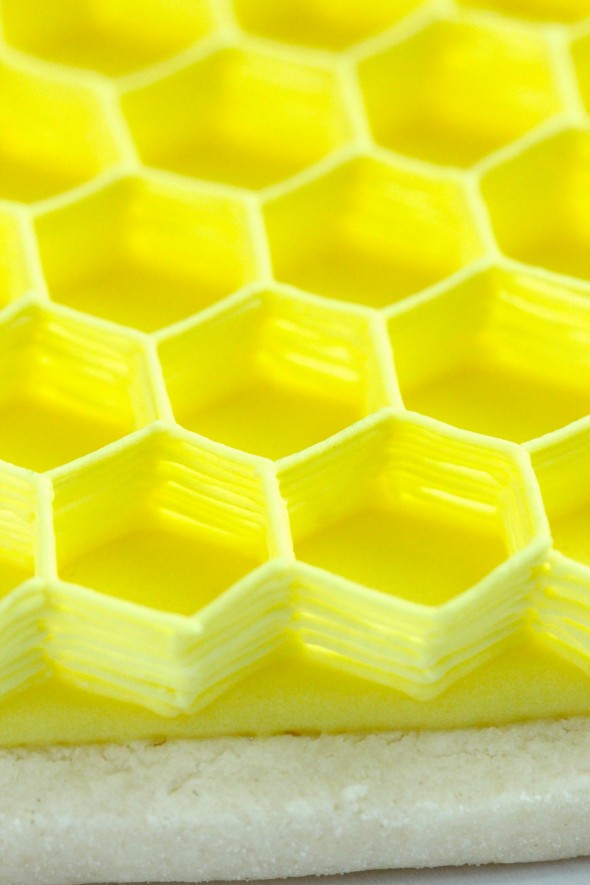
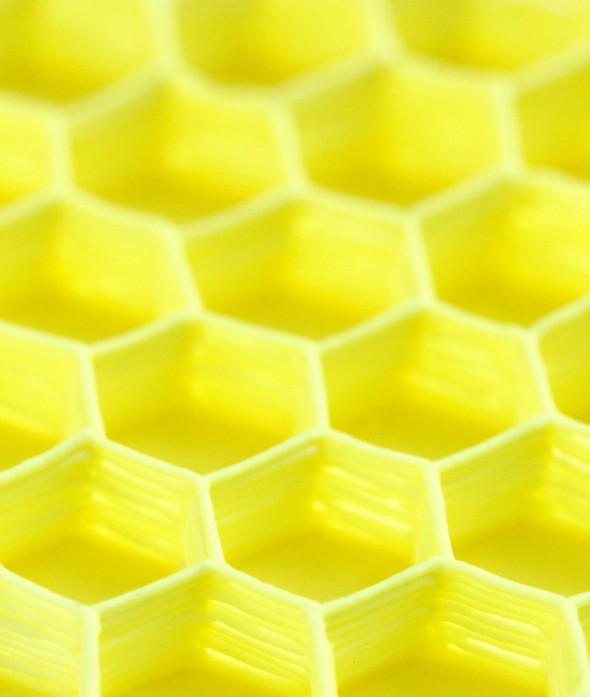
Been wanting to try this for a loooong time now. Lines of royal icing piped on top of each other in the shape of hexagons, to simulate honeycombs.
The idea isn’t difficult – I just printed a honeycomb pattern and projected it in my Kopykake and traced, but, now that I’ve tried it, there are a few things I’d do differently next time. Here are my notes:
- Try to line up the honeycomb image better, so that some of the edges aren’t open.
- Make icing thicker – at first I tried my 10 second icing, hoping it would work, but guessing it might be a tad too runny. Yup… these lines need to be thicker so that they have more body. See the thickness of this icing here if you’d like to try it. I ended up using the thicker icing and could have saved some time with preparing my consistency.
- I probably could have made the honeycomb deeper, but…
- These take quite some time to make. I had originally planned to make six of these… that didn’t last. This one cookie took me approximately one hour to pipe. Enough said.
- It was challenging to pipe nice, short lines. My lines definitely aren’t perfect, and I had to use toothpicks quite a bit to fix mistakes.
- It helped to have a tiny amount of royal icing in my piping bag. It’s easier to pipe (for me), when the piping bag is similar to the size of a pen or pencil.
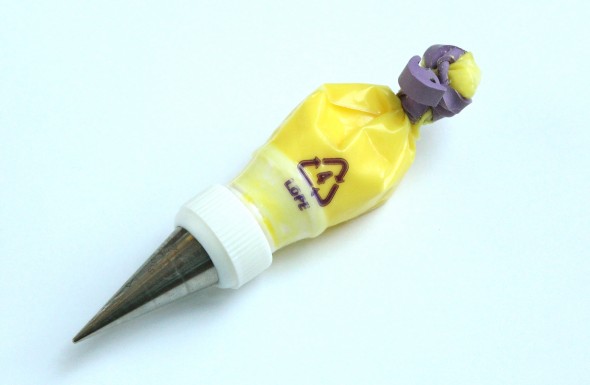
All in all, it was neat to see the finished result.
If you’d like to make the honeycomb cookie, here’s a basic how-to:
Things you’ll need to make the honeycomb cookie:
- Royal Icing
- Shortbread Cookie Recipe
- Hexagon Cutter from Coppergifts
- Yellow Food Gel Coloring
- #1 PME Piping Tip
- Piping Bag and Coupler
- Honeycomb Pattern
- Kopykake Projector (for alternatives to the projector, see the bottom of my Kopykake projector tutorial)
Basic Steps:
Step 1: Once you’ve baked your cookies and flooded the base with yellow icing, and let it dry, you’re ready to pipe the honeycomb. Trace the lines, one side at a time and one row at a time, until you’ve connected all the hexagons.
Step 2: Once you’ve done the bottom layer, go back to the first lines you began piping, which should be set by now, and pipe right on top of them. Repeat until you’re happy with the height of the honeycomb.
Notes: See my notes above for more tips and ideas.
Oh, and one last thing about the honeycomb cookie… well, I can imagine biting into it would create a nice satisfying crunch, but I didn’t try it. Still have it, not sure what I’ll do with it. If you decide you’d like to make them for an order or otherwise, I highly recommend making only one or two and having other simpler cookies to accomodate them. That and make sure you share with whoever’s eating them, that it’s best to remove the gumpaste flower first, before eating. (It’s edible, but not the tastiest).
How to Make Gumpaste Bees
Since it was my first time making these little bees, I think I need to practice a bit more before I share an in-depth tutorial with you, but in the meantime, I can share the simple basics.
What you’ll need:
- Gumpaste
- Yellow and Black Food Gel
- Fine Paintbrush
- Pearl Luster Dust
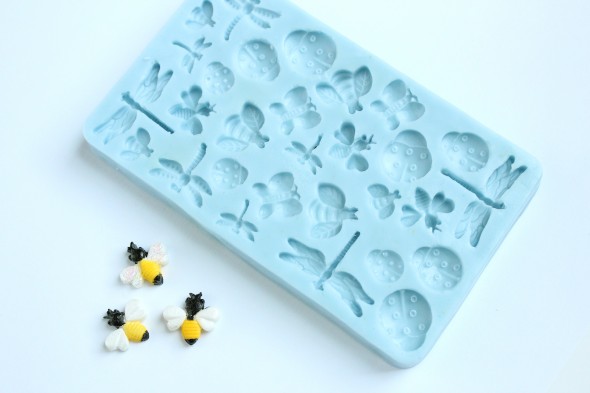
- Mini Bugs Mould
Basic Steps:
Step 1: Knead a tiny piece of gumpaste and press the smoothest end into the bug mold of your choice. Make sure the entire cavity is filled.
Step 2: Gently trim the excess gumpaste with a sharp paring knife, so that the surface of the gumpaste is flush with the mould. Careful not to cute the silicon mould with your knife. (You do need a sharp knife to trim the gumpaste though).
Step 3: Put the mould in the freezer for 10 minutes.
Step 4: Gently pop your shape out, let it dry for 24 hours, and paint with food gel of your choice.
Step 5: Lightly dust the bug’s wings with pearl luster dust.
Note: I didn’t trust myself to do tiny black lines on the bumblebees backs, but may give a shot next time with a really, really fine paintbrush (Not sure what’s available, but a brush with only a few hairs maybe!)
Let‘s Smell the Flowers
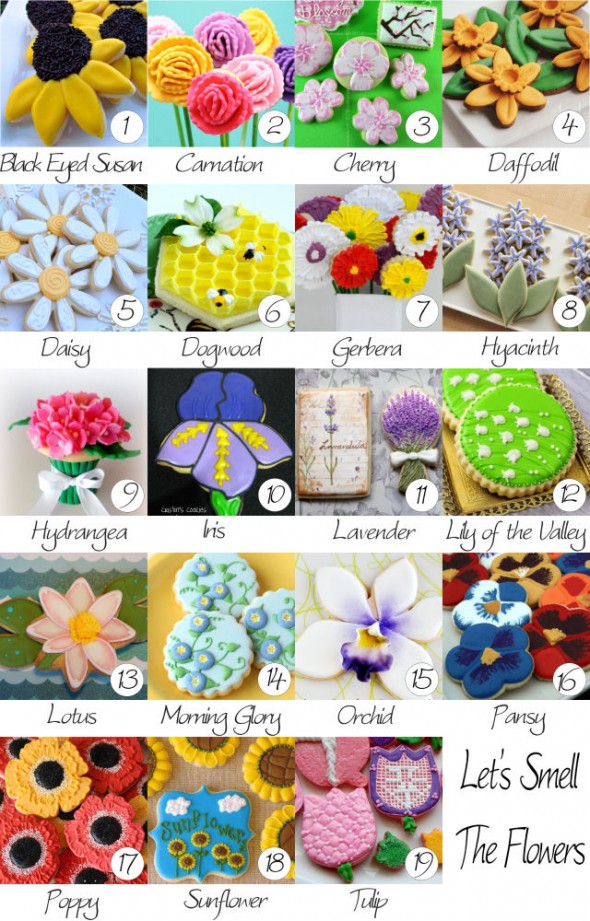
So now on to the best part! Take a look at all the beautiful flower cookies for the Virtual Cookie Party, Let’s Smell the Flowers! There are so many fabulous, gorgeous ideas here – I’m blown away by the talent and creativity of all these wonderful ladies! Below the flower images you’ll find links to all the corresponding posts. I say, grab a cup of coffee or tea (or whatever you enjoy), put your feet up, and savour a walk in this cookie flower garden:
I love every single one of these gorgeous cookies and am happy to be included among such talented cookie artists! Thanks so much to Hani for organizing this collaboration and for inviting me!
Here are the links for you to parouse, and enjoy “smelling the flowers”:
1. Black Eye Susan by Lisa, The Bearfoot Baker
2. Carnation by Meaghan, The Decorated Cookie
3. Cherry Tree Flower by Pam, Cookie Crazie
4. Daffodil by Georganne, LilaLoa
5. Daisy by Stephanie, Ellies Bites
6. Dogwood by Marian, Sweetopia
7. Gerbera by Paula, Vanilla Bean Baker
8. Hyacinth by Amber, SweetAmbs
9. Hydrangea by Kim, The Partiologist
10. Iris by Cristin, Cristin’s Cookies
11. Lavender by Liz, Arty McGoo
12. Lily of The Valley by Hani, Haniela’s
13. Lotus by Marlyn, Montreal Confections
14. Morning Glory by Glory, Glorious Treats
15. Orchid by Ali, Ali Bee’s Bake Shop
16. Pansy Nicole, Life’s A Batch
17. Poppy by Callye, SweetSugarBelle
18. Sunflower by Bea, Cancun Cookies
19. Tulip by Lorriane, LorrainesCookies
You’re welcome to leave comments below if you’d like, and I’d love to see some of your flower creations if you’d like to share pics on my Facebook page, on twitter, pinterest or YouTube.
Happy spring!
xo,
Marian



This is absolutely SHOWSTOPPING!!! You actually taught me what I did wrong with a honey comb design I tried earlier this year! I can’t wait to try it again. Perfection!
Marian, I don’t know what’s more incredible! The dogwood flower looks really-really real (and I spent my days climbing a sweet dogwood tree at the edge of our property when I was a girl, so I know them very well!), or that phenomenal honeycomb cookie! I wouldn’t have guessed to pipe the lines, and I’m just blown away by your perfect dedication!
These are quite amazing! The lines are so super straight on your honeycomb cookies..they are so colorfully beautiful!
@ Nichia: I know, there’s got to be a better way!
@ Janet: I will look it up! Thank you!
@ Kim: Ha ha! Charlie in the fridge… love it!
@ Martha T & @ Leana: Yes, Jennifer *is* awesome; she really aims to please and is so helpful!
@ Peggy: Oh that’s great! Maybe I’ll ‘see’ in the Craftsy course! I really believe you won’t be disappointed – it’s such an excellent course with Jacqueline! For the flower center, if you click through the links that I provide above (in the dogwood ‘what you need’ items, you’ll see a little round silicon mold I used for the centers).
@ sweetsugarbelle: I didn’t know you tried a honeycomb cookie – did you post it? Please share!
Thanks SO much everyone, for your lovely comments!
Marian you certainly know how to make an entrance everyone will remember. When I saw this picture in my inbox I think my mouth stayed open for several moments, amazing.
We have an artist back home in Slovakia and few years back she did a project with honey comb and bees..all from the cookie dough, I thought no one can do it better ..until I saw what you did with yours.
Thank you so much for being a part of the party.
I seriously have no WORDS right now.
At first I thought: Can this be real? haha
Jacqueline is such a huge talent BUT YOU brought your own ideas to life and that honeycomb LOOKS SO PRECISE !! Not everyone can do this..with lots of practise maybe.
I am SO PROUD to see your post, girl. SO awesome.
That flower..well I dont think I need to mention that it looks exactly like a real dogwood flower, right? Your “attempt” is just PERFECT, nothing less. haha..
Thats what happens when YOU post a blogpost: You make people speechless and happy…Well done, sweetie! :))
MUCH LOVE Marian,
niner 🙂
xoxo
This is absolutely stunning! LOVE LOVE LOVE your tutorials. Thank you for sharing.
I love the dogwood/honeycomb cookies! Just incredibly beautiful. I don’t know if I could bring myself to eat such a work of art!
MIND. BOGGLING. AMAZING.
Dear girl, you continue to amaze and delight. I so look forward to your post.
Have a wonderful Easter.
With admiration and appreciation,
Marian N
Are you for real Marian? This is beyond amazing. Jaw-dropping amazing! And I had to laugh (out loud sitting at my computer) when you said that your dogwood flower wasn’t nearly as pretty as the natural one and yet, I honestly couldn’t tell the difference and had to keep looking back again. Also the patience that it must have taken to line up the honeycomb lines! Wow. You are truly amazing Marian! Thanks so much for sharing!
Wow- that it a lot of time to put in for one cookie! so well done though, it’s stunning
just amazing!! And I so need that bug mold now, means another trip to Goldas when it comes in:) And I told Hubby about who your dad was, he was all “he was my favorite chef!” So funny, and thanks so much for your very kind words on my blog:)
Nothing to say here you can’t comment on PERFECTION!
The only comment I can make is that you create master-pieces!! Thank you so much for sharing all your creations with us! I wish I had the chance to be taught in private by you…
This cookie boggle my mind! Even after going through the tutorial I can’t wrap my brain around the gorgeousness happening here. Amazing work Marian!
Holy moly! These are amazing, I’m stunned! I can certainly see why they took you so long to create. Your flowers are amazing too, seriously.
Very, very impressive!
Just about the coolest thing ever, Marian!
That is, by far, the most beautiful cookie I’ve ever seen. I can’t imagine piping all those honeycomb lines! Amazing job.
Marian — This …. CREATION of yours (I cannot even call it a cookie) is AMAZING!! It is SOOOO delicate and beautiful!!! I love the precise lines of the honeycomb and the perfect shading of your light, airy dogwood flower!!! SO WONDERFUL!!
I was considering buying a kopykake projector… I do have one question, though. did you get a reduction lens? there were several comments in the reviews stating that the image was blurry without it, but I haven’t heard much when it comes to cookies. Thanks!
Gorgeous. I am with the others, this is jaw dropping amazing!
Hi @ Leslie: I generally resize my images. Maybe this post will help you? https://sweetopia.net/2010/06/decorating-cookies-with-a-kopykake-projector/
Thank you, everyone, for your lovely comments!
Hi @ Sue @ Cakeballs, cookies and more: That’s so cool btw! Love it! xo
hello Marian
just god knows how much I love you and your beautiful creations and such a big inspiration you are to me. I have to say you are my number one source in cookie decorating and learnt a lot from you (still learning every day). again have to say I love you so much
while ago I made my tiny version of your beautiful honeycomb cookie (of course with not much equipment or careful details) in 5 minutes since I had a crying baby over my feet. but it came out cute and I like it
http://www.cheftayebeh.ir/2012/08/blog-post_20.html#comment-623777116
just wanted to show you the pictures and thank you for your generosity
love
Tayebeh
Thank you, @ Tayebeh! Yours look adorable! Love how did the bees! Just left you a comment on your blog, i hope it went through.
OMG not even in my sweetest dreams I would thought you leave me a comment on my blog
still shocked! I always admired your personality and I have to say you are the sweetest. you made my day darling
lots of love
Aw, well of course I would, @ Tayebeh! You took the time to read my blog and try out an idea, and I am honored! I love your bees more than mine btw, how did you make them?
oh no I am honored. I’m so happy I cant sleep :p
really? you do? well they are simple royal icing transfers I piped with stiff icing. I did a step by step photos previous years. here is one I did on sugar cubes to celebrate spring and our new years eve (it was the year of tiger) :
http://www.cheftayebeh.ir/2010/03/blog-post_15.html
I think these are cuter but not 3D. this time I made them 3D
of course you are the master and know these things better than anyone. gave this link cuz you were so kind to ask. I just tried to make these simple decorated sugar cubes to accompany tea for guests .
and well for the honeycomb cookie I had no time to make them with fondant so I piped these in a jiffy
Hi @ Tayebeh: You are so sweet! Thank you for your kind comments – you made my day. 🙂
I love the sugar cubes you made- There’s something so charming about them. I’ll bet your guests loved them!
thank you for your encouraging words my lovely Marian
kisses and hugs
Gorgeous and talented work! Came across a bee cupcake with a similar top. For the life of me couldn’t figure out how she made the honeycomb. Messaged her and found out she used bubble wrap and white chocolate tinted yellow 🙂 Your talent and precision blow me away!
Hi @ Pamelia Campbell: Wow, what a cool idea she had for the honeycomb! Do you remember who it was? Thanks for sharing!
Oh my! I didn’t realise that you piped the honeycombs! I saw these some time ago and loved them, but took a closer look again. You are just amazing. How precisely you pipe is exquisite. Thanks so much for sharing and inspiring us with your treasures. xxx
Wow, marvelous weblog layout! How lengthy have you been blogging for? you made blogging glance easy. The overall look of your website is fantastic, as well as the content!