
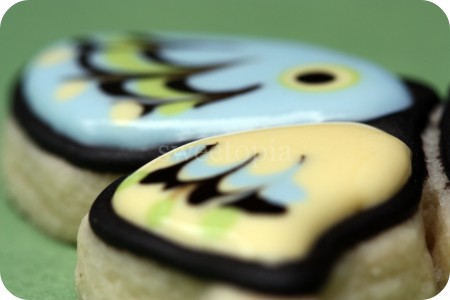
This is my first tutorial on tips and tricks for decorating cookies with royal icing. I have to say first off, that I’ve learned many great tips from various sources on the internet, from books and from cookie decorating classes. If you’re interested in other sources here are the main ones I’ve learned from:
1. Internet:
http://cakecentral.com – Find forums to chat with others about cake decorating etc., photo galleries for inspiration, tutorials and more on this gold mine of a cake decorating (& more!) site.
http://www.cakejournal.com/ – A lovely site with beautiful work by the author, Louise. She’s so great you might want to just leave here and check out her tutorial on decorating cookies! Why am I even writing this?! =)
http://chiccookiekits.blogspot.com/ – Meaghan’s got a great site dedicated to all kinds of cookie decorating. In addition to publishing her own book, Cookie Sensations
http://www.youtube.com/watch?v=tZBXVveAEPE – Cat Cora from Iron Chef, shows how to decorate cookies on youtube.com. Hers is good for the beginner. There are lots of other video tutorials on youtube as well!
There are so many other great sites out there; have fun surfing!
*
2. Books:
Peggy Porschen’s books

Cookie Craft
Toba Garrett’s Creative Cookies
*
Classes:
Bonnie Gordon’s School of Cake Design (www.bonniegordoncakes.com) – Super if you live in the Toronto area! I enjoyed the cookie decorating class offered there and learned some helpful tips. There are many other great-looking decorating classes I’d like to try in the Toronto area, but haven’t taken the classes yet, so I can’t comment on them at this point in time.
*
Okay, here we go!
Decorating cookies is often called ‘flooding’ because you can essentially create a dam, wall or outline of icing on the edge of your cookie, and then ‘flood’ or ‘fill in’ that ‘dam’ with icing. There are those who like to decorate without using a dam by just applying the icing, but I find that I’m able to add more icing onto the cookie when the dam holds it in, therefore making the cookie surface look more thick and rich.
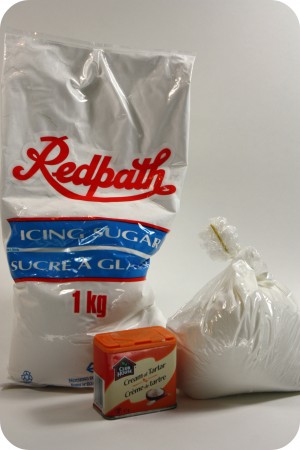
One of the most important components of decorating cookies is the royal icing itself. I have two favorite recipes; Antonia74’s (from cakecentral.com), and Peggy Porschen’s recipe from any of her books
Royal Icing Recipe
Ingredients:
6 oz (3/4 cup) of warm water
5 Tablespoons Meringue Powder
1 teaspoon cream of tartar
1 kilogram (2.25 lbs.) powdered icing sugar

*** Note; if your meringue powder has no vanilla flavour (vanillin powder) in it, add a teaspoon of clear vanilla to this recipe.
Directions:
In mixer bowl, pour in the warm water and the meringue powder. Mix it with a whisk by hand until it is frothy and thickened…about 30 seconds.
Add the cream of tartar and mix for 30 seconds more.
Pour in all the icing sugar at once and place the bowl on the mixer.
Using the paddle attachment on the LOWEST speed, mix slowly for a full 10 minutes. Icing will get thick and creamy.
Cover the bowl with a dampened tea-towel to prevent crusting and drying.
Tint with food colourings or thin the icing with small amounts of warm water to reach the desired consistency.
*
Besides your cookies and the ingredients for the royal icing recipe, you’ll need your tools:
Cookie Decorating Tools:
1) piping bags


3) piping tips
4) couplers

5) coupler covers – these aren’t necessary; you can just rest your tips in a damp cloth
4) glasses – to stand your icing bags in
5) clean cloths – a few damp and dry ones nearby
6) toothpicks

Icing Tips and Tricks:
One of the most important things I’ve learned about cookie decorating is that if your icing isn’t at the right consistency or thickness, the experience can be very frustrating.
So, once you have made the icing, it ususally needs to be thinned a bit to create the best consistency for decorating. This means that it needs to be fluid enough so that it will flow just enough that it settles into your cookie dam, but not too much so that it runs over.
You may realize that that the icing was thinner before you whipped it for 10 minutes according to the recipe, but it does make a difference in the texture that you mix it that long. Do mix it for 10 minutes and then thin it out if you need to.
Add just drops of water at a time to make the icing runnier. If you add too much water at a time it’s more difficult to thicken it with icing sugar than it is to add water to it.
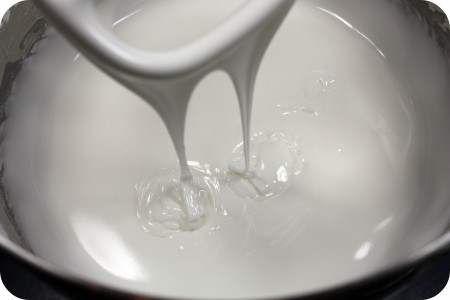
The trick I use to make sure my icing is at the right consistency, is called the “10 second rule“. Drag a butter knife through the surface of your royal icing and count to 10. If the icing surface becomes smooth in anywhere between 5-10 seconds, then your icing is ready to use. If it takes longer than approximately 10 seconds, the icing is too thick. Slowly add more water. If your icing surface smoothes over in less than 5-10 seconds, it is too runny. Mix your icing longer or slowly add more sifted icing sugar to thicken it.
I learned a slightly different ’10 second rule’, through Sarah Bell at Bonnie Gordon School of Cake Decorating… she likes to dip a spoon into the icing, lift it and let ribbons of icing drop back into the bowl, and count how many seconds it takes to make that surface flat again. (5-10 seconds).
Some people use a thicker consistency icing to outline their cookie shape and then a runnier one to fill it in. I have come to prefer using the same icing to outline and flood because it saves me time. (I don’t have to prepare two icings for each color, prepare two piping bags for each color etc.). That being said, the icing then can’t be too runny, because the outlines will not form properly.
Some decorators like to flood their cookies with a very runny icing, so if you are one of them, prepare two icing consistencies, one thicker, one runnier. The thicker icing should not be so thick that it is dry and curls when you try to pipe it. It should just hold it’s shape when you pipe it onto the cookie.
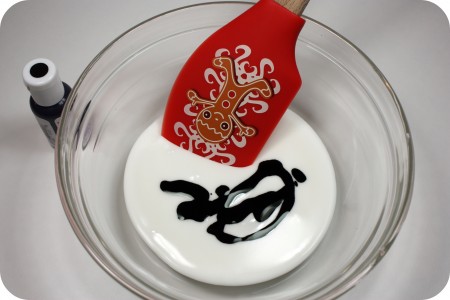
Coloring Icing:
Once you’ve managed to reach the desired icing consistency, add food paste coloring of your choice. I use a toothpick to slowly add color bit by bit. Because deep, dark colors such as red or black usually require a lot more food paste coloring, I’ll use the end of a butter knife to scoop out those colors if they’re in a tiny container. I should also add that I have come to prefer the Americolor brand for black especially. Americolor uses squeeze bottles which makes adding the color much easier, and it seems to bleed less into other colors.
Another tip when it comes to adding color to your icing; the colors usually deepen with time, so I try to color my icings 24 hours in advance to see if I’m happy with them.
Also, stirring your icing to add color will incorporate air into it, so if you leave the icing sitting for a while the air bubbles rise to the surface, where you can pop them by gently stirring just a little before you add the icing to the piping bags.
One more tip to help avoid air bubbles in your piping bag; massage the royal icing a bit before you twist the top end of the piping bag closed. Press the icing in the bag upwards, starting from the tip and working your way up, pushing out the air bubbles as you go. Then push it back down towards the piping tip.
*
Filling Piping Bags:
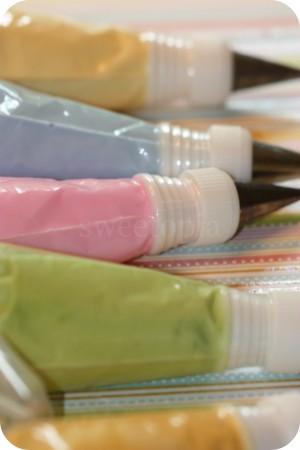
I have disposable and non-disposable piping bags for decorating. Either are fine, however, I tend to lean towards disposable because I can quickly see what color each bag has in it. Important when timing is key! That being said, you could color-code each with a matching elastic if you don’t like using disposable bags. I’ve also tried using squeeze bottles with my students at school, and they’re also great for being able to see the colors easily, they aren’t very messy, and the icing can be kept in them as they’re airtight with the wee little lids. Trying not to lose them with teenage students is a problem though! Sorry guys it’s true! 😉 For me, the bottles are really only good for filling in, or flooding, so I tend not to bother with them for the most part.
Cut off the ends of your disposable piping bags, insert the coupler, tip and close it off. I generally use a number 2 or 3 piping tip to outline my cookies and a number 2 – 5 to flood them. The larger the cookie, the larger the piping tip. There are some great tips for small details, such as 00 or even 000, however they clog very easily! I like to use tip #1-#1.5 for smaller details.
Get as many glasses as I have colors out, add a clean, damp cloth to the bottom of each, and set one empty piping bag into each as well, with the opening of the piping bag folded over the rim of the glass. Fill the piping bag with your royal icing. I find it easier to fill the bags with icing when I have two hands free.
Twist the openings of the piping bags closed, and tightly secure them with elastic bands. Work over your icing bowl so that the icing dripping out of the tips doesn’t go all over your work surface. Rest your finished decorating bags back in the glasses until you’re ready to use them.
*
Outlining Cookies/Piping Techniques:
Practice piping on your work surface so that your hand gets some practice before you begin the cookies. I usually find I need a few minutes to play around before my piping improves. I decorate my least favourite cookies, or my extra cookies first; that way if I make a mistake it won’t matter as much!
Outline the cookies first, and wait at least 15 minutes before you flood the inside of the ‘dam’. If the outline is a dark color such as brown or black, I wait 24 hours before flooding the cookie. It lessens the chance that the colors will seep into each other. If you live in a humid climate, air conditioning or a dehumidifier will help prevent color seepage as well.
I should also mention, that if you don’t like the look of the outline on the cookie, outline your cookie and fill it in right away. The icing needs to be at medium consistency for this… not too runny or it will just flow everywhere, and not too thick or it won’t settle smoothly.
To outline the cookies, hold the bag at a 45 degree angle and position the tip at a corner of the cookie. Put enough pressure on the bag so that the icing comes out and start moving towards the direction you’d like your icing to flow at the same time. About a centimeter after you’ve begun your outline, start lifting the piping bag away from the cookie, so that the icing just falls onto the cookie. Start coming back closer to the cookie when approaching another corner. If the cookie is more intricate, or has more corners, you may not be able to just let the icing fall as there won’t really be room to. Also start to apply less pressure as you approach the corners. While decorating, every once in a while I twist and tighten the top part of the bag to create pressure so that the icing flows well.
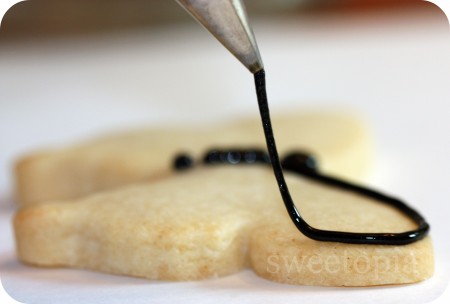
Flooding/Filling In Cookies:
When your cookies are ready to flood use a #3 – #5 sized piping tip. The larger the cookie the larger the tip. Start at one area and quickly zig zag back and forth until you’ve covered your cookie. Don’t worry if you haven’t filled in every little spot; speed is more important at this point. If there are a few spots that haven’t quite filled in once you’ve basically covered the whole cookie, use your piping bag, a toothpick or a paintbrush (used only for food), to push the icing around and fill in the gaps.

If you would like to add more icing colors to your cookie so that they ”meld’ into the base color, you need to add it right away. The base layer starts to dry quickly so you need to add your next colors as fast as possible. For example, I added these two black lines and one colorful line and then drag a toothpick through them.


The ‘eye’ of the butterfly is then made by layering a few colored dots on top of each other, with the white or light color second last and black last. Dots are easy to make; position your piping bag straight above the area you’d like to pipe and gently apply enough pressure so that just a dot comes out of the tip. Stop the pressure on the bag and lift it away. Take your next color and keep layering, making sure that your dots get smaller each time.


Fill in each wing or every two wings at a time.

Packaging and Storing Cookies:
Let the cookies dry for 24 hours before you package them.
If you’d like to store them in tupperware instead of packaging them, stack them with the largest cookies on the bottom and the smallest, most delicate ones near the top, and insert parchment paper between each layer. Store in a cool, dry area. I try to make mine no more than one week in advance, and advise people to eat them as soon as possible! They should be eaten within one month for sure. Some people claim they are fine even up to 3 months, however, I’m a firm believer in “the sooner, the better!”

I hope this tutorial has helped you! I welcome any questions or feedback… Have I forgotten to mention something? Do you need clarification on anything? Please ask or let me know!
If you like learning with video, you can also find me on YouTube, by clicking here.
Have fun creating!!
xo,
Marian
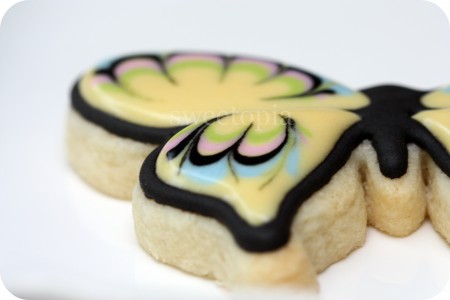
 For some other butterfly cookie examples see this older post here.



Thank you Marian!
Unfortunately I made double quantities of the gingerbread cookie dough and will be baking the rest this week to take to our family celebrations at the weekend, so no chance of taking out the baking powder and I don’t want to waste the dough… so will just make the best of it and maybe roll the dough a little thinner. 🙂
Thanks for the tip about the icing. I am learning as I go along! Never really made cookies much before (I always preferred baking cakes/loaves/muffins) but I’m enjoying it. 🙂
Just want to say thank you once again Marian for your fantastic tutorial. I am a complete novice when it comes to decorating cookies and I iced my first ever cookies this week. 😀
Thanks to your tutorial, they look very pretty and I will not be at all ashamed of feeding them to my family this weekend!
They are nowhere near as pretty as yours but not bad for a first attempt, I don’t think. Here is a pic: http://sphotos.ak.fbcdn.net/hphotos-ak-snc4/hs1389.snc4/164195_496615714904_509279904_5568208_2721401_n.jpg
Thank you once again for your wonderful tutorial. I have bookmarked your site – it is amazing!
Merry Christmas and a Happy New Year!
Thank you all for your lovely comments! I do appreciate them.
Bonnie, your cookies look lovely! They certainly don’t like that was your first time decorating! Congrats – I hope you keep on making them. =)
thank you for the amazing tutorial. you inspired me. i can’t find meringue powder in my country. can i replace them with lime juice or something else? thank you
Crez,
I haven’t tried that personally so don’t feel comfortable recommending that.
I can say that you can try a royal icing recipe using egg whites, icing sugar and cream of tartar, and that should work! Try searching on google for a royal icing recipe made with egg whites.
Great tutorial and BEAUTIFUL cookies! Awesome decorating!
Hi Marian!
I LOVE your website and all of your creations. I am going to attempt valentines royal icing decorations similar to your LOVE cupcakes and I have a question about RI. I have made cookies in the past with it but for some reason everytime I make a batch of RI ( I use the recipe you have posted here) I got to thin it and I can never seem to get the same consistency every time. I end up adding too much water. I only add a bit at a time but by the time I think I am close to the 10 second rule time period its actually too runny. Have you ever measured EXACTLY how much water it takes to get to your desired consistency ( the one you use for both outlining and flooding) or is it a different amount each time you make a batch?
Thanks!
Shanna
Shanna, interestingly enough I don’t always add the same amount of water. Several factors affect how much water I add; if it’s a really dry winter day (where I live), I sometimes add an extra cup of water! In the summer time I end up adding less because I’m working in a very humid environment. Don’t have exact amount as I add it bit by bit as well. I’ll have to check this summer and I think I’ll do a video so that I can show you and others; much easier to see than just explain!
k so we wanna make the dirty cute cookies from how does she. and i was wondering if we really need meringue powder for the icing? in our small town we do not have meringue powder? what do we need to do?
Jen, you could make icing using egg whites instead. Just google, “royal icing made with egg whites recipe” to find one.
I’m sorry I don’t have a specific one to recommend as I just use meringue poweder.
Have fun making your cookies!
Super duper job on both the video and the written tutorial. This is a difficult process for me because I cannot seems to keep from putting TOO much icing so it flows over the outline. My cookies end up not so nice. I am working on it.
Thanks so much!!
Charlotte
whow this is really beautiful, but i still don’t want to use colorant in my food because many says that it isn’t healthy. I have a questions is there any natural colorant that I can use?
I haven’t tried them, but I’ve heard of a product (natural vegetable food dye), by ChefMaster here:
http://www.amazon.com/Chefmaster-Food-Coloring-Kit-1-Ounce/dp/B001AMGPZ6
Wow! Your cookies are absolutely gorgeous! About 3 days ago I felt the need to learn how to bake and decorate cookies. I tried about 4 different icing recipes, and just today I tried the one on your site. It is absolutely the best! It took me a while to get the right consistency, but I finally got it. I have no problem flooding an entire cookie…my problem is that I can’t seem to make a design outline perfectly onto the cookie and then flood in that more detailed design…what do you suggest..can you share your experiences of when you first started decorating cookies? What inspired you, did you have any previous decorating knowledge….maybe that will help keep me motivated lol….
“…my problem is that I can’t seem to make a design outline perfectly onto the cookie and then flood in that more detailed design…what do you suggest..”
Bianca are you having trouble drawing? For that I use a kopykake projector to help. (in the tutorial section).
Or is it that the icing isn’t holding it’s shape when you do the designs? Maybe try a thicker icing or even a smaller piping tip.
It would help if you’d send me a pic… [email protected]
I did get frustrated at first… (like I say in my Royal Icing Consistency video… I’m assuming you watched it cuz you talk about consistency), but it really did help to get that down… Letting your icing kind of FALL instead of forcing it really helps and also, because I have trouble drawing, the KopyKake projector really helped me improve my designs.
What inspired me.. hmmm… I think it was the fact that people were SO HAPPY to receive these handmade decorated cookies; they were always so delighted… it just really gave (still gives me) joy to give them away! Don’t give up!! YOU WILL get better! It takes a few of the key tips, a little practice, and you’ll be on your way!! And even if you’re not perfect, it doesn’t matter; the fact that you made your edible works of art, had a good time doing it, and made others happy with the results… that’s what counts!
What experience did I have… well, by the time I began this blog I had been decorating for years (at least 6-7 by then)… In the beginning I read all the cookie decorating material I could get my hands on (I have a lot of books!), and I took a cookie decorating class through the Bonnie Gordon College. I was determined to learn and am still learning and growing I think.
I hope you continue playing around with decorating… it’s been such a pleasure to have in my life… I find it stress-relieving (most of the time lol), a fun hobby, exciting…. it’s an outlet for creativity… I would never have guessed as a child that THIS would be my passion, but it is! I hope you continue to try and have fun Bianca!!
Marian, I just want to say that you are fantastic trying to help other people get better at decorating their cookies. 🙂 Your tips have been wonderfully inspiring for me. After decorating my first two batches of Christmas cookies I was sad when Christmas was over and I had no real reason to bake and decorate more!
I am going to try baking and decorating some sugar cookies next. (My last batches were gingerbread.) In your recipe (here: https://sweetopia.net/2009/12/sugar-cookie-recipe/) you mention 5 cups of flour. I am in the UK and we have two types of flour here, plain flour and self-raising flour. The latter has a raising agent in it. Which type of flour would you recommend for cookies?
Thanks again for your wonderful website and tutorials! Oh and I covet your KopyKake projector!
Thanks Bonnie for your lovely comment!
Definitely the regular flour, not self-raising. The self-raising has the levening agent right in the flour and I don’t usually want my cookies to rise/spread very much so often times I take out the baking powder altogether!
Thanks marian, for sharing that! I’ll have to pass up on sending you a picture lol…at least till I get better… they are too embarassing …my piping is all over the place! I will practice piping on parchment paper with different tips and different icing consistency until I get it right lol…thank you so much for all your tutorials…they are very helpful…I am absolutely obsessed with the kopy cake! I’ll probably get me one soon…:)
Ps. Can you recommend a “cookie book” that you think will be most helpful 🙂 thanks again
que dulzura todo lo que hacen, felicitaciones desde argentina para manos artesanas y delicadas
http://www.caneladorada.com
canela dorada
Marian,I can’t thank you enough for being so willing to share all of your insight and knowledge about decorating cookies. Your site has made a world of difference in my ability and comfort level. Thanks to you I’ve gone from this http://www.flickr.com/photos/58880047@N06/5618526836/in/photostream/ to this in 7 short days http://www.flickr.com/photos/58880047@N06/5618526818/in/photostream/ oh and your icing recipe rocks. It is so fluffy and creamy. I love it best of the the 5 recipes I have tried this week. Your tutorials are great and you are a blessing. Thanks so much for all you do!
Hi Mirian!
In the directions for making royal icing, you note that after all ingredients have been mixed in, to “use the paddle attachment” to mix slowly for 10 minutes. I only have a hand mixer, and no paddle attachment : ( What’s my alternative? And will it effect how my icing turns out? : / And I don’t happen to have cream of tarter on hand : / Is it ok to omit it? Thank you for being so willing to help me along my way : )
@ bianca: Hope you’re having fun with decorating! Sorry it took me so long to reply; I somehow missed these comments!
Cookie books… I like Cookie Craft for explanations, and Julia Usher’s for absolute BEAUTY. She’s coming out with a new book in November, where she probably will be explaining things more. I’m thinking it’s going to be an awesome book!
@ gralelu: Thanks and thanks for sharing!
@ Nancy M: Super duper awesome awesome!! I’m SO glad to hear that stuff on this blog has helped you!! Keep me posted with more if you like!
@ Jessica: You can use your hand mixer no problem; it just will take a little bit more work. (The icing gets really thick but you can do it!). A little bit more air gets incorporated with a hand mixer or whisk, so after you’ve finished your icing and put it away in containers, let it sit for a bit so the bubbles can rise to the top. Then pop em! 😉
@ Jessica:
p.s. It still works fine with the cream of tartar omitted. When I make icing to stick a gingerbread house together, the cream of tartar is more important (i add lots)… it seems to really help everything hold better.
Hi Marian,
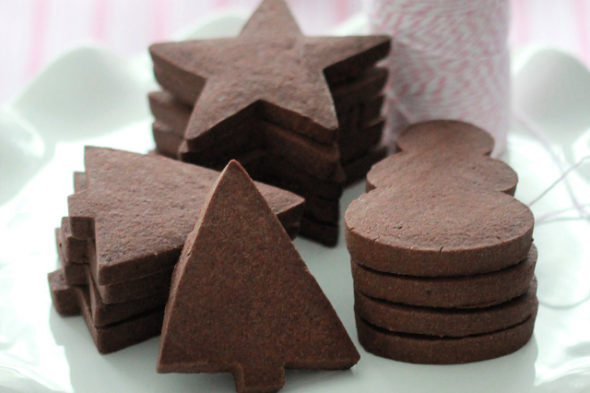
I know you’ve heard this many times already but what a fantastic tutorial this is.. I’m a complete beginner when it comes to cookies and having introduced myself to royal icing last night I’m now feeling confident I can produce good looking cookies for my 2 girls butterfly party -thanks to this site! I’m writing to ask, I’m including a batch of chocolate cookies and I’m unsure of the colour scheme, particularly the outline.. is black then ruled out with the dark underneath? I know I want to use pink, yellow, purple and turquoise for other parts. Thanks so much!
So glad to hear it Hayley! I wouldn’t say ruled out at all! You may not see it as much though.
Really, do whatever you feel like!
Hi Marian! Thank you so much for this site and all the tutorials. I got into cake decorating about 5 months ago and am now about to get my feet wet with the cookies! I’m pretty nervous about it–but really excited, too. I’m wondering: you said you try to tint your royal icing 24hrs in advance. How do you store it after tinting it? Do you keep it in the fridge? If so, how long in advance before you start outlining/flooding should you pull it out of the fridge?
Thanks!! Happy creating!
Ok-scratch that. I just googled it and your blog came up! : https://sweetopia.net/2011/01/how-do-you-store-royal-icing-and-how-long-can-you-keep-it/ Thank you for being so thorough! So it sounds like you store yours at room temp?
So I’ve decided to ask another question I’ve been wondering for quite awhile: Where do you get all of your adorable stands from for your cakes and cupcakes? They are too cute! Thank you!
Hi @ Sheila: My pleasure! I do store mine at room temp. if it’s made with meringue powder.
Cake stands – ebay, amazon, home sense, and a store called, Holly’s Sweets & Eats in Barrie, Ontario, Canada.
I wish you lots of fun decorating! xo
I was wondering what you do with the extra royal icing that is left over? How do you store it and how long does it last for?
Hi Holly,
What a perfect question for this post here:
https://sweetopia.net/2011/01/how-do-you-store-royal-icing-and-how-long-can-you-keep-it/
so glad I stumbled upon your site. My cookie decorating is all self taught and I believe your tips are going to make my life so much easier. I’m excited, maybe I’ll just stay up all night reading all your tutorials. Thank you, thank you.
Hello! Does anyone know, what does adding a little extra meringue powder do to a recipe? Or more cream of tartar? Does either affect how hard it dries, or the drying time?
The recipe i use calls for 4 tbsp meringue powder, 6 oz water, a tsp of cream of tartar, and 2 lbs of powdered sugar. Directions are the same as Antonia74’s.
I’m dealing with some pretty bad humidity this week and have a big cookie order to do. Im concerned about the icing consistency and drying time. I’m panicking and I havent even started!
Thanks so much! Love this site 🙂
Hi Christine!
The meringue can help give the icing more volumne/make it more ‘fluffy’, and the cream of tartar may help the drying time a little bit (make the icing a bit stiffer as well), but my advice to workin in a room that has a dehumidifier and air conditioner (I know, a lot of ‘equipment’).
I’m near Toronto and it is sooo humid right now, no matter what I do to the icing, the colours will bleed if I’m not working in a temperature/humidity controlled environment.
Good luck and all the best! xo
Bought my dehumidifer at Walmart and it works well!
Hi my cookie goddess…
I have a critical question regarding the icing..
I want to make RI that less sweet..Do you have any suggestion?
I found some idea to add lemon juice or add some fat (milk)…
What do you think??
Thanks before Marian
Hi Olivia,
That’s exactly it; use lemon juice. I like almond extract too (but hardly use either of them to be honest, I don’t mind the icing as is). I haven’t tried the milk though. Sorry can’t help with that part. =)
Happy decorating!
I have a strange problem and I hope you can help. When I use the smaller tips like PME 1 or less, my icing kind of spins out of the tip in a spiraling motion. Oh it makes me crazy as it makes it impossible to make a straight line or write anything legible. Any ideas? Is it my consistency or something else? In use your royal icing recipe. Thanks again for all you do. Your site is such a blessing!
Hi Nancy,
Definitely consistency. It sounds like it’s too thick.
Another thing which might help, which is more work (but saves frustration in the long run) is here (#5):
https://sweetopia.net/2010/03/how-to-prevent-your-tips-from-clogging-and-what-to-do-if-it-happens-top-10-tips/
@ marian:
Thanks so much for the suggestions. I will try the nylon sifting trick. I appreciate you taking the time to respond.
Nancy