
Happy Monday! Hope you had a great Saturday and Sunday! I’ve been meaning to make gluten-free cupcakes and was happy to finally get down to it this past weekend. I also had a chance to experiment with making royal icing shiny. You may have seen me chat about it in the comment section of my cookie decorating tutorial or other posts. Royal icing is glimmery and glossy when you first apply it, {and in fact some of my photos are taken while the icing is wet}, but it dries to a matte finish. I don’t actually mind the matte look, but the good news is, for those of you who prefer a shinier finish, there are options.
Okay, first to the gluten-free cupcakes!

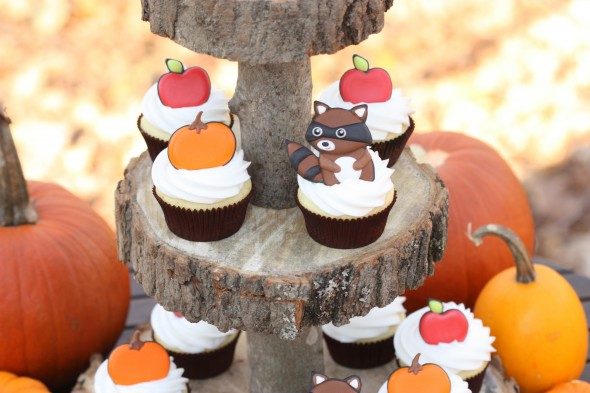
These are gluten-free coconut cupcakes with coconut frosting. The cupcake toppers are royal icing transfers copied from Apple Cider Thanksgiving stickers. I’m so happy with how they turned out! Rich flavour but light texture, coconuty sweetness and scrumptious smooth vanilla coconut frosting. OH my! The recipes are courtesy of Taylor, who has worked in a Gluten-Free bakery and cooks and bakes gluten-free at home. I’m so grateful she shared some simple recipes with me, one of which I’ll share with you today. She happens to be the lovely counterpart to my web designer Arthur, and I’m so thankful to both of them, I decided to make these cupcakes for them and their daughter Joyce, with a bit of a thankful theme in the royal icing cupcake toppers. Perfect for you at this time of the year too, if you live in the United States and would like to try making them for the upcoming Thanksgiving holiday.

Taylor shared an easy-to-make recipe from The Cake Doctor Bakes Gluten-Free recipe book, which mostly uses gluten-free prepackaged cake bases (which can be found at most local grocers now in the baking aisle. i.e: Betty Crocker), but still adds different ingredients to bring out favourite cake/cupcake flavours! If you’d like to try the royal icing transfers, click on this link to see a tutorial.

The cupcakes are made with cake mix base and pre-made frosting, and although I usually make everything from scratch, they were useful for my busy schedule this weekend, and really ended up tasting very nice! Taylor has lots of from-scratch gluten free recipes that she’s generously offered to share with me in the future too (yay!).
Here are the recipes for the cupcakes pictured here:
Gluten-Free Coconut Cupcakes with Coconut Frosting
{Click here for a printable version}

For the Cupcakes
1 package (15 ounces) of yellow or white Gluten-Free cake mix (I used Betty Crocker)
2/3 cup of coconut milk (must be full fat/regular)
1/2 cup butter flavoured vegetable shortening sticks (regular is fine if you can’t find butter flavoured)
3 large eggs
1 teaspoon coconut extract
*Preheat oven to 325 degrees Fahrenheit
**Place cake mix, coconut milk, vegetable shortening, eggs and coconut extract in a large bowl and mix/beat on alternating low and medium speeds.
***Fill each liner (makes approx 14-16) 3/4 full
****Bake for 18-20 minutes, or until a toothpick comes out clean
*****Make frosting as cupcakes bake
For the Frosting
2 containers (459 g) of Duncan Hines Whipped Frosting (read fine print to find gluten free)
2 tsp coconut extract
**you can also try a coconut flavoured buttercream by adding the coconut extract to your favorite buttercream recipe
Another Option – Pineapple Frosting
1 container (8 ounces) of frozen whipped topping
1 cup of finely chopped pineapple
**allow topping to thaw and then continue to mix pineapple, keep in fridge until ready to serve
**note that royal icing transfers would be affected by the moisture in the frozen topping – eventually bleeding and/or disintegrating
**for other garnishes you can top with toasted coconut or a pineapple slice

More tips:
- For consistency in cupcake size, use an ice cream scoop (level the amount in scoop) for filling the cupcake liners
- To turn a cupcake recipe into a cake, be sure to have at least 3 1/2 cups of batter.
- Lowering your oven temperature and baking longer will allow for evenly baked cupcakes/cakes and often times allows for a more desirable eating texture

Okay, now on to making royal icing shiny!
I have to say, this really was an exercise in icing experimentation. I don’t usually take the steps needed to result in shiny royal icing… I do like the dried matte finish, and either way enjoy the soft crunch of the icing and the sweet sugary taste on a cookie. While taking a class at the Bonnie Gordon College years ago, I learned that there are ingredients you can add to the icing to help result in a shinier surface, and although I knew it, I never really used the information. Now I’m finally putting the knowledge to the test, and will be sharing the results of my experiment here.
So let’s get to it!
How can you make royal icing shiny?
There are three ingredients that have been said to add that little bit of shine to royal icing when it dries. They aren’t meant to be added together into the icing, each one on its own in the icing is said to add that slight gleam.
They are corn syrup, glycerin (specifically for confections not craft glycerin), and glucose. If you’re interested in knowing a little bit more about what each item is, or what it is made of, you can check them out in my glossary here.
Here’s a photo of all the items, so you can see which brand etc. I used. I’d love to hear if you have a different result than mine with different brands. The PME lustre spray I’ll talk about near the end of the post – that gets sprayed on when the icing is dry.

I thought I’d try each one individually and compare the results. I added 60 g of corn syrup to the royal icing recipe I use {click here for the recipe}, 60 g of glycerin to another batch and 60 g of glucose to the last batch. It’s the same measurement ratio as recommended in the Bonnie Gordon recipe, so I thought I’d stick to a similar amount. If you’ve used more or less and have different results than I’m about to share, I’d love to hear from you in the comment section below. (*Please excuse the spelling mistake in the following photos. Glycerine should say glycerin).
Sweet and simple apples piped with royal icing seemed to be the best bet to compare the shininess of the icings. Here they are just after the outlines have been flooded with the various batches.

And 24 hours later:

Results:
Interestingly, when dry, the icing with nothing added to it (to help make it shine), looked like the icing which had the glucose and corn syrup added to it. The icing with the glycerin in it actually looked even duller, although when put in the sun, seemed to have extra sparkle. Overall, the added ingredients didn’t really seem to make a difference in adding shine.
There are a few other options to consider if you’d like your royal icing to have a little more shine. PME pearl lustre spray can be lightly sprayed on after the icing is dry. Here’s an example of what it looks like:

I’d love to hear from you if you had ‘shinier’ results with your royal icing. Maybe more of each item (glucose, glycerin or corn syrup) needed to be added?
Others have had greater success than I had here, saying that added corn syrup or glucose really does make the icing look shinier, although the icing doesn’t necessarily dry 100% (as the ingredients themselves never ‘dry’ 100%).
One other option to consider, which I didn’t try, is to dry the icing under a heat lamp. Have you tried it? I would love to hear about the results!

Gluten-Free Chocolate Topper & Edible Icing Image
Aside from the icing experiment, I did try something new with royal icing transfers. This one (below) is on gluten-free chocolate.

To make these, first melt your chocolate and using a bench scraper, spread the melted chocolate out on a baking sheet lined with parchment paper. I used two colours, red and white, and smoothed them together so it ended up looking like swirls. Let the chocolate cool and cut shapes as desired.
Then spread a thin layer of corn syrup on the chocolate with a paintbrush used only for food purposes. Lightly press your edible ink image onto the chocolate and you’re done! For a more detailed tutorial on edible ink images, click here.

A couple of other things I wanted to mention. What do you think of the rustic cake tier? I saw it on Pinterest a few months ago and was instantly smitten! {If you follow me on Pinterest you may have already seen it pinned to my ‘Cake Tier Obsession’ board. Anyways, the tier costs next to nothing – even better! It has managed to turn into something sentimental for me as well, as two wonderful people in my life, my husband and my father, had a hand in making it. Dad, thanks for picking out and cutting the wood, and DH, thank you for putting it together on Sunday {with a one day notice!}.

If you have any questions or comments please feel free to drop me a line in the comment section below, on Facebook or twitter.
Happy gluten-free, shiny icing, thankful baking and decorating to you!
xo,
Marian
p.s. You can find a video on how to make the cupcake swirl here.


Impressive photography! I can’t wait to try your Gluten-Free Coconut Cupcake recipe,and thanks for your cool tips too!
Happy Monday what an amazing post Marian love it loving ur cupcakes cookies and your photos are great. Wish you a wonderful and successful week. xoxo
PS I will pin your cookies and sweets on my pinterest.
Flour Box Bakery has a facebook page, but also a website with TIDBITS. In a post called “Elmo, Dorothy, and the Heat Gun”, she suggests that by just using a heat gun briefly on the icing, it gives it a shiny finish when dry, but also seems to stop craters appearing in smaller sections. I’m going to give it a try this weekend! Love your decorations for these! x
I love the experiment and how you show the different looks before and after!
What a great start into the week with your LOVELY post, Marian!!
FALL ATMOSPHERE guaranteed!
The cuppies are SO cute, the recipe sounds DELISH,
the rustic cake tier is absolutely amazing and I hope I can make one of those as well, this is such a great idea!!
The royal icing transfers are so lovely and cute, I feel like a child again, watching cartoons (the Racoons haha)
THANKS for making me smile, sweetie.
MUCH LOVE and a great day to youuuu,
niner
I dry mine with a fan and they always seem to have a shine to them and not that matte look. I got the idea from Sugarbelle!
I’ve never tried using Royal Icing, but do you think you could buff ever so slightly with some vegetable oil once dry? I know you can do that to sugar diamonds to bring back the sparkle when they dull, so thought it might work with royal icing.
How wonderful of you to take the time to compare and share your experiment results with us! As I have just recently started making cookies, this information is very much appreciated.
Love, love, love your cupcakes and your pictures are just amazing! Did you make the cupcake stand yourself? I actually gasped when I saw it! So very clever!
So pretty Marian! I love the cupcake stand. Very well done tutorial.
Another great blog with amazing photos. I’ve never made gluten free cupcakes but afer reading your post I will definitely make them very soon.
Do you know of any places that have a good chocolate gluten free cake recipe?
@ Claire, @ Rowaida Flayhan: Thanks! Wishing you a wonderful week too!
@ Michelle: Oh interesting! Will definitely check that out.
@ melissa {thebakedequation}, @ niner // We Choose Organic // sweet treats:Thanks so much!
@ Candi, @ Bianca: Thanks for the feedback, great ideas! Will def. try both of them out!
@ Becky Jo: My Dad cut the pieces and my husband put it together with screws. I’m lucky to have a husband who can figure out how to do things like that – I’m pretty useless with that kind of stuff.
@ Charlotte, @ DominikaZR: Thanks very much!
@ Holly: Not offhand – I haven’t tried many gluten-free recipes personally, but maybe others will suggest some places.
thank you for your tips.. I tried the corn syrup once and my cookies never dried well being in Texas the humidity is horrible. I like the shiny finish more than the matte but to say the least that is personal preferences. Now i don’t use royal icing just make a glaze with powdered sugar and a few drops of water. Cookies are shiny and dry really fast. I add a few drops of lemon juice to cut the sweet some. This works best for me. Some time I use plastic bottles, decorating bags or paint brushes.
I love your icing decorations, I really want to try them one day.
Marian, thank you so much for this wonderful blog. It is so informative and the photographs are beautiful. Love the cupcakes and toppers, and the stand is amazing!
I noticed your wooden tier in the first photo and loved it. To read that your husband and father made it for you just makes it all the more wonderful!
Great experiment and thank you for doing it and sharing your results with us. The only time I had *shiny* dry cookies was when I used a glaze icing. However, my preference for looks, taste and ease of use is to decorate with royal icing with just 2 teaspoons of clear corn syrup added to it.
Marian, I forgot to add how beautiful your cupcakes are and I absolutely love that adorable raccoon cookie topper!
Sooooo adorable!!!
Marian, thanks for the great tutorial and information on shiny RI! I added 1/4 cup of corn syrup to my last batch of RI and honestly didn’t notice a difference except in the “crunchiness” of the icing once it dried. It’s interesting to actually see the comparisons of what you’ve tried.
And I LOVE your cake stand!
Absolutely adorable!!! Thanks for the gluten free recipe, can’t wait to try it out, I have several gluten free extended family members and this would be perfect for a holiday dessert for them. Also, thanks for the shiny “testing”. I will have to try just using a fan or heat gun and see if that makes a difference. Right now, I mostly use a glaze recipe and they dry shiny. I really want to use royal icing, but want the shiny look of a glaze.
very nice..
Hi, Marian! I’ve used corn syrup but, yes, I did have to add quite a bit more.
Here’s some cookies that I used corn syrup in the royal icing. I took this picture when they were dry. There is a bit of shine to it, but like I said, I had to add more than 60 g. (I don’t know if this link will work…you may have to type it in.)
http://a2.sphotos.ak.fbcdn.net/hphotos-ak-snc6/225702_10150177594326179_638841178_7334357_4832362_n.jpg
love the racoon topper…<3
@ Brenda: Such awesome tips, thanks so much for sharing!
@ sue: I’m sure you’ll have fun!
@ Paula: Thanks Paula! I will try that in my next batch of RI!
@ Stephanie: Schanks! 😉
@ Christine: Interesting, I’ll have to notice the crunchiness as well when I try them later!
@ Dina: I’ll have to try a glaze too. Thanks for sharing your feedback.
@ subraja: Sweet thanks =)
@ Arjay: The link works. They certainly do look shinier. (and how cute btw!). Thanks for sharing!
@ aiesha: Thanks!
The raccoon is just too adorable for words!
Thanks for the tips. The royal icing recipe that i have always used calls for 1 tsp of corn syrup..they do have a bit of a shine to it after they are set. I have been real happy with the results. But, I do want to try the lustre spray on my next cookies…I love that look. Sure enjoy your posts and am learning a lot..thanks! 🙂
Marian, you’re tha ‘bestest’!! 🙂 love your cupcake tutorial, and yeah of course I’m in love with you rustic cake tier!!! I love, love, love it, So, whenever you Dad and hubby wish to start making them to sell please let me know 🙂
@ Jennifer: Aw thanks! I can’t take credit for the design (as I’m sure you already know) – he’s from scrapbooking products.
@ Angela: Good to know Angela; I probably just didn’t add enough.
@ Rosie: You’re the bestest sweetheart! I will let them know. 😉
Great helpful hints about royal icing! I admire your perfection … the raccoon is sooo cute!
Absolutely adorable! Everything came out fantastic. I really love the tier piece as well! Very creative!
Your cupcakes are beautiful and I love the adorable raccoon topper! Your work is amazing.
oooh these are so cute- the raccoon is adorable! i also love the cupcake tier… so rustic. thanks for sharing!
also, would you mind telling me what tip size you used to frost the cupcakes? thank you 🙂
These are adorable and I love that they are gluten free so I can share them with all the people I know who can’t handle gluten.
I love the raccoons. So adorable. Thanks for this!
Beautiful cupcakes! Just wanted to say I use 1/4 cup corn syrup and 1T glycerin to my icing (which uses 5T merengue powder) and it dries pretty fast and perfectly for stacking etc. but stays nice & soft on the inside. I don’t really add the extra ingredients for the shine, but to make the icing softer inside, and I never get bleeding or blotching (I think the glycerin helps with those issues as well as softness.) I have used an embossing gun and that makes a little shine, but if I want really shiny cookies I just use glaze. Thanks for the comparison!
@ Brenda @ SweetSimpleStuff, @ Jany@SuperCuteCookies, @ Jill: Why thank you so much – I appreciate every comment!
@ Michelle: Great info. – I hadn’t thought about using the ingredients for other purposes than the shine and learned some new info. from you. Thanks!
I can never get canned frosted to keep it’s shape when I pipe it, your cupcakes look beautiful, is there a trick to it. Beautiful pictures, your posts are a treat for the eyes!
@ amandamck: I was thinking it might need extra icing sugar to thicken it a bit, but it was fine… I put the frosting in my kitchen aid mixer with the paddle attachment and gave it a good stir before I used it. (To help smooth it out).
preciosas!!! they are so beautiful…. thank you marian! for posting these cute cupcakes
Wow, such perfection!!! I’d like to try these in CHOCOLATE!!! 🙂
@ mariana: Thanks! xo
@ Laura @ GotChocolate: Brilliant idea! They’re simple enough that it could be done.
Bestest, chock-full-o’-info post ever! Had no idea about the shiny royal icing. Just posted a link on edible crafts, too! 🙂
@ meaghan (the decorated cookie): Thanks sooo much Meaghan! xo
Ahhhh! I seriously went to see if there was gas in the chainsaw. I LOVE love love the tired stand, (I love power tools too!) Great post, but those raccoon cookies were the most adorable woodland creatures! I have got to do something with that Pinterest account I set up…
Thanks for posting this!!! I love anything coconut and I’m super excited to try this out. I also love the idea of royal icing transfers as cupcake decorations. But I know you said if you use the cool whip that the transfers will bleed, so will they start to “melt” or fall apart with regular homemade buttercream? Thanks again for all your great tips and help =)
So cute! I have tried the lamp and it helps a bit. It’s not like patent leather or anything but the difference is definitely noticeable :).
The raccoon is the cutest thing ever!!! great post
@ sweetiepetitti: I am so impressed that you know how to use a chainsaw! Seriously! Would *love* if you would share a photo with me on fb or email when you make one!
@ Courtney: yes, the moisture in the coolwhip will just ‘melt’ the transfer. Buttercream (or any icing with grease of some sort), will also affect a transfer in that the grease seeps into it. I write about it in some other royal icing transfer posts – recommend that you put them on last minute and it’s best to have the least amount of surface area of the transfer, touching the buttercream. If you know you’re making something which will need to be ready days ahead, transfers aren’t the best choice. Hope that helps!
@ sandie: thanks!
nicole {sweet peony} wrote:
I’d also like to know what tip size did you use 🙂
Can you maybe leave a lik? Thanks!
link*