
Little craters in royal icing have always been a bit problematic for me. There doesn’t seem to be a whole lot of information on them out there.

It’s been a bit of an experimental journey, but my main theory was that air in the royal icing was causing the indents.
When it began to dry the icing would settle and air trapped underneath would ‘pop’ open, leaving a little crater.


On the off chance you hadn’t noticed them:

Before I go on, I have to mention that following the tips to avoiding air bubbles is good practice when decorating cookies with royal icing (for tips click here).
There might be something more to these little indents in the icing though. The only thing I can’t figure out is why it usually happens in smaller flooded areas. I’m no scientist, but guess there must be some physical/chemical reason behind it.
*
I emailed the extremely talented Cookie Swap author Julia Usher, just before I posted my Valentine cookies, in the hopes of finding the definitive answer. Here is her reply:
… Funny you should ask about the crater issue – that’s one problem with icing that I haven’t figured out how to reliably correct. I have most trouble with it when, as you said, trying to flood a particularly small area. I actually don’t think it’s an issue of air bubbles, though, but one of surface tension. When wet, the icing looks fine; but as it dries, more surface tension and pressure on the drying skin causes the icing to sort of collapse into itself. The smaller the area, the more concentrated the surface tension – if you will – and the more likely the icing is to collapse. That’s my theory anyway. I can sometimes minimize the cratering effect by thinning the icing and applying less – using a toothpick to spread a smaller amount within the same area. The more I heavily flood a small area, the more it seems to collapse. If you come up with a better solution, let me know!!
*
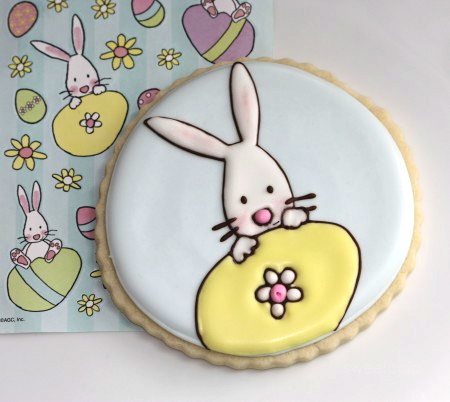
So, to experiment, when making these decorated Easter cookies I filled many areas with a little less icing.

The beak, because of its small size, would be a typical place where a hole might occur.

No craters! Hurray! Thank you Julia!
This is going to sound ungrateful, and I don’t mean it to be! I’m just thinking more experimentation might be in order because I still prefer the look of a ‘full’ flooded cookie.
*
Since I last posted about how to prevent air bubbles some feedback was also provided by Noelle and Nancy in the comment section of the Valentine post, who seem to be thinking somewhat along the same lines as Julia.
Besides using less icing to fill in an area here’s what Noelle offered as a solution:
… My mentor finally decided that it helped to use a hand mixer on the royal icing that was being used in the small space. She would whip it for 5-10 minutes and use it immediately. She swore that it cuts down on the holes but I could never really tell a difference.
I recently tried a royal icing recipe out of one of the Cookie Craft books and it used lemon juice for the flavoring. I did not get any bubbles like these when I used it. It had a really nice flavor too, but I noticed that it separates much more quickly than traditional royal icing. I wonder if there’s something with the lemon juice that reduced the incidence of bubbles? Anyone else have a similar experience with that?
Interesting! In my response I wondered if the acidity of the lemon and/or the amount of liquid in the icing had anything to do with it.
*
I’d also like to know why the craters occcur in some areas covered with a thick layer of royal icing and not others?

*
Lots of ideas and questions. It would be great to hear your feedback on this issue. What do you think? Has anyone else tried the tips mentioned here with success? Any new ideas, theories or information to build on what we have here? Would love to hear from you in the comment section!
*
Just a side note for you too… I’m happy to share with you that Julia Usher of Cookie Swap will be sponsoring a giveaway for her book on Sweetopia! That’s coming soon. 🙂
*
I usually get emails regarding how to make cookies I post (if I haven’t explained it), so for anyone interested in a visual guide on making these Easter cookies, below are some step-by-step pictures:
*
Easter Cookies – Decorating Steps
If you’d like to make these, you’ll need:
4. Decorating Bag/Piping Bag – (I use disposables
which can be washed and re-used)
5. Couplers
6. Decorating Tips (#’s 1
–4)
*
For an in-depth Cookie Decorating Tutorial see here, and for my Top 10 Decorating Tips see here.
*
This is the order in which I piped the details of each cookie:
1. Base of Royal Icing

*
2. Outline Shapes
Of course I made these using a Kopykake Projectorand some cute Easter stickers. You can freehand if you’re able to.


3. Flood Cookie


*

**
4. Bag and ribbon

*

*

*
Hoppy decorating!
xo,
Marian
p.s. Thank you for your emails; I love hearing from you! I’m a little behind though; if you’re waiting for a response I haven’t forgotten you and will reply soon.
p.s.s. I dusted the Easter bunny ears and cheeks using a paintbrush and pink luster dust


I get air bubble too, but I thought it might be from mixing the frosting too much.
I do have a question if someone could please answer. For some reason my royal icing is drying dull instead of shiny. Could anyone give me some tips?
Hi Diana,
Mine dry fairly dull too – I’ve just accepted that they dry with a matte finish. For pics, you could take the pictures while the icing is still wet.
I have also heard that adding clear corn syrup to the icing recipe helps add shine. Still have to experiment with that and find out for myself though.
Hi Marian,
Just knew about your web recently.Really love your cookies.it’s so cute & adorable.
It’s very nice pink color that you put on bunny’s ears & cheeks.I have few questions about luster dust.Sorry if it is not related with the tutorial subject.
1. I want to know how to apply the luster dust on the royal icing?
2. When is the best time to apply it on the royal icing?
Thanks…
No problem Via. When the royal icing is completely dry, use a small paintbrush (only used for sugarcrafting), dip it in the luster dust and apply it onto your cookie. It’s as easy as that!
Thanks so much for your quick answer Marian!
Can’t wait to see another new tutorials from you…
I found it really helpful for me since i’m new in making cookies.
I knew about your blog a week ago, and always spend my time open it again & again every day to see if there is everything new in it.
Hi Marian,
It’s me again…
Have few questions to ask again :
1. Since i couldn’t find the same Luster Dust like yours, can i replace it with Wilton Orchid Pink Pearl Dust?
2. Are they the same products with different brands or what?
3. How can i apply Wilton Cake Sparkles (Edible Glitter) & Nonpareils on royal icing? When is the best time to apply them?
4. Just wondering, have you tried to put corn syrup into your royal icing yet? Really want to know the results …
Thanks so much!
Cheers,
Via
Hi Via,
1. Wilton’s Orchid Pink Pearl Dust is not as good in my humble opinion. It doesn’t have the same sheen to it.
2. I don’t think so.
3. Apply when the icing is wet. I just set my cookie on a plate or on parchment paper to catch the excess, and shake gently over the wet icing.
4. I had better get around to that! So many things I want to try!
Hope that helps.
Marian
@ Via:
Thanks for the nice comments b.t.way!
Thanks so much for answering all my questions Marian …
Cheers,
Via
No problem Via. Glad I could help in some way!
Hi Marian,
Do you use the luster dust dry?
Also where can I get the sugarcrafting brushes? I bought some brushes that were in the baking section of Michael’s, would that be the same thing. They were over in the area by the Fondant.
I so want a KopyKake. That is on my Christmas list:)
Thanks so much,
Diana@ marian:
Hi Diana,
In this case I do use it dry; it’s like make-up 😉
You can use any kind of brush you like; paint, make-up brushes, as long as they’re only used for sugarcrafting and have never been used for other purposes.
Hope Santa is good to you!
Marian
I just notice your questions and your desire for a kopykake. I might be a little late responding to this request but I recently found a app called Camera Lucinda that people are using for designing cookies. Works with your ipad or iphone, same principle as the kopykake. It’s only 4.99, worth a try.
I also just discovered this wonderful site. I’ve used the same simple royal icing recipe for years (conf.sugar, meringue powder and water). I would prefer it dry with a shiny finish so would corn syrup take care of that? I rarely have problems with air bubbles leaving holes in my icing but my big and continuous problems is when making dots, big or little. I always end up with the dimple effect, sinking in the middle. I’m thinking I could outline the eye area and then fill with a layer of thin icing. Once that dries, add another thin icing? Has anyone tried this and it not work? Thanks!
@ Melissa:
I’ve seen comments where people have said that the clear corn syrup helps create a shiny finish, but I personally still have to play around with that.
For the dot dimple effect, doing the two thin layers of icing should probably work – that’s the jist of what I learned by writing these two air-bubble posts and reading everyone’s feedback.
hey! just found your site! how on earth do you spread the base on soooo smooth and perfectly?
Hi Rachel,
I have a tutorial here which goes over how I decorate:
https://sweetopia.net/2009/06/cookie-decorating-tutorial-general-tips-butterfly-cookies/
My top 10 tips here:
https://sweetopia.net/2009/09/how-to-decorate-cookies-with-royal-icing-top-10-tips/
and a video here:
https://sweetopia.net/2010/12/video-how-to-marble-or-swirl-royal-icing/
Have fun decorating!
hey! just found your site! how on earth do you spread the base on soooo smooth and perfectly?
do you make your own black icing or buy it? I cant get mine to be black, it turns into a dark greenish color any tips? I ever bought black food coloring :/
I make my own icing and then color it black with *LOTS* of Americolor soft food gel/paste.
So true: craters do form more on small areas… I think in small areas sometimes icing clings to the border but don’t cover the COOKIE surface, so there’s air between the icing and the COOKIE surface and when RI starts drying air escapes and forms the crater… what has worked for me is using a toothpick to move icing around so that it touches the COOKIE surface and thus preventing craters…
Such a TIMELY post! I just finished decorating some cookies today and noticed all these craters! Had no idea what it was. I too use my electric mixer with the beater attachment so now I am going to use the paddle attachment instead.
@ Bea @ CancunCookies: Thanks so much Bea!! Will definitely do!
@ Tiffany: Have fun decorating!
This may seem like double work, but I thought that in order to avoid the craters and still have a full flooded cookie, you could maybe fill the small areas in layers, a bit of flooding first, let it dry, and then fill it again.
The other idea I had is that as soon as you fill one small area, use a toothpick there to move the icing gently and thus avoid any unwanted crater.
As you said its a matter of experimenting to get it right.
I loved your website and all the wonderful things you do.
Sweet hugs from England! x
Karin, thanks so much!
Hi Marian,
Love your website and your advice/inspiration! Thank you so much for sharing your craft! I recently did a royal icing transfer of the iconic Grateful Dead scull and I noticed that the royal icing cracked as it dried. It wasn’t smooth like the snowman transfer you showed us in your tutorial. Since this question is along the same lines as air bubbles, I was hoping you can give me some advice. I used the 10-second rule but I’m thinking maybe I should have made the royal icing thinner? I tried it again with the NY Yankees logo and the same thing happened.
Thanks!
Marcie
Marcie’s Cake Creations
I’ve never experienced craters in my cookies until recently, making valentine cookies. This was also the first time I used your royal icing recipe, I usually use the Wilton one (printed on the meringue powder tin). I thought the culprit was possibly 1: the mixing technique (so many steps as opposed to dumping all in at once & going for it) or 2: the addition of the cream of tartar. The wilton recipe doesn’t use it, and i’ve never had any problems, however, the mixing is different also, maybe the incorporation of air in extra steps or the chemical mixture of the cream of tartar with the meringue powder is to blame…?
Hi @ Kaite: It’s a possibility, interesting! It would be neat to see if the other cookie decorators who experience it, are using cream of tartar in their recipe.
Hi Marian I have the same problem with the royal Icing, have so many bubble, I use antonia’s 74 recipe for me it’s not working, but after that I use wilton and sugarbelle recipes for me are working well
Where did you get that cute fabric? It’s adorable and your cookies are fantastic!
Hi @ Patricia Rolon: Thanks for your input!
HI @ Lisa Olson: They’re stickers, actually. I bought them either at Hallmark, Walmart or Michael’s. Sorry! It’s been a few years since.
Being a old Pastry Chef, I was taught to use a little egg white to make royal icing shiny. Since I use the meringue powder, now that I am obessed with Cookie Decorating, to make Royal Icing, I too have matte finished cookies. I have tried adding a tad of corn syrup to my icing and had a MESS!! I will NEVER do that again. I am going back old school for my Easter Cookies and use some actual egg whites to see if I can get that shine I used too!!
As for the air bubbles, I find I have less if I thin by hand or use the paddle attachment on LOW. I had tried the tick of using the spray bottle to add my water, but that is when I started having TONS of air bubbles. I went back to the first mentioned way for my Valentine’s Day Cookies. I only had 2 that had air bubbles. I also did not hurry as I was flooding. I had noticed at Christmas when I was letting my family decorate our cookies, that the boys were in a hurry when they were flooding and theirs had the darn air bubbles. Hope this helps some….
@ Diana:Try drying your cookies under lamps. I believe the heat causes sugar to rise to top and creates a glossy shell much like in the brownie. I learned this a million years ago in a Cooks Illustrated article on the perfect brownie. It all has to do with the rate the sugar comes to the top. yadda, yadda, yadda all chemistry. I use painters lamps
As for air bubbles, they drive me nuts! I’m in the air bubble theory camp. It allows me to sleep at night! My explanation: they finally find their way to the surface and break through because the elasticity of the icing has gone when it dries out. it’s maddening. It has to be something random like that. If it were tension then wouldn’t it happen on all? I had to do an exclamation point in a logo the other day and knew this would be my biggest challenge so i dragged the tip up and down hoping it would kill all the little bubbles. It worked – not one bubble or cave in…and contrary to what was said about thinning the icing, this was pretty thick while still being able to flatted itself smooth. There are so many variables who knows but the dragging kills the bubbles if that’s, in fact, what’s goin’on, girlfriend.
@ Diana: I have used both meringue and eggs whites makes no difference. The gloss comes up under lamps…but I’m no scientist.
Hi there! I read this post yesterday and I pondered it all evening while I was decorating some cookies. I noticed that the air bubbles flowed freely out of the icing and popping instantly and I haven’t had the crater issue. So, I posed the question to my father-in-law, who happens to be an engineer and smart about (most) things. I explained that the crater issue seems to only happen in small areas and I showed him what I meant. He instantly said that it likely had to do with trapping air *under* the flood, rather than *in* it. He noticed that when I was filling a large area, the air had plenty of room to escape before I was done; not so in a small area. Also, when doing a small area, you have to hold the icing bag nearly vertical…allowing air to be trapped under the icing as it has nowhere to escape to. His suggestion was to flood the area and then immediately move the icing around inside the flooded area with a toothpick. This should release the trapped air and you should be crater free! *Hopefully* 🙂
I used to do work decorating cookies for commercial photography for a major cake decorating supplier. Smaller areas ARE more susceptible to cratering, and my opinion is that it has to do with surface tension. It wasn’t foolproof, but when I worked in the commercial studio, we would sometimes put cookies while still wet to dry under a heat lamp. It seemed to help with the cratering… the faster drying time (especially on the surface) seemed to help. So if the cratering is caused by bubbles “working their way up to the surface” if the surface sets before the air bubbles rise to the top, they can’t really make a crater. Like I said, this wasn’t foolproof, but it did seem to help.
@ Christi Roberts, @ Jennifer, @ Andrea,
@ michelle: You guys are the best! *Thank you* so much for your input! xo
Hi Marian, I have found that using thicker royal icing (similar to the consistency of toothpaste) to fill small areas seems to stop craters.
I am, however, having trouble with my flooded cookies once they’re dry. I’m finding that the icing seems to shrink. They look lovely and full when the icing is wet, yet once they’re dry they are concave. I have tried adding more icing when flooding them but they tend to overflow, and I have also tried adding less water to my flooding icing. Have you ever experienced this? Thank you!
Hi @ Taryn: Thanks for your input!
As for the concave thing, yes, that’s happened to me, and usually what I would suggest is exactly what you said… Add less water to your flood icing as it will then hold its shape easier and not flow over, and you’ll be able to pile more on. Hmmm… How do you check your royal icing consistency? Do you use the 10 second rule?
The other thing I can think of is *how* you’re applying the icing. Sometimes if you go zig zag (i.e. left to right), more icing is applied to the edges and less to the middle, and if you apply the icing in a spiral, the application is more even. Does that make sense?
Also, would you mind sharing a photo with me please? On my facebook page, on twitter, on my Sweetopia Net facebook page… that way other people can respond too.
xo
p.s. @ Taryn: Not on all of those pages (lol), whichever one you choose.
@ marian:
Thank you Marian! I’ve just posted a photo of one of my ‘shrinking’ biscuits on your facebook page.
Hi Marian
Just reading through this, I thought I would throw in my few cents for what its worth.
I was reading a blog post (and Im rakign my brain to remember who’s it was) about air bubbles but more importantly the collapsing and I found it interesting on her take is the heat vs cool vs moisture in teh drying time as I was in agreeance some cookies dry fast and some slower and I do feel when they dry fast for whatever reason the result does look better. The Cookier had just bought a Heat Gun and she found it solved this issue for her. I agreed also that I find the collapsing happens when you ice ontop of icing, its like the top layer wets the bottom during the drying and causes the collapse. She recommended dry them in a warm dry room and the gun helped.
To solve the dullness look I add corn syrup always to my RI, read that tip over a year ago and it definately makes the dry RI appear more shiney in its finish.
I hope I have helped?? Happy Cookie’ing!
@ Diana:
Having a fan pointed in the direction of the cookies will have give it a shine. No blasting hurricanes, just a medium to gentle breeze should do it.
@ marian:
I think cream of tartar has something to do with it. I was wondering if you had a typo on your recipe for RI using Antonia’s recipe? I thought you had revised her recipe and was using 1 Tbsp COT, so that is what I tried and all of a sudden, my RI was glossy, didn’t separate out, less bubbles. I loved it, BUT…. the COT alters the colours so that they really darken over time and actually change hue, so that it was impossible to obtain any sort of predictable colour palette. So I am compromising and using 2 tsp of COT, colour issues are better, and it is still glossy.
Pretty cool @ Jadine! I do use 2 Tbs for my gingerbread house icing, as I find it makes teh icing an amazing ‘edible glue’ for helping the walls stand up. Because I’m not coloring that icing (white for snow, usually), I never noticed a color change.
I need to try this out, THANKS! 🙂
RI is so finicky. I had so much problems with it separating out, dull finish, bubbles… Now, I:
1. add more cream of tartar
2. almost always use a fan (because I’m always running late)
3. usually add an extra TBSP dehydrated egg whites (my sister sent me some DebEl from the US when I ran out of meringue powder.) I’m not really convinced that this is necessary, but now I have lovely icing and I am trying to use up the can of egg whites !
As a bonus to the more stable RI, I now have less bubbles AND beautiful GLOSSY icing !! I can’t really tell if it is one of the above, or a combination but it works for me.
I rarely get holes in my flooding but I am meticulous about popping bubbles and tapping. I get holes in the piping but I know what causes this. When I transfer the piping icing to the plastic wrap (Karen’s method), it takes 3 or 4 scrapes of the bowl. Each time I add a blob of icing, I can see there is a little air pocket that is formed and I try to massage them out before I pull the plastic thru the bag and add the tip. I’m not always successful – it’s easier said than done bec by this time, that blob of icing is basically sealed tight so there is nowhere for the air to go. I thought about adding a pin size hole but that would defeat the purpose of the plastic.
FYI, my RI recipe is now modified Antonia’s:
5 TBS meringue powder (CK but I am going to switch to McCalls bec u say it tastes better)
1 TBSP DEB EL dehydrated egg whites
~¾ c water
2 tsp cream of tartar
1 kg icing sugar
flavoring
If you use dehydrated egg whites, you have to let them stand in warm water for about 10 min and you have to mix a long time to get them dissolved in water. I think I might prefer the whisk but I hate cleaning it so I mostly use the paddle but at med. speed on Cuisinart stand mixer.
I am relieved to hear that so many people have issues with RI. I thought it was only me.
So awesome, @ Jadine! Thanks SO much for your input. Lots of great tidbits of info.!
I will def. try more cream of tartar and experiment a bit.
For meringue powder, taste-wise, I don’t have a preference now between brands. I may change my mind if I keep trying different ones, but that’s where I’m at now.
Thanks again for the super info. you shared today!
hopefully, you will be able to replicate in Toronto, what I am doing in northern ON. I’m sure I’ve had shiny icing without the Deb El.
I was so pleased when I found this on internet and realised I was not alone. I’ve always used the same recipe (on the Wilton meringue powder mix) and all of a sudden those little craters started appearing and once they started, they never stopped. The worst case was when I made some spiderman faces. The shiny white eyes were perfect until they dried. I tried covering them with another layer of icing but that didn’t work and I ended up giving up and cutting out fondant shapes and sticking them in the sockets haha! Next time I make some cookies, I’m going to try out a new recipe from the suggestions above (I haven’t decided which yet haha). Is there any way that this problem could have something to do with the weather (humidity etc?) Thanks for all the tips everyone.
I haven’t ventured much into the realm of cookie decorating, but I am a die-hard royal icing fanatic!
Regarding holes in icing, I think Julia is right, and so are you! It’s a combo of the two issues of surface tension versus trapped air under the icing, or rather, air bubbles that expand during drying. There are a couple of ways you can defend yourself against this:
1) make your runout icing, and let it sit for a while (1-2 hours), covered with a damp cloth, to allow the larger bubbles rise to the surface. Then re-stir the icing gently before using. You can also use the hand mixer to “flatten” your icing a bit, instead of allowing it to sit…a handy little trick, but I’m still experimenting with this one myself…so no promises! 🙂
2) Make sure you’re not using anything over a #2 plain tube to flood. Anything larger will allow those pesky bubbles to pass through without popping on their own. Any leftover bubbles you see, pop with a toothpick or a small paintbrush
3) Use powdered egg white instead of meringue powder. This will give you a much stronger icing. I usually flavor mine with a little lemon extract (a drop or two).
4) Use a small paint brush (specifically for your icing work) to “push” the icing where it needs to go. This will minimize the chances of their being unseen gaps. And the agitation of the brush or toothpick is good for getting a nicely settled icing.
5) Properly dry your icing. This is the big one! The icing should be slightly heated after filling to allow it to skin over as quickly as possible. Set your flooded cookies under a lamp (flexible desk lamp with a 60W-75W bulb will work beautifully). The lamp head should be positioned about 8 inches above the surface…you may need more than one to cover the entire drying surface. Work on one cookie at a time, and place them immediately under the lamp after flooding (and before you start another cookie). This will have the dual effect of allowing the icing to skin over quickly and give your icing a nice matte-shine…and it also prevents the sinking effect.
6) Don’t disturb the cookies as they’re drying. They should be left under the lamp, on a flat surface for at least 1.5 hours. Then you can turn the lamp off and let them rest on their own for another 8-12 hours.
7) If you dry your icing in the oven, make sure the door is slightly open to minimize moisture build-up inside.
Hope this helps!
~tony